Sanplex is online project management tool for task tracking and is designed for Teams & Enterprises with complex projects and creates the development workflow for all the company’s management and execution layers. From task assignment and progress tracking to seamless communication, Sanplex, a innovative software simplifies the complexities of project management, allowing teams to focus on what matters most – delivering exceptional results.
Step 1: Create a new project
Scurm project is the best fit for agile teams. Set up the iterations, use agile boards to work, track team efficiency and manage the user stories of your project.
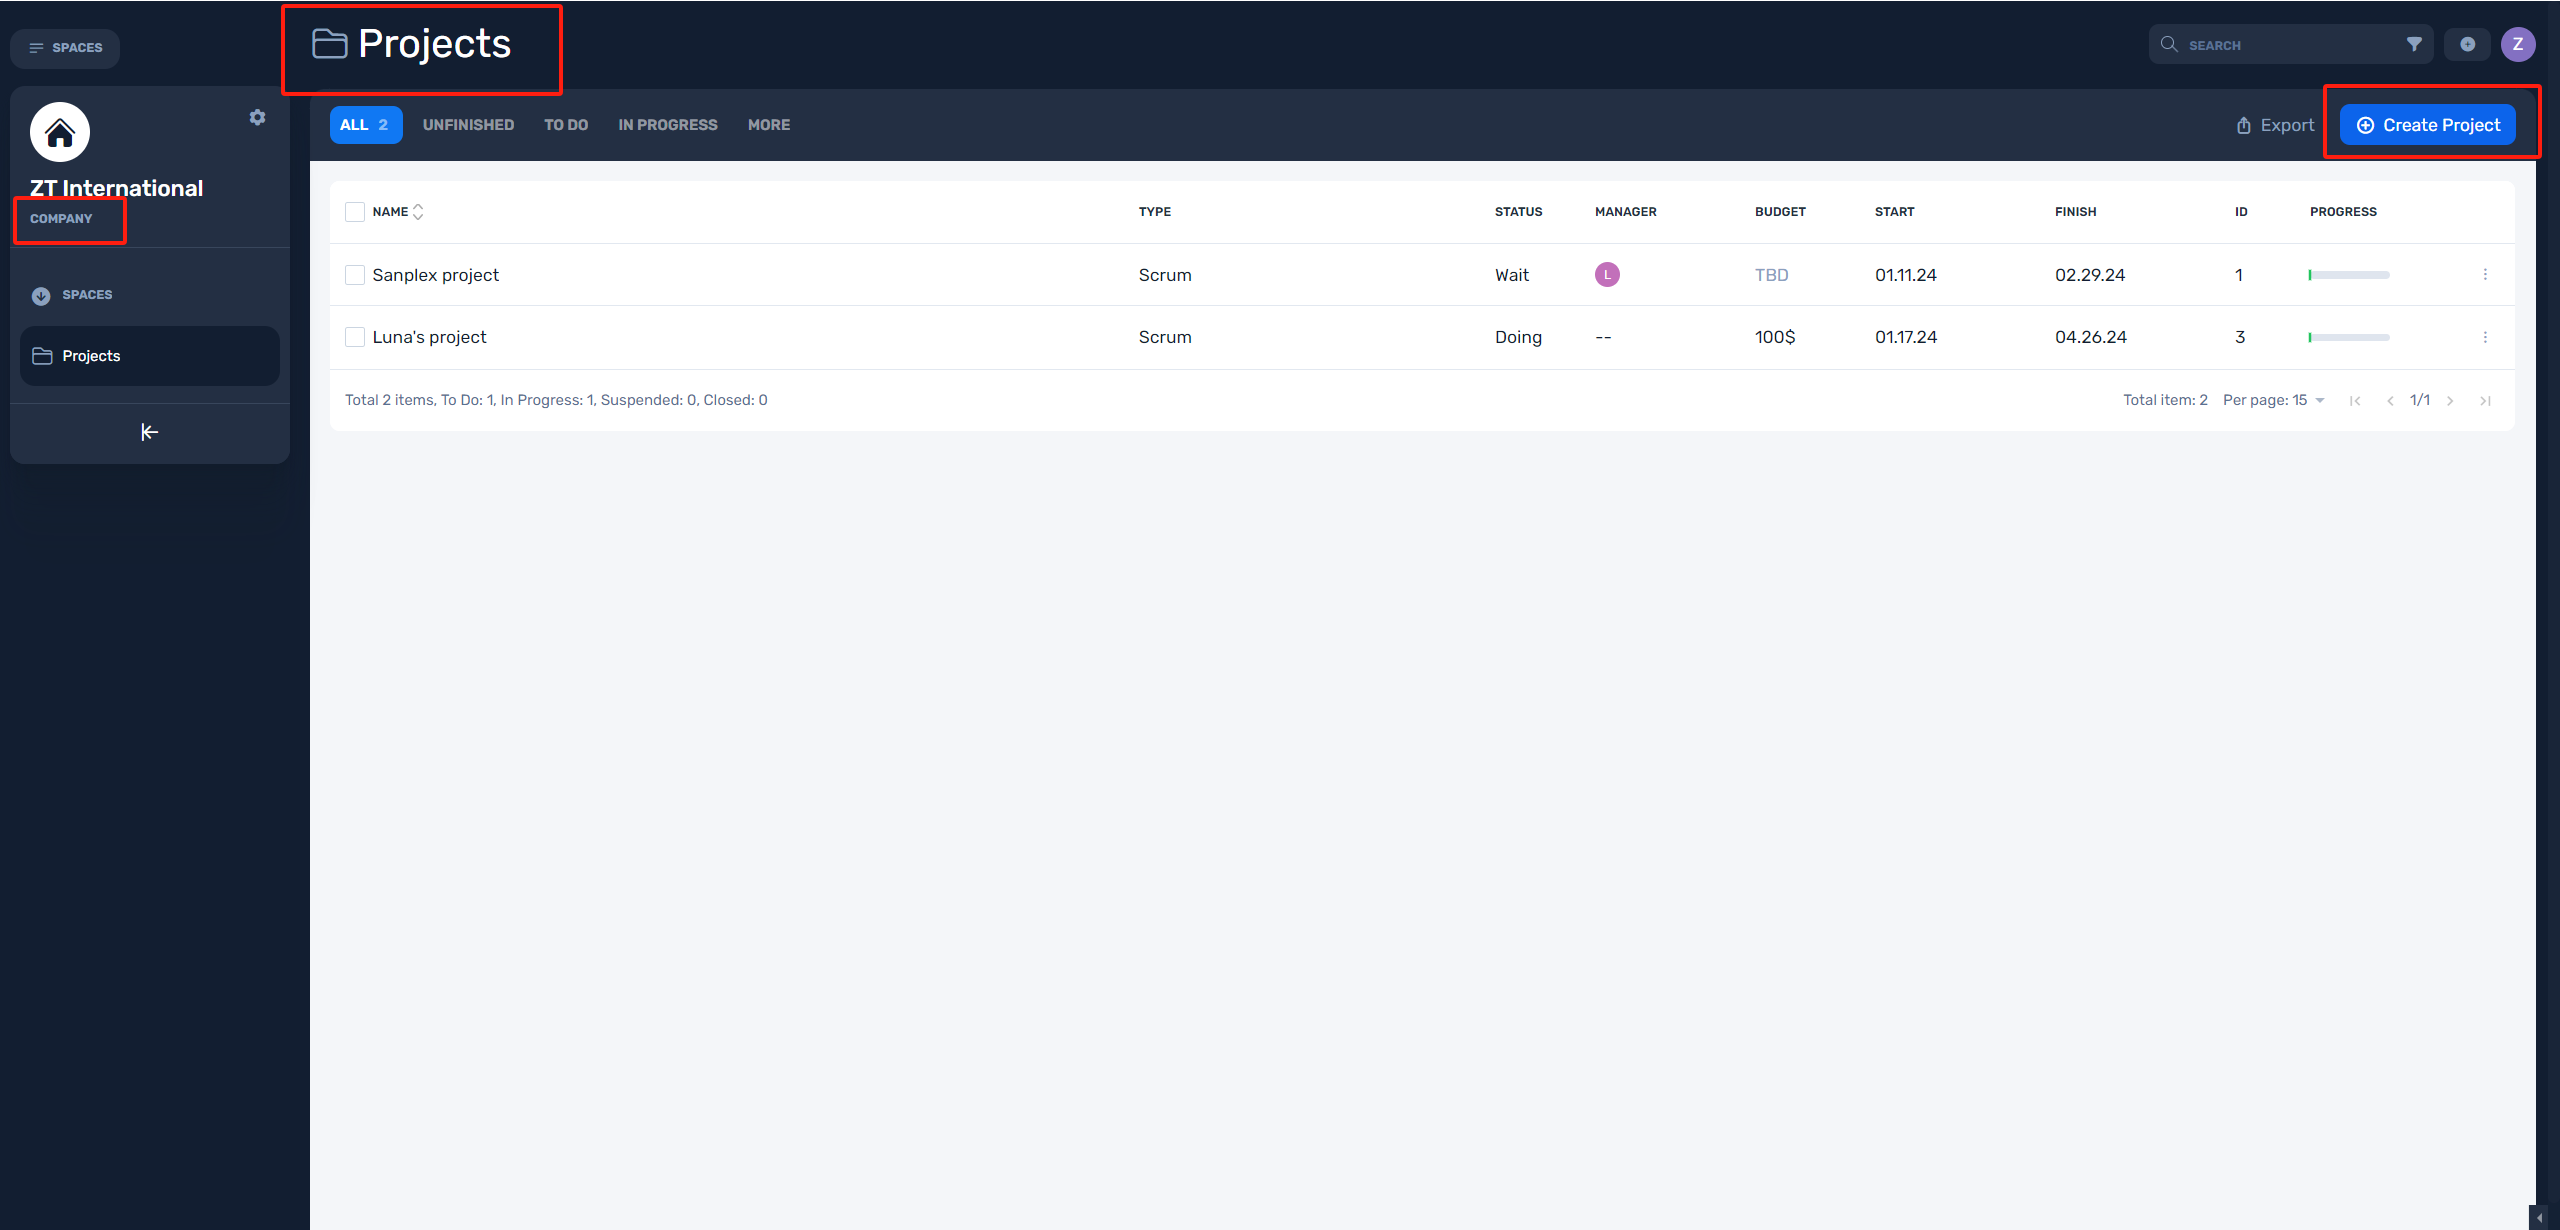
- Log into your Sanplex site. In the "Company Space", click the "Create project".
- Please note that you won’t see this button if you don’t have permissions to create projects.
Step 2: Invite your project team
Adding and managing team members is crucial for collaboration and maximizing productivity.
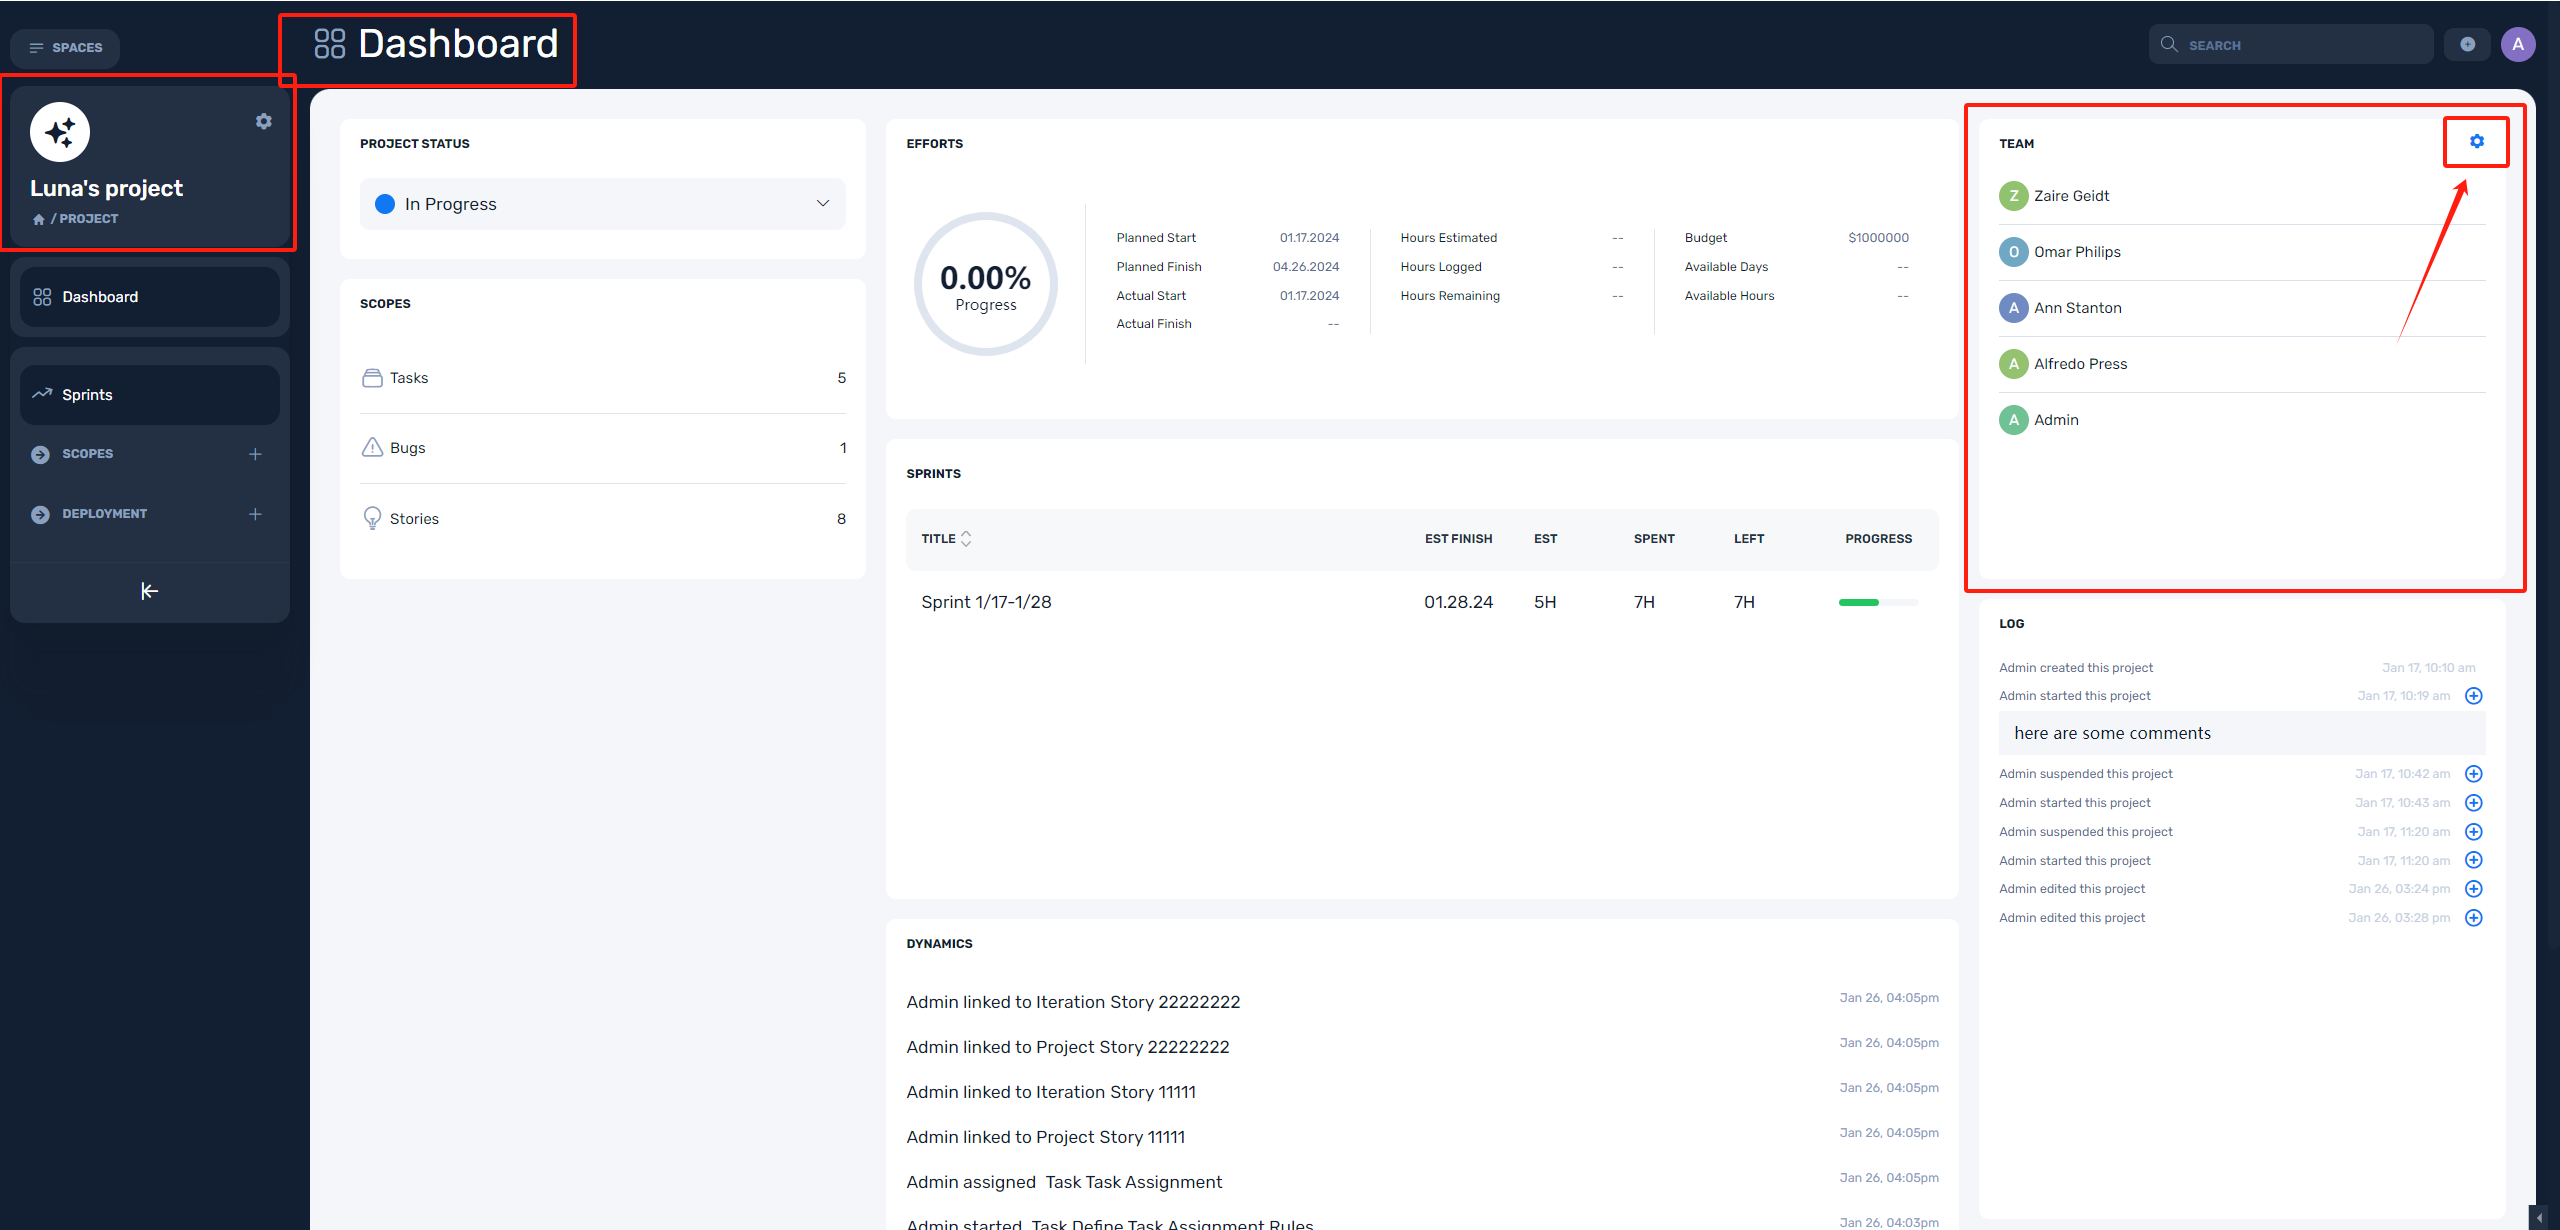
- Click "Project Title" in the "Company Space > Project list", then you will go into the Project Dashboard.
- Go to Team section and click Settings (gear button).
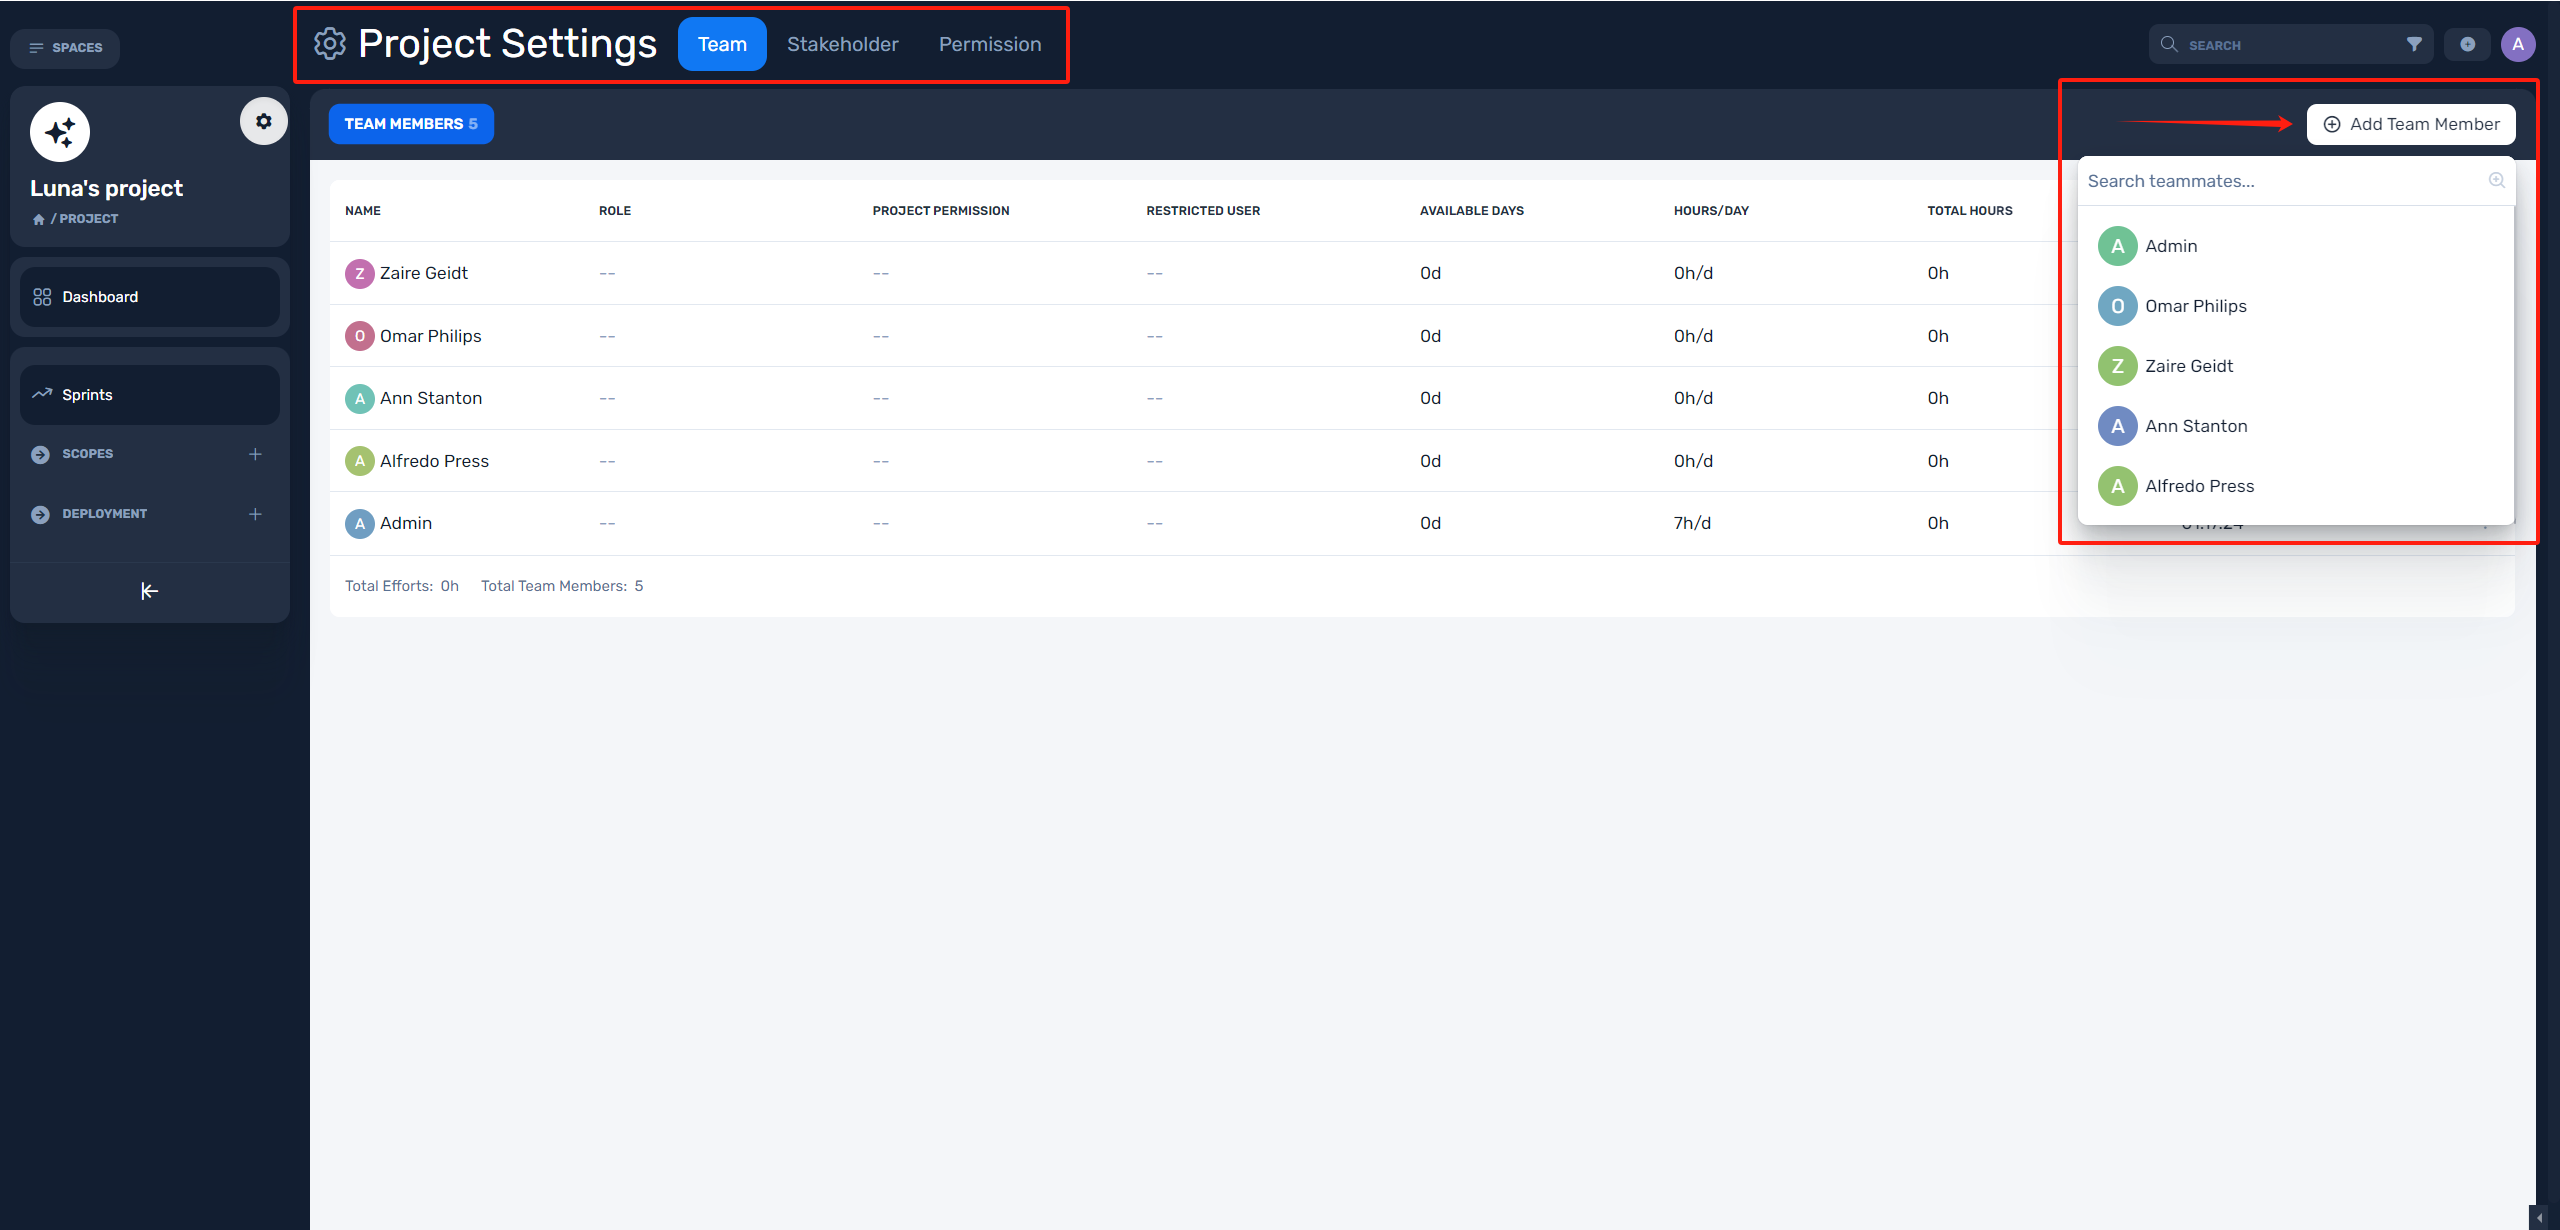
- Click "Add Member" and select your teammates.
Step 3: Add stories to your project
Story is to make a set of statements that describe what a system or product must do in order to meet the needs of its intended users. It may functional or non-functional needs, such as features, performance, security, and usability.
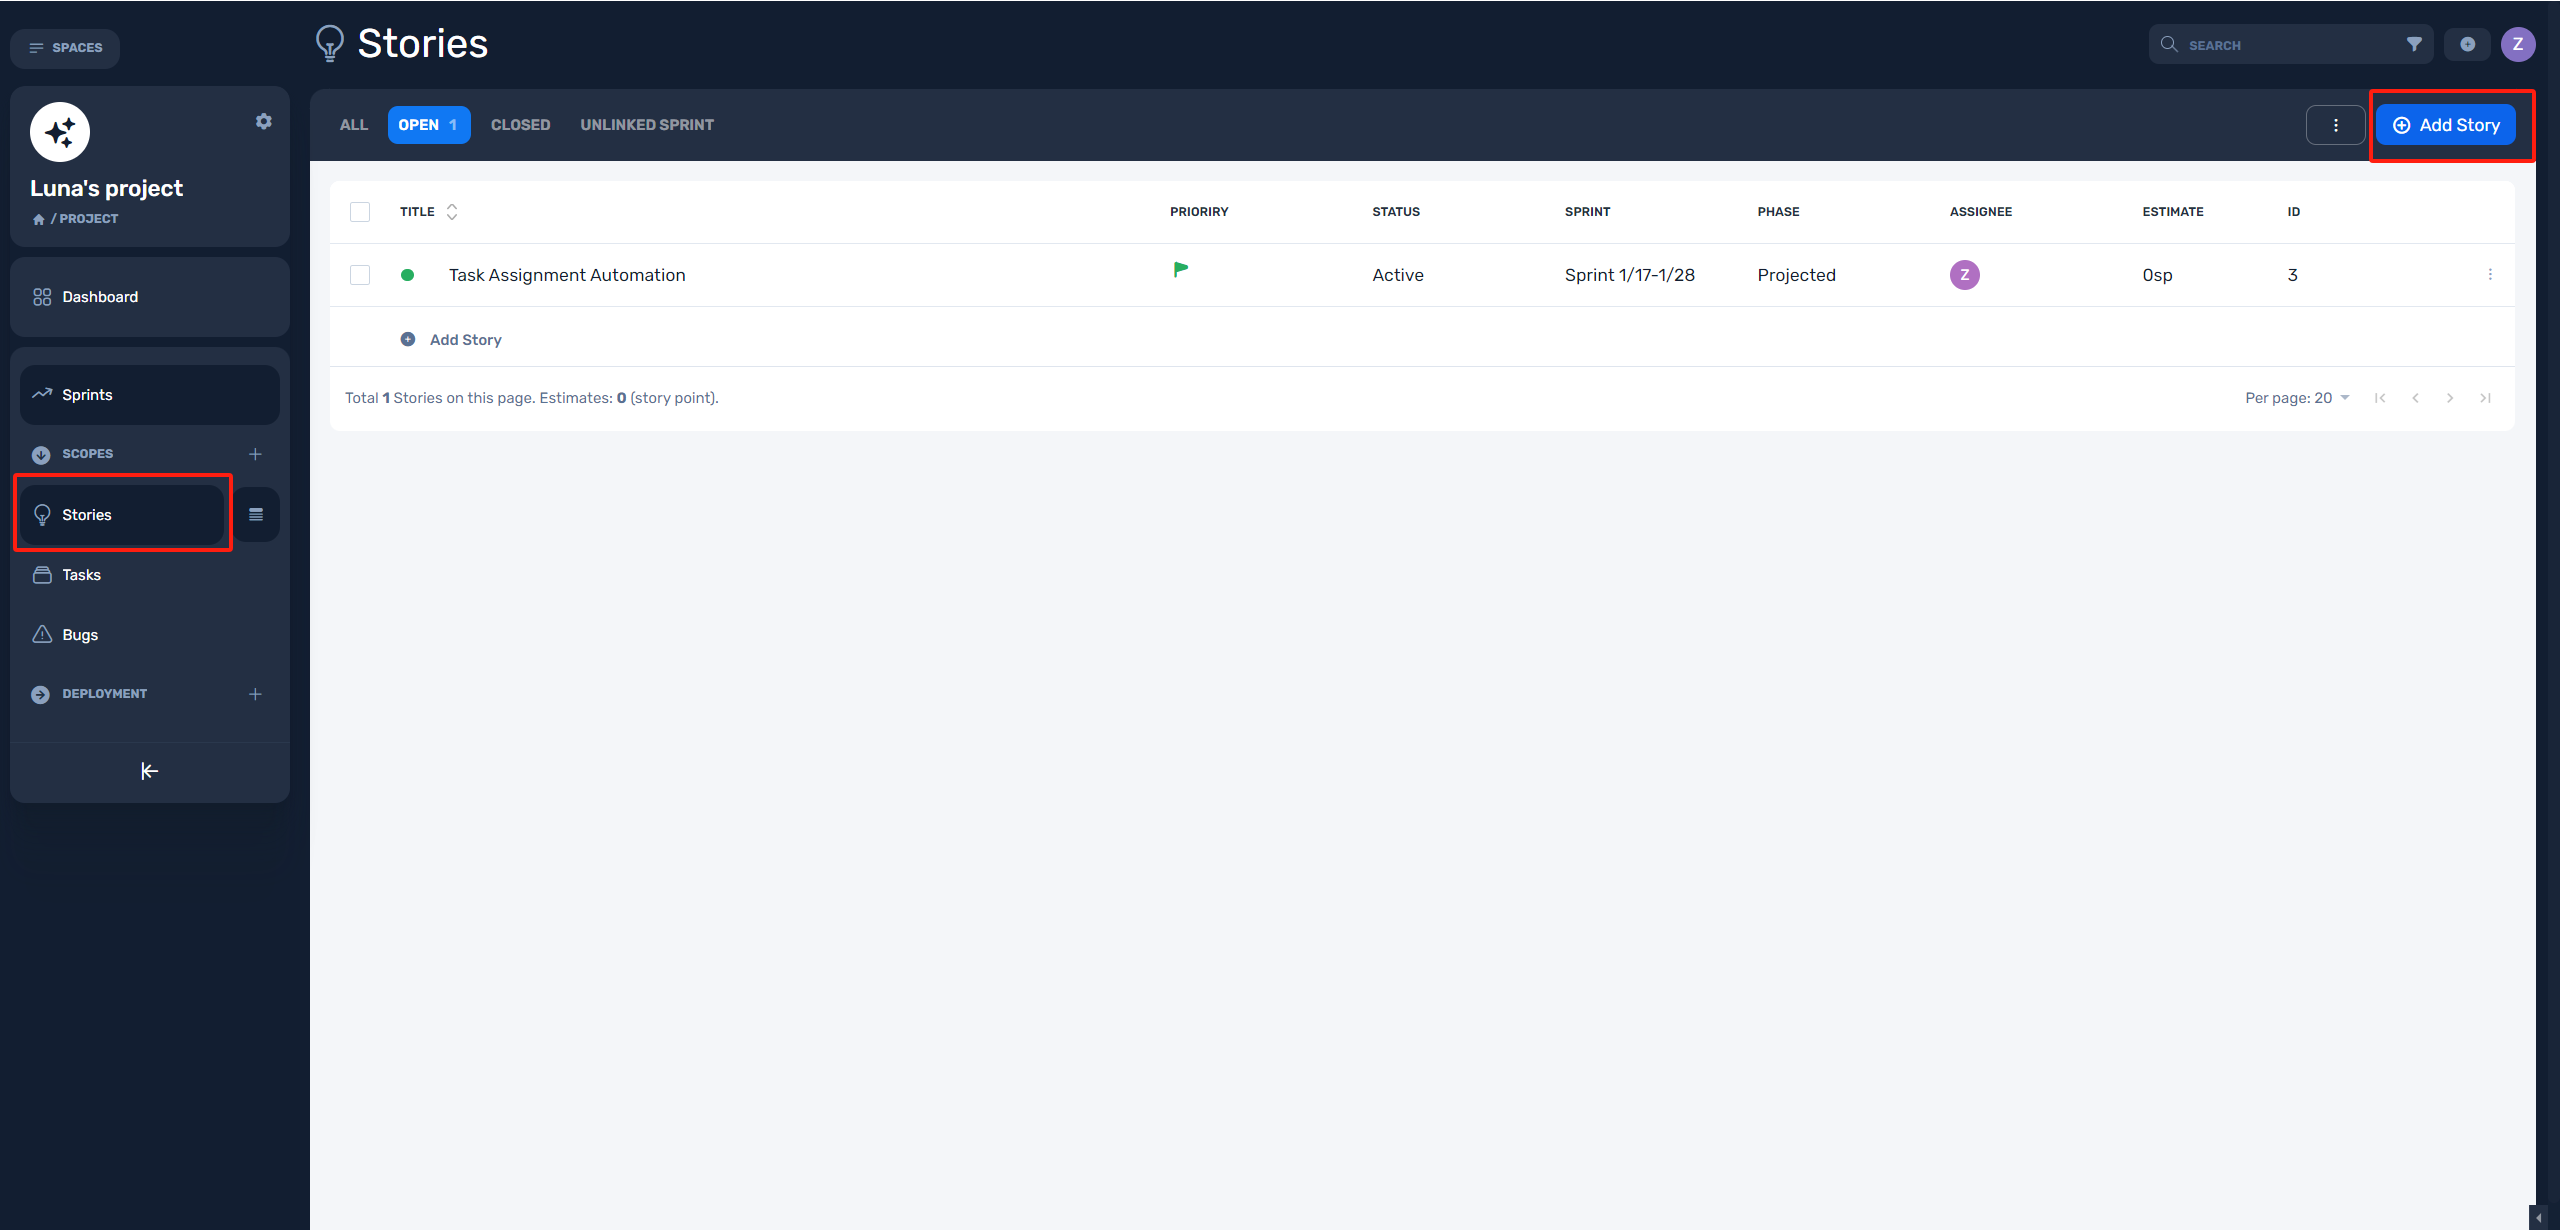
- Select "Stories" in the sidebar and Click "Add Story".
Step 4: Add sprints to your project
Sprint is a set of processes focused on improving a product or system through repetitive testing and refining. This allows for continuous improvement and adaptation to user feedback and market changes.
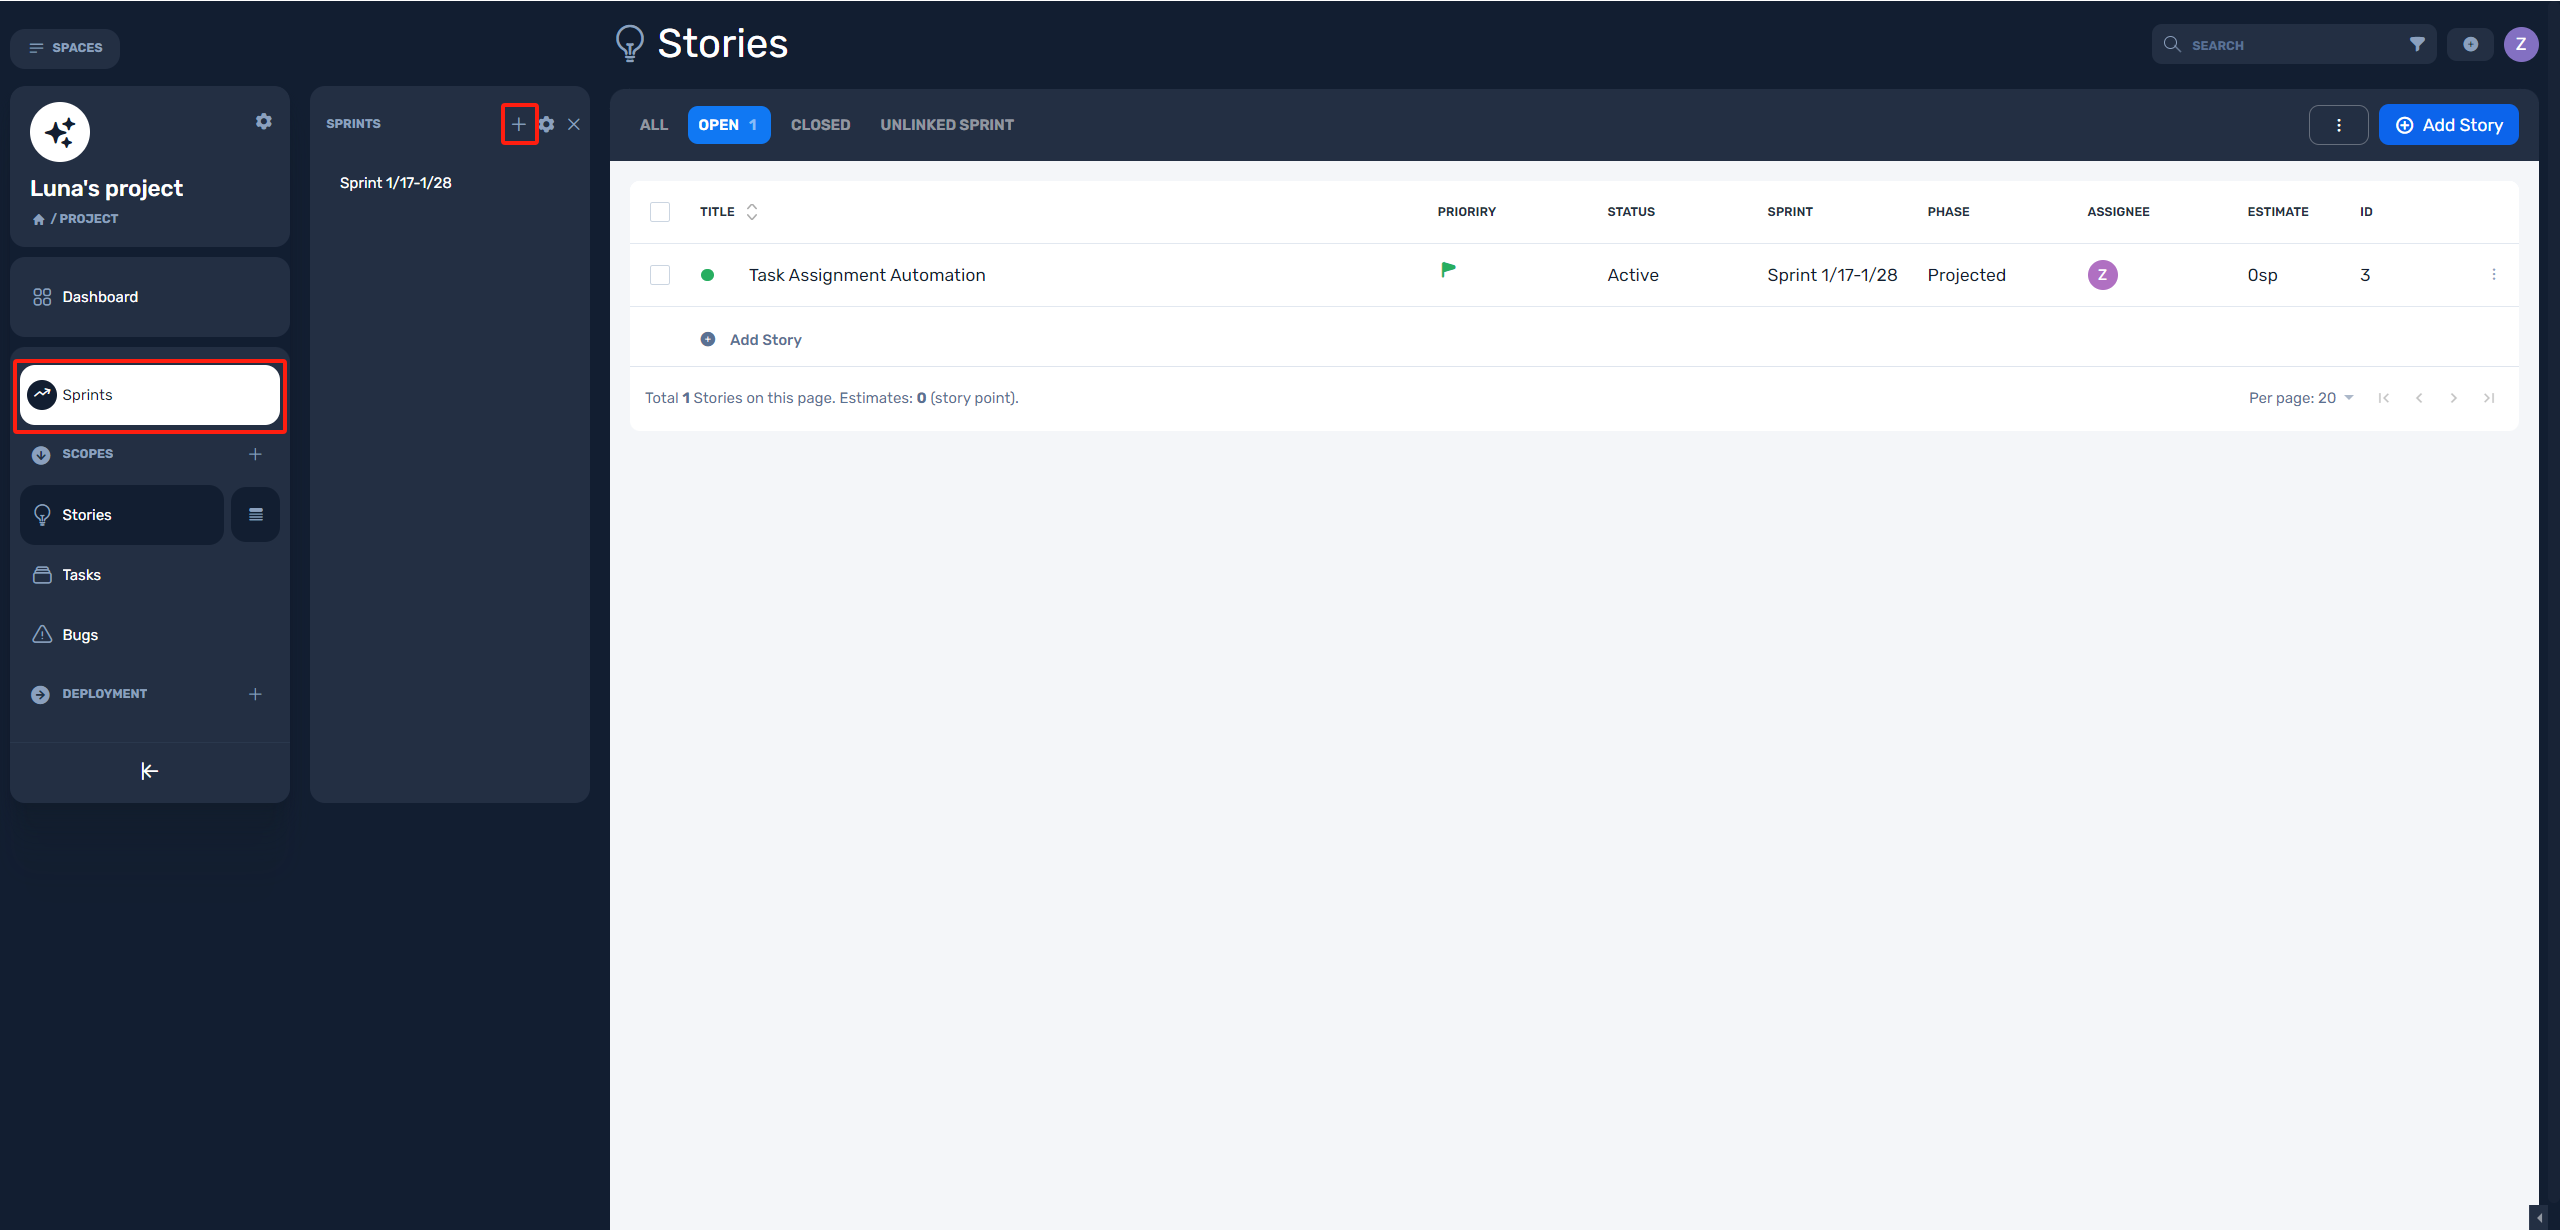
- Select "Sprint" in the sidebar and Click "Plus button".
Step 5: Link stories to this sprints
Scrum emphasizes delivering work in short, time-boxed iterations known as sprints. By linking stories to sprints, the team can break down larger requirements into smaller, manageable pieces that can be completed within a single sprint. This enables the team to deliver tangible results and receive feedback early and frequently, reducing the risk of developing features that do not meet the stakeholders' expectations.
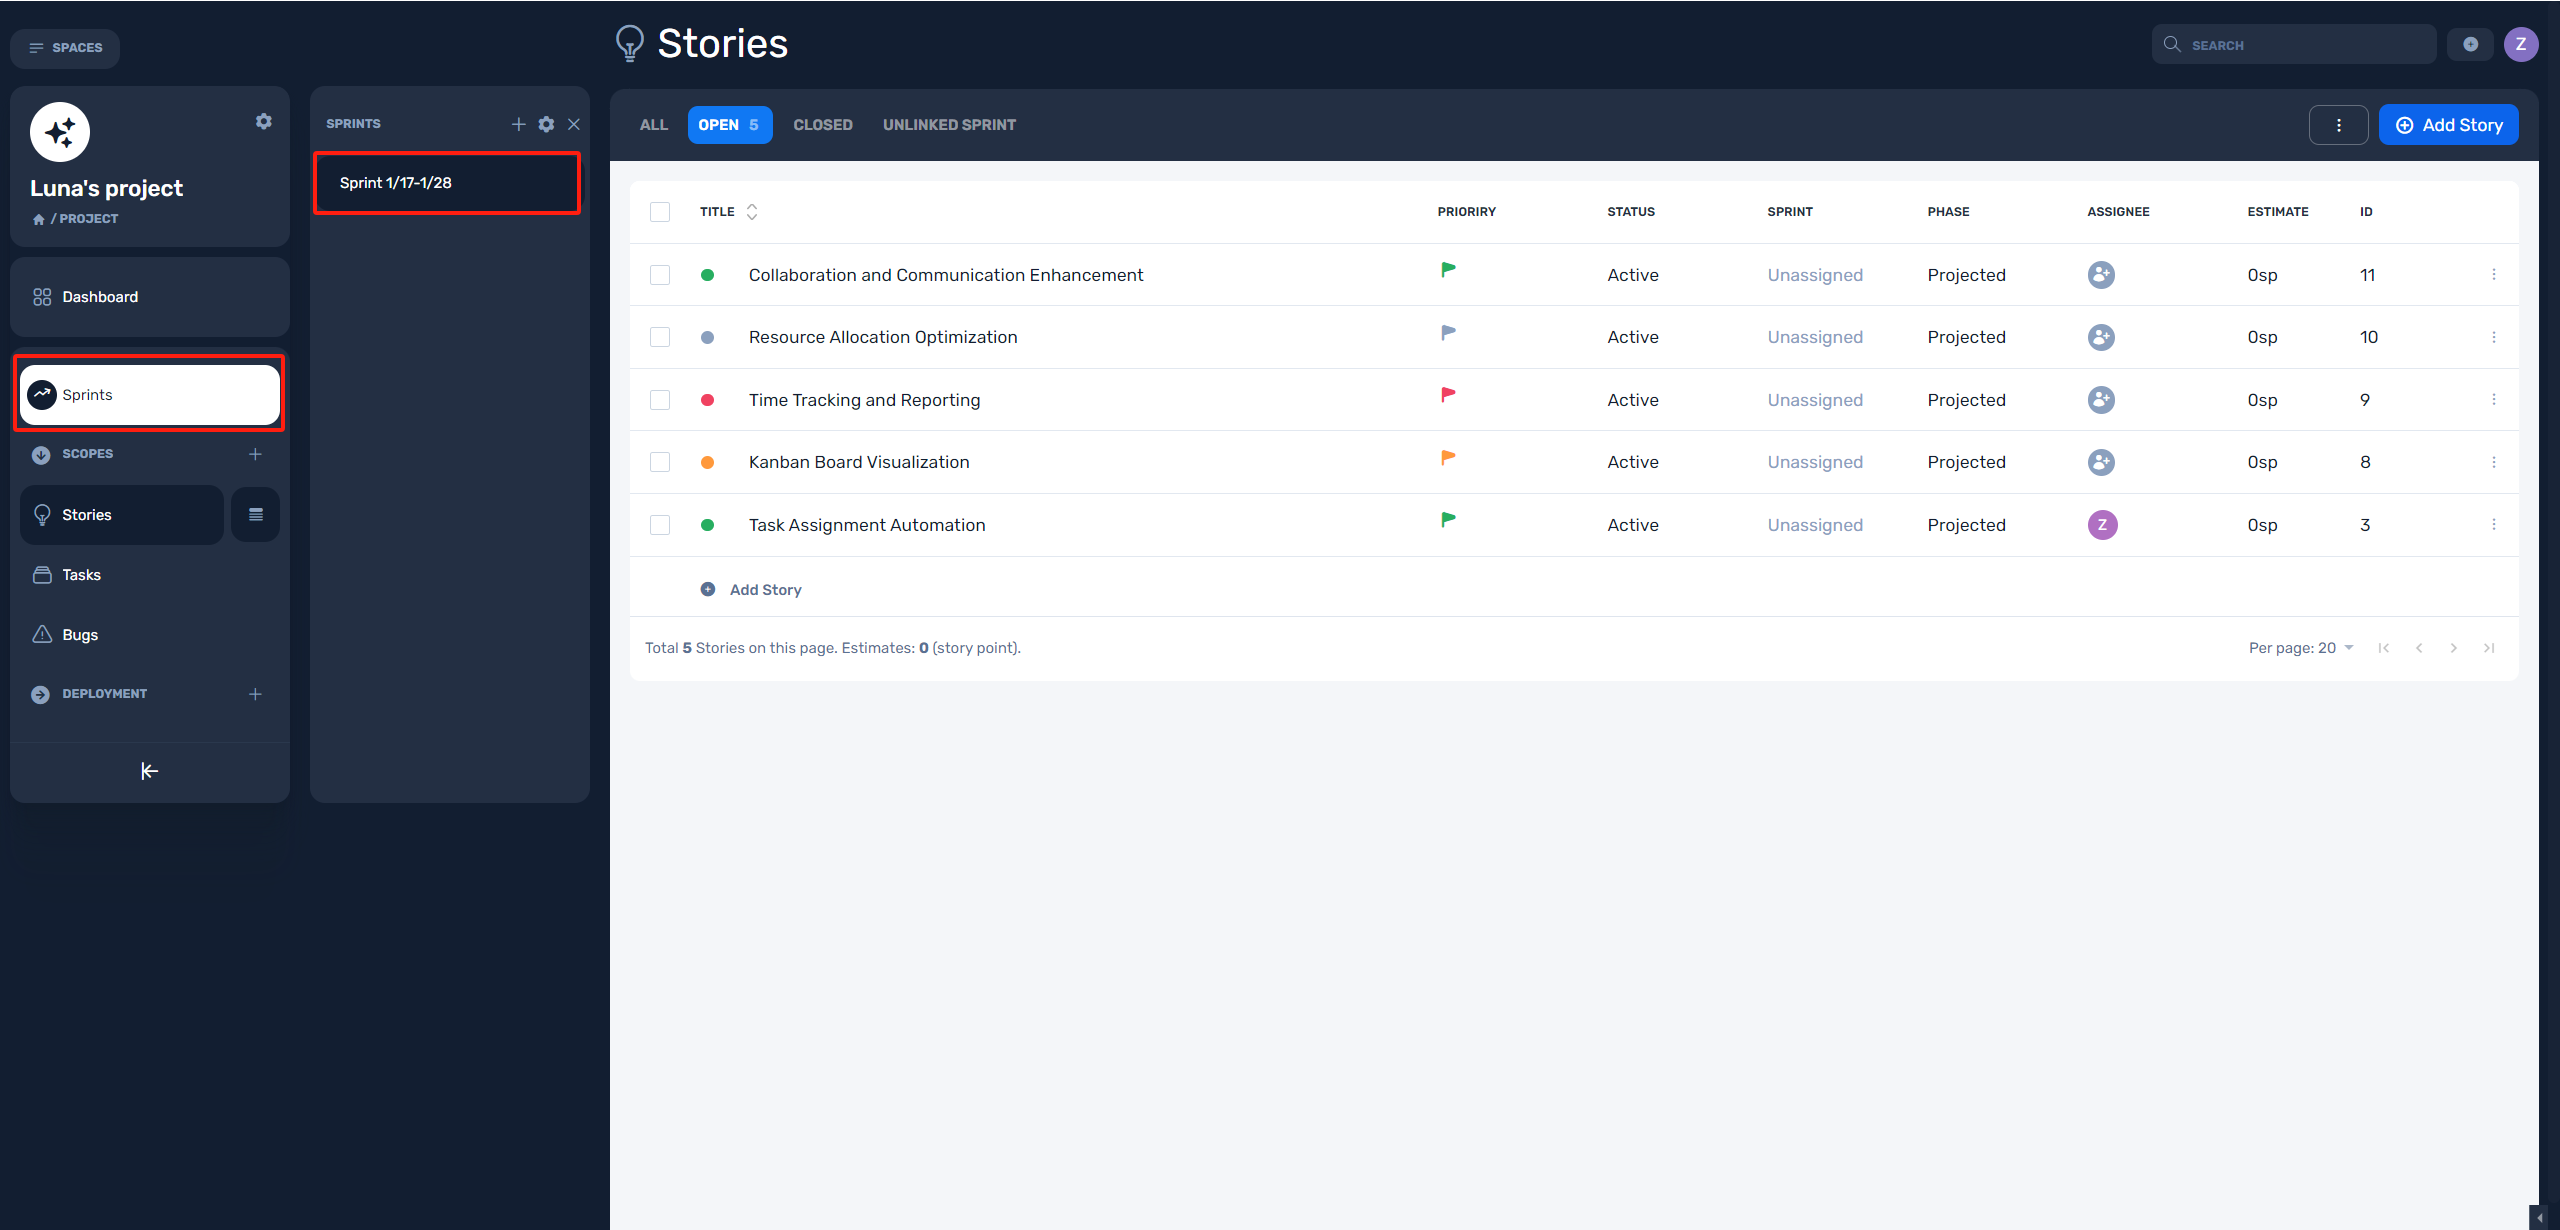
- In the "Project Space > Stories", click the "Sprint" in sidebar.
- Select one sprint from sprint menu, then you will go into the "Sprint > Story list".
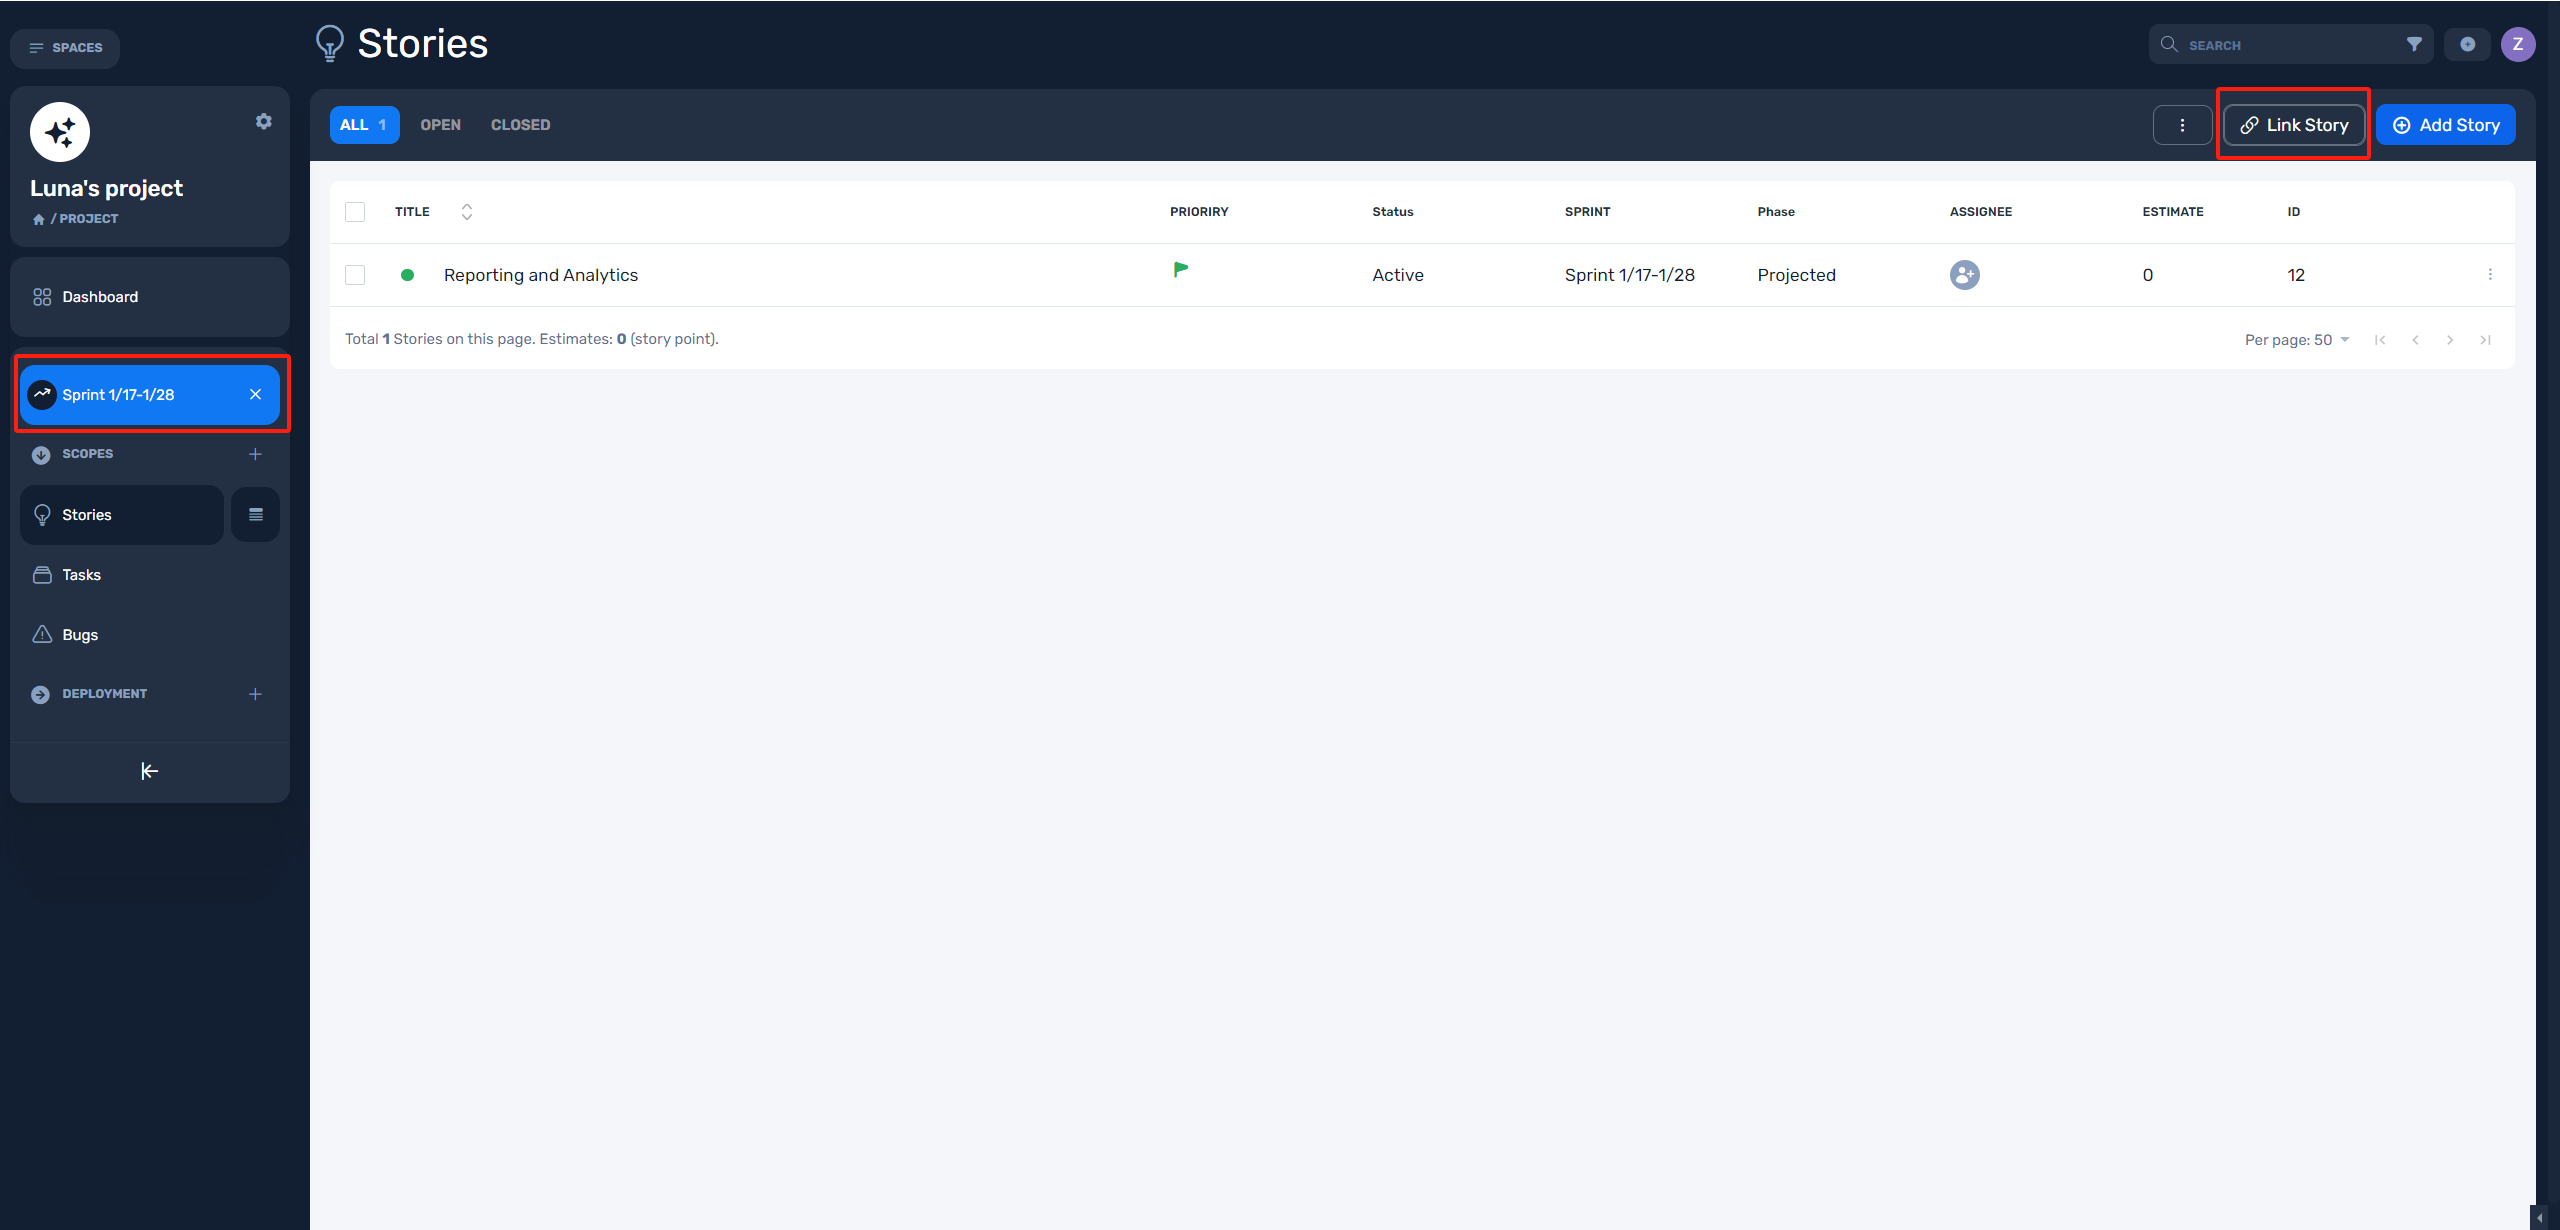
- Click "Link Story" in "Sprint > Story list".
- You can use the filter and search options in link page to find stories.
- Click "Link Story" in link page.
Step 6: Breakdown stories into task
By dissecting the story into smaller, more manageable tasks, team members can grasp the specific actions and steps needed to accomplish the work. This clarity reduces ambiguity and enhances communication within the team.
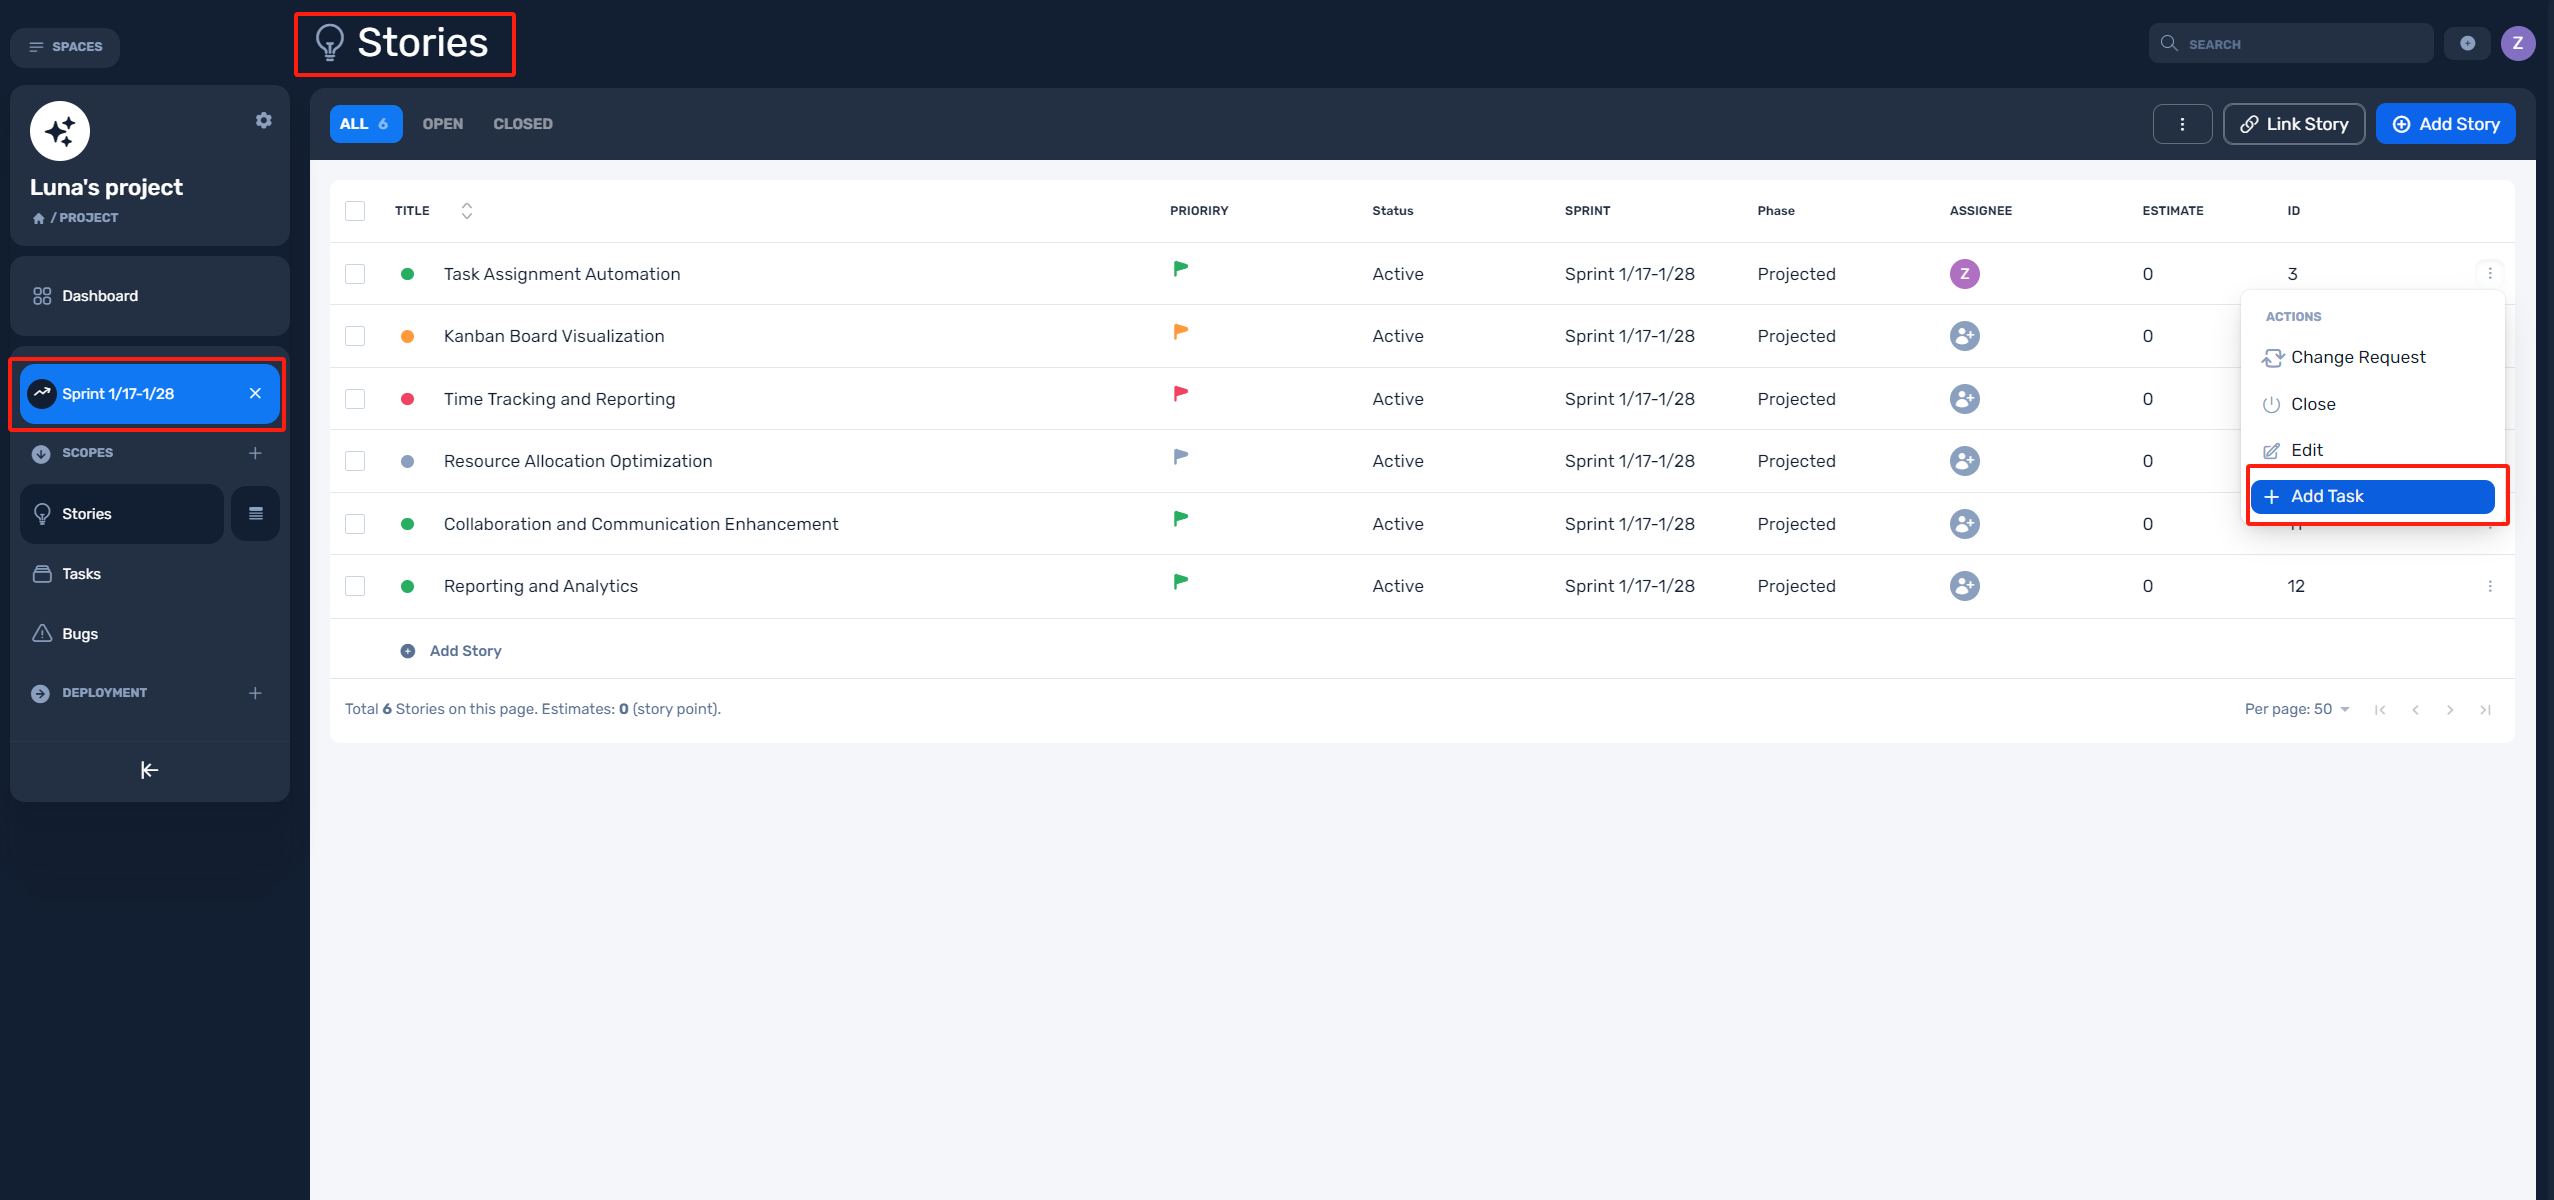
- In the "Sprint > Stories list", click the on three dots button to the right of the story item.
- Select the "Add Task" in the dropdown menu.
Step 7: Assign tasks to your team members
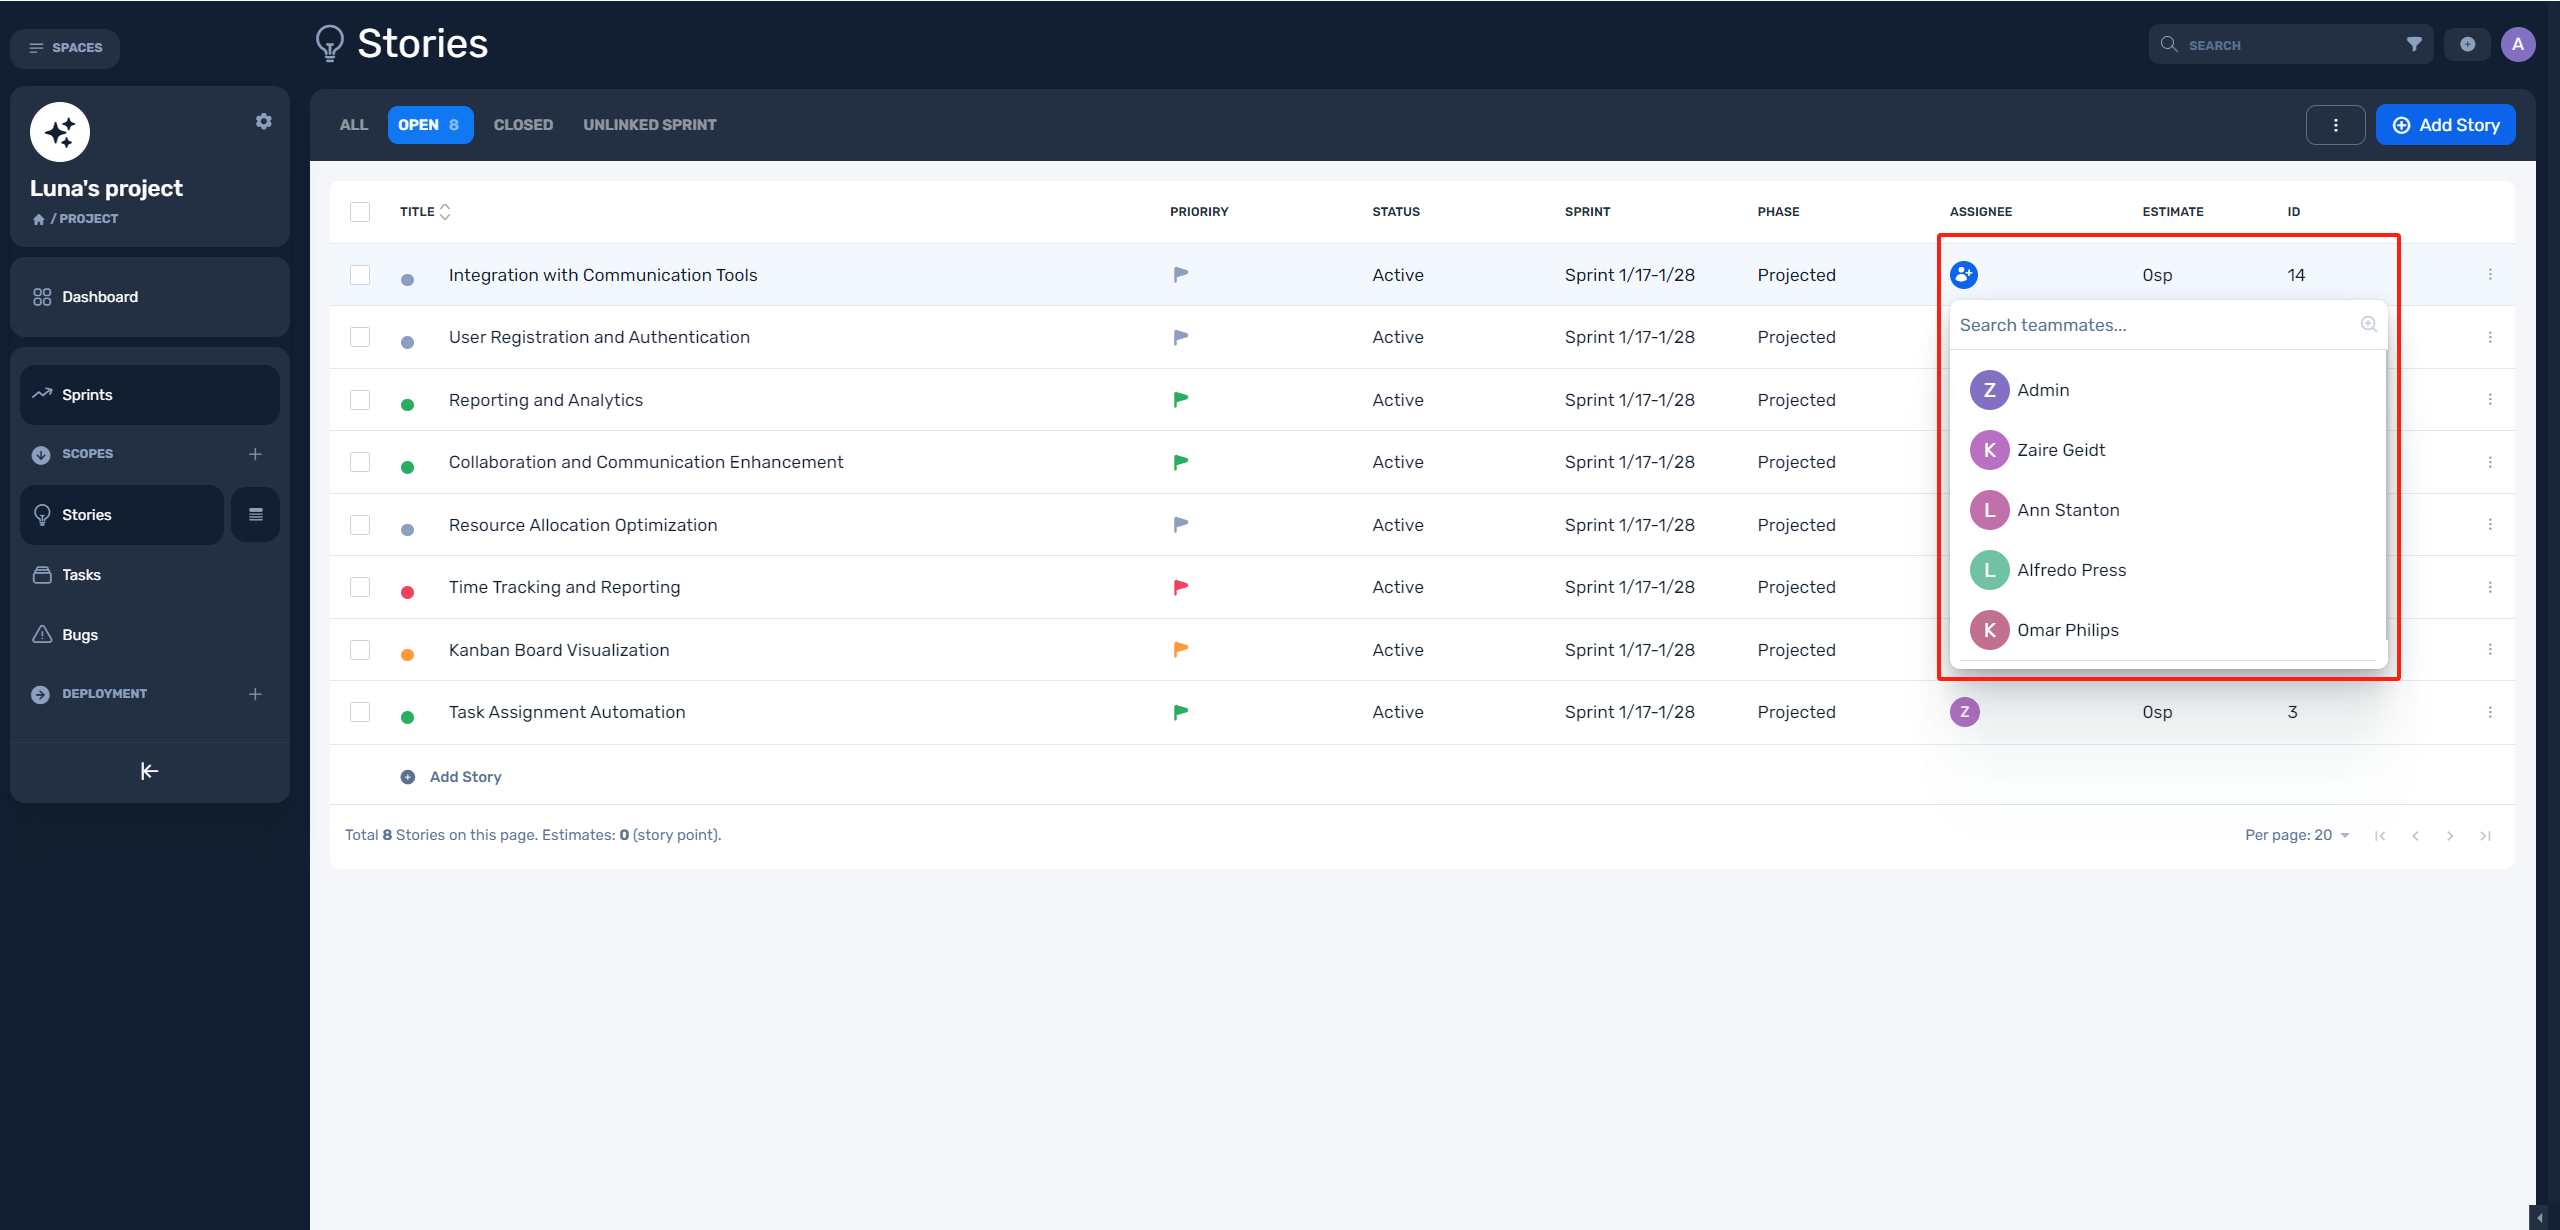
Next up is the need for closer teamwork. In the "Sprint > Stories list", you can assign tasks to your teammates.
Step 8: Log your task efforts
Accurate time tracking helps in evaluating project progress, identifying potential bottlenecks, and making informed decisions regarding resource allocation and task prioritization. Logging task efforts will also provide valuable data for future estimation and planning.
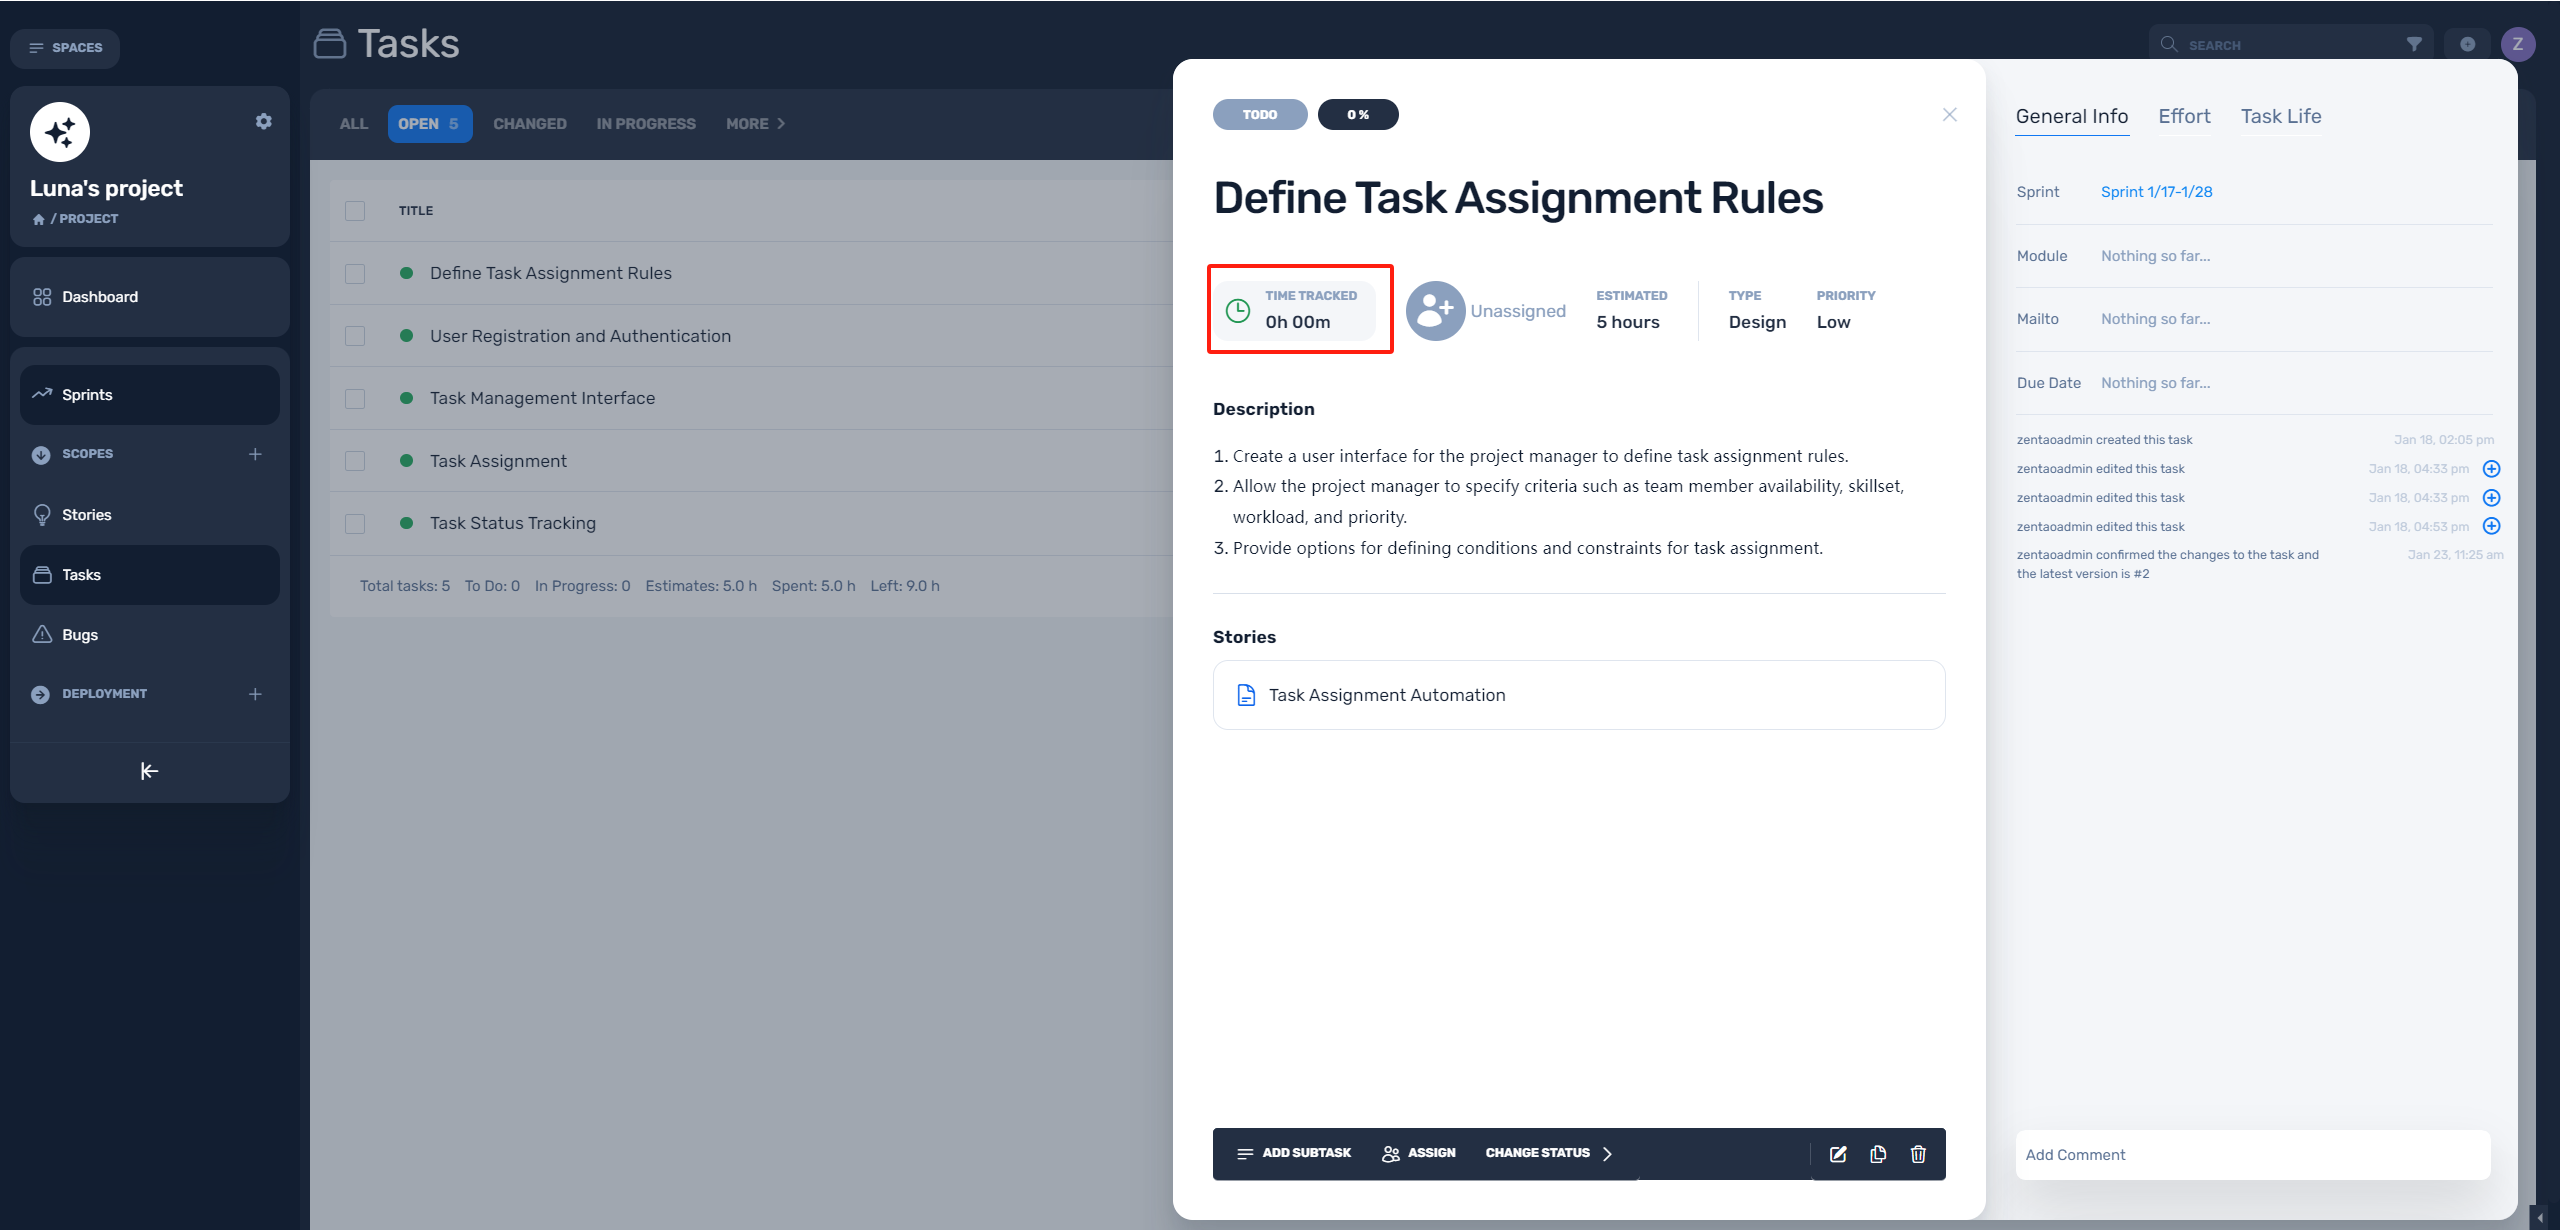
- Click the "Task Title", then go to the "Task details".
- In "Task details", click "Time Tracked" to log work.
