Jira Import Tool: The Complete 2026 Guide & Comparison
11 hours agoPUBLISHED INWeekly Sharing
 ali
ali 2026-07-16 17:57:00
 0
0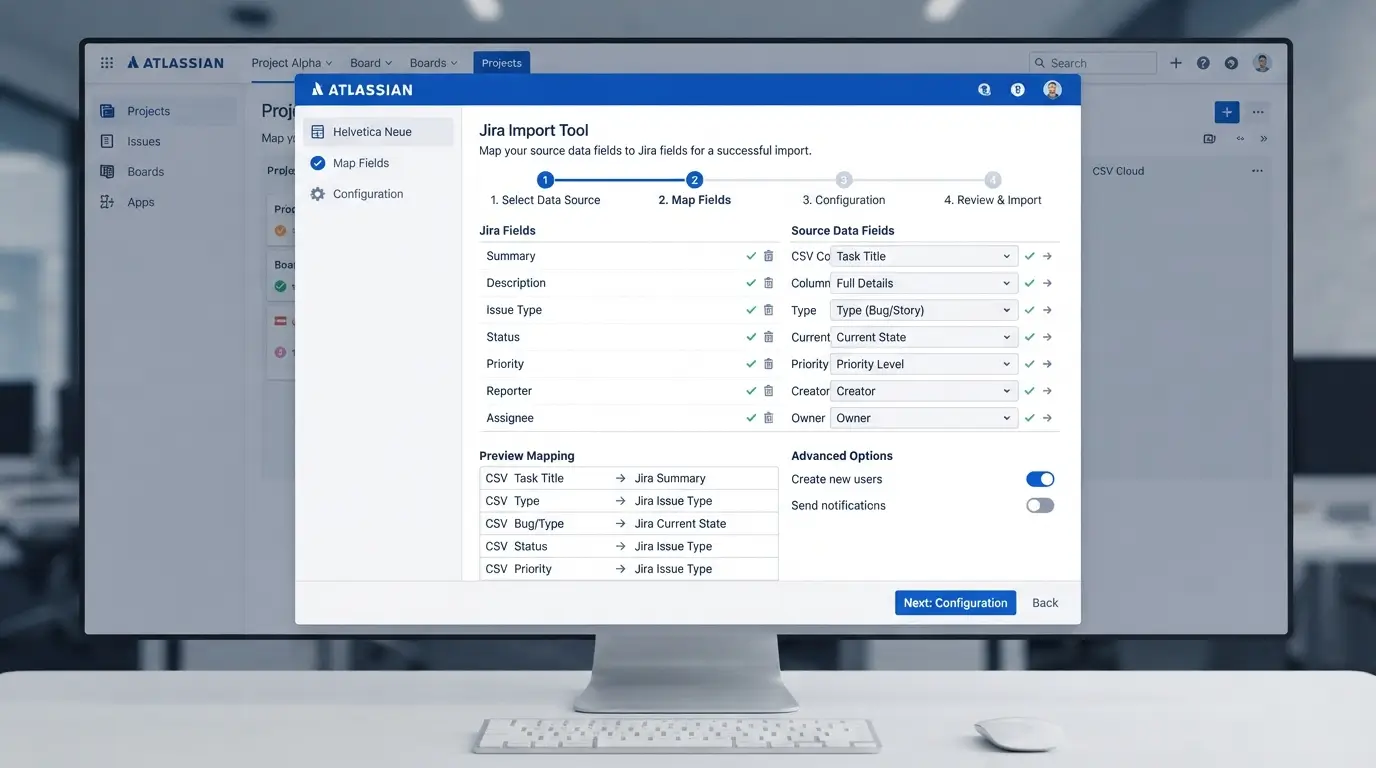
A Jira import tool moves data — issues, tasks, comments, attachments — from an external system like Trello, Asana, Excel, or another issue tracker into Jira, so you don't have to recreate hundreds of records by hand. Jira ships with native CSV, JSON, and API import options, and a growing ecosystem of third-party tools fills the gaps those native options leave behind. This guide covers every method available in 2026, how to prepare your data, which tool fits your migration, and the mistakes that turn a simple import into a multi-day cleanup job.
What Is a Jira Import Tool?
A Jira import tool is any method or software — native or third-party — used to bring data into Jira from an external source. This covers three broad categories: Jira's own built-in CSV/JSON importers, the Jira REST API for programmatic imports, and dedicated third-party migration platforms that add features like real-time sync, bulk error handling, and non-admin access.
The right choice depends on three things: how much data you're moving, whether you need this once or repeatedly, and whether you have Jira administrator access.
Native Jira Import Methods (Free)
Jira includes several import paths at no extra cost, though each comes with real limitations.
CSV Import (Jira Cloud and Data Center): The most common method. You export data from your source tool to a CSV file, then use Jira's field-mapping wizard to align columns with Jira fields. Jira Cloud's newer import experience also supports direct import from apps like Asana and Notion without a manual CSV step first.
JSON Import: Used for external tools that can't export to CSV. Jira Cloud accepts a structured JSON format for the same field-mapping process as CSV import.
Jira REST API: For developers, the REST API lets you programmatically create issues, comments, and attachments — the standard route when you need a repeatable, scriptable import, or when you don't have Jira admin rights to use the native CSV wizard.
Atlassian Cloud Migration Assistant: Free, but limited specifically to Atlassian-to-Atlassian moves (e.g., Jira Server/Data Center to Jira Cloud) with standard configurations — not a general-purpose external import tool.
Step-by-Step: Importing a CSV File Into Jira
Follow this sequence for a clean, low-error CSV import:
- Export your source data to CSV. Most tools (Trello, Asana, Monday.com, spreadsheets) support a native CSV export.
- Clean your CSV before touching Jira. Remove columns you don't need (watchers, estimates, anything without migration value) to keep the mapping step simple.
- Add a header row Jira can read. The header row must include a "Summary" column at minimum, and should avoid punctuation other than the commas separating columns.
- Wrap special characters in double quotes. Any text containing commas, line breaks, or quote marks itself needs to be quoted so Jira parses it correctly — for example, wrap a description with an internal comma in
" "marks. - Structure parent/child hierarchy if needed. Add "Work item ID," "Work type," and "Parent" columns, giving each row a unique sequential ID and referencing it in the Parent column of any child rows. Parent rows must appear before their children in the file.
- Split large files into batches. For big imports, break the CSV into smaller batches and import them separately — and run imports during off-peak hours to avoid performance issues.
- Start the import. In Jira Cloud: Settings → System → External System Import → CSV. Choose your file, map each column to a Jira field, and review the mapping preview before confirming.
- Save your configuration file. Jira generates a mapping configuration file at the end of the process — save it if you'll be running additional batches, so you don't have to remap fields each time.
- Validate a small batch first. Import 5–10 rows first, check the results in Jira, then run the full file once you've confirmed the mapping is correct.
Pro tip: Only Jira administrators can run the native CSV import UI. If your team members need to import their own data without admin access, you'll need either a service account with the Jira REST API or a third-party embedded import tool.
Third-Party Jira Import Tools Compared
| Tool | Best For | Key Capability | Admin Access Required? |
|---|---|---|---|
| Jira native CSV/JSON import | One-time, simple migrations | Built-in, free field mapping wizard | Yes |
| Jira REST API | Developers needing repeatable, scriptable imports | Full programmatic control over issue creation | No (service account) |
| Exalate | Phased or ongoing migrations needing sync | Bidirectional, real-time synchronization between instances | No |
| CSVBox | SaaS products embedding CSV import for end users | Schema-driven validation, row-level error handling, webhook delivery | No |
| Skyvia | Importing CSV directly into an existing Jira project without recreating it | Field mapping without forcing a new project | No |
| Atlassian Cloud Migration Assistant | Jira Server/Data Center → Jira Cloud moves | Native Atlassian-to-Atlassian migration | Yes |
Which Import Method Should You Use?
Use this quick decision guide:
- Migrating once, from a spreadsheet or CSV export, and you have admin access → Jira's native CSV import.
- Migrating from Jira Server/Data Center to Jira Cloud → Atlassian Cloud Migration Assistant.
- Two Jira instances need to stay in sync during a phased migration (e.g., after a company merger) → a synchronization tool like Exalate.
- You're building a product that lets your own customers import data into their Jira → an embeddable tool like CSVBox.
- You need full control over field transformation logic and don't have Jira admin rights → the Jira REST API via a backend service account.
- Large enterprise migration with complex custom fields and professional services support needed → an enterprise migration platform with incremental migration capabilities.
Field Mapping and Data Preparation Checklist
- [ ] Confirm your CSV has a "Summary" column — Jira requires this at minimum.
- [ ] Remove unnecessary columns (watchers, estimates, or any field without a clear destination) before mapping.
- [ ] Decide how to handle Resolution, Priority, Work Type, and Status values that don't already exist in Jira — you can create new values for most fields, but Status values must already exist in the destination.
- [ ] Set up Work item ID / Parent columns if you need to preserve epic-to-story or parent-to-subtask hierarchy.
- [ ] Confirm attachment URLs are accessible with the right project permissions before import, since Jira pulls attachments from the URLs specified in your CSV.
- [ ] Check date format settings match your CSV before starting the import.
- [ ] Decide upfront whether you're doing a full-history migration (comments, attachments, status changes) or a clean-slate migration of current state only — this affects how much prep work you need.
Common Jira Import Errors (and How to Fix Them)
- "Field not available in the destination" — The custom field referenced in your CSV doesn't exist in the target Jira project. Fix: create the field in Jira first, or remove the column from your CSV.
- Import forces a new project instead of using an existing one — A known quirk in some Jira Cloud CSV flows. Fix: use the "switch to old experience" option in External System Import, or use a third-party tool like Skyvia that maps directly into an existing project.
- Status values fail to map — Jira only lets you map to statuses that already exist in the destination; it won't create new ones during CSV import. Fix: create the missing statuses manually in Jira before running the import, or map to an existing equivalent status.
- Users import as "Anonymous" or unassigned — This happens when the CSV is missing valid email addresses for assignees or reporters. Fix: ensure every user row has a correctly formatted email address matching an existing Jira account.
- Special characters break formatting or truncate text — Usually caused by unescaped commas or quote marks. Fix: wrap any field containing special characters in double quotes, and double up internal quote marks.
- Large files time out or slow down the whole Jira instance — Fix: split the file into smaller batches and import during off-peak hours.
Migrating From Specific Tools (Trello, Asana, Excel, GitHub)
Trello → Jira: Export your board to CSV or JSON, then use Jira Cloud's newer import experience, which recognizes Trello exports directly and selects an appropriate space template automatically.
Asana → Jira: Jira Cloud's newer import flow supports direct import from Asana without a manual CSV step. For more complex field mapping, some teams instead script the migration with the Jira REST API and Asana's own API.
Excel/Spreadsheet → Jira: Save your spreadsheet as a CSV file, then follow the native CSV import steps above — this is the most common and lowest-friction Jira import path.
GitHub Issues → Jira: No native one-click path exists; teams typically export GitHub Issues via the GitHub API, transform the data into a Jira-compatible CSV, and run it through the standard CSV import wizard, or script the transfer directly with both platforms' REST APIs.
Basecamp → Jira: Because Basecamp's data structure (message boards, to-dos, docs) differs significantly from Jira's issue-based model, this typically requires manual field mapping rather than a direct import — plan extra time for this migration specifically.
Pricing Breakdown
| Method | Cost |
|---|---|
| Native Jira CSV/JSON import | Free (included with any Jira plan) |
| Jira REST API | Free (uses your existing Jira license; developer time is the real cost) |
| Atlassian Cloud Migration Assistant | Free |
| CSVBox | Free tier available; paid plans scale with usage/rows imported |
| Skyvia | Free tier for limited records; paid plans for larger, ongoing imports |
| Exalate | Custom pricing based on sync volume and instance count |
| Enterprise migration platforms | Custom pricing, typically includes professional services |
Pros and Cons of Each Approach
Native CSV/JSON Import
- Pros: Free, no third-party account needed, sufficient for most one-time migrations.
- Cons: Admin-only access, labor-intensive for large datasets, no ongoing synchronization, parent/child relationships can be finicky to set up correctly.
Jira REST API
- Pros: Full control, scriptable and repeatable, works without native admin UI access.
- Cons: Requires development time and Jira API familiarity; not a point-and-click solution.
Third-Party Sync Tools (e.g., Exalate)
- Pros: Real-time bidirectional sync, ideal for phased migrations where teams need to keep working in both systems.
- Cons: Ongoing cost, added complexity versus a one-time import.
Embeddable Import Tools (e.g., CSVBox)
- Pros: Removes admin-only friction, gives end users a guided upload experience with validation.
- Cons: Best suited to SaaS products building this into their own app, not a typical one-off internal migration.
Expert Tips for a Clean Import
- Always test with a small batch first. Import 5–10 rows, verify field mapping in Jira, then scale up — this catches mapping errors before they multiply across thousands of records.
- Decide what not to migrate. Watchers, time estimates, and other low-value fields often aren't worth the mapping effort; a leaner CSV is a more reliable import.
- Use a configuration file for repeat imports. Jira generates one automatically after your first CSV import — reuse it for subsequent batches instead of remapping fields each time.
- Security matters for cross-platform migrations. If you're using a third-party migration tool and moving sensitive project data, confirm it has encryption in transit and at rest, plus role-based access control, before granting it access to your instance.
- Don't wait until a deadline forces a rushed migration. Large, last-minute imports under time pressure are exactly the scenario that produces avoidable data-quality errors.
Frequently Asked Questions
What file formats can I import into Jira?
Jira natively supports CSV and JSON imports. For tools that can't export to either format, teams typically use the Jira REST API to script a custom import instead.
Do I need to be a Jira administrator to import data?
For the native CSV import wizard, yes — only Jira administrators (or, for team-managed business spaces, users with space-creation permission) can run it. Non-admin users need either a bulk issue import option, a backend service account using the REST API, or a third-party embedded tool.
Can I import a CSV into an existing Jira project instead of creating a new one?
Yes, though some newer Jira Cloud import flows default to creating a new project. Use the "switch to old experience" option in External System Import, or a third-party tool like Skyvia, to map directly into an existing project.
How do I preserve parent-child relationships (like epics and subtasks) during import?
Add "Work item ID," "Work type," and "Parent" columns to your CSV, give each row a unique ID, and reference that ID in the Parent column of any child rows — making sure parent rows appear before their children in the file.
What happens if my CSV references a status that doesn't exist in Jira?
The import will fail for that field. Jira only lets you map to existing statuses during CSV import — it can't create new ones on the fly — so you need to create any missing statuses manually before running the import.
Is there a limit to how much data I can import at once?
There's no fixed hard limit, but Jira explicitly recommends splitting large CSV files into smaller batches and importing during off-peak hours to avoid performance issues on large instances.
Can I import attachments along with my issues?
Yes — specify the attachment's URL in an Attachments column in your CSV. The Jira project where the images are stored needs appropriate browse permissions for this to work correctly.
What's the difference between Jira's CSV import and a tool like Exalate?
Jira's native CSV import is a one-time, one-way transfer. Exalate and similar tools provide ongoing, bidirectional synchronization — useful when two Jira instances (or Jira and another tracker) need to stay updated simultaneously during a phased migration.
How long does a typical Jira CSV import take?
For small to mid-sized migrations with a clean CSV, the import itself usually completes in minutes; the real time investment is in preparing and mapping the data beforehand, which can take hours depending on data complexity and how many custom fields need mapping.
Can I automate recurring imports into Jira?
Yes — the Jira REST API is the standard approach for scripted, repeatable imports, and several third-party tools (CSVBox, Exalate) are built specifically around ongoing or automated data flows rather than one-time transfers.
Conclusion
For most teams, Jira's native CSV import is the right starting point — it's free, handles straightforward migrations well, and covers the vast majority of one-time data transfers from spreadsheets, Trello, and Asana. Reach for the Jira REST API when you need scriptable control or lack admin access, and consider a dedicated third-party tool like Exalate or CSVBox only when your situation calls for ongoing sync, embedded end-user imports, or complex multi-instance migrations.
Next step: Export a small sample of your source data, run it through the CSV import checklist above, and test it on 5–10 rows before committing to a full migration — that one step prevents the vast majority of import headaches teams run into.
Related Blogs
12 Cheap Jira Alternatives Compared (2026 Pricing)

Sanplex vs OpenProject: On-Premises PM Compared