Catalog
ZenTao 10.2+ has integrated Xuan. Once you integrate ZenTao and Xuan, ZenTao will work as the server for Xuan, and ZenTao users can log in Xuan with ZenTao username and password. The integration is optimizing, and other information in ZenTao will be shared in Xuan.
Xuan is an instant messenger for enterprises and it is open source, free, secure, and cross-platform. Visit http://xuan.im for more.
Next, let's see how to integrate Xuan with ZenTao.
1. Download and install ZenTao, Xuan, and Xuan xxd server.
- ZenTao open source download https://www.zentao.pm/download.html
- Xuan 2.0.0 client download http://xuan.im/page/1.html
-
Xuan 2.0.0 xxd server download http://xuan.im/page/2.html
2. Integrate Xuan
Take ZenTao for Windows as an example and let's see how to integrate Xuan.
2.1 Install ZenTao and make sure it works.
Note:
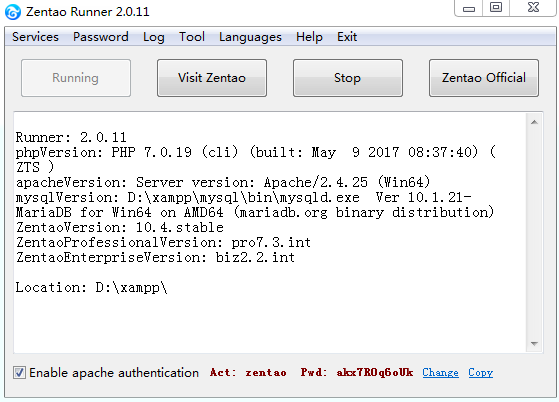
- If you install ZenTao via one-click installation package, you have to turn of the Apache Authentication in ZenTao Control Panel. Or you cannot log in Xuan client.
- Apache Authentication is ON by default. Uncheck the Apache Authentication box will do.
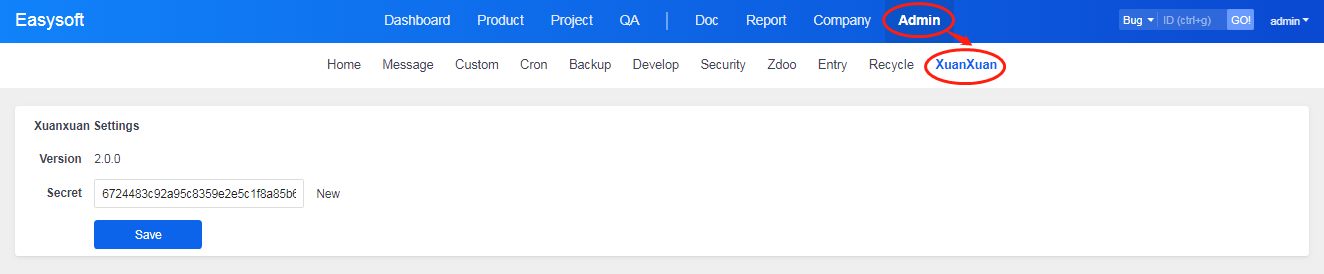
Go to Admin->Xuan in ZenTao and check the settings of Xuan. The key by default is 32 bits of 8. It is recommended that you Re-Create a key for security reasons.
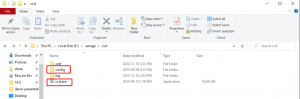
2.2 Go to xxd and change configure files.
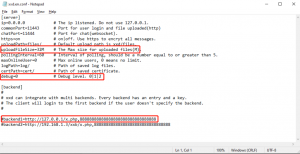
Unzip the xxd file for Windows, and you will have config and xxd.exe. Go to config->xxd.conf and change it.

Refer to the comments and change it accordingly.
Note:
- ZenTao is the only and default server for Xuan. So add "default" when configuring the server.
- The key in the config file should be the one genereate in Admin->Xuan.
- Server name is the address that you visit ZenTao.
For example, the address to visit ZenTao is http://127.0.0.1/zentao, then localhost=http://127.0.0.1/xxb/xuanxuan.php,88888888888888888888888888888888. The actual configuration is xuanxuan=http:127.0.0.1/zentao/xuanxuan.php,myanris5vpthvvghuo33mtqepxqs3eq7,default

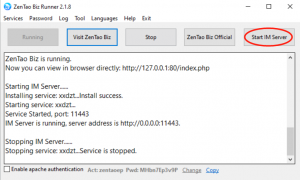
Save the configuration, and start IM server.

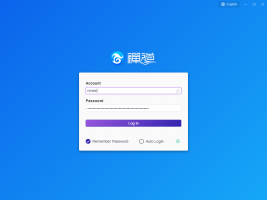
3. Login Xuan desktop
Use ZenTao username and password to log in Xuan. The server IP on Xuan login page is the Listen IP.
Note:
- If ZenTao and xxd are on the same server, it is OK to enter the IP to visit ZenTao in server address.
- If ZenTao and xxd are not on the same server, the server IP has to be the Listen IP.
- If the Listen IP is the intranet IP and Xuan has to connect to the internet IP, use the internet IP as the server IP.

After login Xuan, you can use Xuan to communicate with other users.
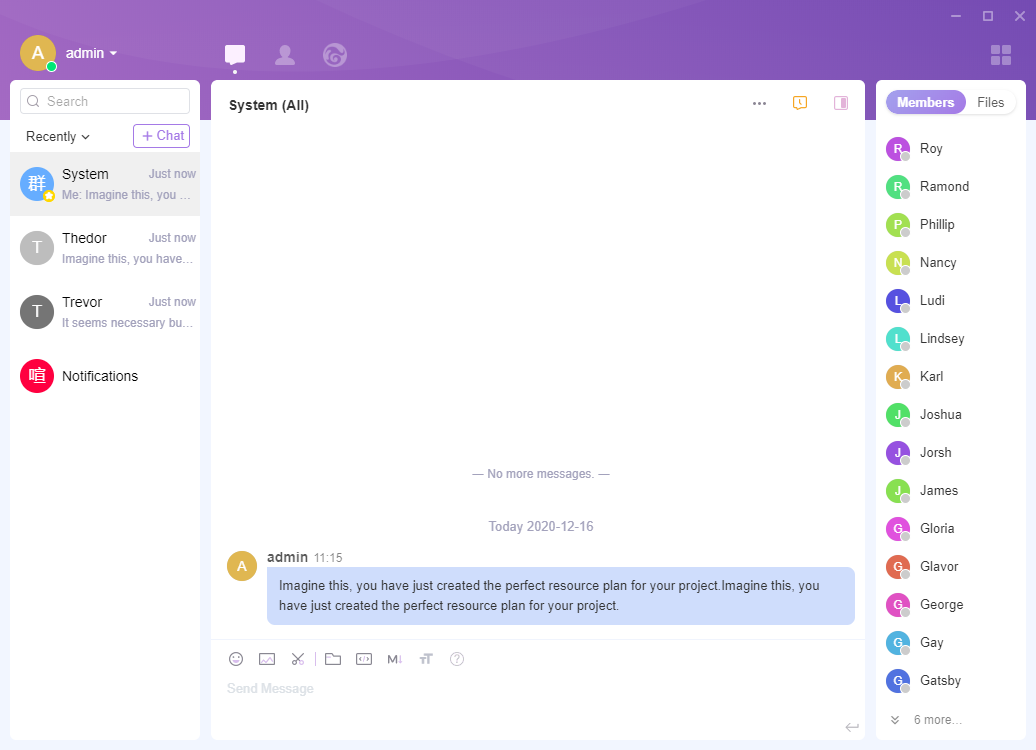
After integrating Xuan with ZenTao, username and password are shared. ZenTao works as the server for Xuan.
4. Note
4.1 Add the parse of xuanxuan.php and upgradexuanxuan.php
If your ZenTao is upgraded to ZenTao 10.2, you should add the parse to xuanxuan.php and upgradexuanxuan.php.
For Windows one-click installation package, go to xampp/runner/res/apache/conf/httpd.conf and add the code below to setting for zentaopms(or ZenTao open source), setting for zentaopro(for ZenTao Pro), or setting for zentaobiz(for ZenTao Enterprise).
<Files "xuanxuan.php">
    SetHandler application/x-httpd-php
  </Files>
  <Files "upgradexuanxuan.php">
    SetHandler application/x-httpd-php
  </Files>
After adding the code, save the file. Restart ZenTao and it should work.
For Linux one-click installation package, go to /opt/zbox/etc/apache /httpd.conf and the code below to setting for zentaopms(or ZenTao open source), setting for zentaopro(for ZenTao Pro), or setting for zentaobiz(for ZenTao Enterprise).
<Files "xuanxuan.php">
    SetHandler application/x-httpd-php
  </Files>
  <Files "upgradexuanxuan.php">
    SetHandler application/x-httpd-php
  </Files>
After adding the code, save the file. Restart ZenTao and it should work.
4.2 Turn off the Apache Authentication in Windows one-click installation package.
- If you install ZenTao via one-click installation package, you have to turn off the Apache Authentication in ZenTao Control Panel. Or you cannot log in Xuan client.
- Apache Authentication is ON by default. Uncheck the Apache Authentication box will do.
4.3 Fail to use ZenTao username and password to log in Xuan
If you cannot log in Xuan with ZenTao username and password after integration,
- check whether ZenTao, Xuan, and Xuan xxd are working.
- If so, check the configuration in xxd.conf.
Check the server name, the key, and "default".
4.4 Misc
You can leave a message, write a post, and email us, if you have any questions.
Forum: https://www.zentao.pm/forum/feedback.html
Email: [email protected]