
Dashboard
1. Introduction of Sanplex features
1.1. Core Management Framework
1.1.1 Program
1.1.2 Project
1.1.3 Product
1.1.4 Execution
1.1.5 Management Models
1.2. Dashboard
1.2.1 Getting Started with Tutorials
1.2.2 Quick Add
1.2.3 Notification Center
1.2.4 Effort Tracking
1.2.5 Dashboard - Project and Execution
1.2.6 Dashboard - My Work, Contribution, and Recents
1.2.7 Dashboard - Approval
1.2.8 Contacts
1.3. Program
1.3.1 Program List
1.3.2 Program Kanban
1.3.3 Create Program
1.3.4 Create Sub-Programs
1.3.5 Project Charter Management
1.4. Product
1.4.1 Create Product
1.4.2 Manage Modules
1.4.3 Multi-Branch and Multi-Platform Management
1.4.4 Manage Plans
1.4.5 Manage Requirements
1.4.6 Requirement Reviews
1.4.7 Requirement Status and Phase
1.4.8 Create Releases
1.4.9 Track Progress
1.4.10 Business Requirements and Multi-Level Requirements
1.5. Project
1.5.1 Scrum Project
1.5.2. Waterfall Project
1.5.2.1 Manage Project Phases
1.5.2.2 Project Design
1.5.2.3 Project Matrix
1.5.2.4 Project Reports and Earned Value Management
1.5.2.5 Project Baselines
1.5.2.6 Project Change
1.5.3. Kanban Project
1.5.3.1 Set Up Kanban Projects
1.5.3.2 Configure Kanban Boards
1.5.3.3 Use Kanban Boards
1.5.4 Hybrid Agile Project
1.5.5 Hybrid Waterfall Project
1.5.6. Project Settings
1.5.6.1 Project Setup
1.5.6.2 Project Executions
1.5.6.3 Project Requirements
1.5.6.4 Project Builds
1.5.6.5 Project Tests
1.6. Admin Settings
1.6.1 Confluence Data Import
1.7. Workflow

Quick Add

2026-08-13 18:32:42
Sanplex Content
293
Last edited by Jing WANG on 2026-08-13 18:33:13
Share links
Summary: Learn how to use the “+” menu in Sanplex to quickly create commonly used work items, with creating a To-do as an example.

Sanplex provides a “+” button in the upper-right corner of the interface for quickly creating commonly used items from a single entry point.

Depending on your permissions, enabled modules, and the current workspace, the available options may include items such as To-do, Log, Bug, Requirement, Task, Test Case, Document, Execution, Project, Product, Program, Space, and Kanban.


Notes:

  • If a specific option is not displayed, contact your administrator to confirm whether you have the required permission or whether the corresponding feature is enabled.
  • The available options may vary depending on the current interface and enabled modules.
  • If installed plugins support this feature, their related actions may also appear in the menu.

Create a To-do with Quick Add

Click the “+” button in the upper-right corner and select To-do. In the Add To-do window, enter the required information and configure other details as needed.
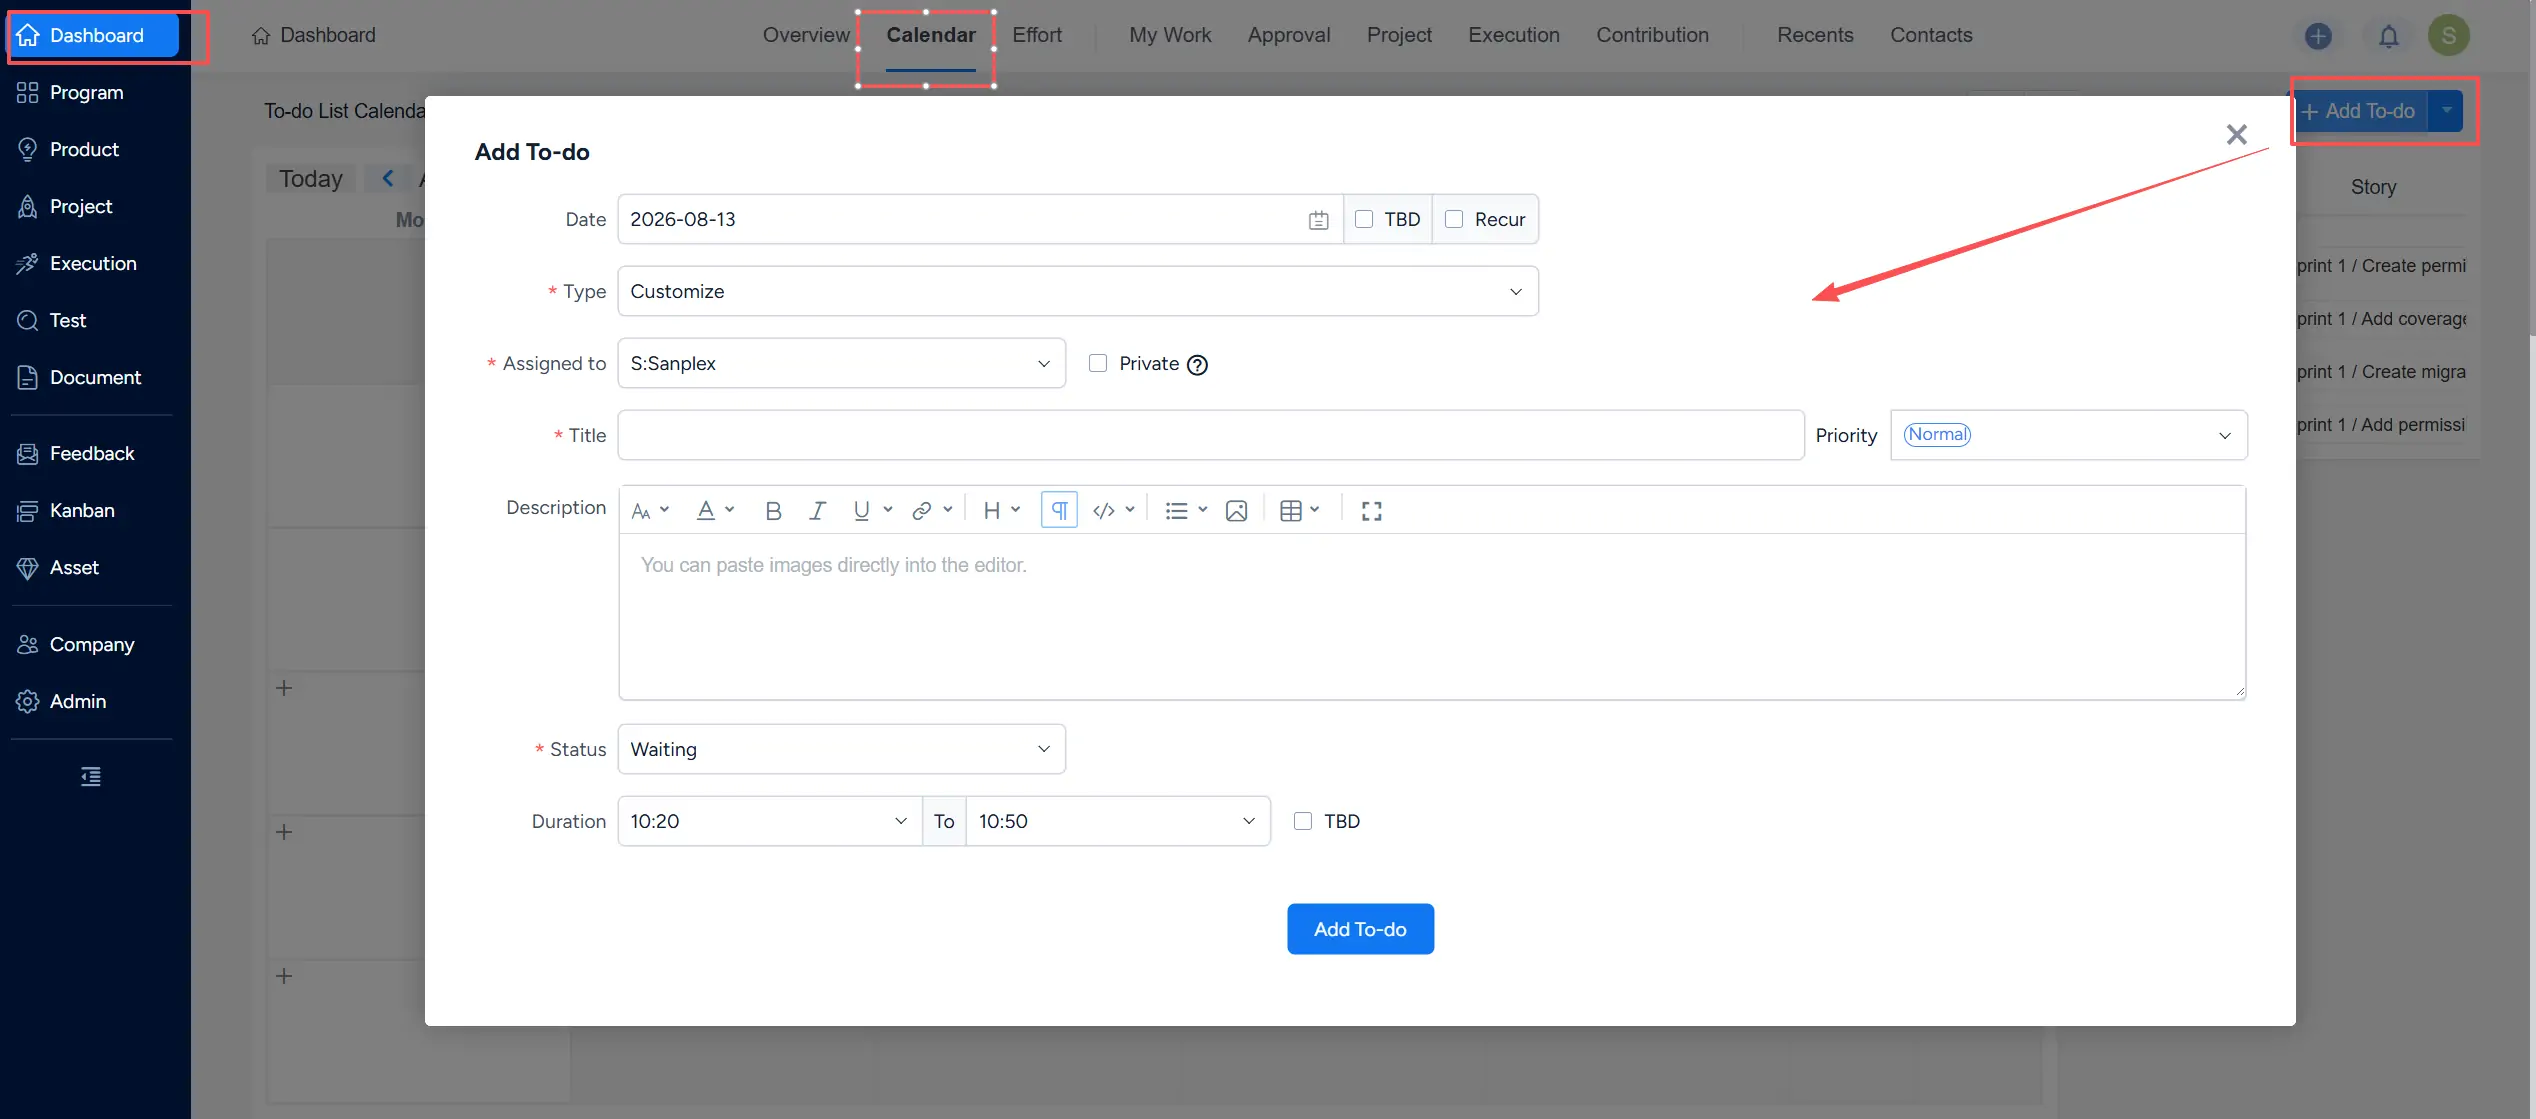
Add To-do window opened from the “+” menu, showing fields for creating and scheduling a To-do.

Click Add To-do to create the item. The new To-do can then be viewed and managed from the Calendar section of Dashboard.

Dashboard Calendar showing a created To-do with its scheduling and status information.

Write a Comment
Comment will be posted after it is reviewed.
