
Product
1. Introduction of Sanplex features
1.1. Core Management Framework
1.1.1 Program
1.1.2 Project
1.1.3 Product
1.1.4 Execution
1.1.5 Management Models
1.2. Dashboard
1.2.1 Getting Started with Tutorials
1.2.2 Quick Add
1.2.3 Notification Center
1.2.4 Effort Tracking
1.2.5 Dashboard - Project and Execution
1.2.6 Dashboard - My Work, Contribution, and Recents
1.2.7 Dashboard - Approval
1.2.8 Contacts
1.3. Program
1.3.1 Program List
1.3.2 Program Kanban
1.3.3 Create Program
1.3.4 Create Sub-Programs
1.3.5 Project Charter Management
1.4. Product
1.4.1 Create Product
1.4.2 Manage Modules
1.4.3 Multi-Branch and Multi-Platform Management
1.4.4 Manage Plans
1.4.5 Manage Requirements
1.4.6 Requirement Reviews
1.4.7 Requirement Status and Phase
1.4.8 Create Releases
1.4.9 Track Progress
1.4.10 Business Requirements and Multi-Level Requirements
1.5. Project
1.5.1 Scrum Project
1.5.2. Waterfall Project
1.5.2.1 Manage Project Phases
1.5.2.2 Project Design
1.5.2.3 Project Matrix
1.5.2.4 Project Reports and Earned Value Management
1.5.2.5 Project Baselines
1.5.2.6 Project Change
1.5.3. Kanban Project
1.5.3.1 Set Up Kanban Projects
1.5.3.2 Configure Kanban Boards
1.5.3.3 Use Kanban Boards
1.5.4 Hybrid Agile Project
1.5.5 Hybrid Waterfall Project
1.5.6. Project Settings
1.5.6.1 Project Setup
1.5.6.2 Project Executions
1.5.6.3 Project Requirements
1.5.6.4 Project Builds
1.5.6.5 Project Tests
1.6. Admin Settings
1.6.1 Confluence Data Import
1.7. Workflow

Create Product

2026-08-15 11:54:35
Sanplex Content
386
Last edited by Jing WANG on 2026-08-15 11:55:45
Share links
Summary: Learn how to create and configure Products in Sanplex, manage Product Lines, use Product List and Product Kanban, configure Access Control, and export Product data.

Products are connected with Programs, Projects, and Executions, and provide a central structure for organizing product-related work in Sanplex.

On the Product > Overview page, you can view overall Product statistics and progress information, including Product Lines, Products, Plans, Stories, Bugs, and Releases.
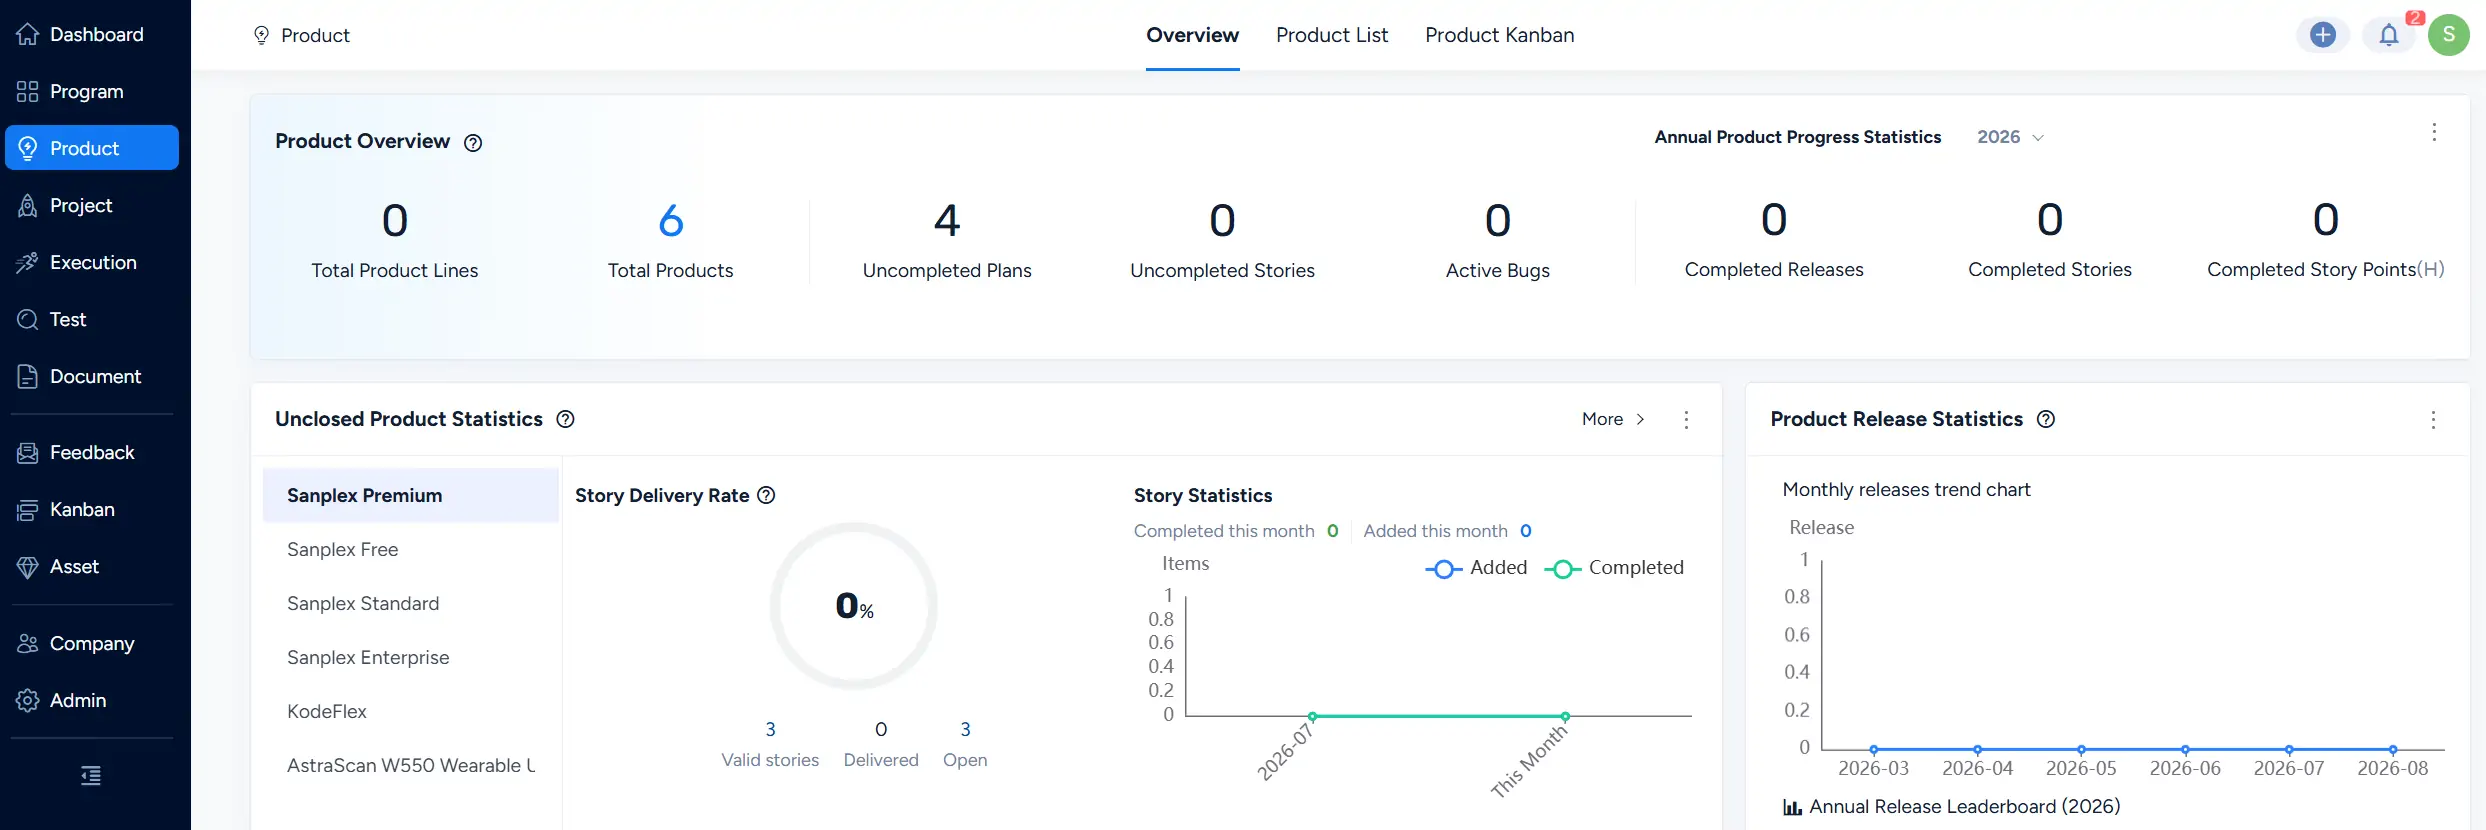
Product Overview showing overall Product statistics and progress information.

On the Product List page, you can view Products you have permission to access and filter the list by Program or status. You can also create Products, manage Product Lines, and export Product data.
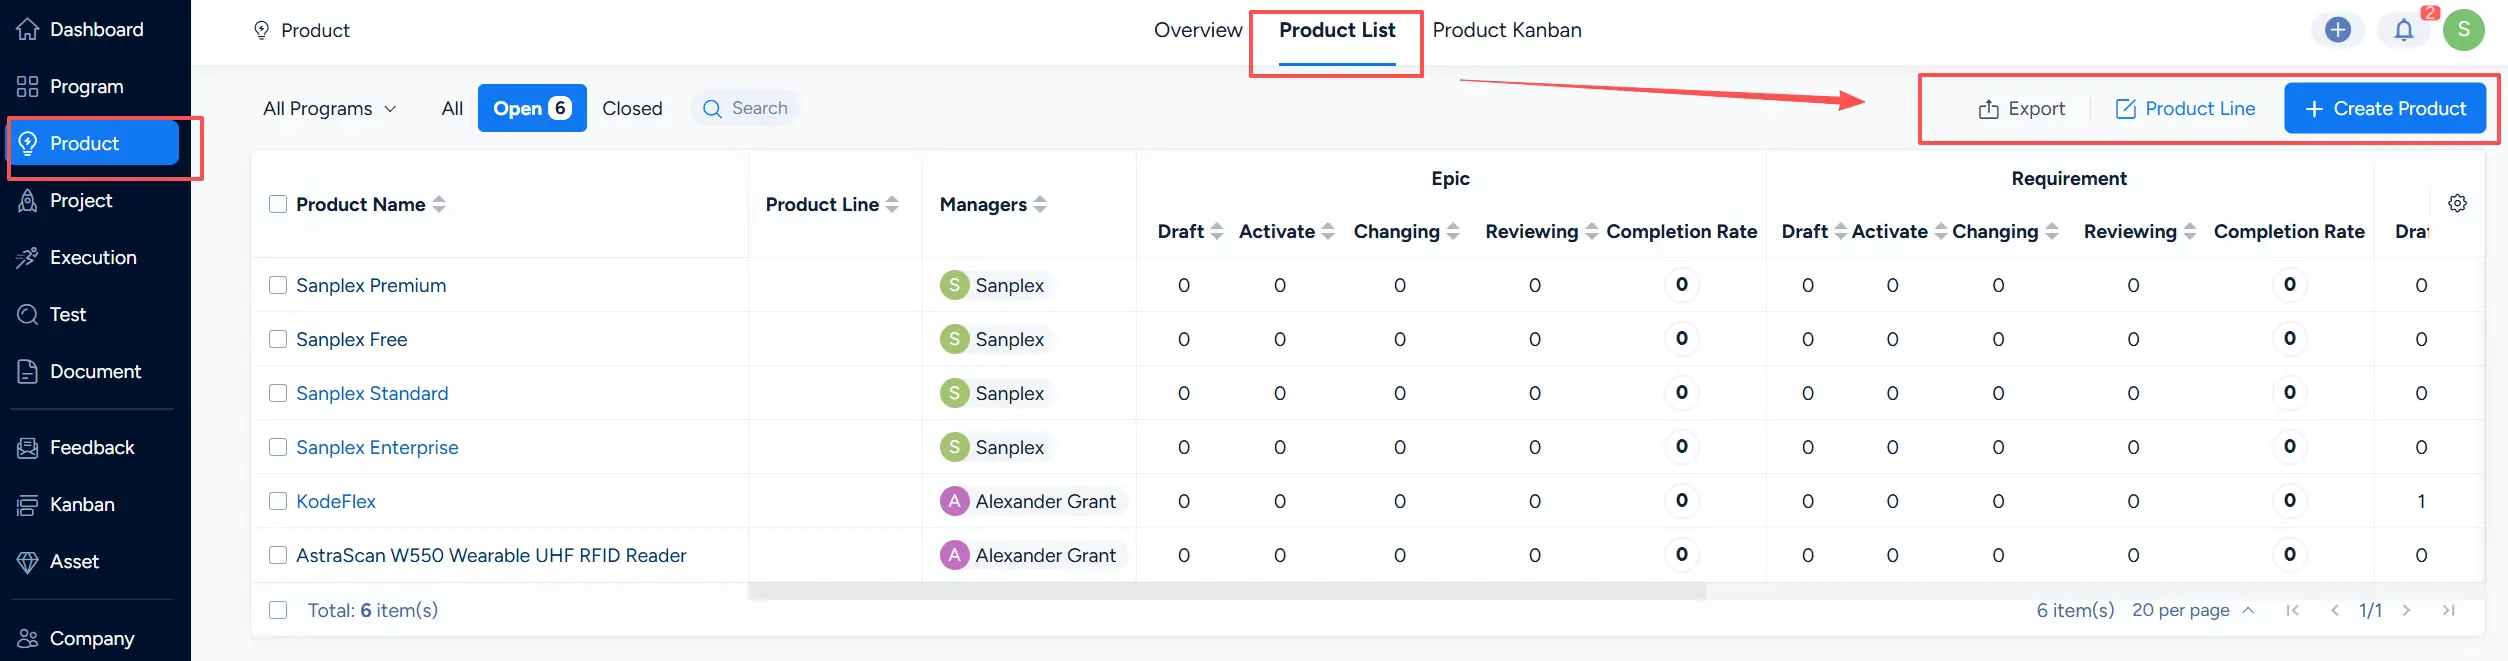
Product List showing accessible Products, Product Lines, managers, and Product-related statistics.

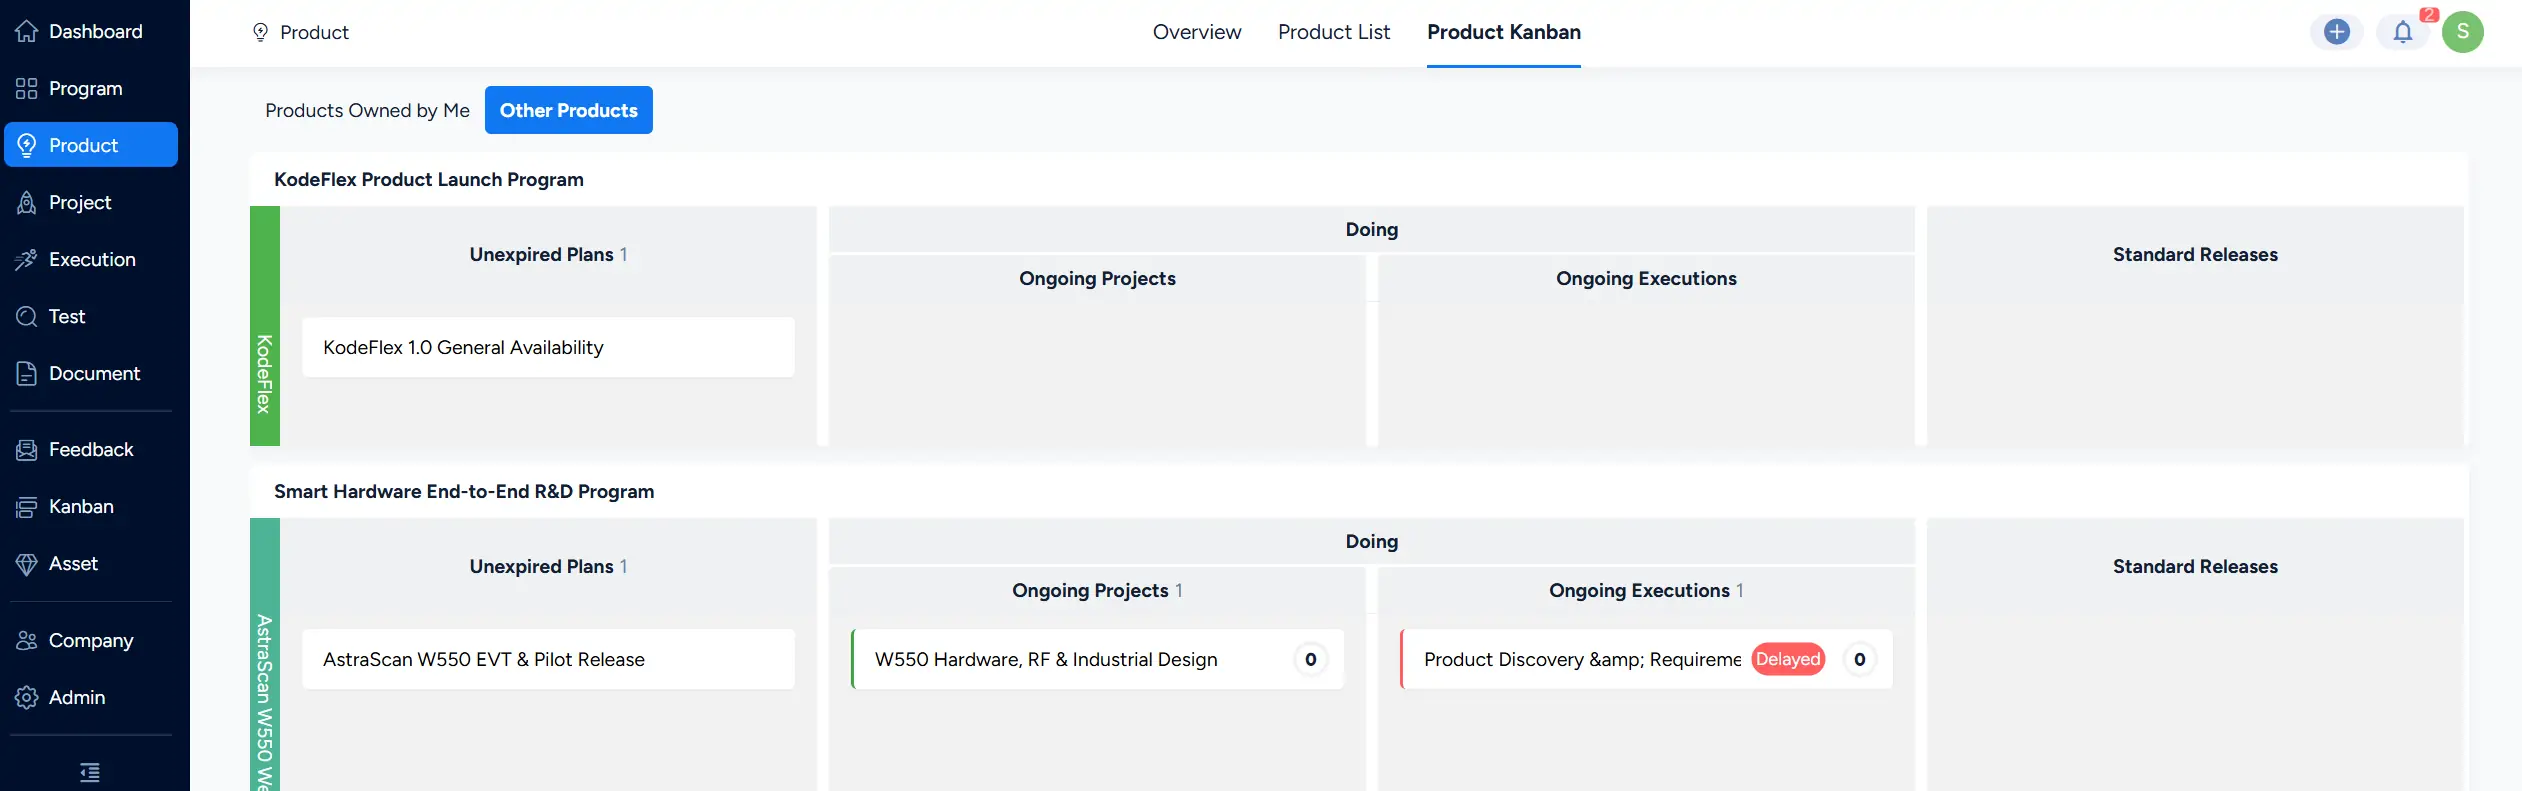
Product Kanban provides a visual overview of Product-related work. You can switch between Products Owned by Me and Other Products to view relevant Products and track related Plans, Projects, Executions, and Releases.
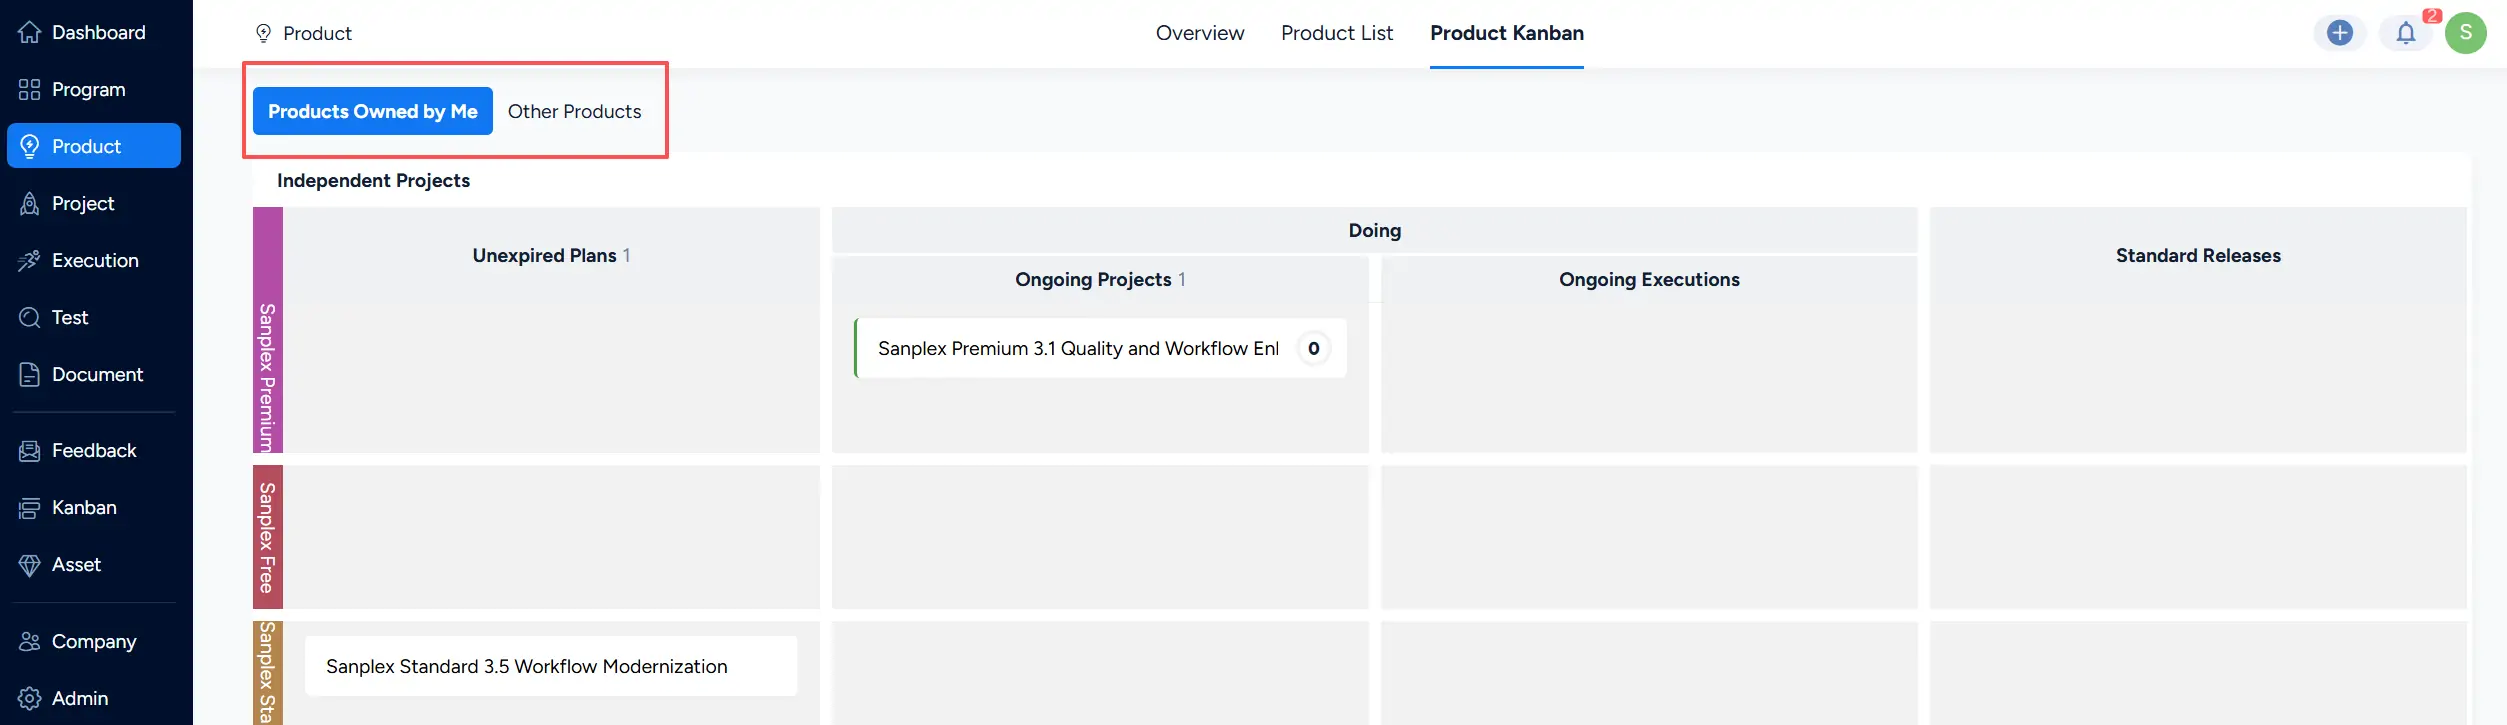
Product Kanban showing Products owned by the current user and related Plans, Projects, Executions, and Releases.

Product Kanban showing other accessible Products and their related delivery information.

Click a Product name to open the Product workspace and access its related modules and information.
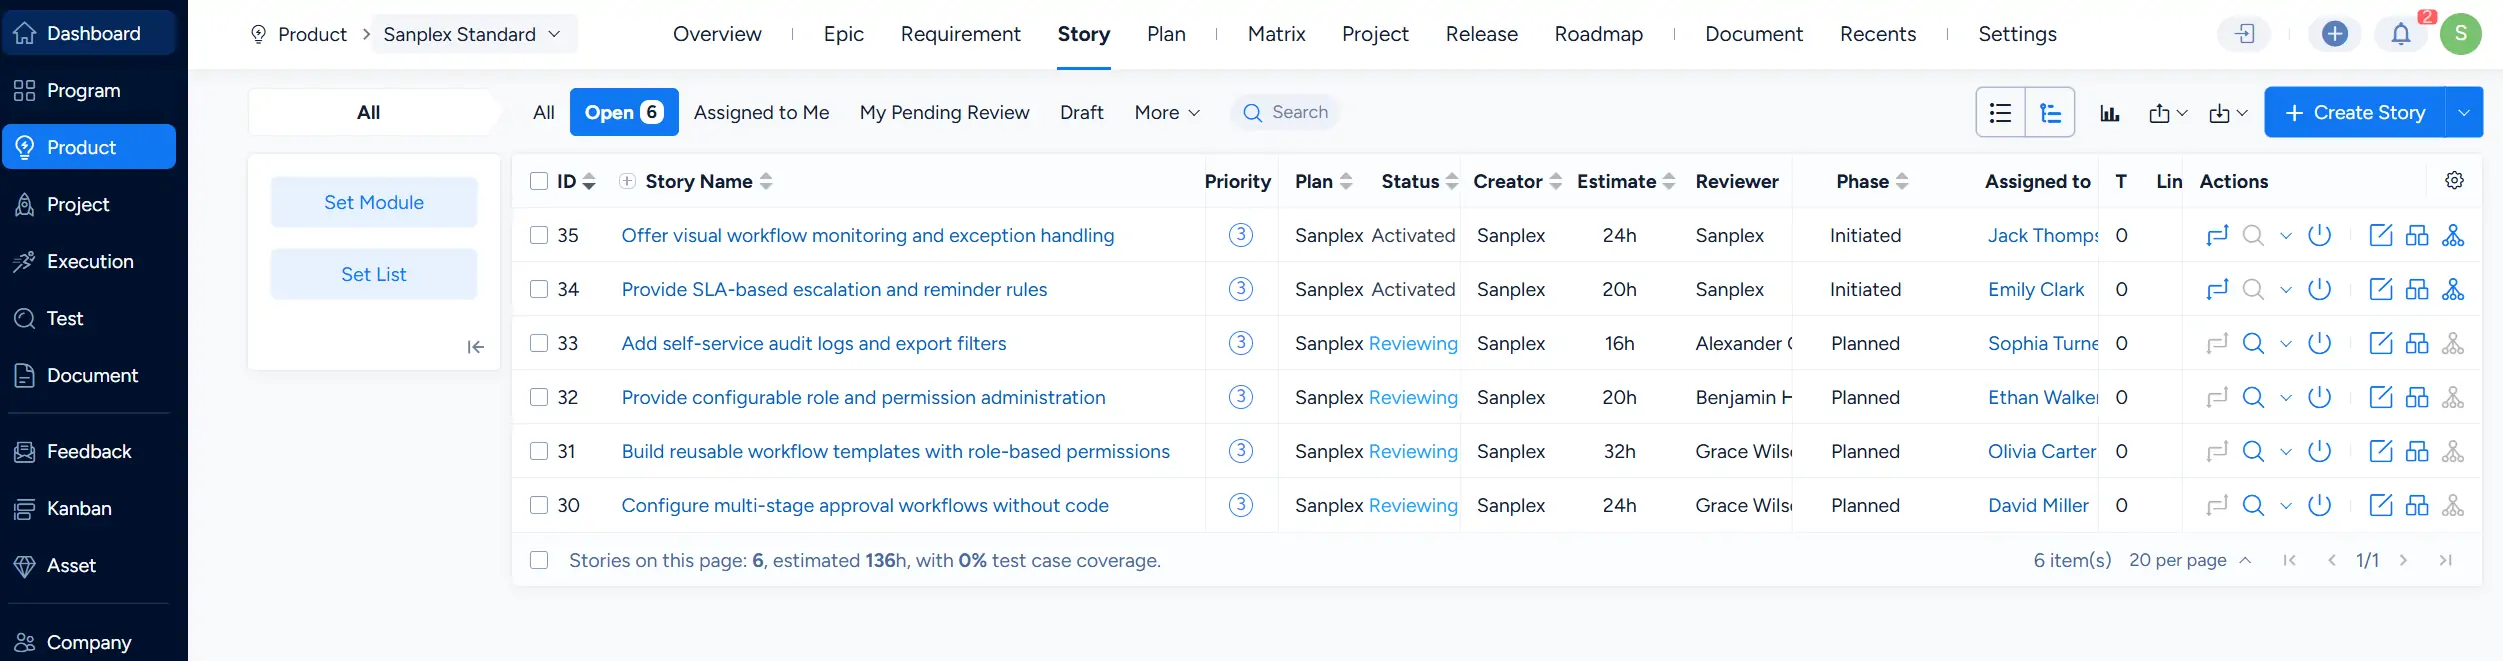
Product workspace showing the Story module and related Product navigation.

1. Create a Product

Go to Product > Product List and click Create Product to open the Product creation page.

The form opens in Lite Mode by default. You can switch between Lite Mode and Full Mode according to the amount of information you need to configure.
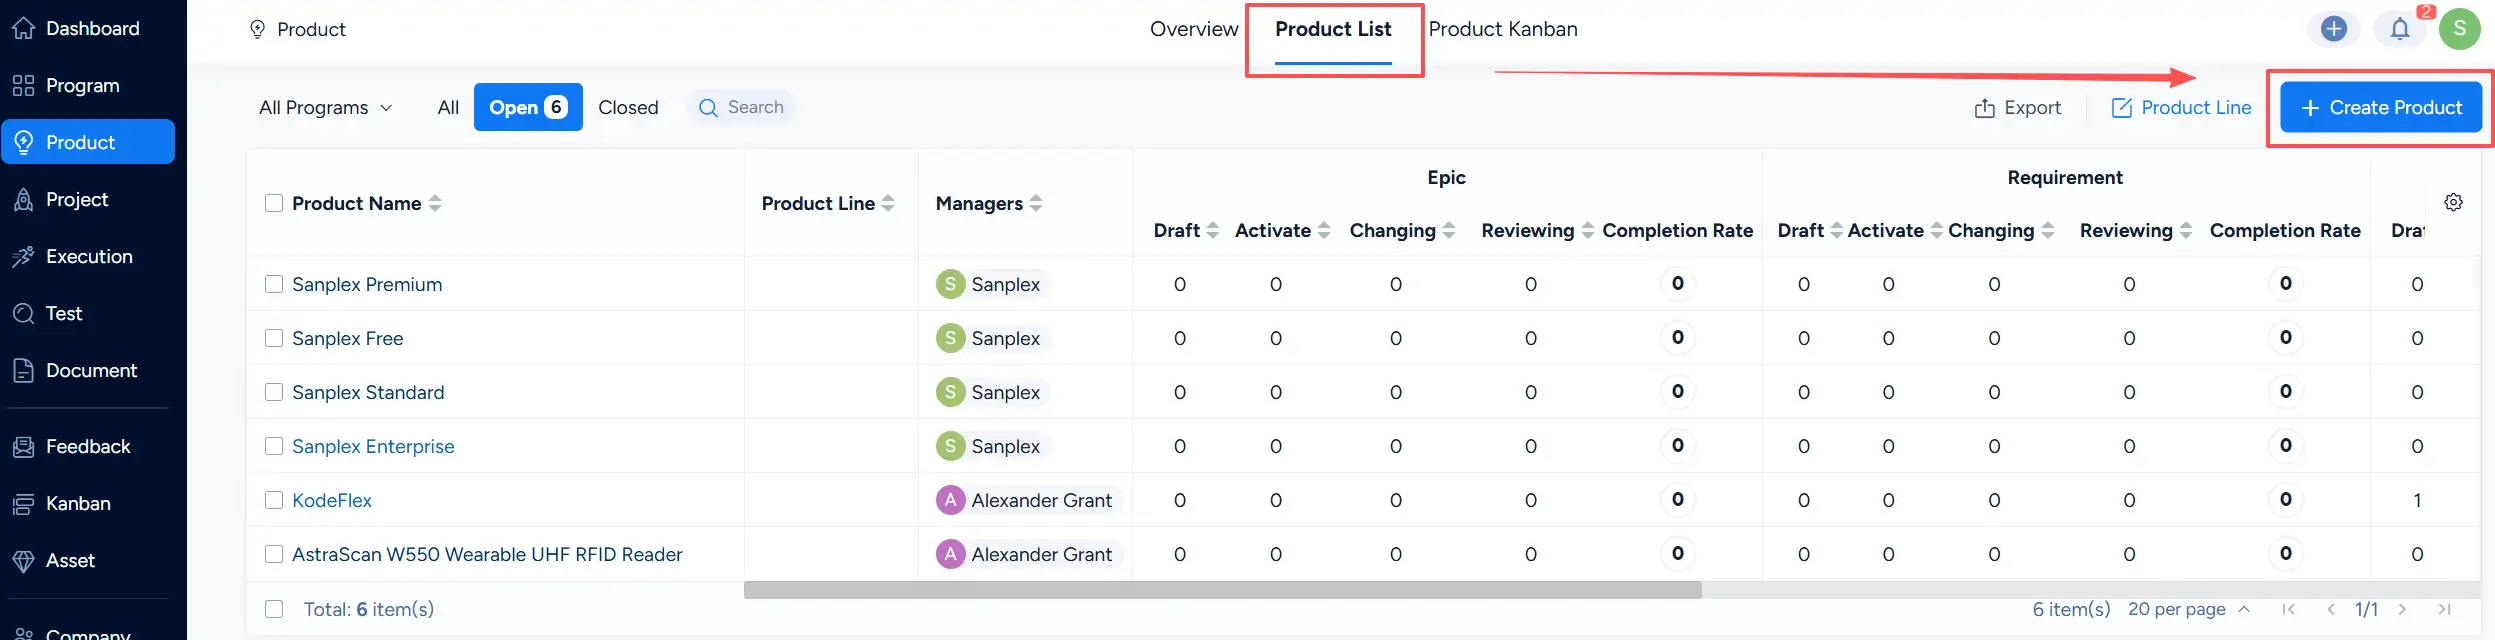
Create Product form in Lite Mode, with options to switch between Lite Mode and Full Mode and to show additional fields.

In Lite Mode, the form displays the main fields required to create a Product, while additional fields remain collapsed. Full Mode displays the available configuration fields in an expanded form.
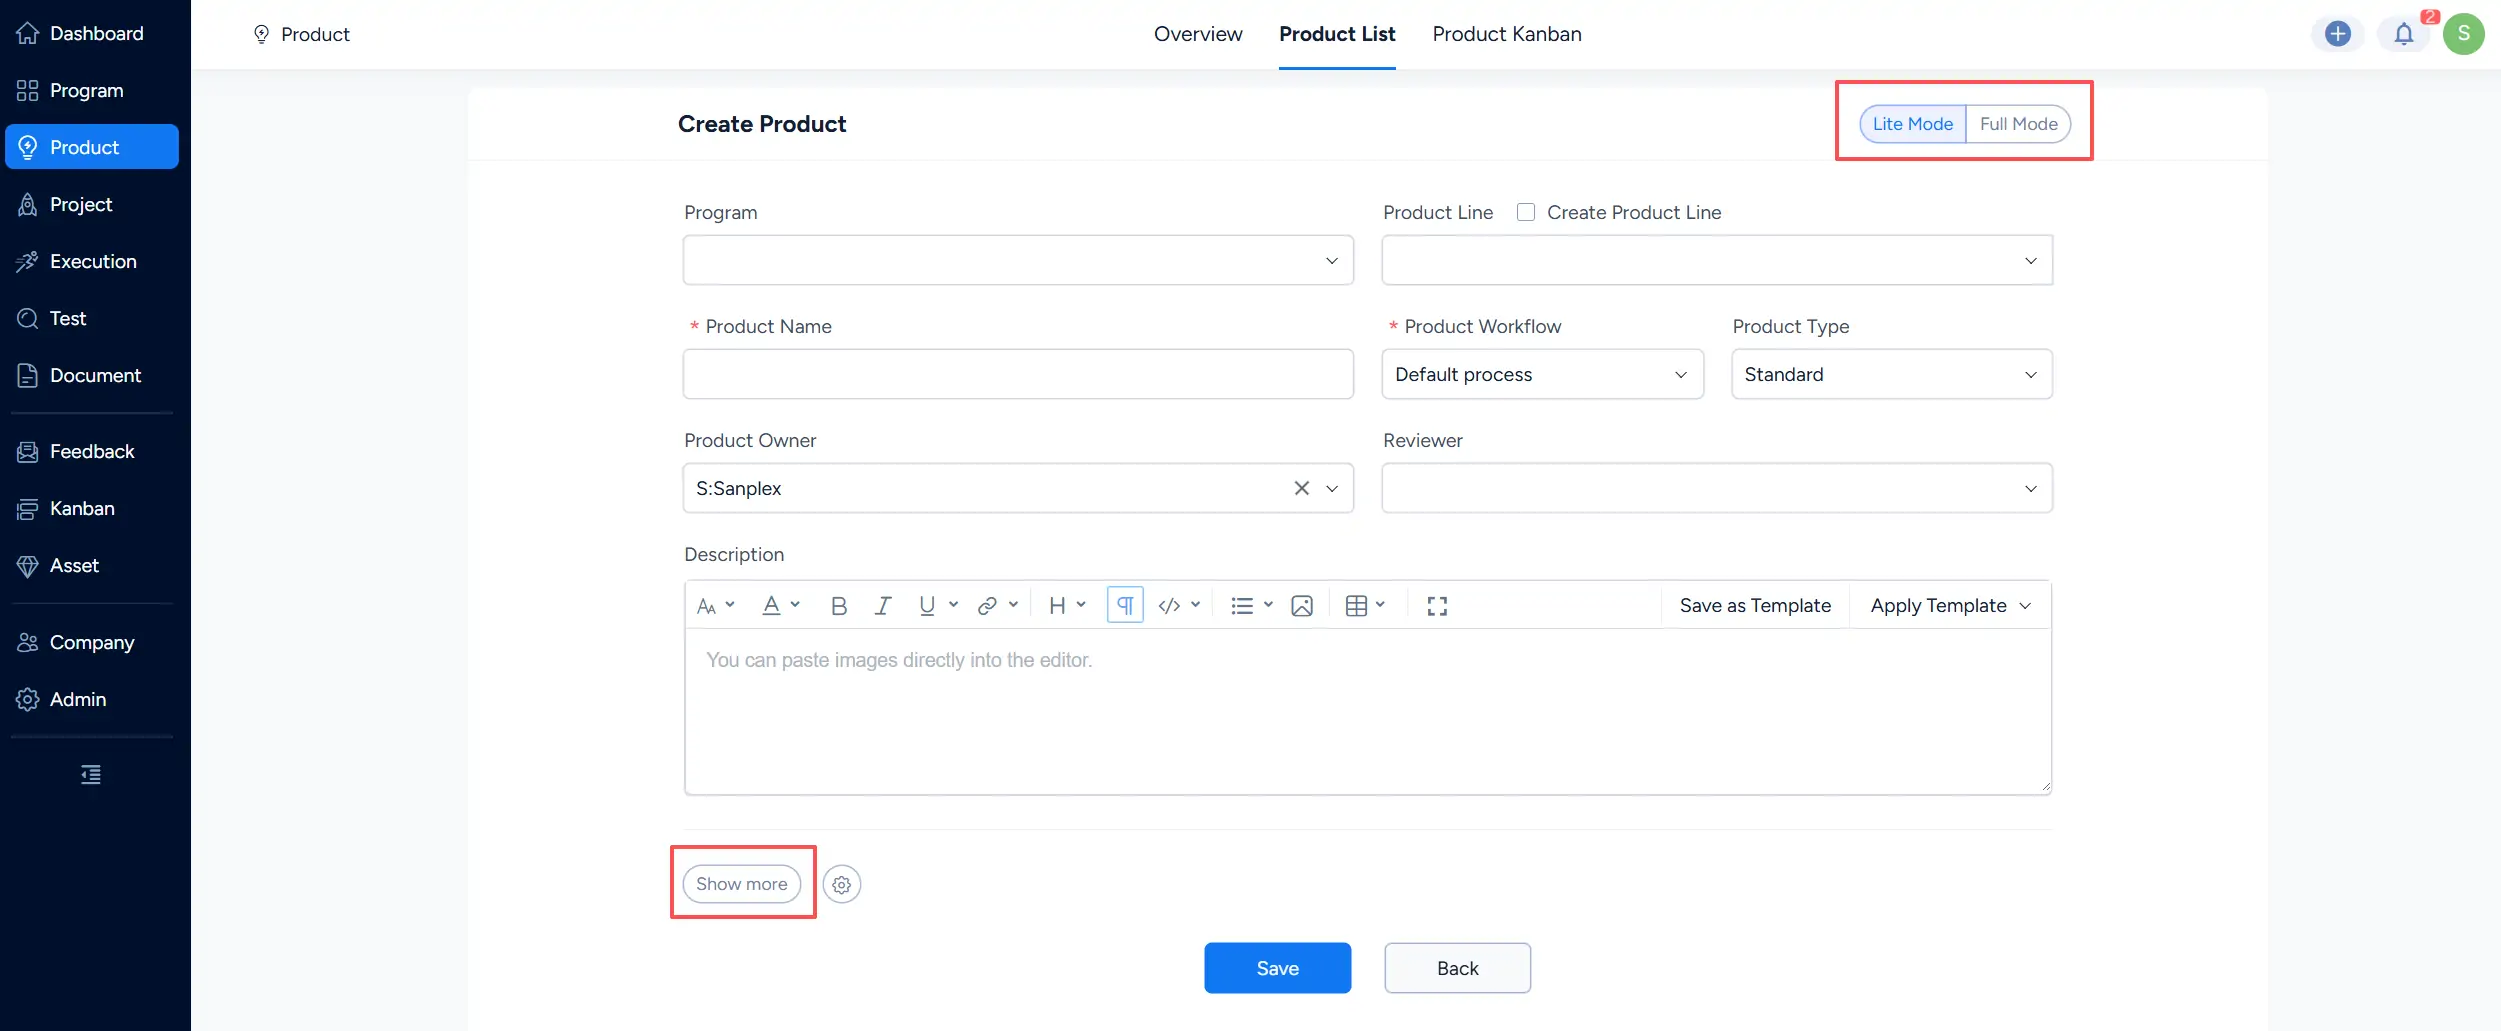
Create Product form with the Show more button for expanding additional Product configuration fields.

If you need to configure additional Product roles or access settings while using Lite Mode, click Show more at the bottom of the form. This expands additional fields such as Test Manager, Release Manager, Feedback Manager, Ticket Manager, and Access Control.

  • If a Test Manager is assigned, that user can serve as the default assignee for Bugs created under the Product.
  • If a Release Manager is assigned, release-related notifications for the Product can be directed to that user.
  • If a Feedback Manager or Ticket Manager is assigned, related feedback items or tickets can be assigned to the corresponding manager by default.

You can also configure Access Control to determine who can access the Product.
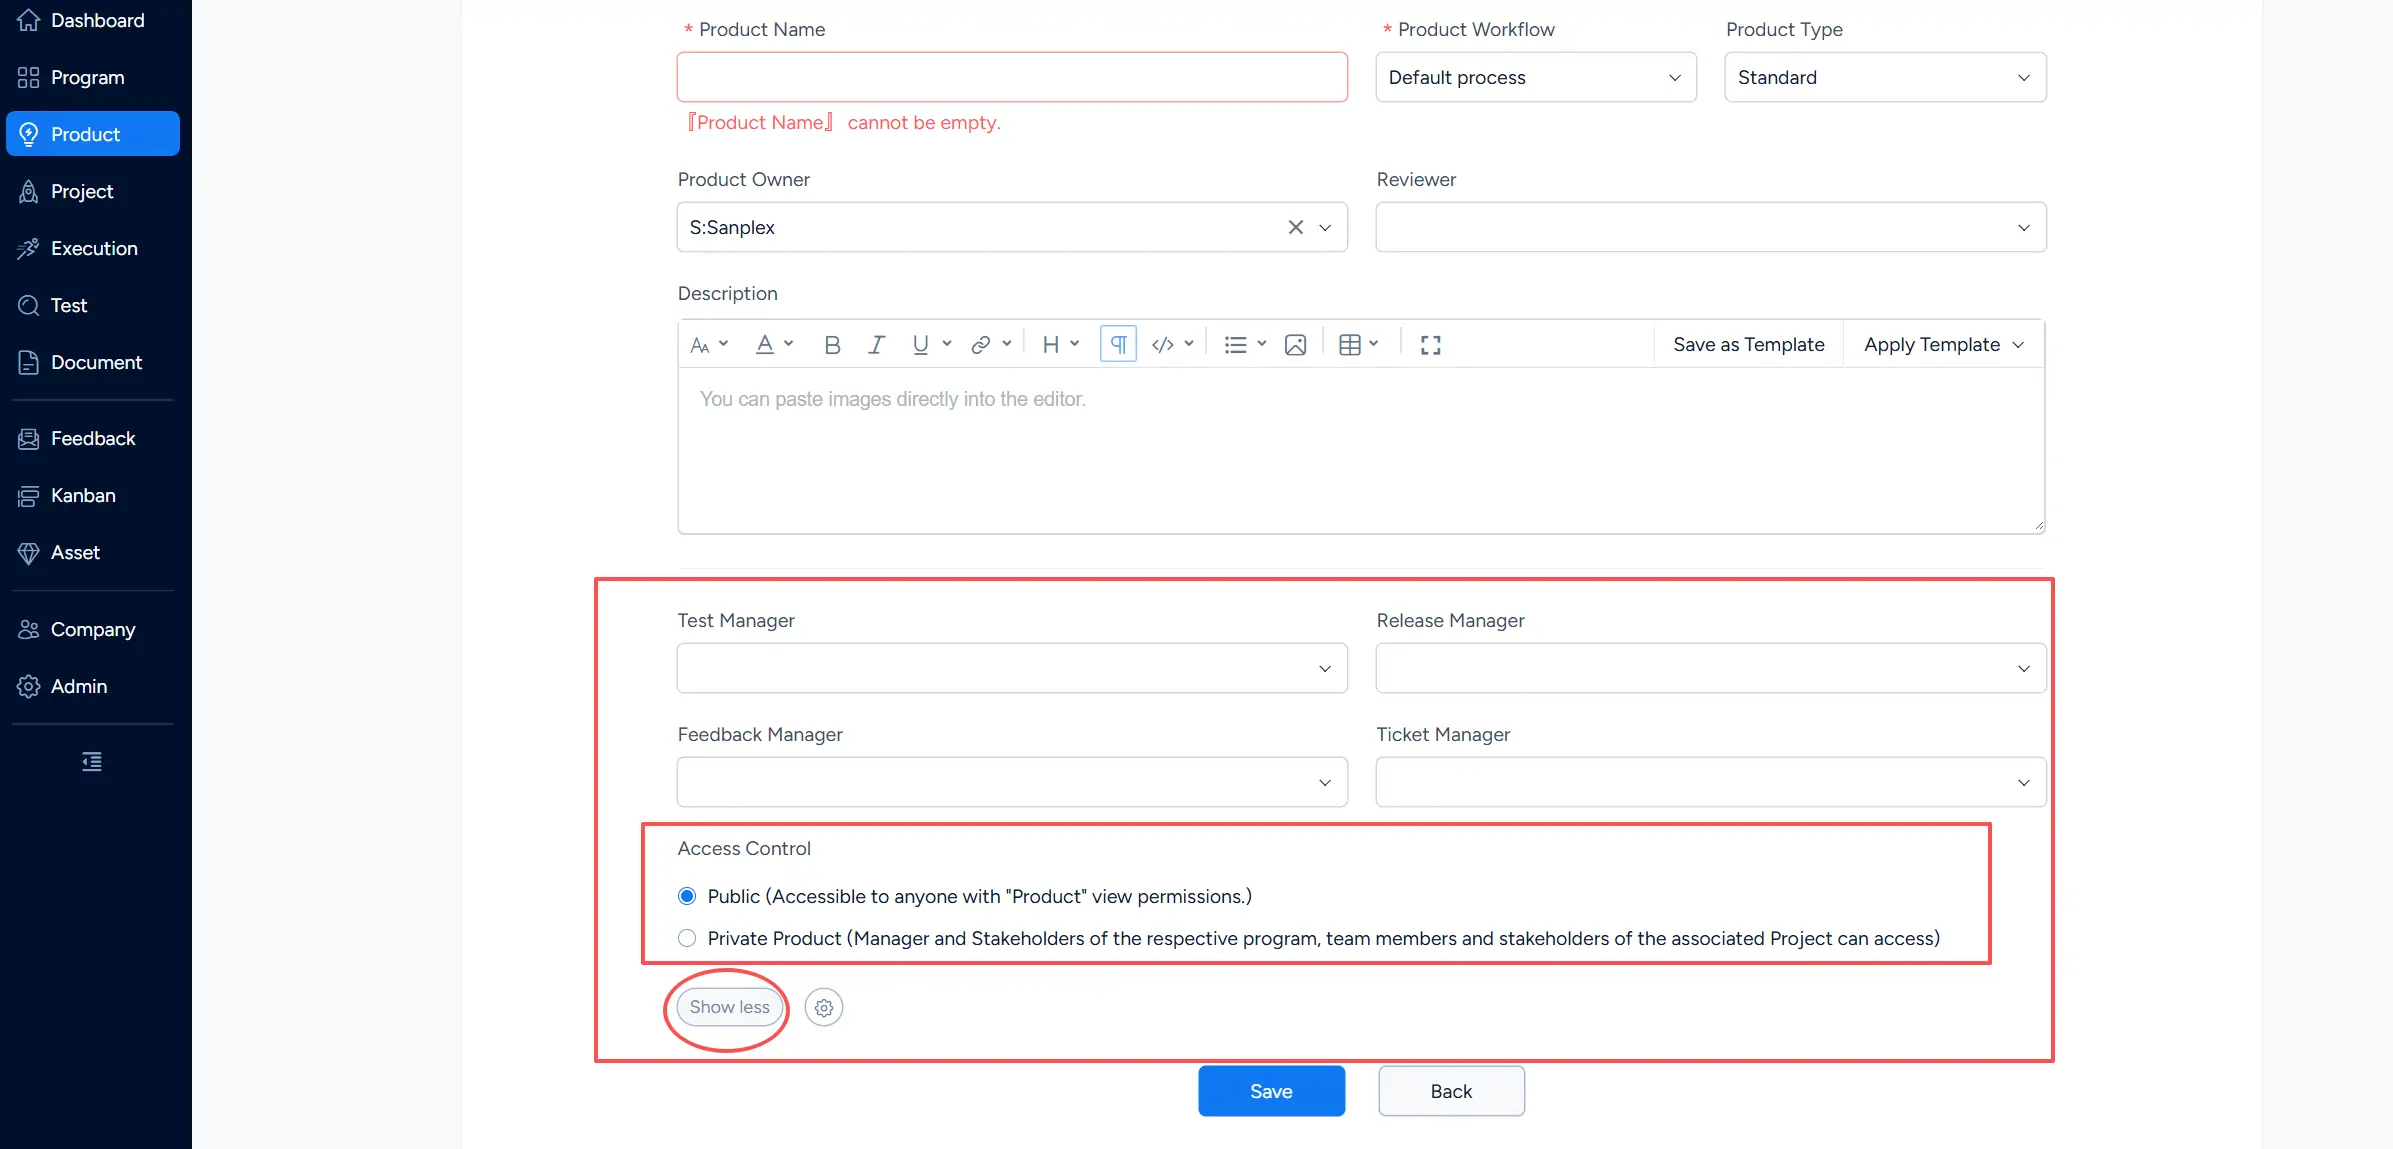
Expanded Create Product form showing additional manager fields, Access Control options, and the Show less button.

After completing the Product information, click Save. The Product is created and you can continue managing its Stories, Plans, Projects, Releases, and other related information from the Product workspace.
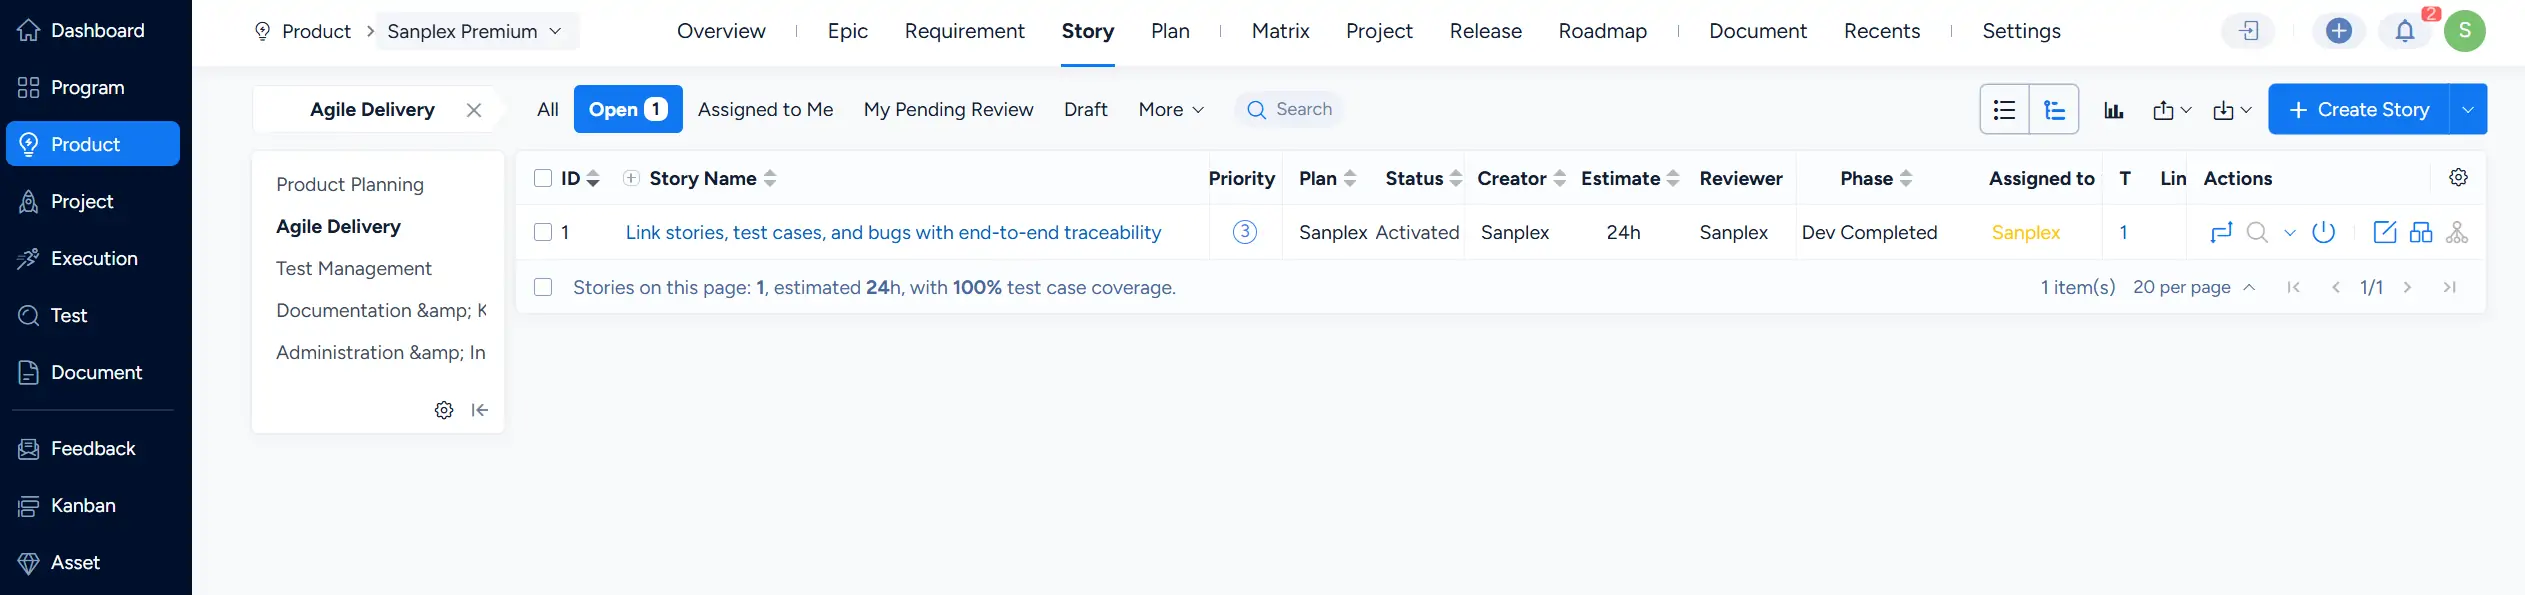
Product workspace showing the Story list after entering a Product.

2. Manage Product Lines

Go to Product > Product List and click Product Line to open the Product Line management window.
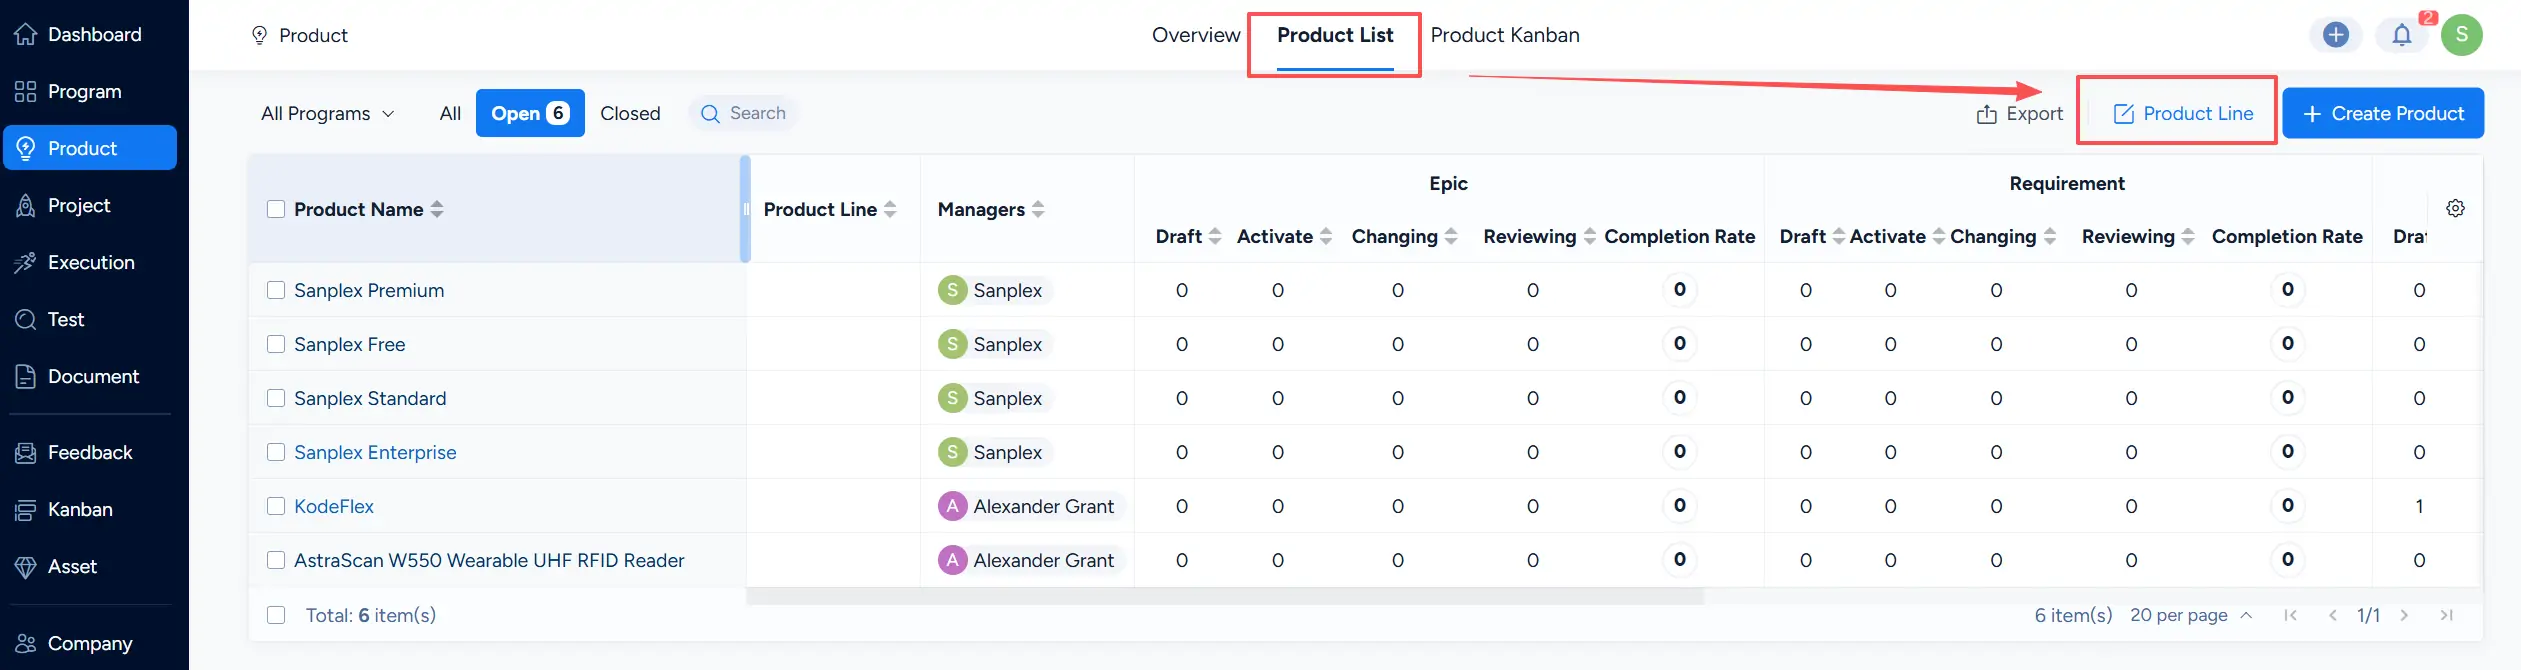
Product List showing the Product Line management entry.

From this window, you can create and maintain Product Lines and associate them with the appropriate Programs.
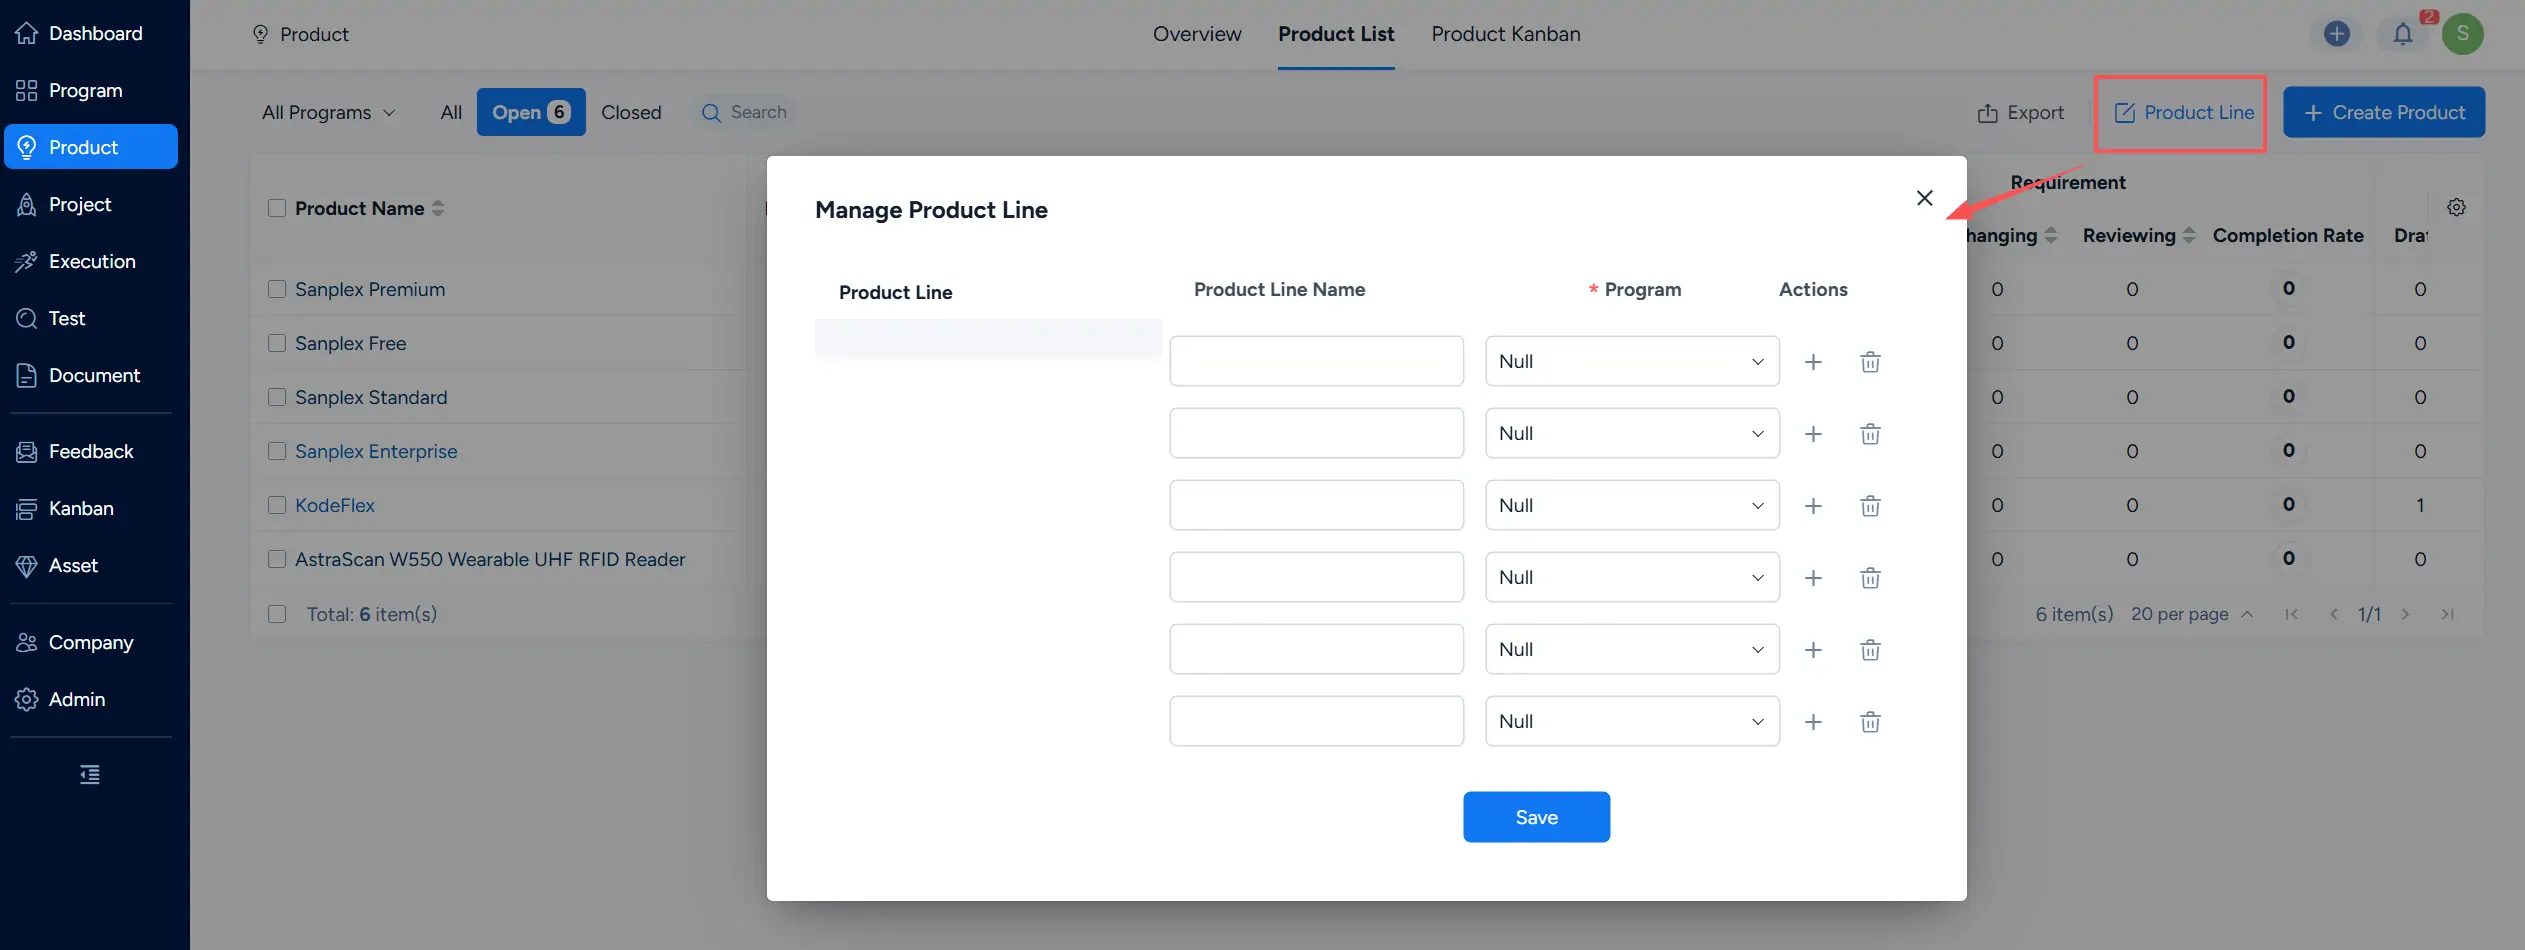
Manage Product Line window for creating and maintaining Product Lines and their associated Programs.

3. Export Products

Go to Product > Product List and click Export.
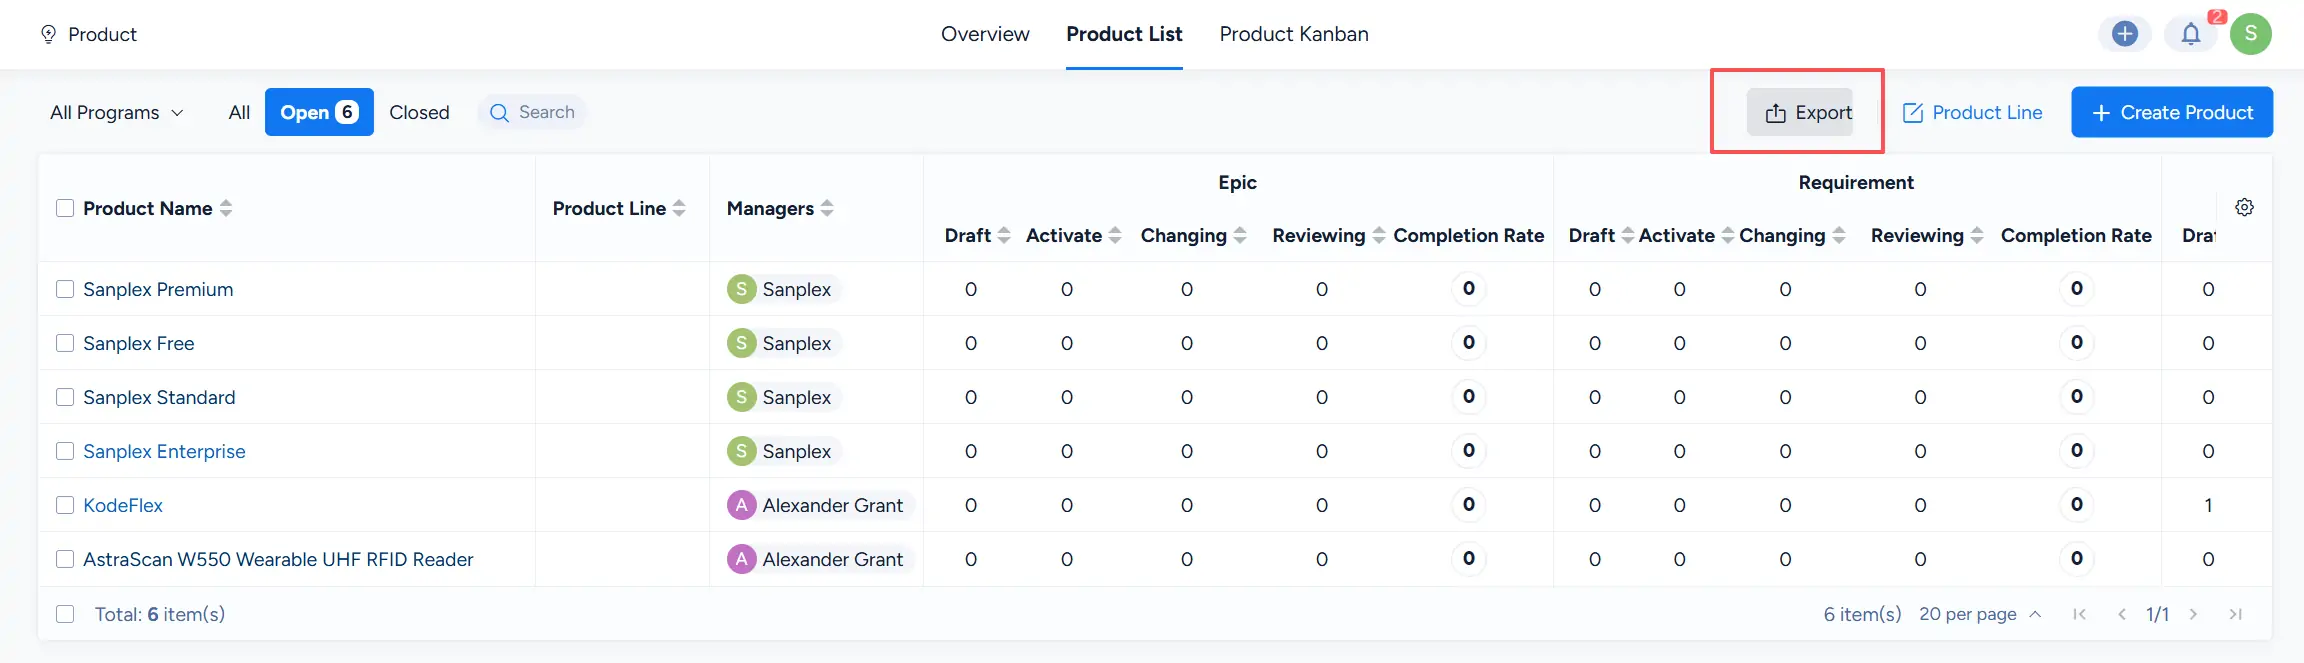
Product List showing the Export action.

In the Export Data window, you can specify the file name and select the available file type and encoding options before exporting the Product data.
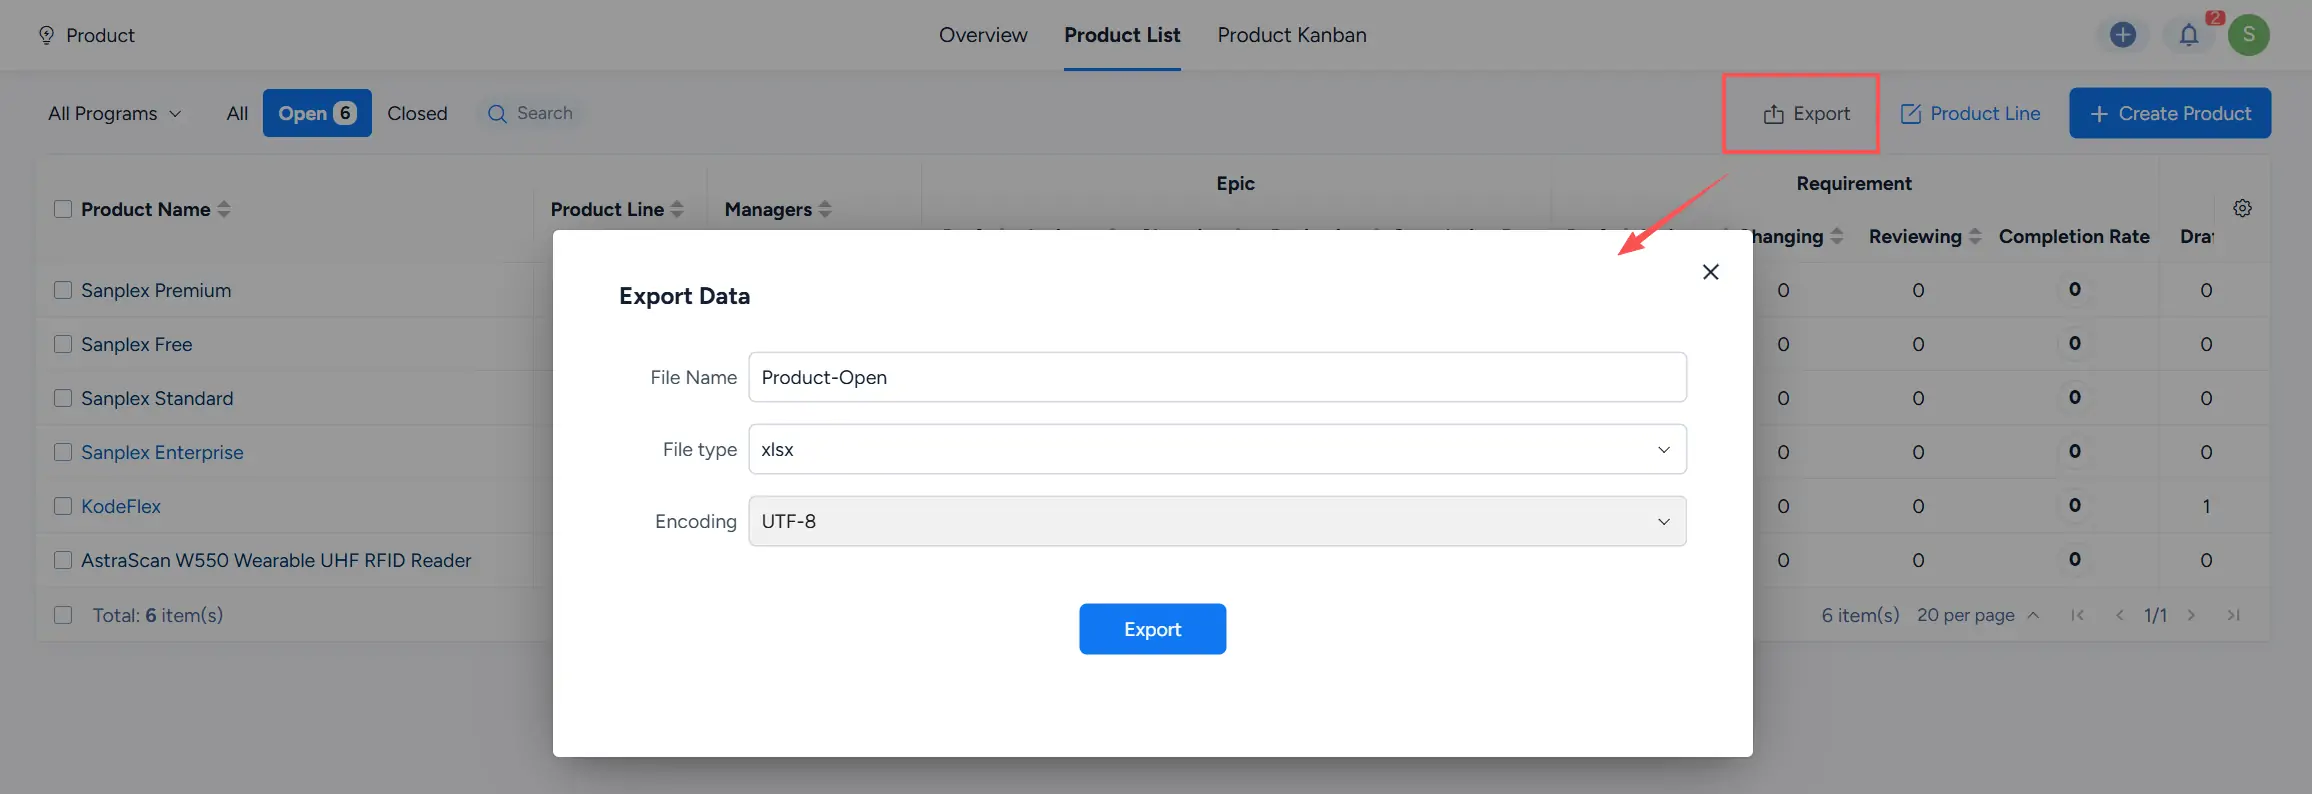
Export Data window showing file name, file type, and encoding options.

Write a Comment
Comment will be posted after it is reviewed.
