Catalog
Feature Overview
Test Case Scenes provide a structured way to organize related test cases in Sanplex. A scene can group test cases around a specific testing context, workflow, or functional area, making larger test case collections easier to organize and review.
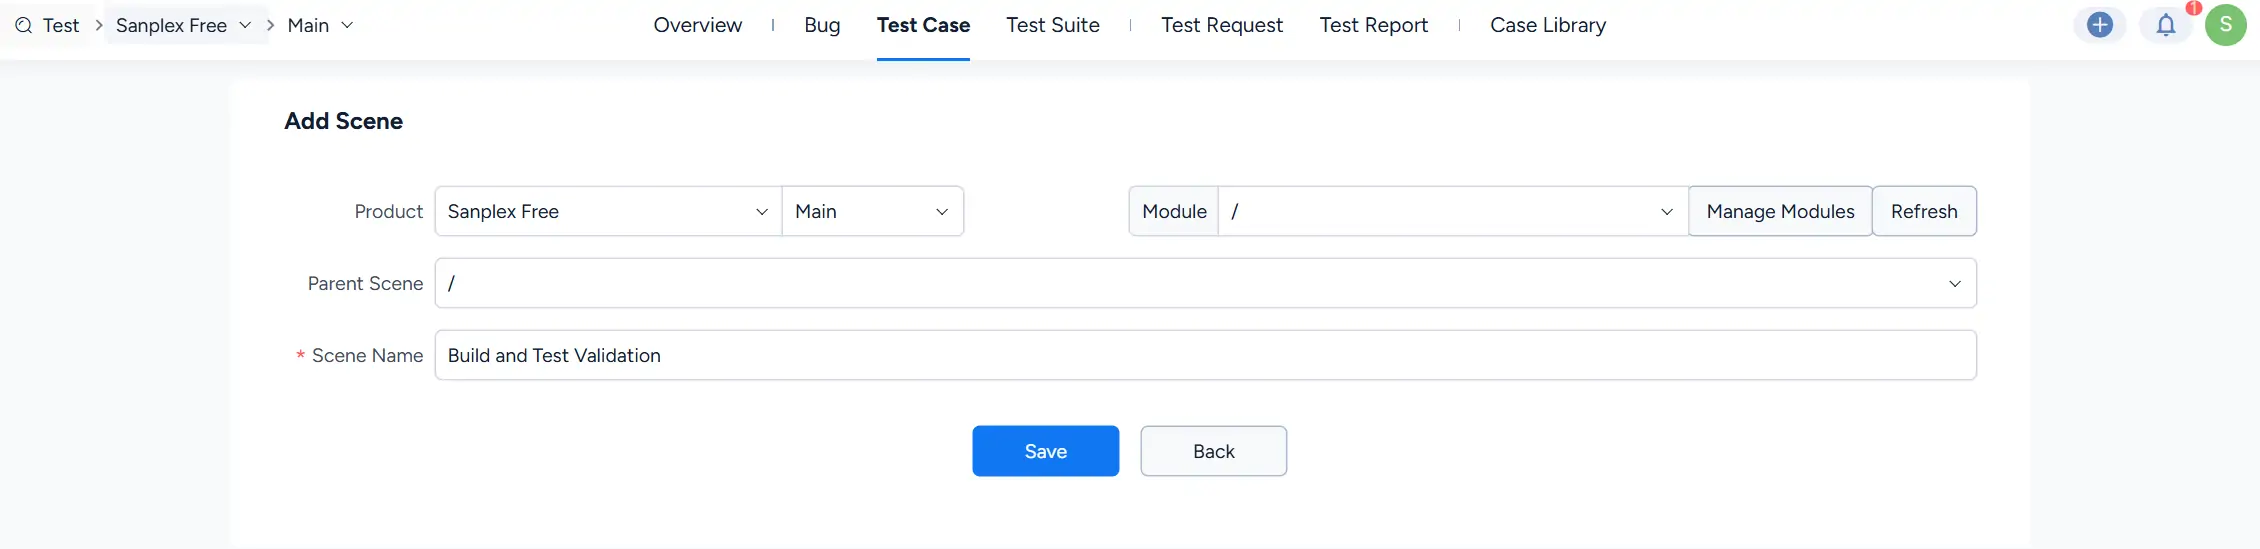
When creating a scene, you can specify its Product, Module, Parent Scene, and Scene Name. The Parent Scene field can be used to organize scenes hierarchically.
Sanplex also provides scene filtering, hierarchical display, batch scene assignment, and Xmind import and export for managing structured test case collections.
Typical Use Scenarios
- Organize Related Test Cases: Group test cases that belong to the same testing context or workflow under a scene. For example, test cases related to build and test validation can be organized under a Build and Test Validation scene.
- Manage Larger Test Case Collections: Use scenes and parent scenes to structure test cases into clearer groups, making it easier to locate, review, and maintain related cases.
I. Add Scenes to Test Cases
1. Add a Scene
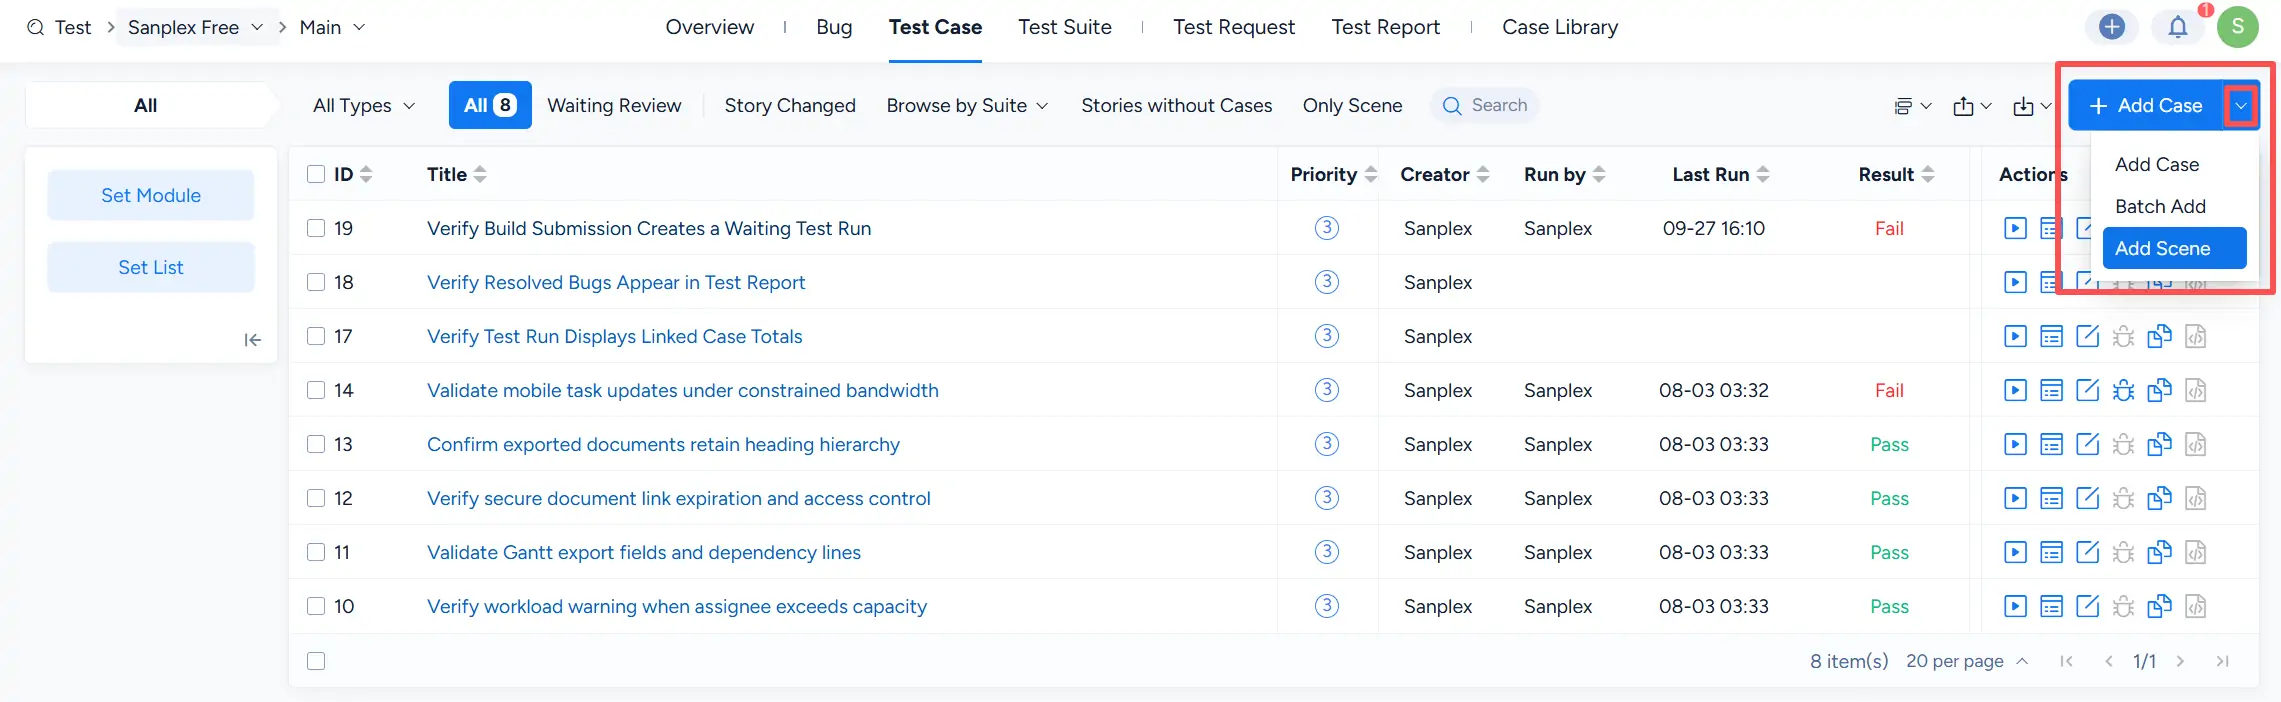
Open the dropdown next to Add Case and select Add Scene.
On the Add Scene page, select the Product and Module, choose a Parent Scene if needed, enter the Scene Name, and click Save.
2. Edit a Scene
On the test case list, locate the scene and click the Edit icon in the Actions column to update its information.
3. Delete a Scene
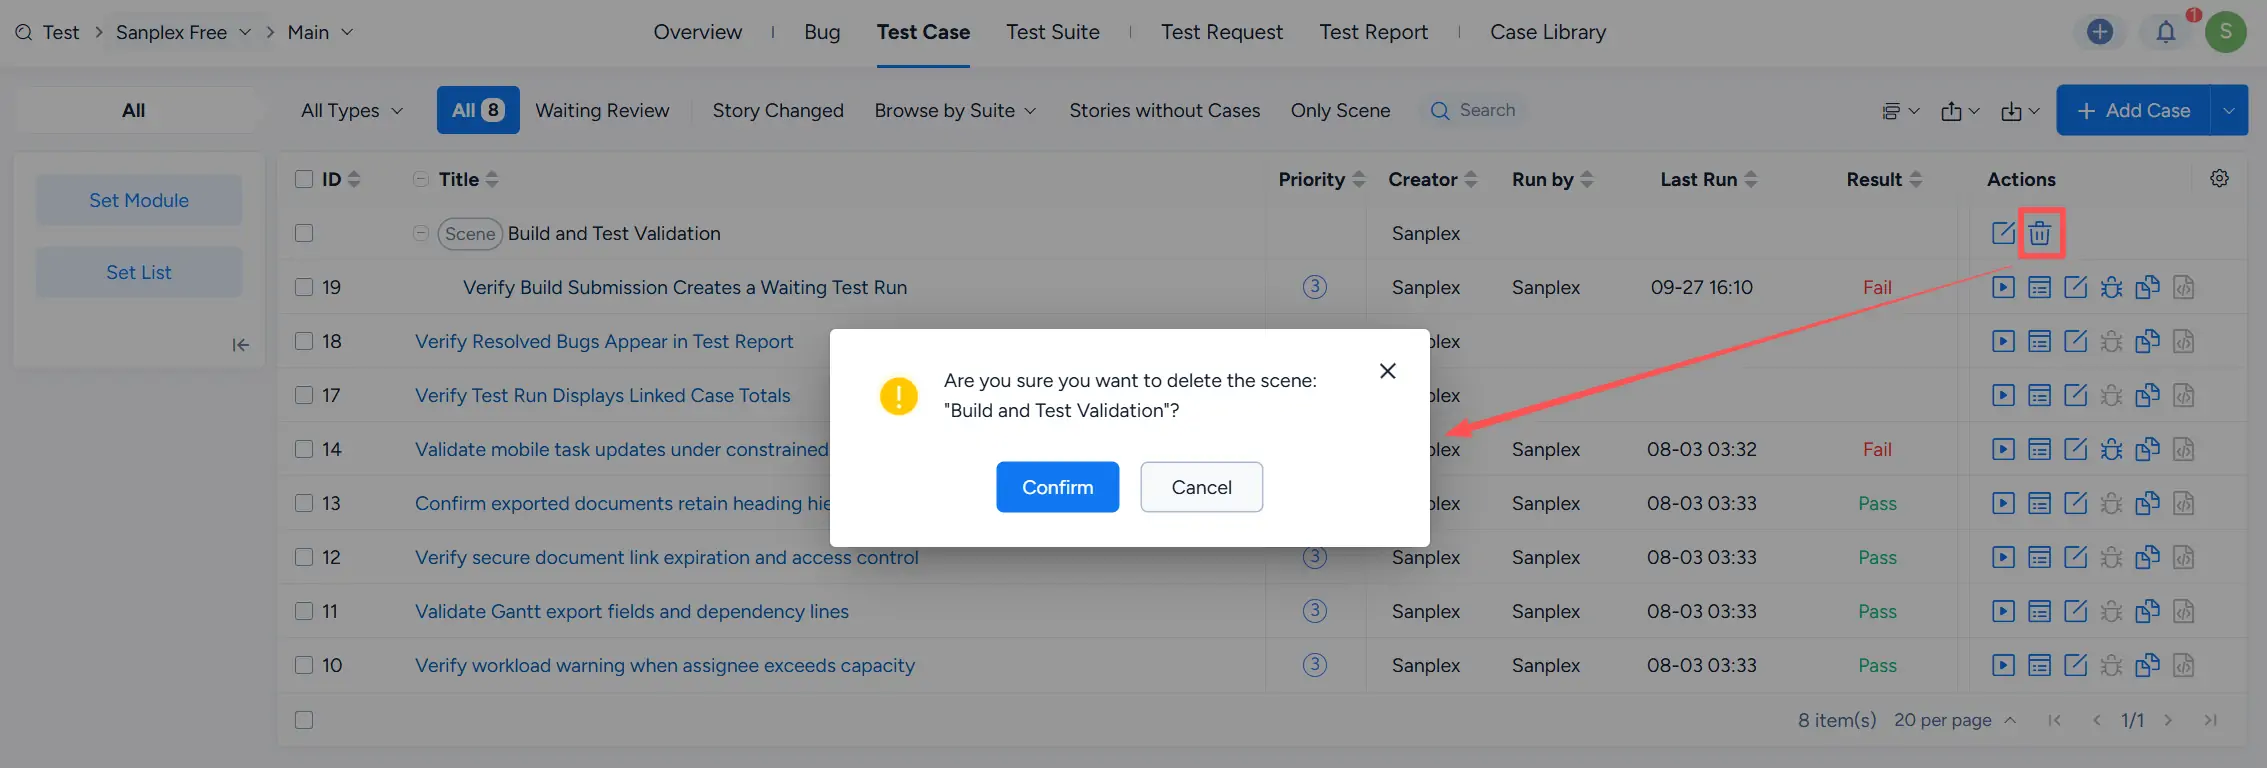
On the test case list, click the Delete icon for a scene. Sanplex displays a confirmation dialog before deleting the selected scene.
4. View Scenes and Test Cases
Click Only Scene to display scene records only. This provides a focused view of the scene structure without displaying individual test cases.

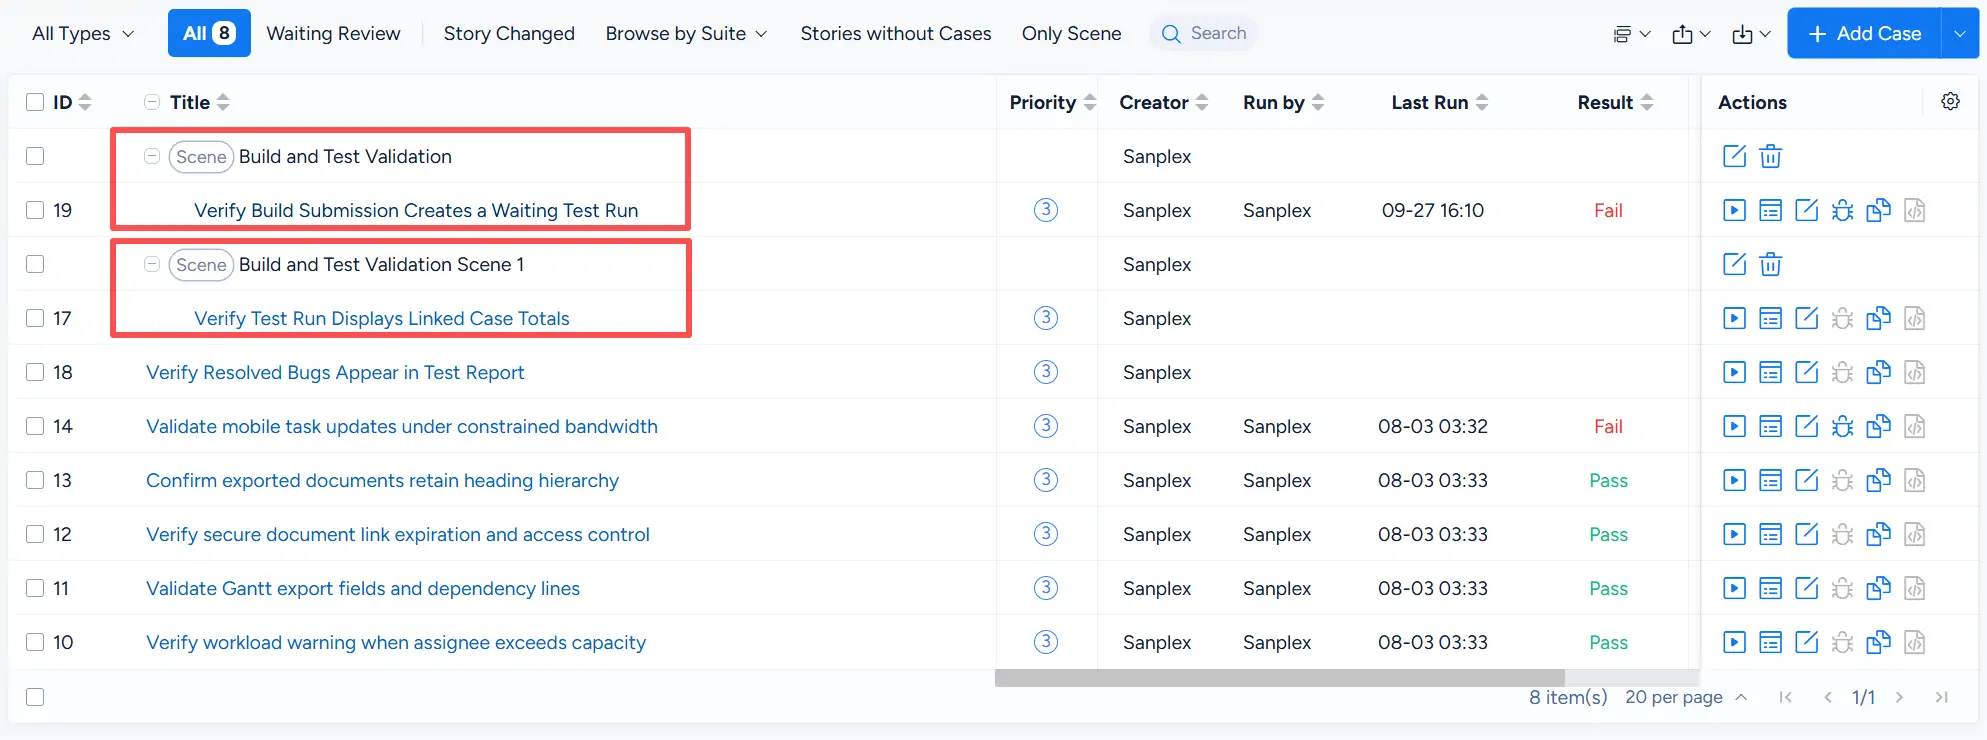
In the standard test case list, scenes and their associated test cases can be displayed together. Test cases placed under a scene appear beneath the corresponding Scene entry.
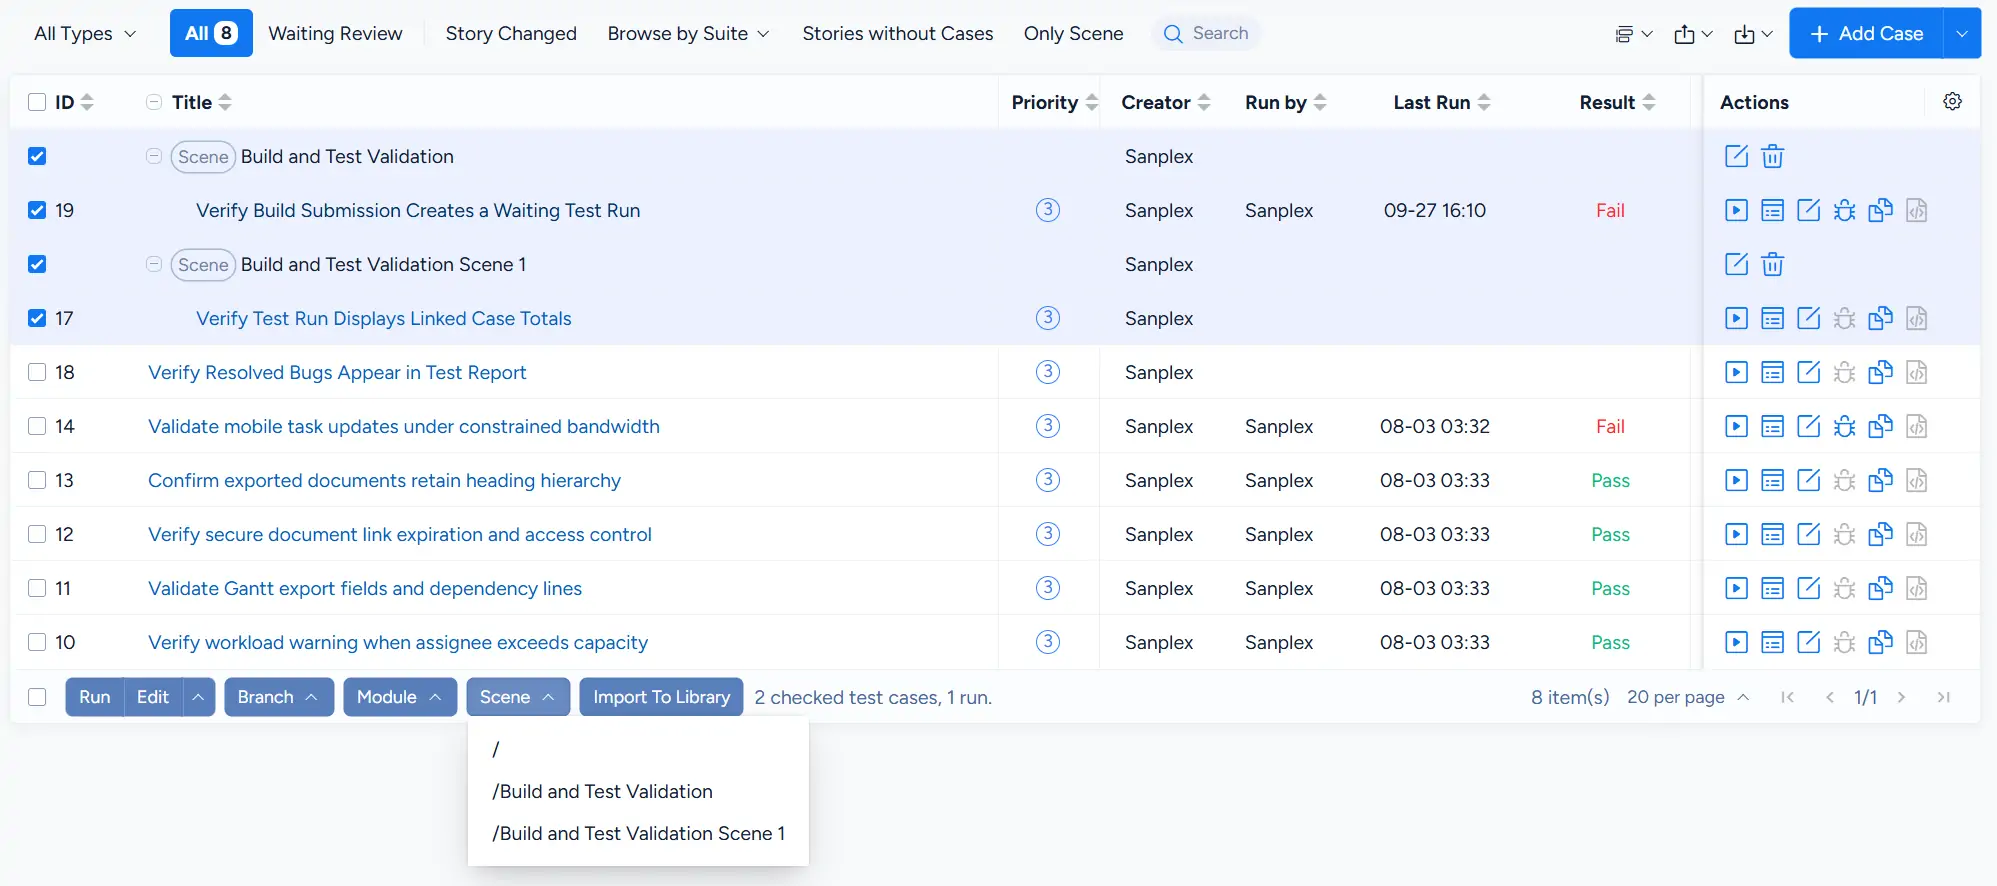
Sanplex also supports updating the Scene field for selected test cases in batch. Select the relevant test cases, open Scene in the batch action bar, and choose the target scene.
5. Move Test Cases Between Scenes
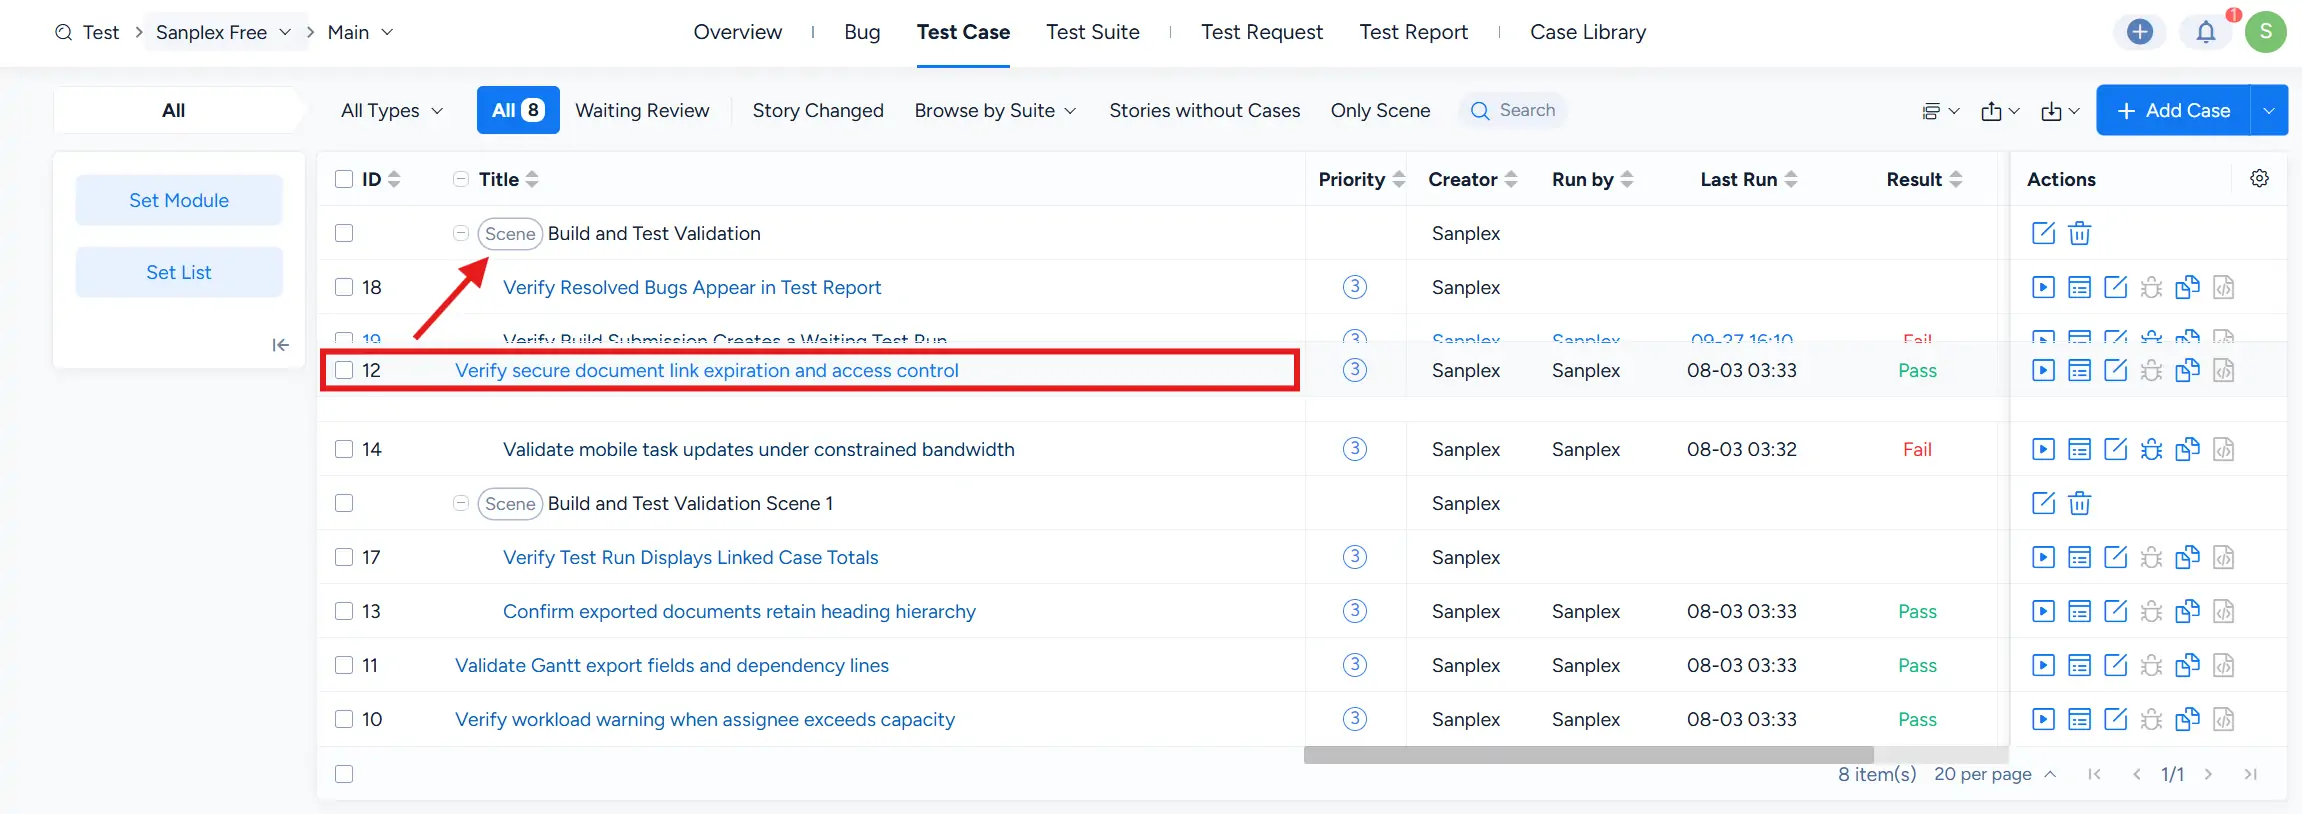
You can move a test case into a scene by dragging the test case to the target scene in the test case list.
This provides a direct way to reorganize test cases within the scene structure.
II. Import and Export Xmind Files
1. Export to Xmind
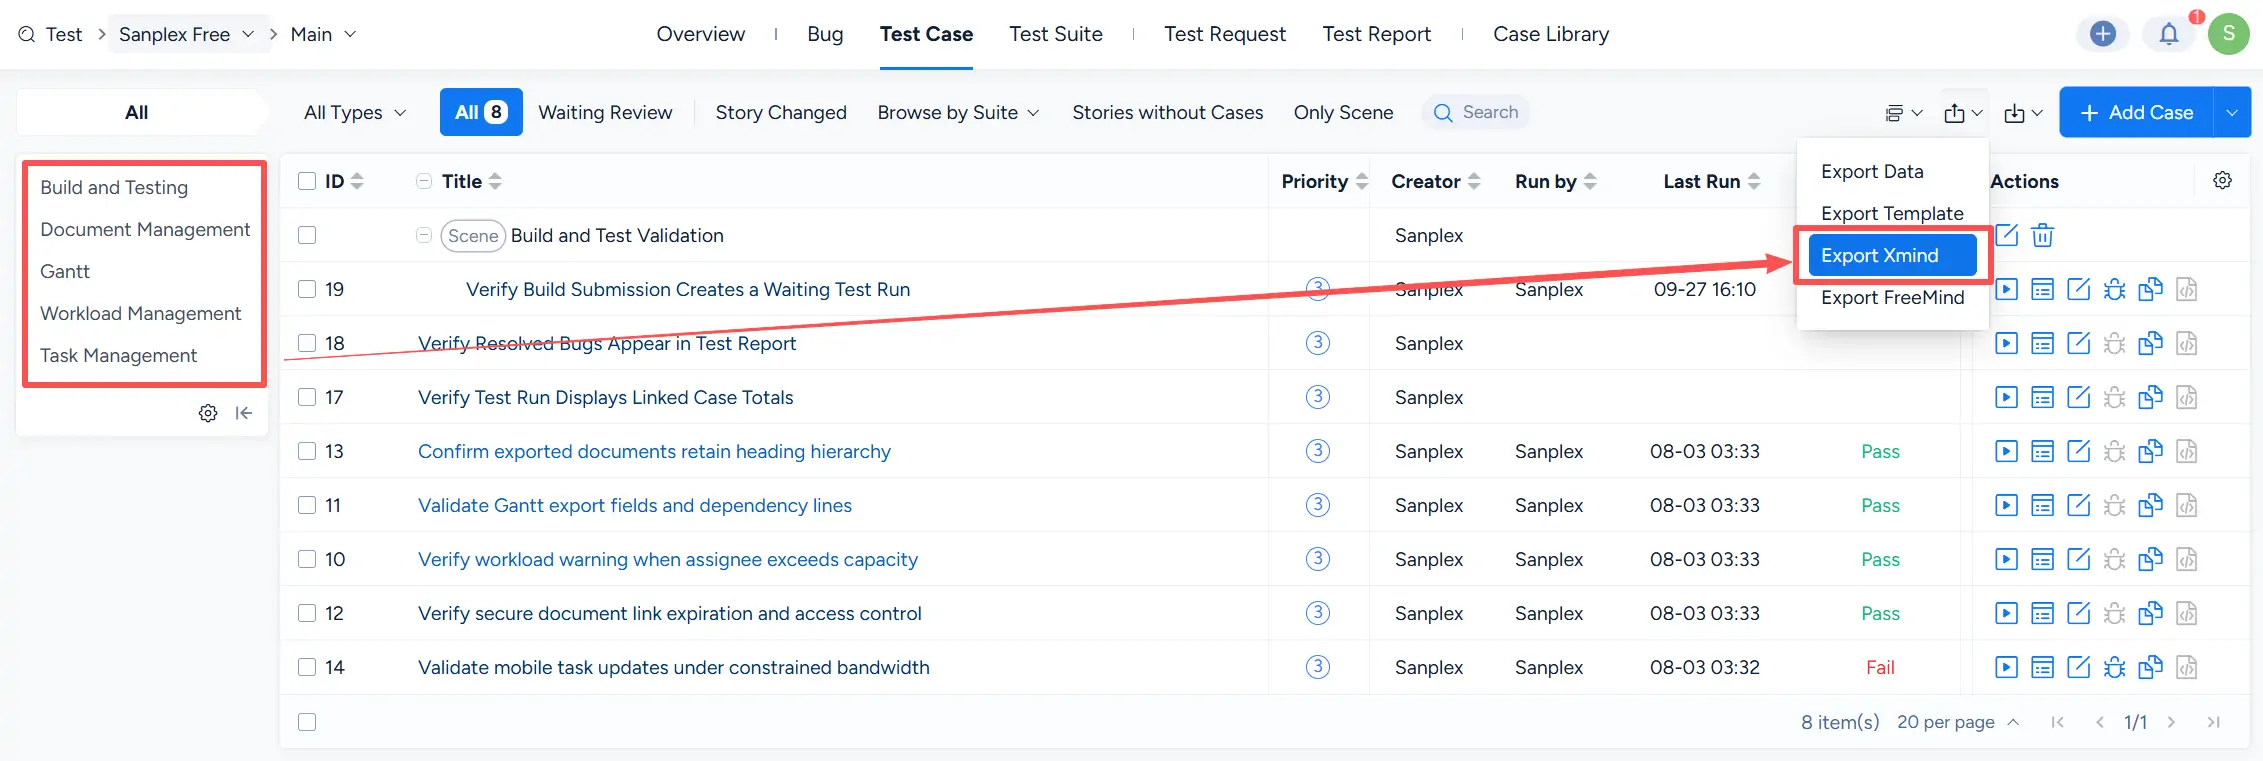
From Test > Test Case, open the Export menu and select Export Xmind.
The module list on the left can be used to navigate test cases by module before exporting.
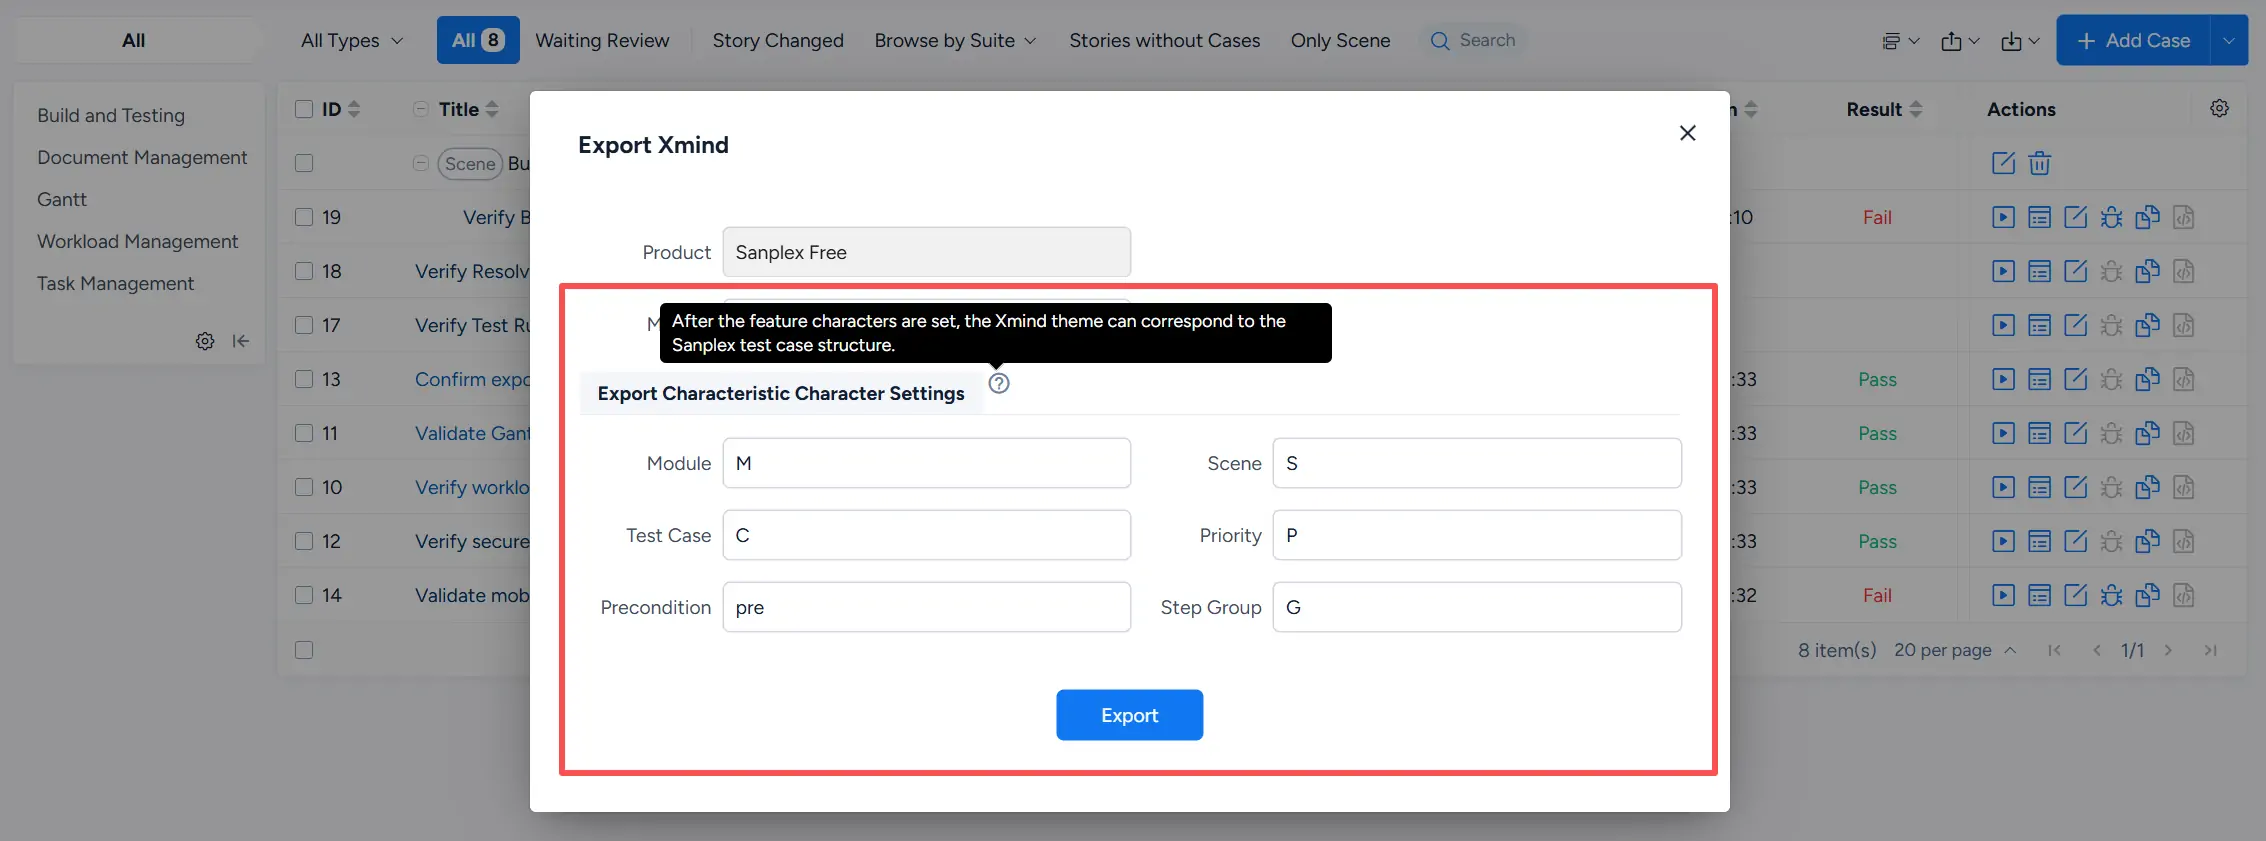
In the Export Xmind dialog, you can configure characteristic characters for the exported structure, including:
- Module
- Scene
- Test Case
- Priority
- Precondition
- Step Group
These character settings are used to distinguish different elements in the exported Xmind test case structure.
2. Import Xmind Data
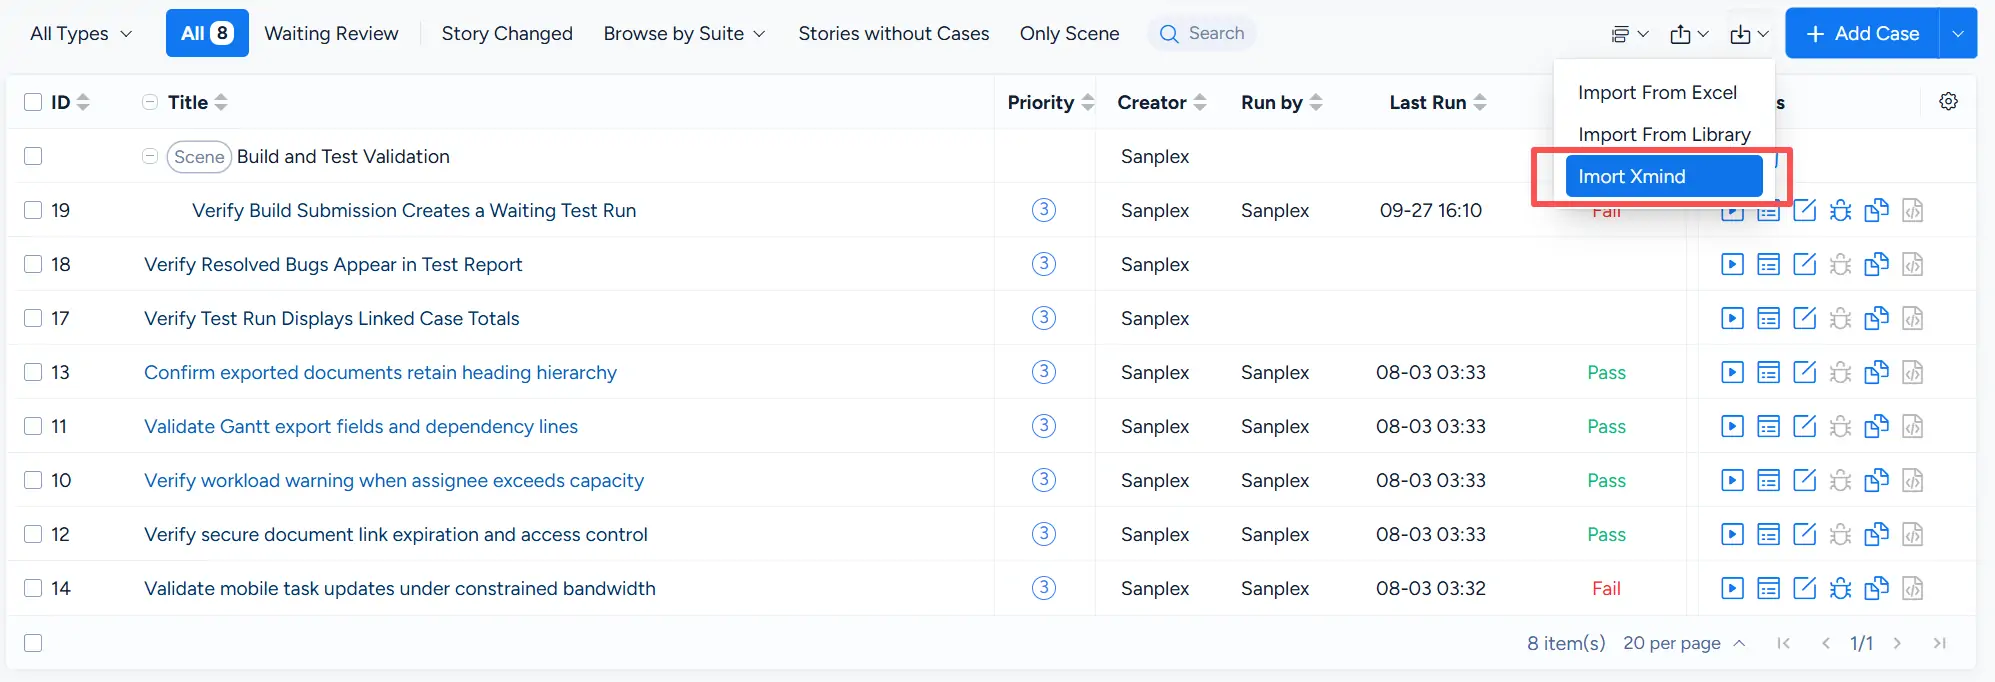
To import test case data from an Xmind file, open the Import menu on the Test Case page and select Import Xmind.