Project Settings
1. Introduction of Sanplex features
1.1. Core Management Framework
1.1.1 Program
1.1.2 Project
1.1.3 Product
1.1.4 Execution
1.1.5 Management Models
1.2. Dashboard
1.2.1 Getting Started with Tutorials
1.2.2 Quick Add
1.2.3 Notification Center
1.2.4 Effort Tracking
1.2.5 Dashboard - Project and Execution
1.2.6 Dashboard - My Work, Contribution, and Recents
1.2.7 Dashboard - Approval
1.2.8 Contacts
1.3. Program
1.3.1 Program List
1.3.2 Program Kanban
1.3.3 Create Program
1.3.4 Create Sub-Programs
1.3.5 Project Charter Management
1.4. Product
1.4.1 Create Product
1.4.2 Manage Modules
1.4.3 Multi-Branch and Multi-Platform Management
1.4.4 Manage Plans
1.4.5 Manage Requirements
1.4.6 Requirement Reviews
1.4.7 Requirement Status and Phase
1.4.8 Create Releases
1.4.9 Track Progress
1.4.10 Business Requirements and Multi-Level Requirements
1.5. Project
1.5.1 Scrum Project
1.5.2. Waterfall Project
1.5.2.1 Manage Project Phases
1.5.2.2 Project Design
1.5.2.3 Project Matrix
1.5.2.4 Project Reports and Earned Value Management
1.5.2.5 Project Baselines
1.5.2.6 Project Change
1.5.3. Kanban Project
1.5.3.1 Set Up Kanban Projects
1.5.3.2 Configure Kanban Boards
1.5.3.3 Use Kanban Boards
1.5.4 Hybrid Agile Project
1.5.5 Hybrid Waterfall Project
1.5.6. Project Settings
1.5.6.1 Project Setup
1.5.6.2 Project Executions
1.5.6.3 Project Requirements
1.5.6.4 Project Builds
1.5.6.5 Project Tests
1.5.6.6 Project Docs
1.5.6.7 Project Releases
1.5.6.8 Project Reports
1.5.6.9 Project Risks
1.5.6.10 Project Issues
1.5.6.11 Project Opportunities
1.5.6.12 Project Deliverables
1.6. Admin Settings
1.7. Workflow

Project Docs

2026-08-31 15:49:19
Sanplex Content
568
Last edited by Jing WANG on 2026-08-31 18:46:18
Share links
Summary: Learn how to create and edit project documents, create documents from templates, configure Office conversion, organize documents with libraries, and access project attachments.

Sanplex includes built-in document management in the Project module.

Under Document, you can create documents directly, create documents from templates, import documents, create Word, PPT, and Excel files, and create document libraries.

At the project level, documents are organized into document libraries. A Project Primary Library is available for the project, and additional libraries can be created as needed.

The Attachments page provides centralized access to files uploaded or attached to project-related content.

I. Create Documents

1. Create a document directly

Go to Project > Select a Project > Document.

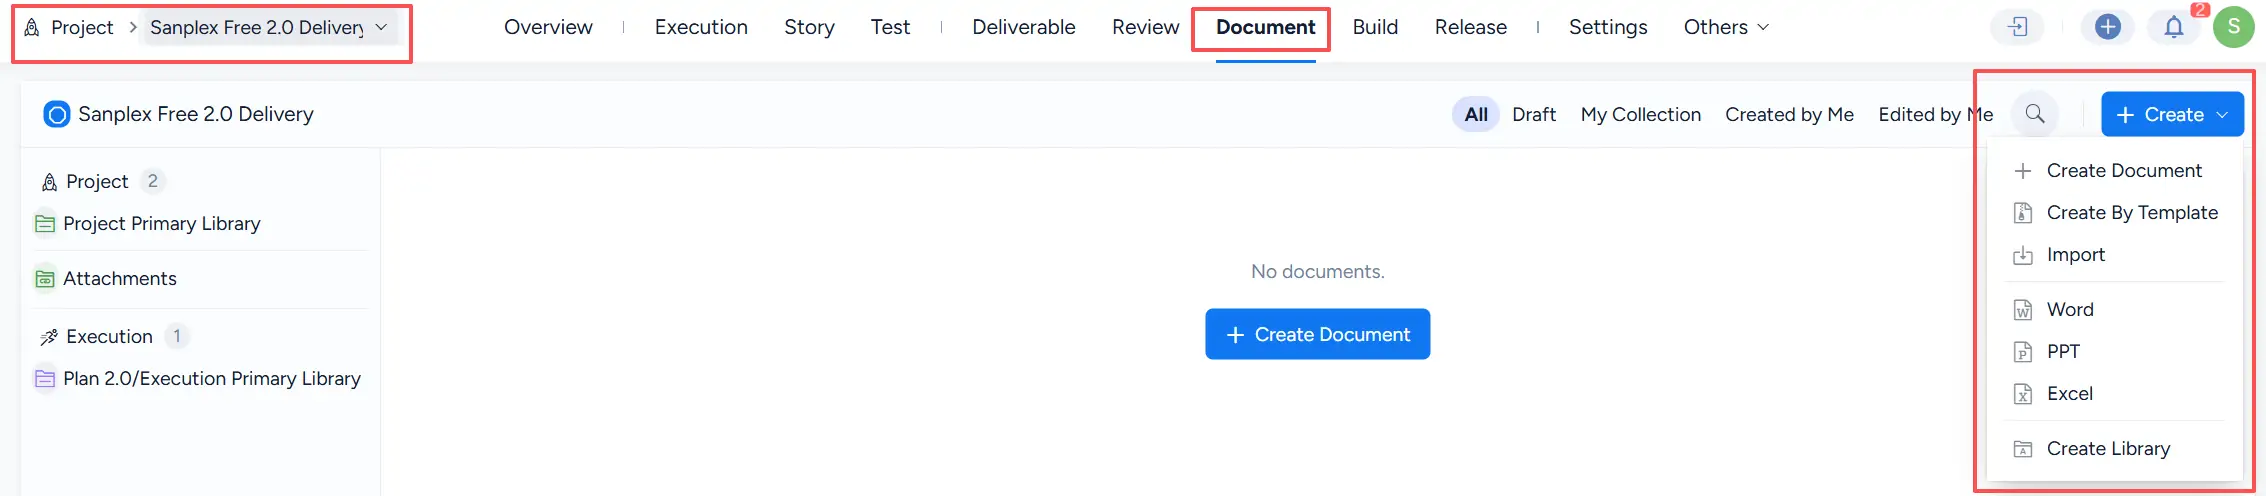
Open the Create dropdown. The available options include:

  • Create Document
  • Create By Template
  • Import
  • Word
  • PPT
  • Excel
  • Create Library

The Project Document page with the Create dropdown expanded, showing options to create a document, create from a template, import content, create Word, PPT, or Excel files, and create a document library.

For Word, PPT, and Excel document processing, the related Office conversion settings are available under Admin > System > Office. The Office Convert settings include the conversion service status, conversion type, and service path.
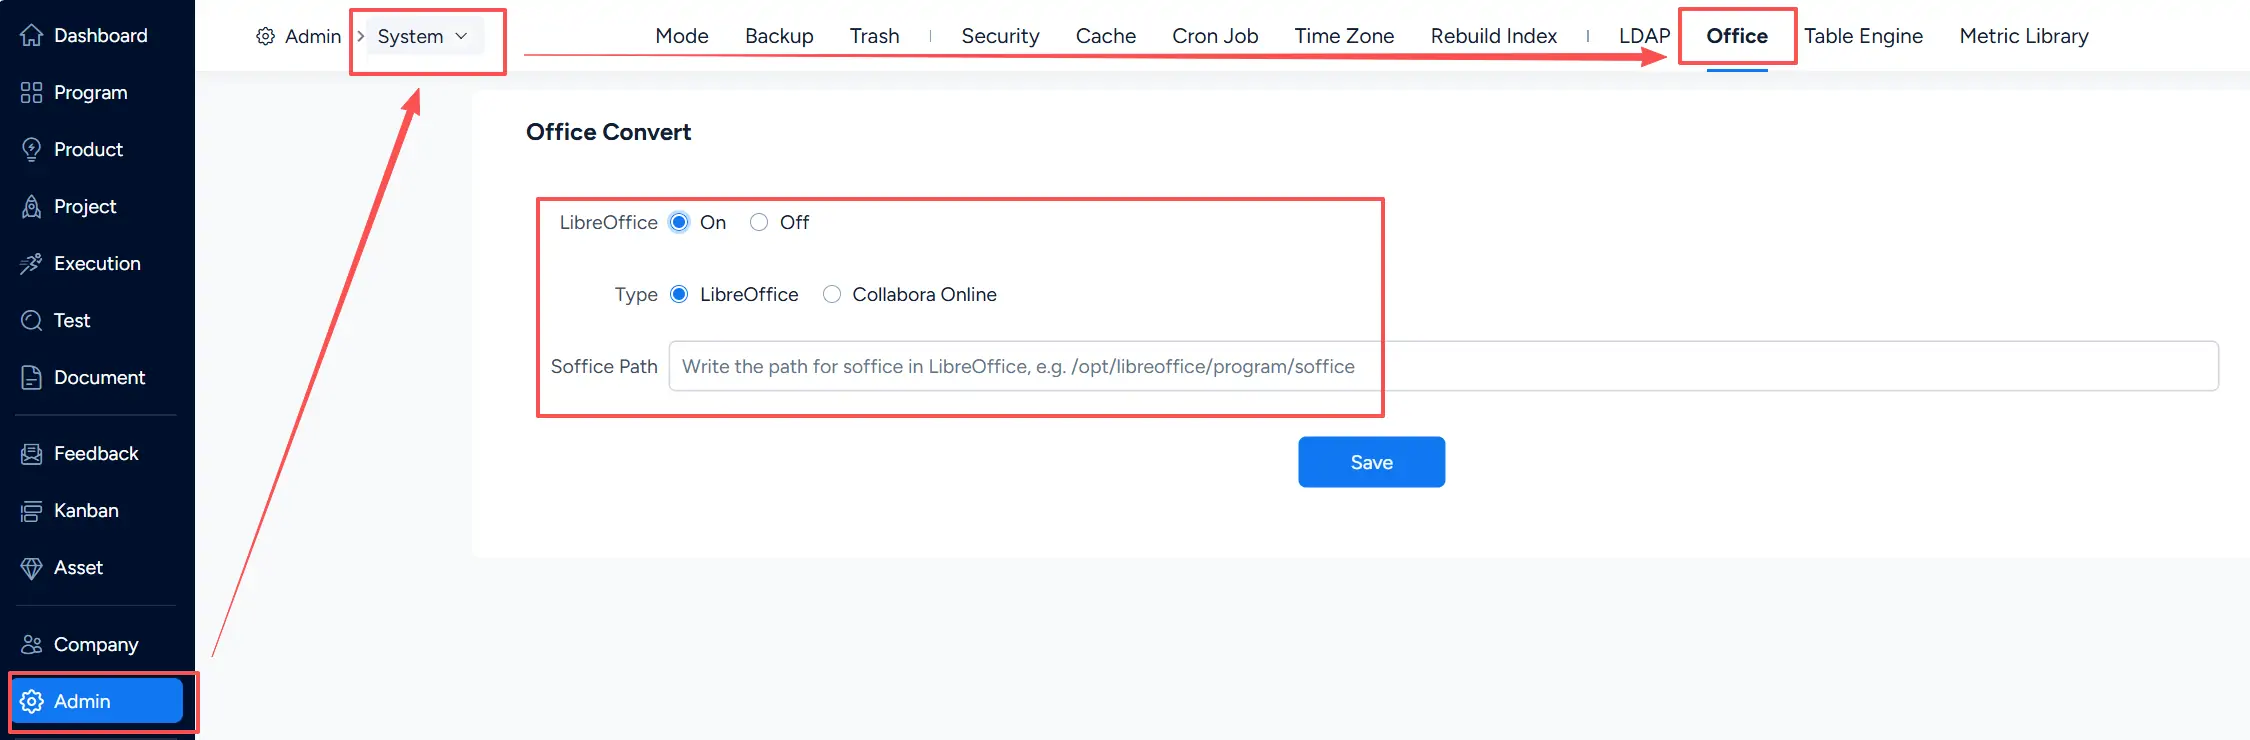
The Admin System Office page showing Office Convert settings, including the LibreOffice on or off option, conversion type selection for LibreOffice or Collabora Online, and the Soffice Path configuration field.

To create a document directly, select Create Document.

Enter the document Title, select the target Library and optional Parent, configure Mail to and Access Control as needed, and click Save.
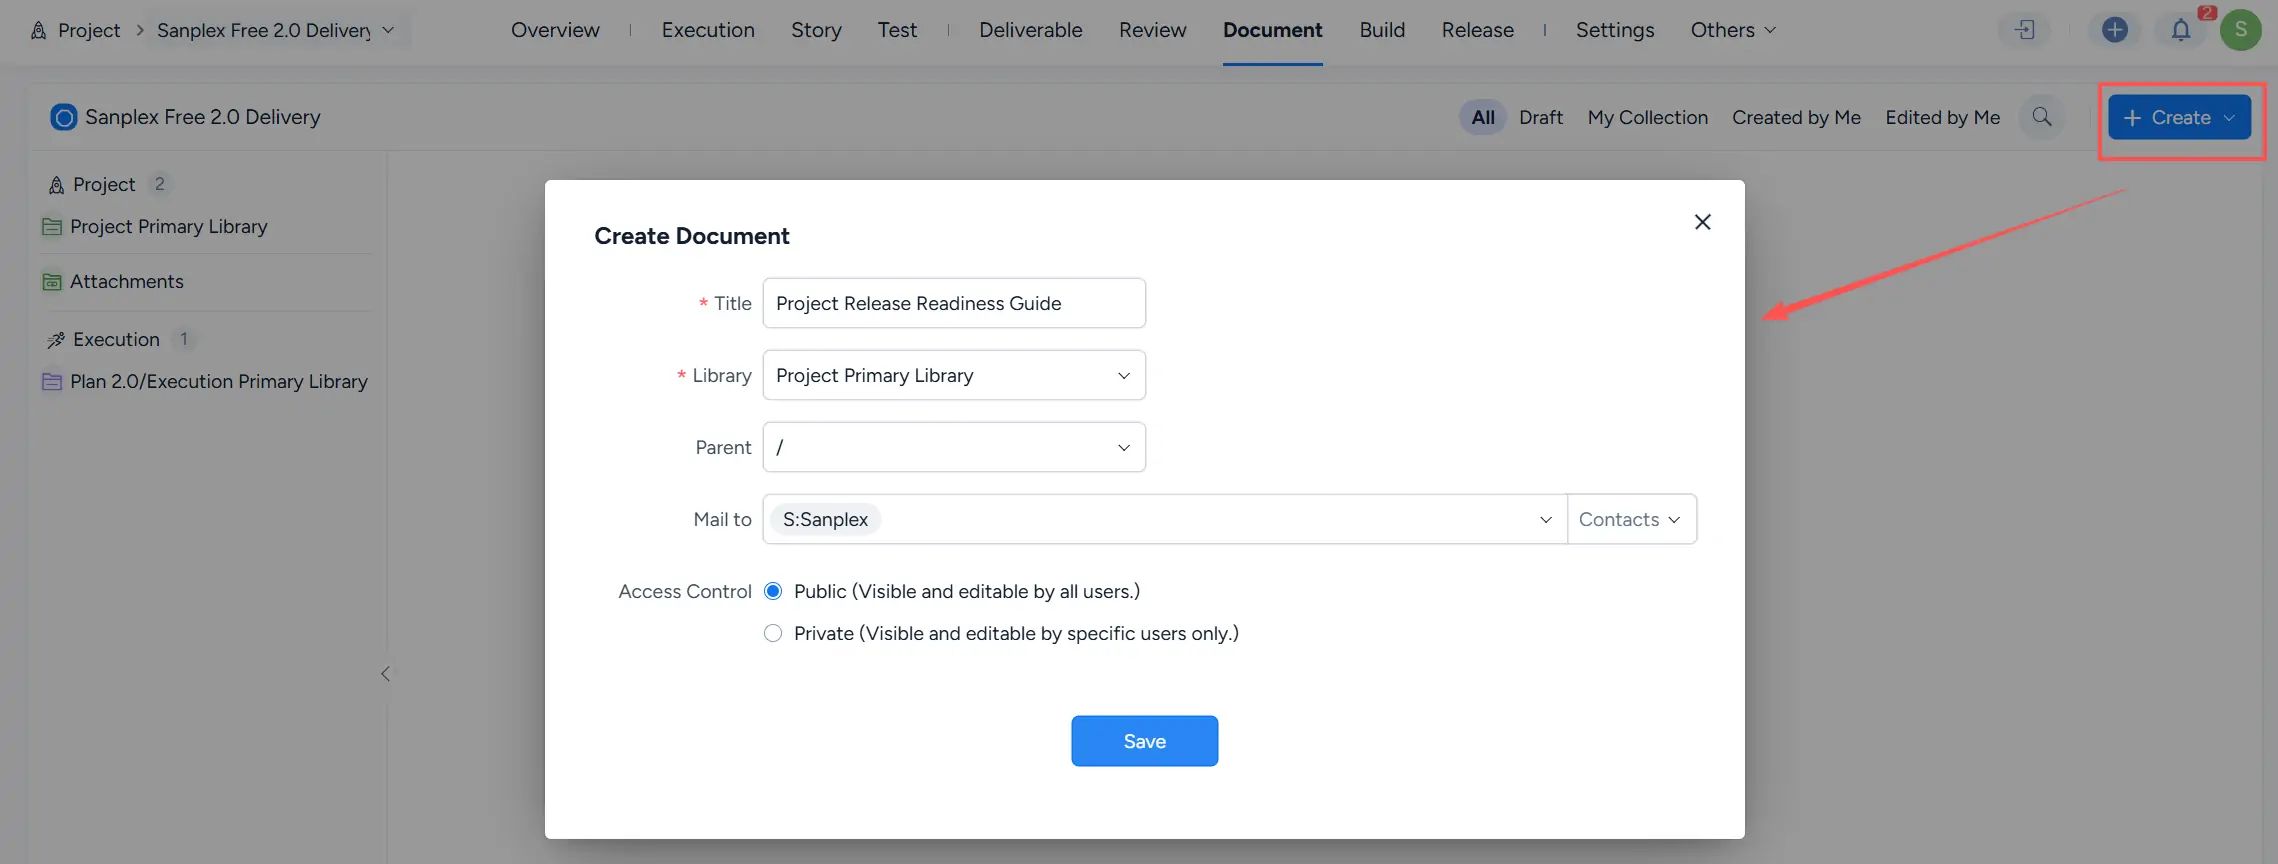
The Create Document dialog showing fields for the document title, target library, parent location, mail recipients, and Public or Private access control before saving the new project document.

After the document is created, it opens in the document editor. You can add and format content, save the document as a draft, or release it when the content is ready.
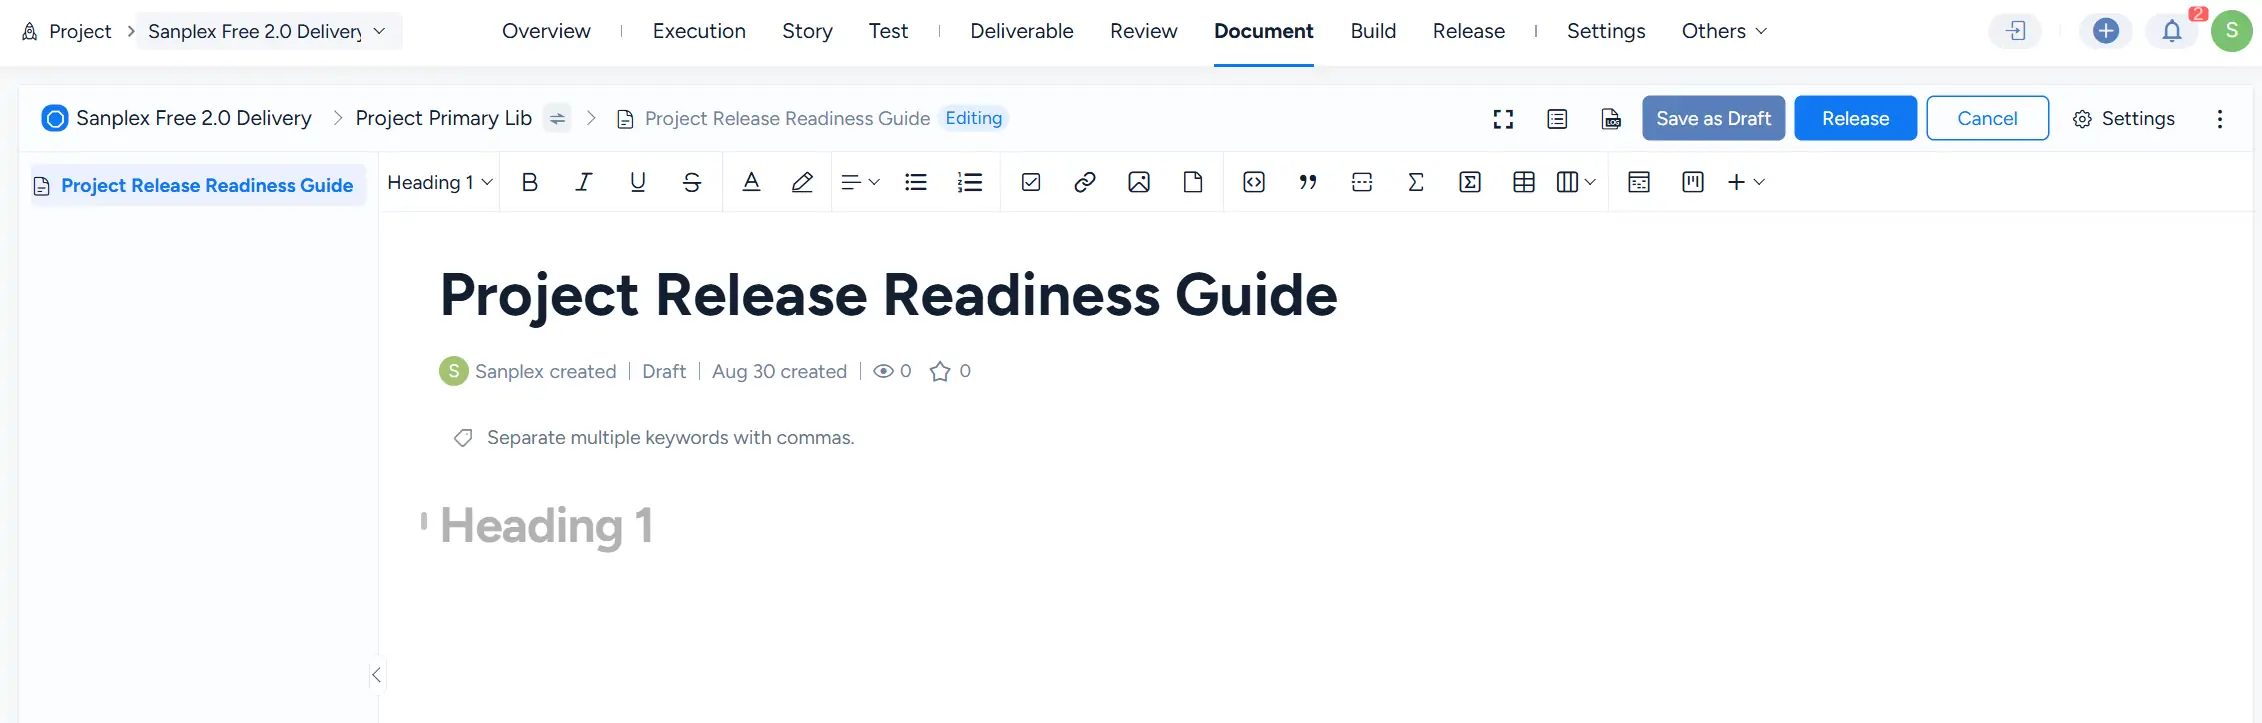
A newly created project document open in the Sanplex document editor, showing the document title, editing toolbar, content area, and controls for Save as Draft, Release, Cancel, and Settings.

2. Create a document from a template

You can also create a project document from an available template.

Go to Project > Document, open the Create dropdown, and select Create By Template.
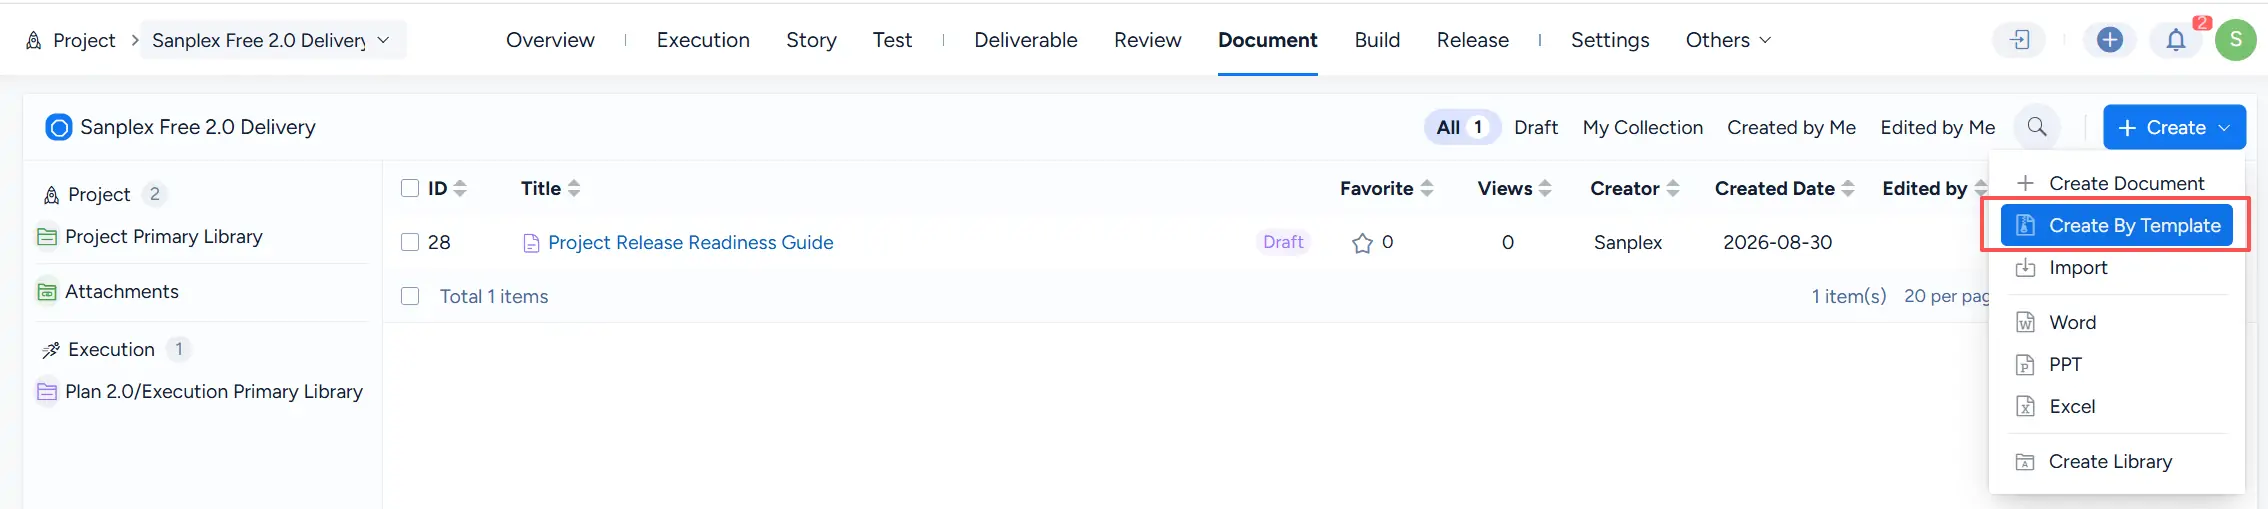
The Project Document page with the Create dropdown expanded and Create By Template highlighted, providing the entry point for creating a project document from an available document template.

II. Create a Document Library

In addition to the Project Primary Library, you can create additional document libraries to organize project documents for different purposes or work areas.

Go to the Document area, open the Create dropdown, and select Create Library.

The Document Project Space page with the Create menu expanded and Create Library highlighted, showing the option used to start creating an additional document library for the selected project.

On the Create Library page, select the appropriate Library Type. For a project document library, select Doc Lib.

Select the project, enter a Library Name, and configure the Default Docs Order and Access Control. If the Execution field is left empty, the library is created as a project-level library.

Click Save to create the library.
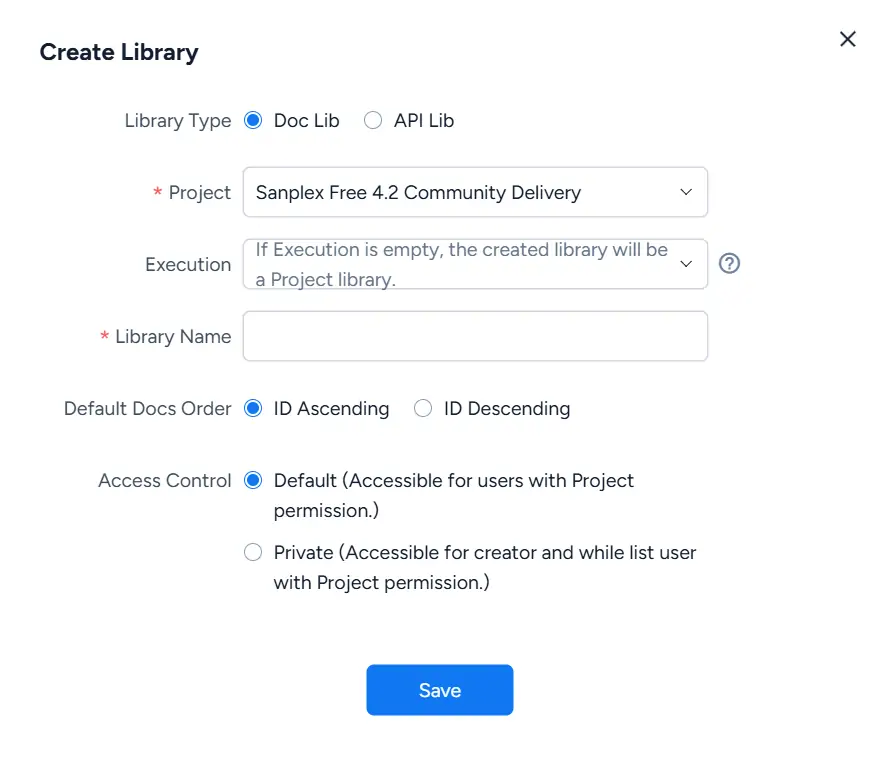
The Create Library dialog showing Doc Lib and API Lib library types, Project and Execution fields, Library Name, default document ordering options, and Default or Private access control settings.

After the library is created, it appears in the library list on the left side of the Document page.

Select a project library from this list to switch between available document libraries. Execution-level libraries are also displayed separately under Execution.
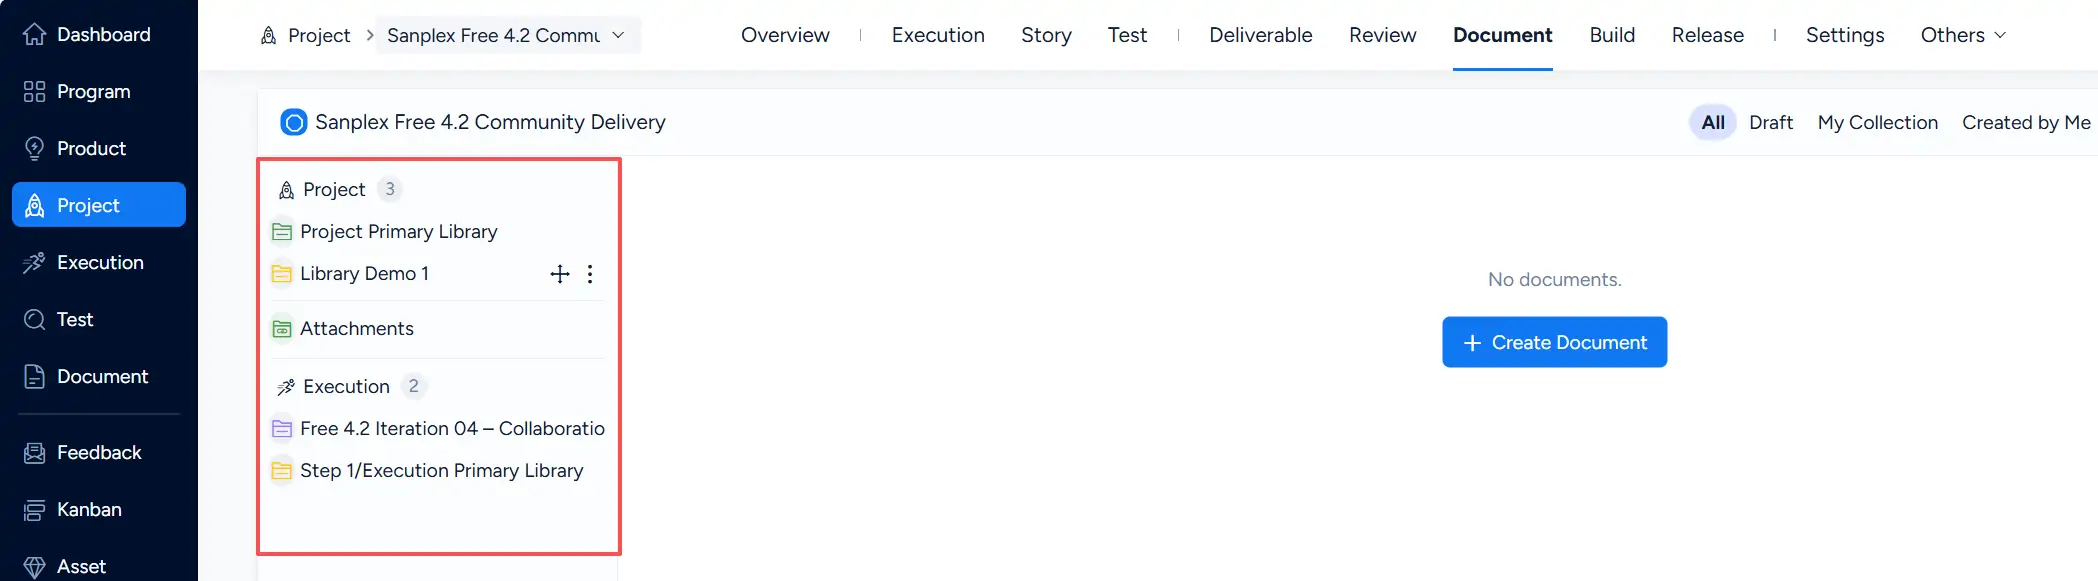
The Project Document page showing the left-side library navigation with the Project Primary Library, an additional project library, Attachments, and separate Execution libraries available for selection.

III. Attachments

Files uploaded or attached to project-related content are collected under Attachments.

This can include files such as:

  • images uploaded through supported document editors
  • files attached to project documents
  • files attached to other project-related content

Select Attachments from the library list on the left to open the attachment list.

The page displays information such as File Name, Source, Type, File Size, Creator, and Created Date. You can also filter files, search the attachment list, export information, or use the available file actions.
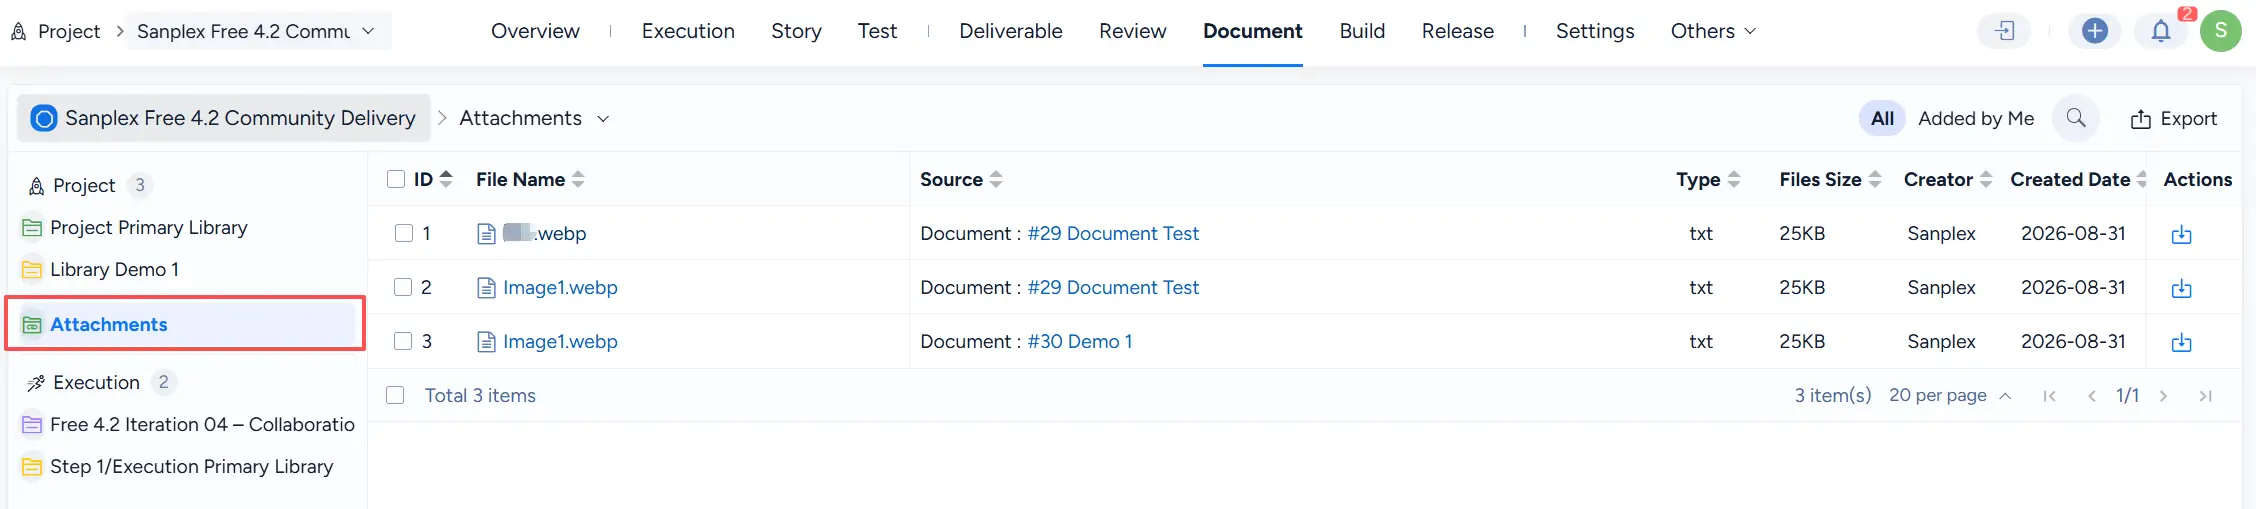
The Project Attachments page showing uploaded files in a table with File Name, Source, Type, File Size, Creator, Created Date, and Actions, together with All and Added by Me filters, search, and export controls.

Write a Comment
Comment will be posted after it is reviewed.