
Users Management
1. Introduction of Sanplex features
1.1. Core Management Framework
1.1.1 Program
1.1.2 Project
1.1.3 Product
1.1.4 Execution
1.1.5 Management Models
1.2. Dashboard
1.2.1 Getting Started with Tutorials
1.2.2 Quick Add
1.2.3 Notification Center
1.2.4 Effort Tracking
1.2.5 Dashboard - Project and Execution
1.2.6 Dashboard - My Work, Contribution, and Recents
1.2.7 Dashboard - Approval
1.2.8 Contacts
1.3. Program
1.3.1 Program List
1.3.2 Program Kanban
1.3.3 Create Program
1.3.4 Create Sub-Programs
1.3.5 Project Charter Management
1.4. Product
1.4.1 Create Product
1.4.2 Manage Modules
1.4.3 Multi-Branch and Multi-Platform Management
1.4.4 Manage Plans
1.4.5 Manage Requirements
1.4.6 Requirement Reviews
1.4.7 Requirement Status and Phase
1.4.8 Create Releases
1.4.9 Track Progress
1.4.10 Business Requirements and Multi-Level Requirements
1.5. Project
1.5.1 Scrum Project
1.5.2. Waterfall Project
1.5.2.1 Manage Project Phases
1.5.2.2 Project Design
1.5.2.3 Project Matrix
1.5.2.4 Project Reports and Earned Value Management
1.5.2.5 Project Baselines
1.5.2.6 Project Change
1.5.3. Kanban Project
1.5.3.1 Set Up Kanban Projects
1.5.3.2 Configure Kanban Boards
1.5.3.3 Use Kanban Boards
1.5.4 Hybrid Agile Project
1.5.5 Hybrid Waterfall Project
1.5.6. Project Settings
1.5.6.1 Project Setup
1.5.6.2 Project Executions
1.5.6.3 Project Requirements
1.5.6.4 Project Builds
1.5.6.5 Project Tests
1.5.6.6 Project Docs
1.5.6.7 Project Releases
1.5.6.8 Project Reports
1.5.6.9 Project Risks
1.5.6.10 Project Issues
1.5.6.11 Project Opportunities
1.5.6.12 Project Deliverables
1.5.6.13 Project Reviews
1.5.6.14 Project Process
1.5.6.15 Deliverables
1.5.6.16 Quality Assurance
1.5.6.17 Project-specific Workflow Management
1.5.7 Project Templates
1.6. Execution
1.6.1 Product Planning and Task Breakdown
1.6.2 Task Assignment and Daily Tracking
1.6.3 Build Creation and Test Requests
1.6.4 Bug Confirmation and Resolution
1.6.5 Execution Kanban Boards
1.7. Admin Settings
1.7.1. System Settings
1.7.1.1 Mode
1.7.1.2 Backup
1.7.1.3 Trash
1.7.1.4 License
1.7.1.5 Security
1.7.1.6 Cron Job
1.7.1.7 Time Zone
1.7.1.8 Rebuild Index
1.7.1.9 LDAP
1.7.1.10 Table Engine
1.7.2 Feature Options
1.7.3. Permission Management and Access Control
1.7.4. Agent Configuration
1.8. Asset Library (Premium)
1.8.1 Asset Library Management (Premium)

Manage Users

2026-09-28 11:13:56
Sanplex Content
408
Last edited by Kelsea Zhang on 2026-09-28 11:15:30
Share links
Summary: Once departments are set up, administrators can manage users in Sanplex. They can add users individually or in bulk, edit or delete users, unlock locked accounts, and perform bulk edits.

Once departments are set up, administrators can manage users in Sanplex. 

  • Click Add User or Batch Add Users in the top-right of the user list to add new users.
  • After a user is added, click the action buttons on the right side of the user list to edit or delete the user.
  • If a user is locked, you can unlock the account.
  • Click Edit at the bottom of the user list to perform bulk editing.

I. Enter User Management

Go to Admin > Users to open the user management page.
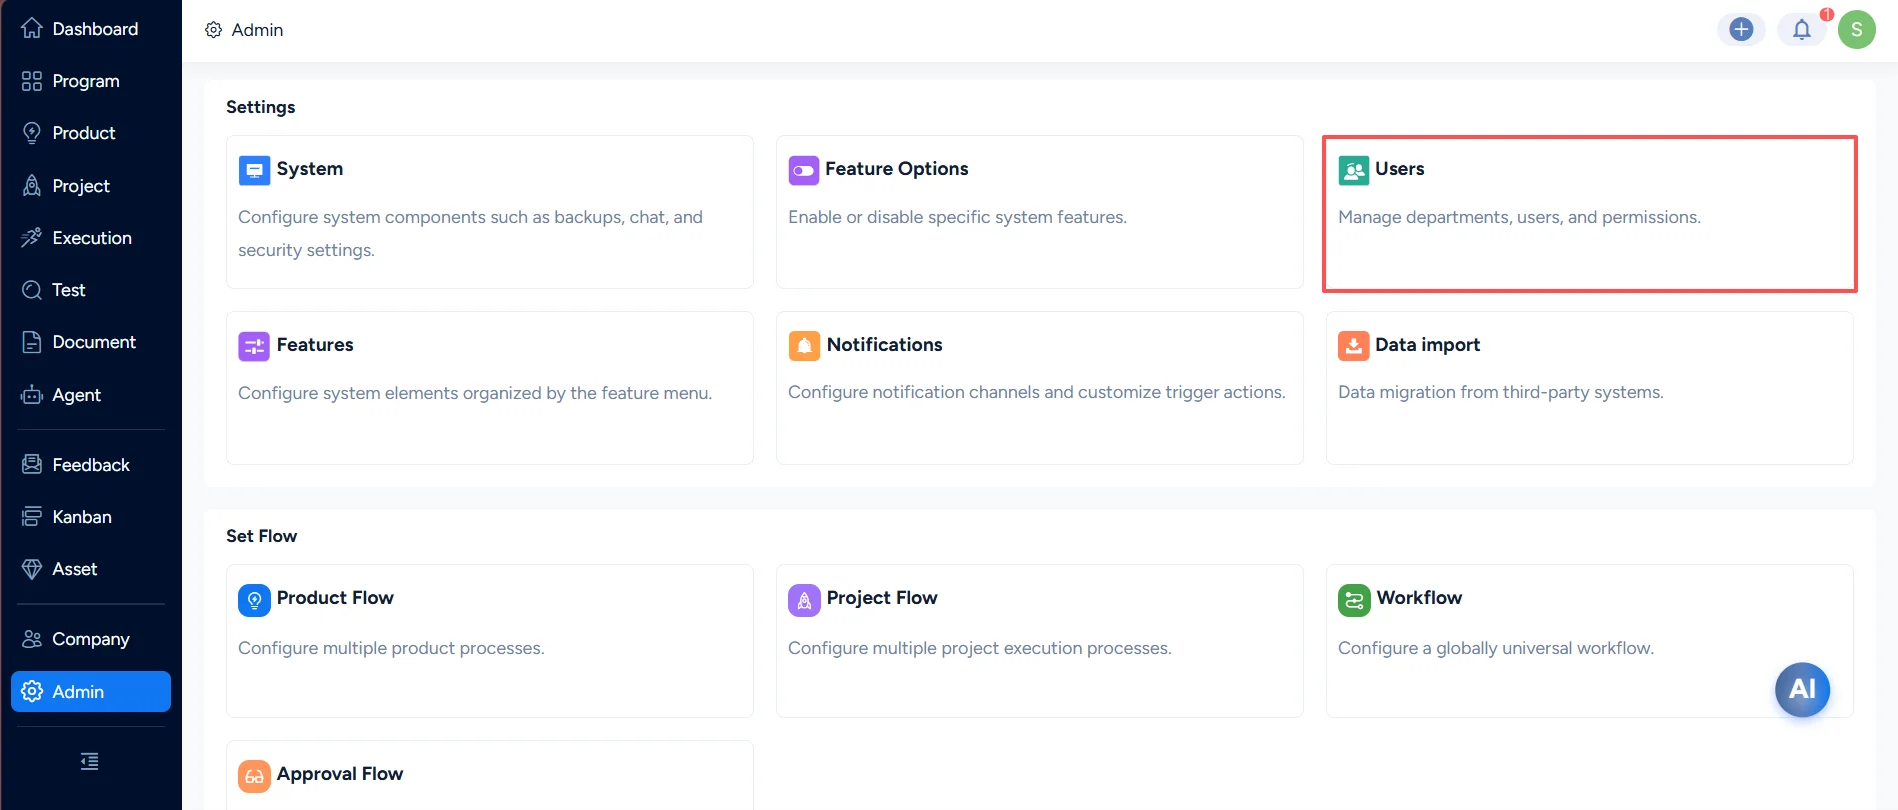
The entry of user management

II. Add Users

Log in as an administrator. In Admin > Users > User, you can add users, batch add users, and bulk edit users.
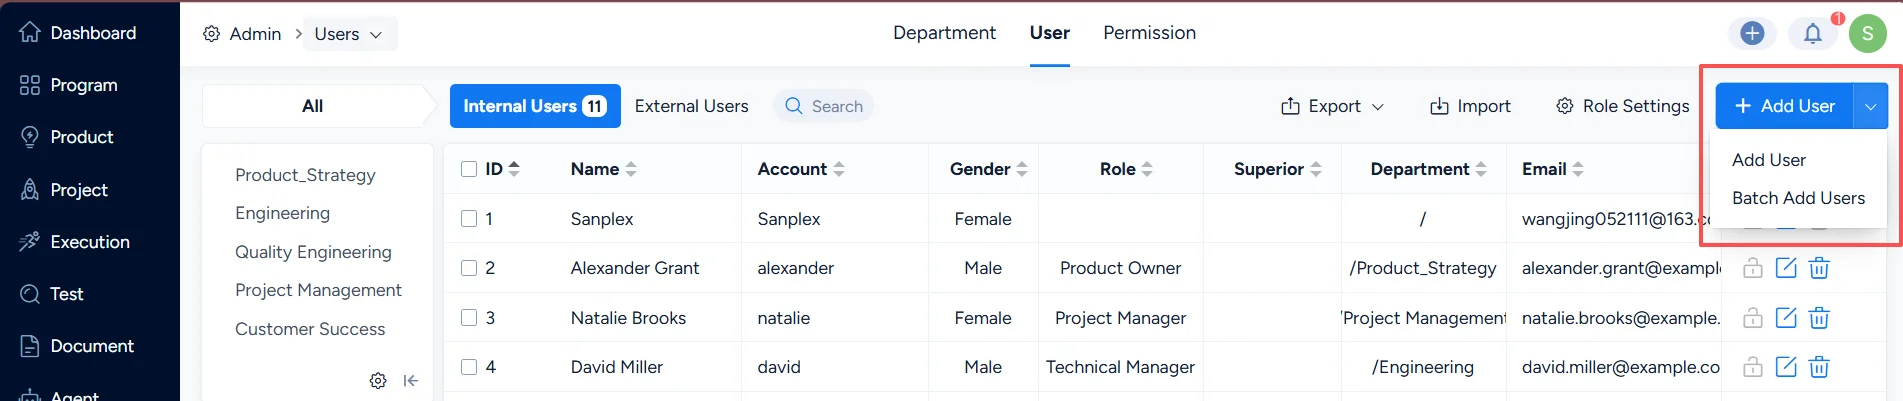
Add a user

On the Add User page, you can set the basic information such as User Type, Department, Account, Password, Interface Type, Name, Role, and Permissions.

Interface Type: Sanplex provides different workspaces based on role scenarios, including Full Feature Interface and Operations Interface. You can assign an interface type based on each user’s role.

After selecting a role, the system assigns a default permission group for that position. If it does not fit, you can change it.
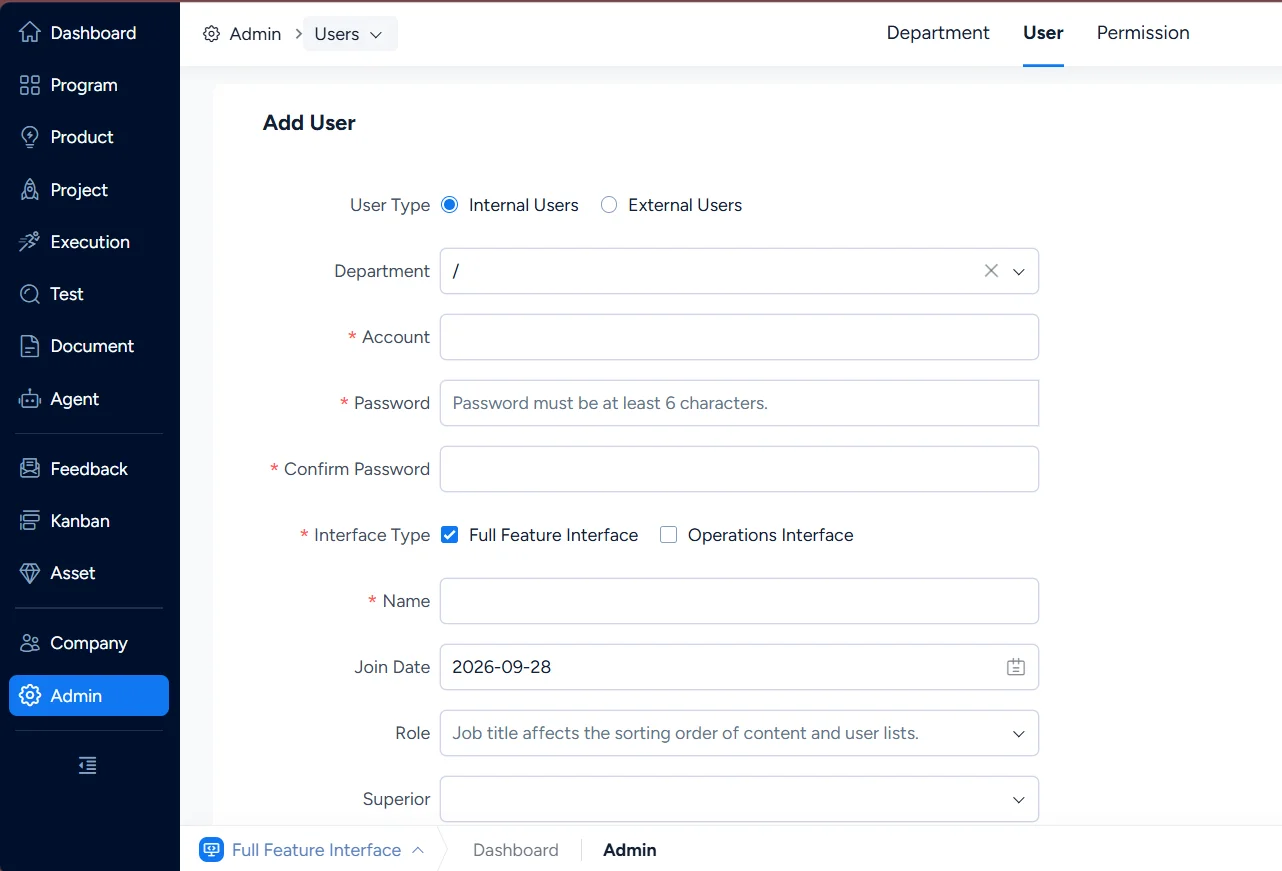
Fill in the neccesarry information to add a user

Note: Permission groups can be configured under User > Permission, down to individual operation-level permissions. Click here to check more about the permission settings.

At the bottom of the Add User page, enter the current operator’s password in Password, then click Save. The system returns to the user list, where you can see the newly added user.

III. Batch Add Users

Go to Admin > Users > User > Batch Add Users.
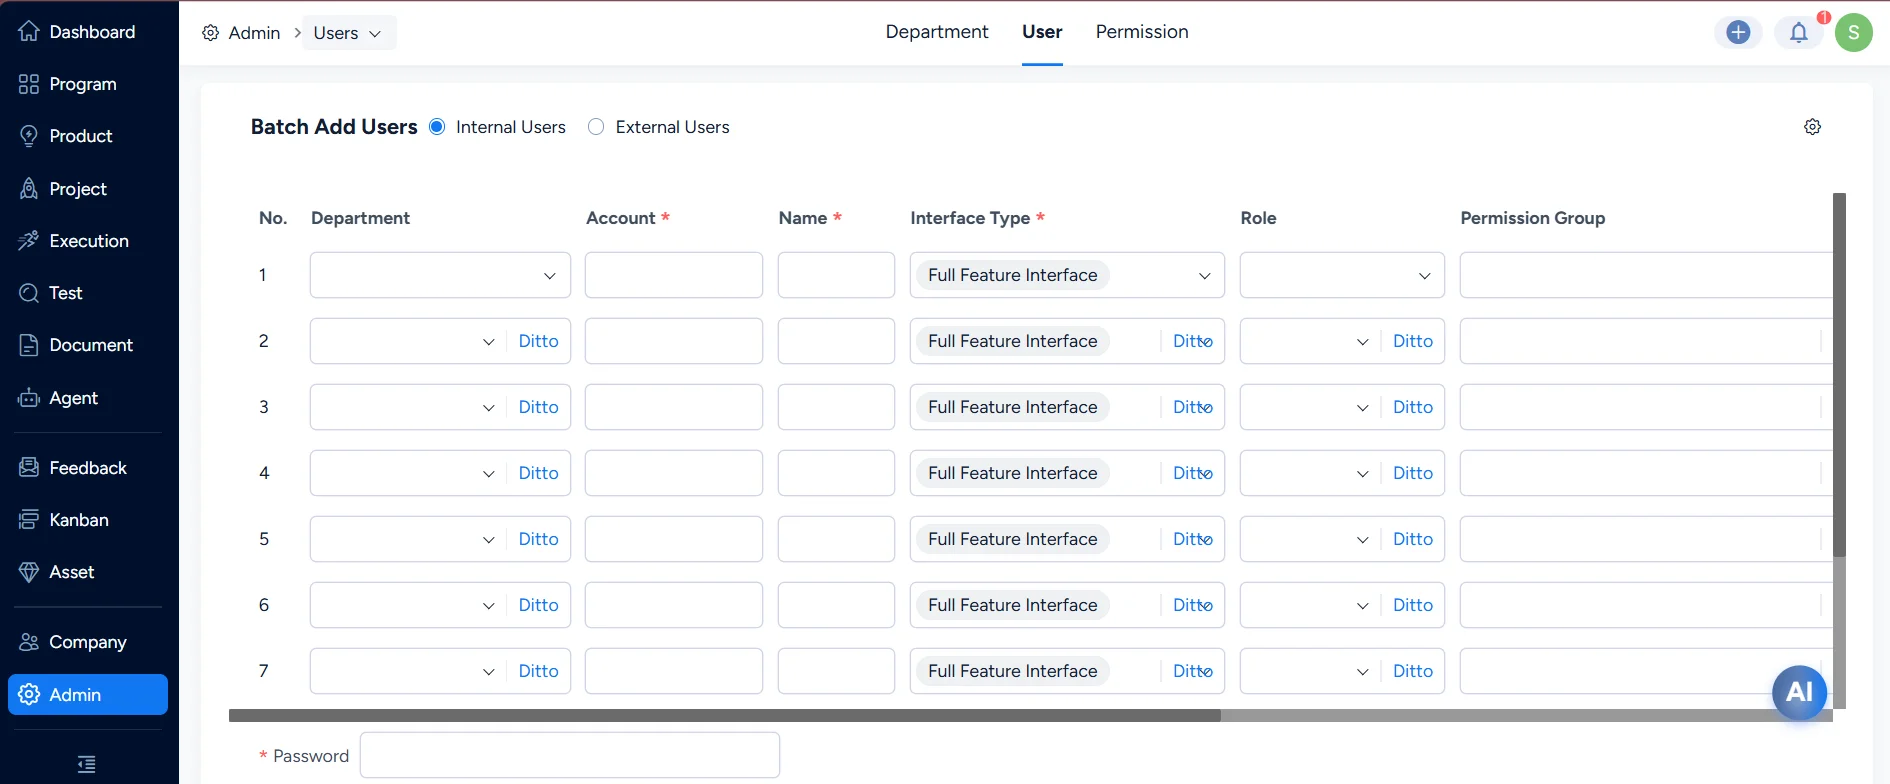
Batch add users

Enter Password at the bottom of the page, then click Save. After returning to the user list, you can see the users you added in batch.

IV. Bulk Edit Users

On the user list page, click Total or select multiple users, then click Edit to perform bulk editing.
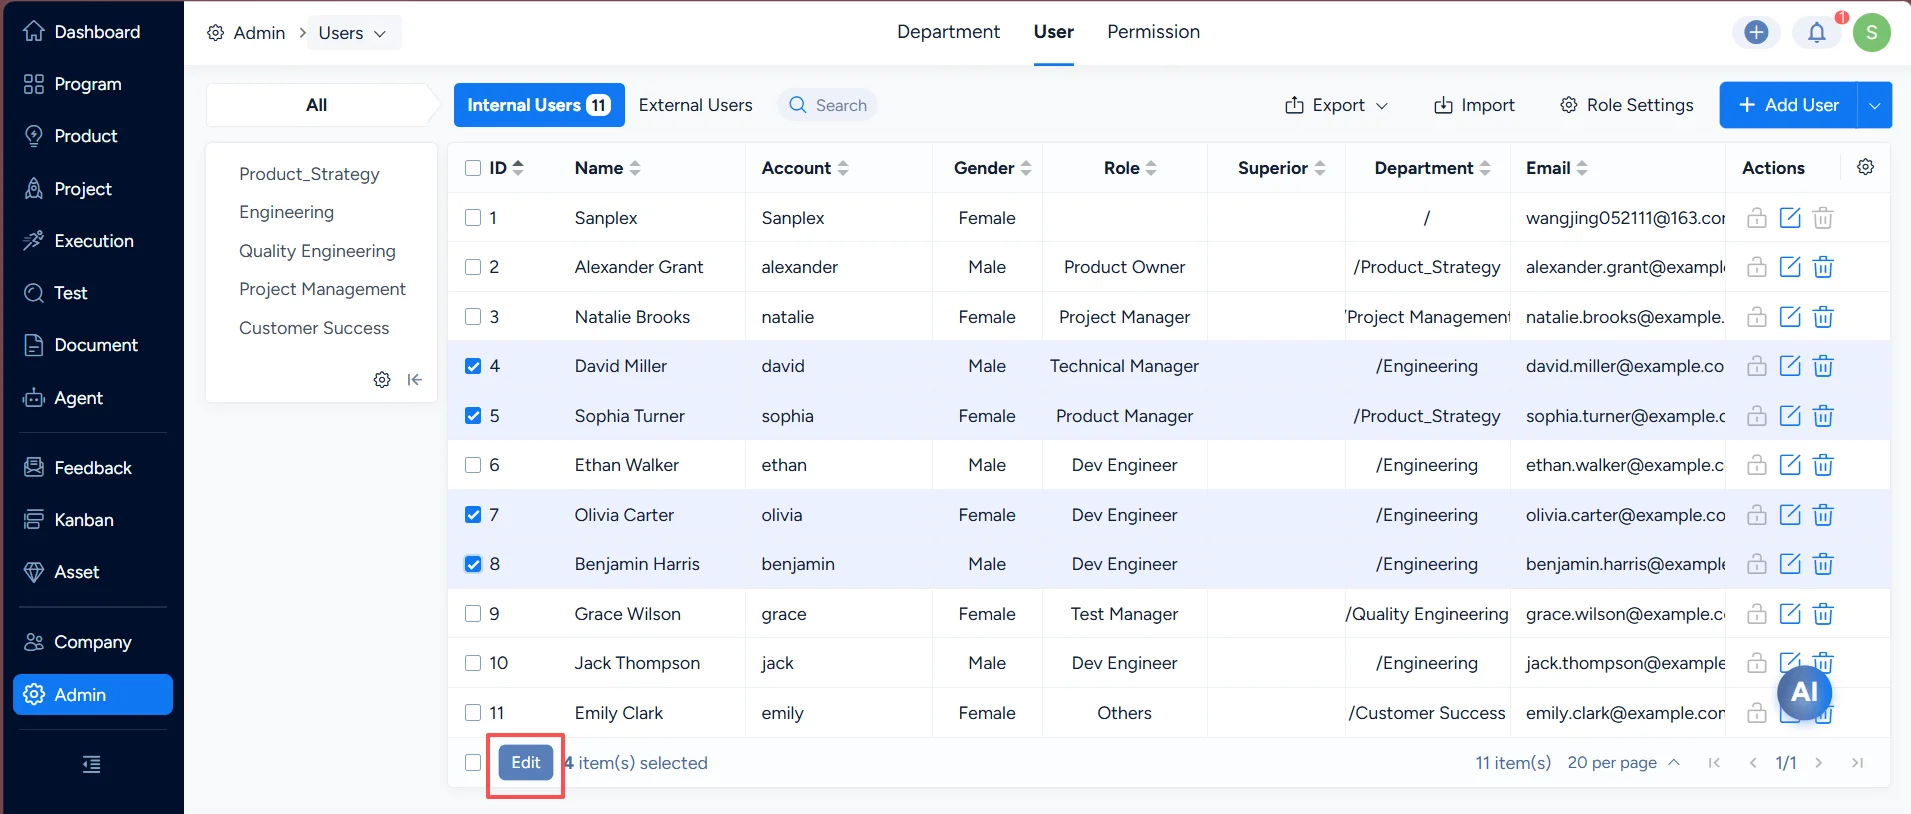
Batch edit users

Write a Comment
Comment will be posted after it is reviewed.
