

Catalog
In software delivery, a build is a potentially testable package produced during development. A build does not necessarily include everything intended for a release; it represents the work completed up to the current point in time.
The primary purpose of builds is to define a clear test scope, facilitate collaboration between developers and testers, and support scenarios such as multi-version delivery and bug-fix validation.
When Stories are completed or bugs are fixed, you can create a Build under Project/Execution > Build to package the completed work. When creating a build, specify the Product and Application it belongs to.
- Application vs. Build: An application is an independent deliverable under a product. A build is a testable package associated with an application, and an application can have multiple builds.
- Relationship between Release, Application, and Build: A release can include applications, while an application can have multiple builds.
I. Create a Build
1. Create a Build
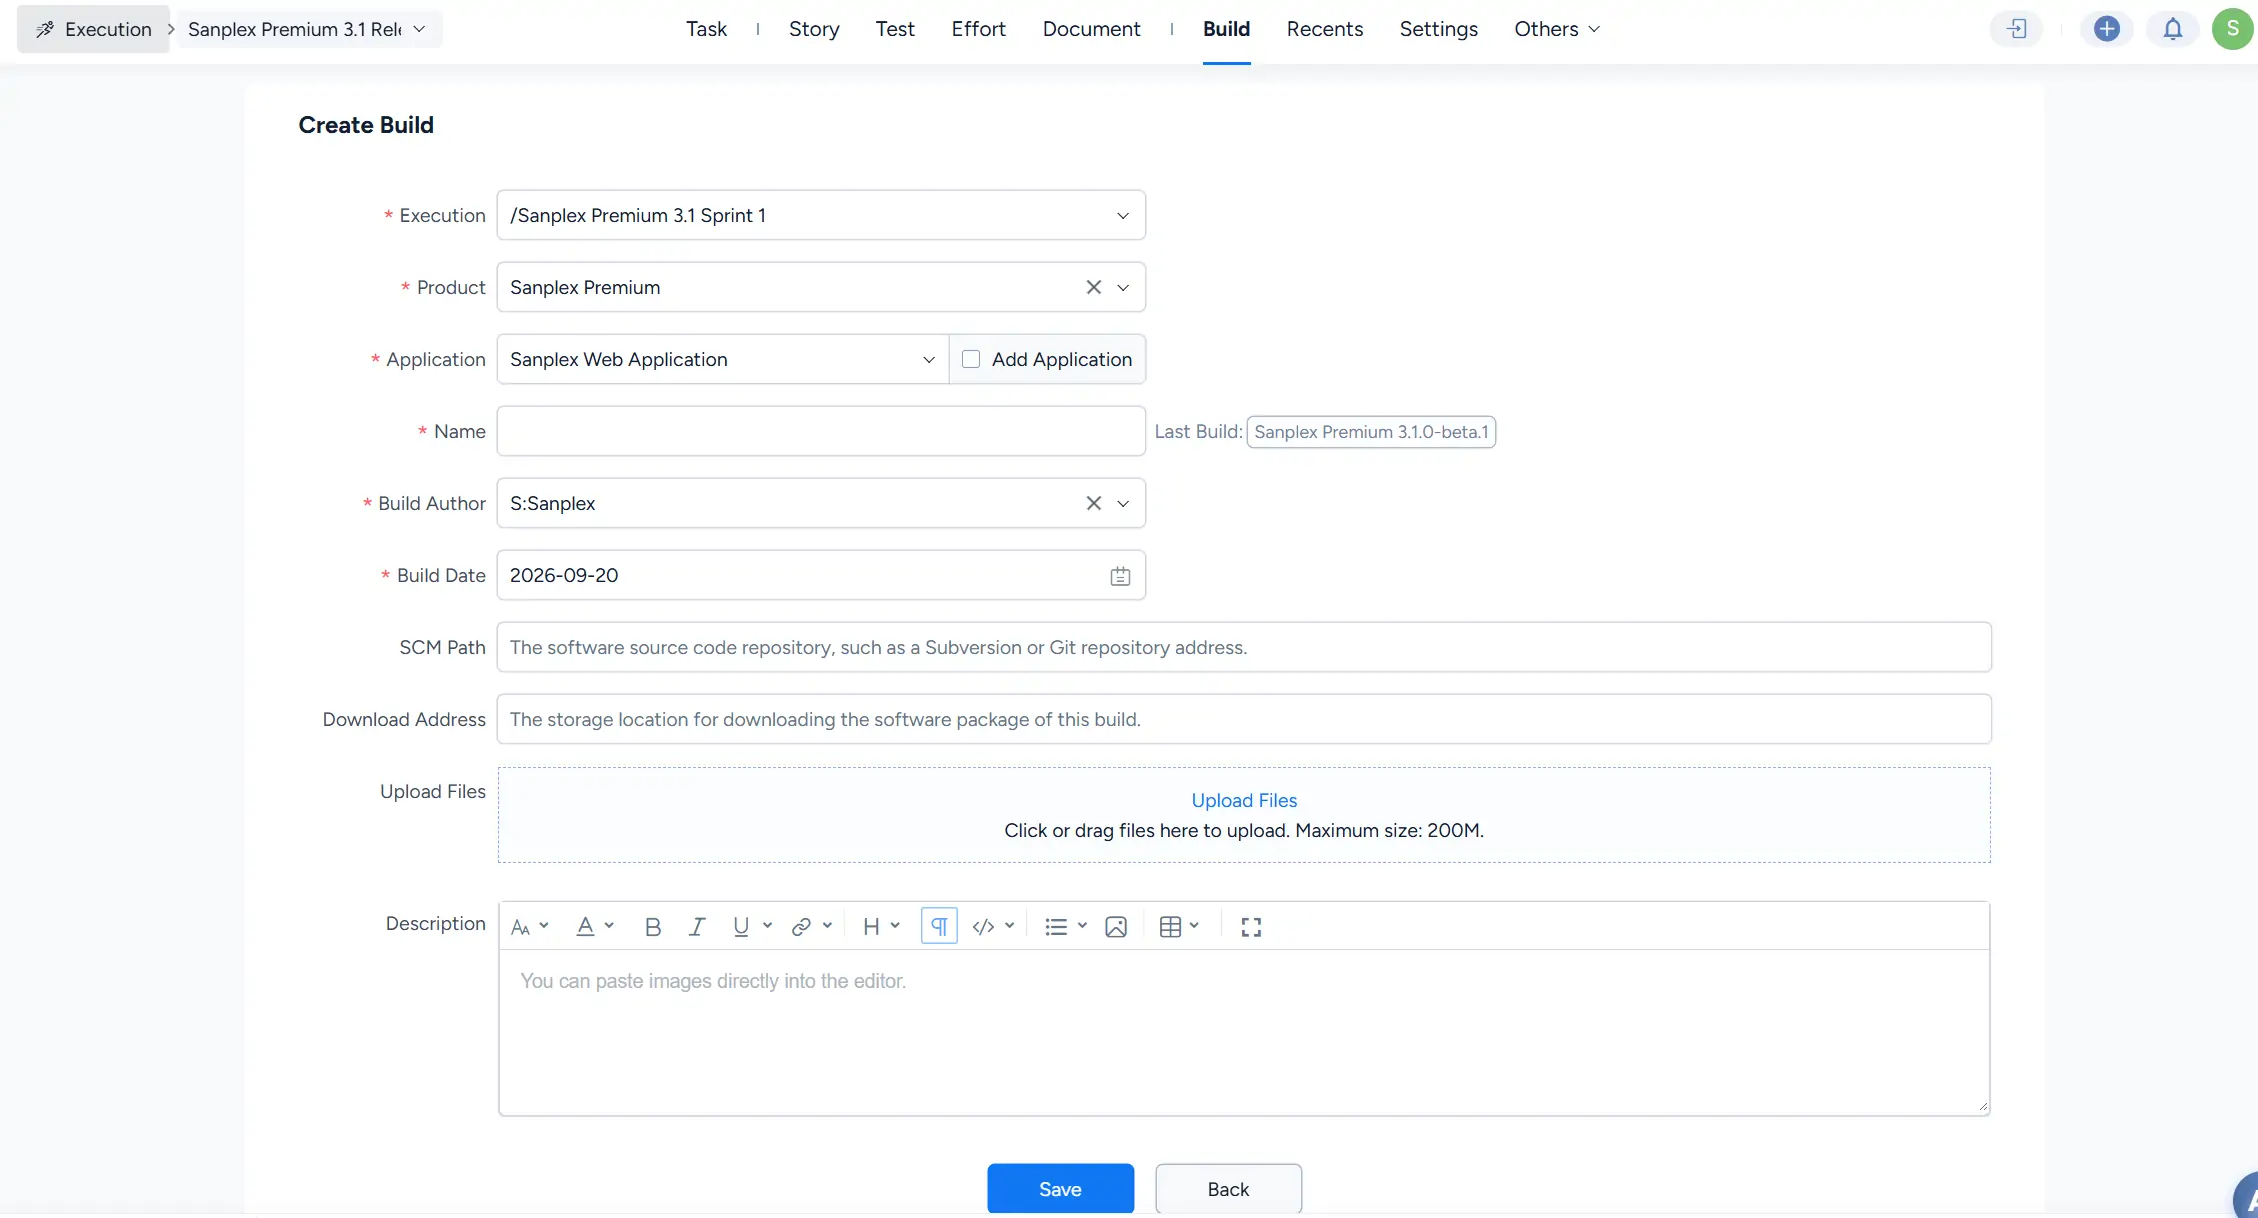
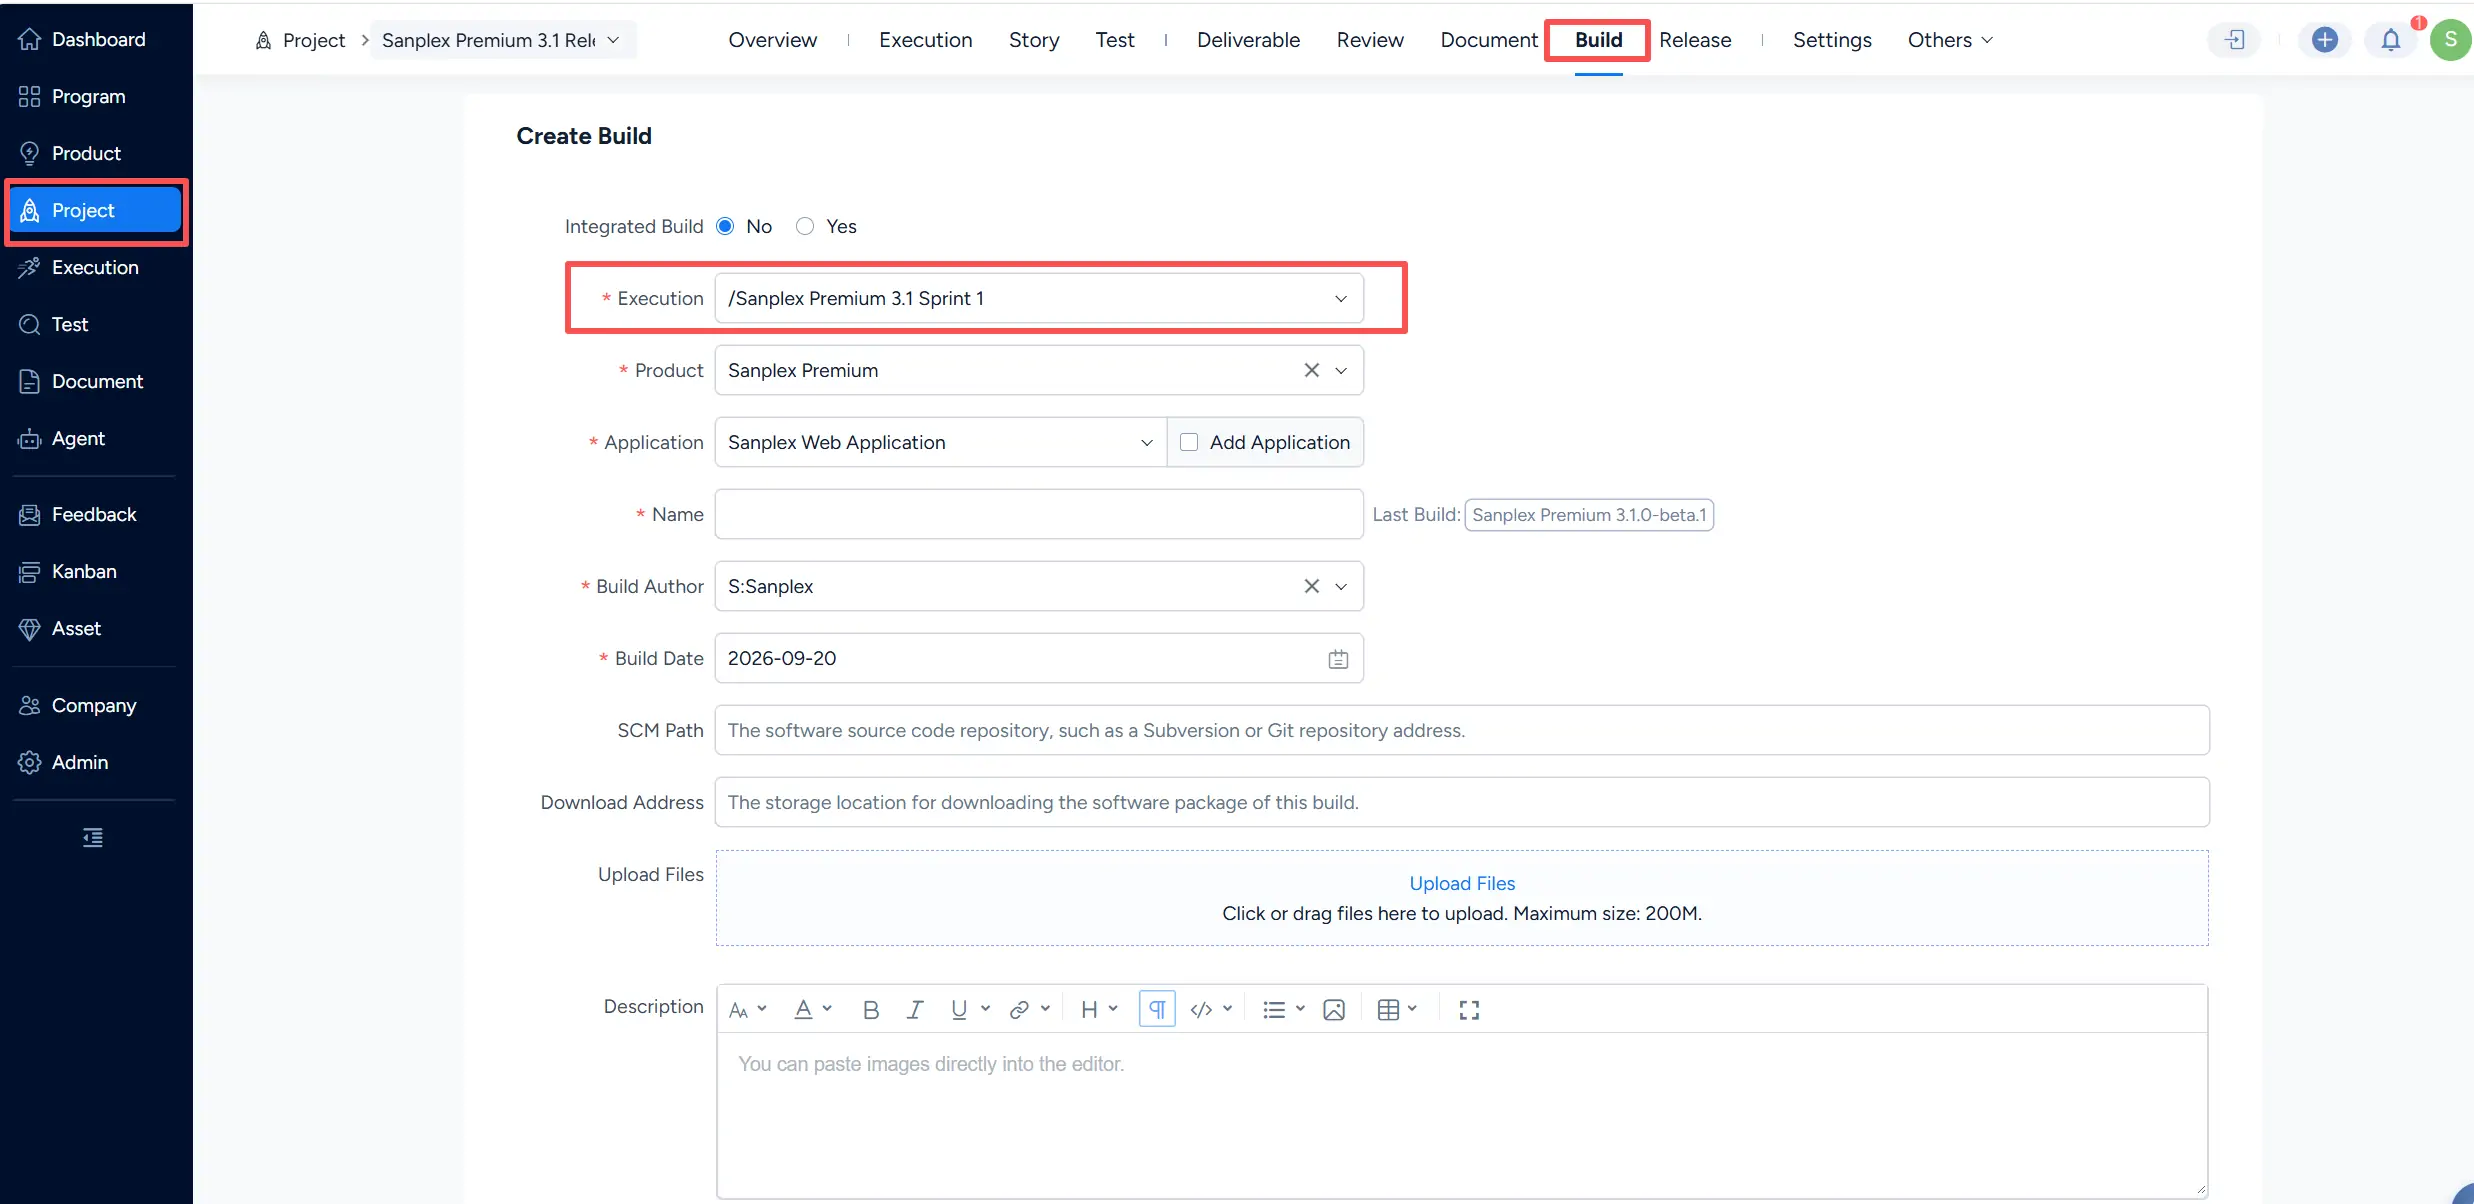
Go to Project/Execution > Build, and click Create Build.

When creating a build, complete the required information, including Execution, Product, Application, Name, Build Author, and Build Date. You can also provide an SCM Path, Download Address, uploaded files, and a description.
2. Link Stories and Bugs
After the build is created, use the actions in the build list to associate relevant Stories and bugs with the build. These linked items help define the scope represented by the build.

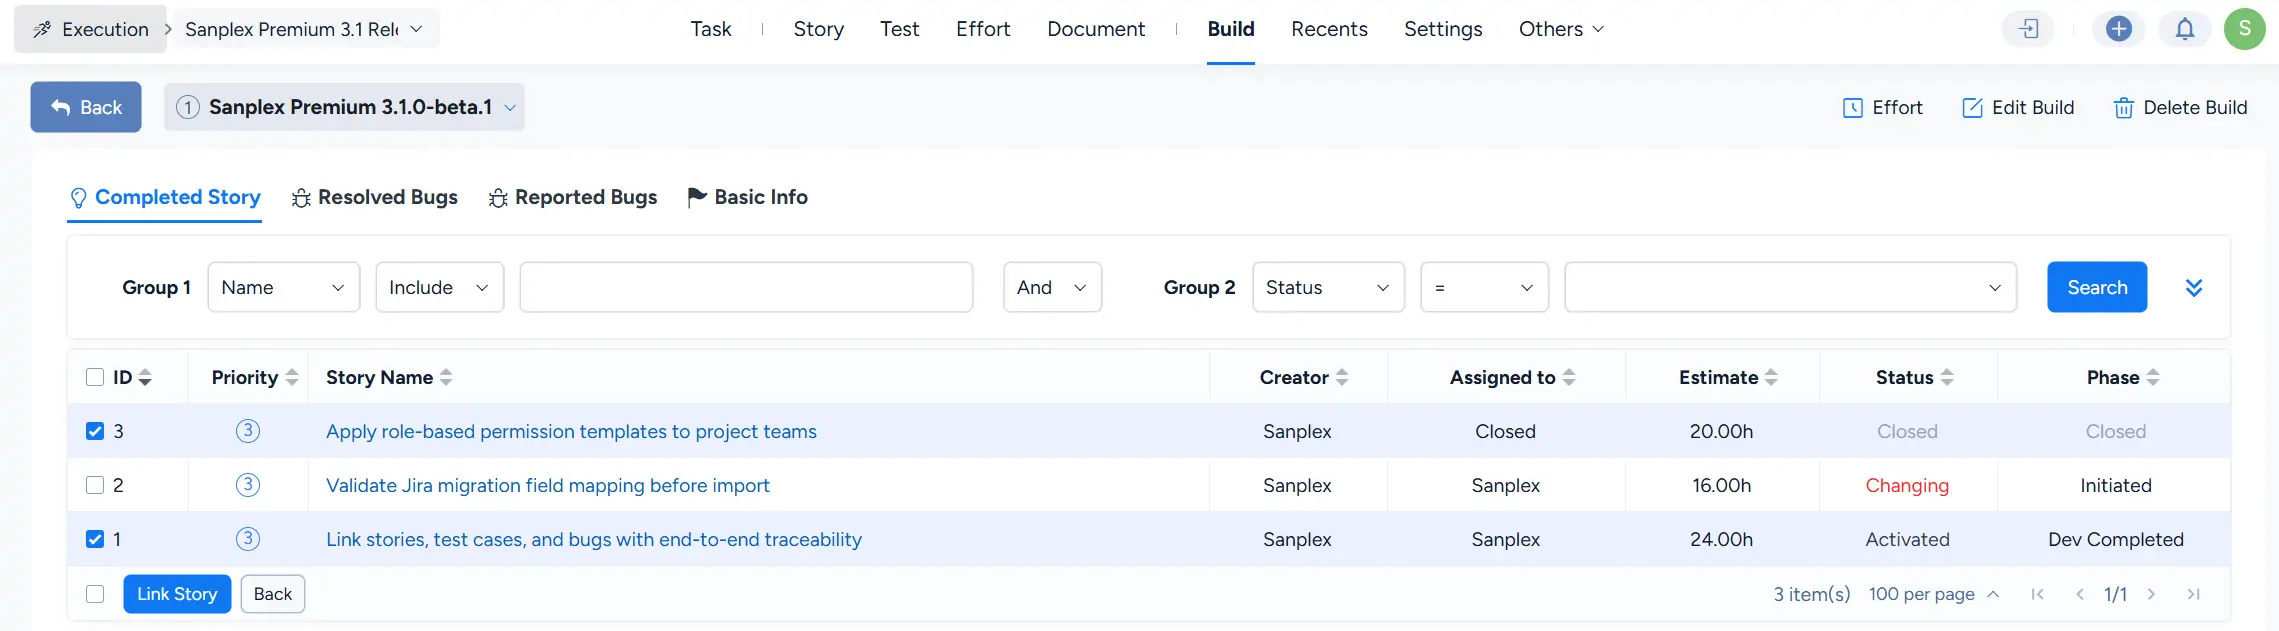
To link Stories, open the Link Story page, select the Stories to include, and click Link Story.
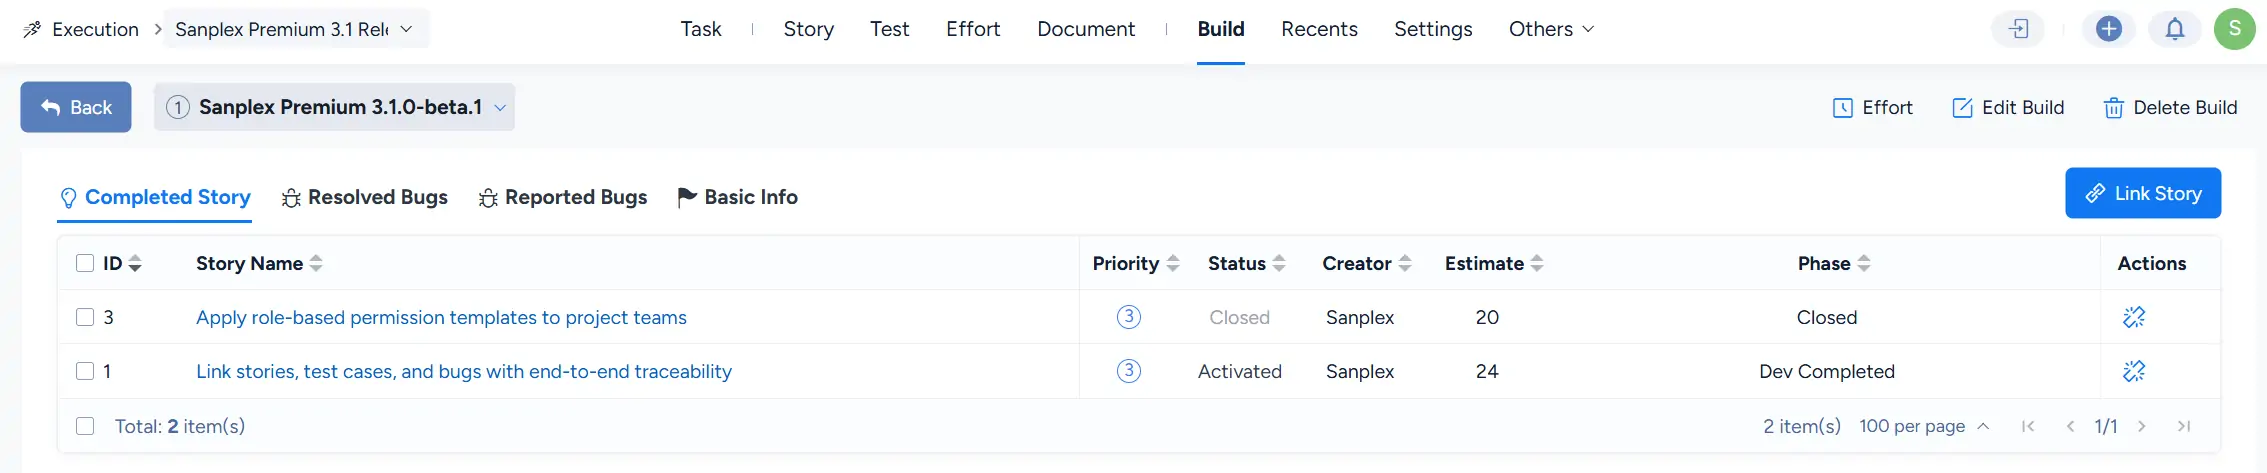
Linked Stories can be viewed under the Completed Story tab on the build detail page. The build detail page also provides Resolved Bugs and Reported Bugs tabs for related bug information.
3. Maintain Builds
The build list provides actions for maintaining the build, including linking related items, submitting a Test Request, editing the build, and deleting the build.

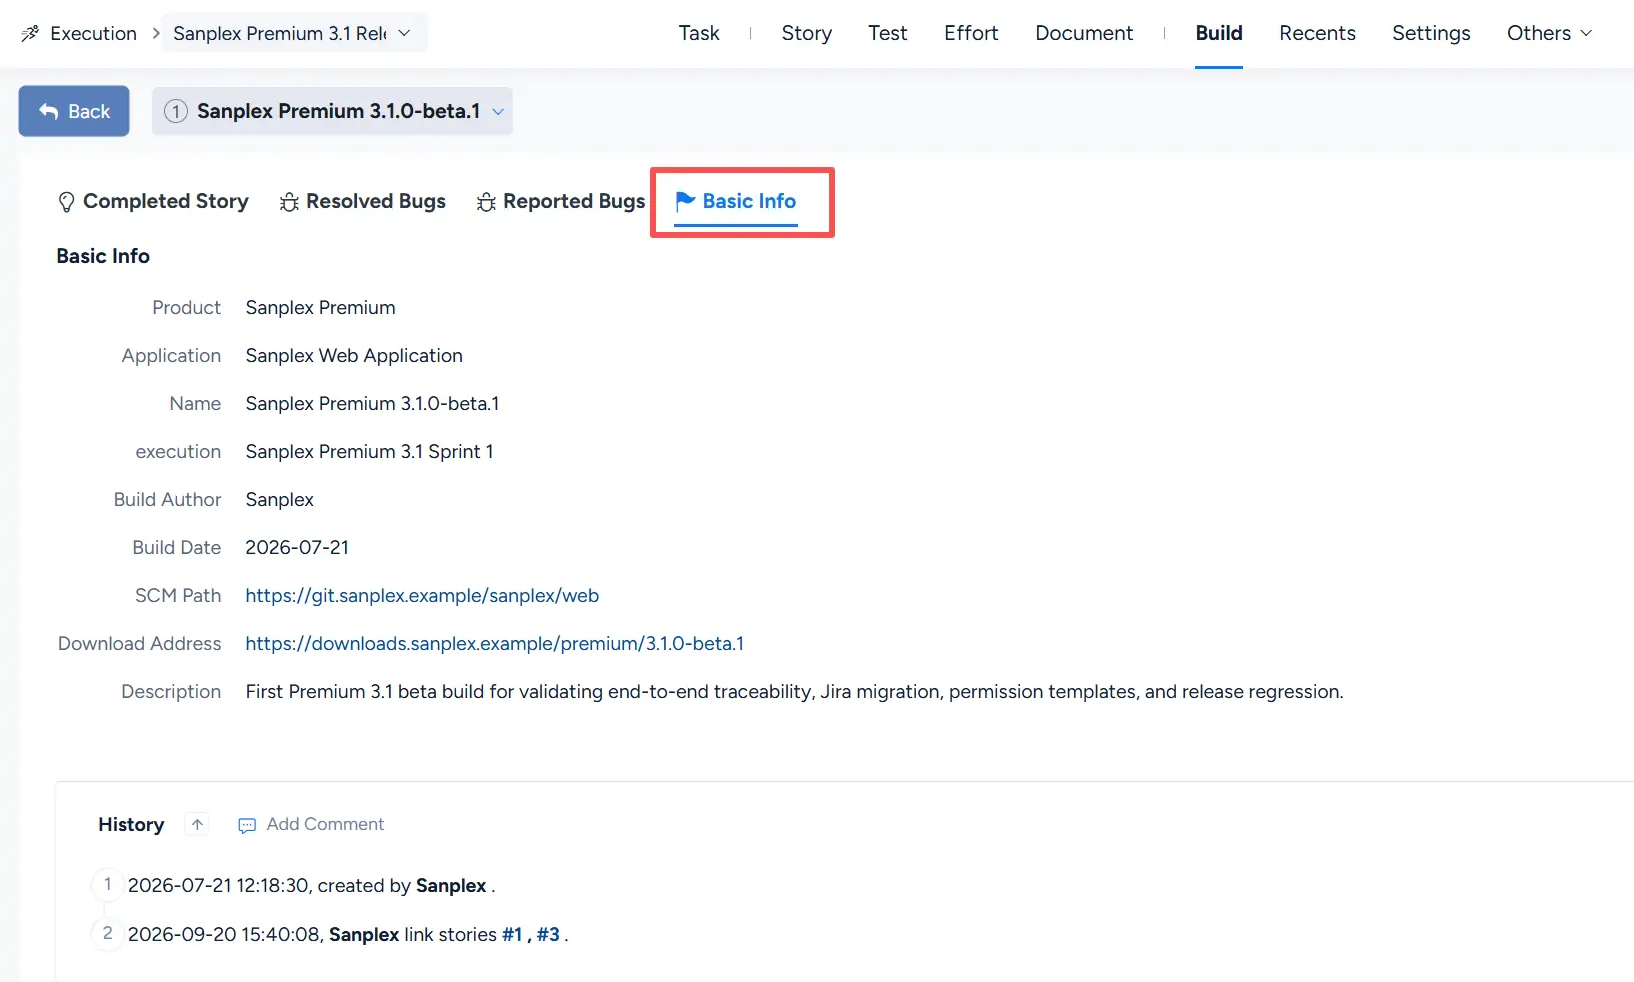
Click the build name to open its detail page. Under Basic Info, you can view information such as the Product, Application, Name, Execution, Build Author, Build Date, SCM Path, Download Address, and Description.
II. Create an Integrated Build
At the project level, the Create Build page provides an Integrated Build option.
When Integrated Build is set to No, select the related Execution for the build.
When Integrated Build is set to Yes, the Inclusive Build field is available for selecting builds to include in the integrated build.
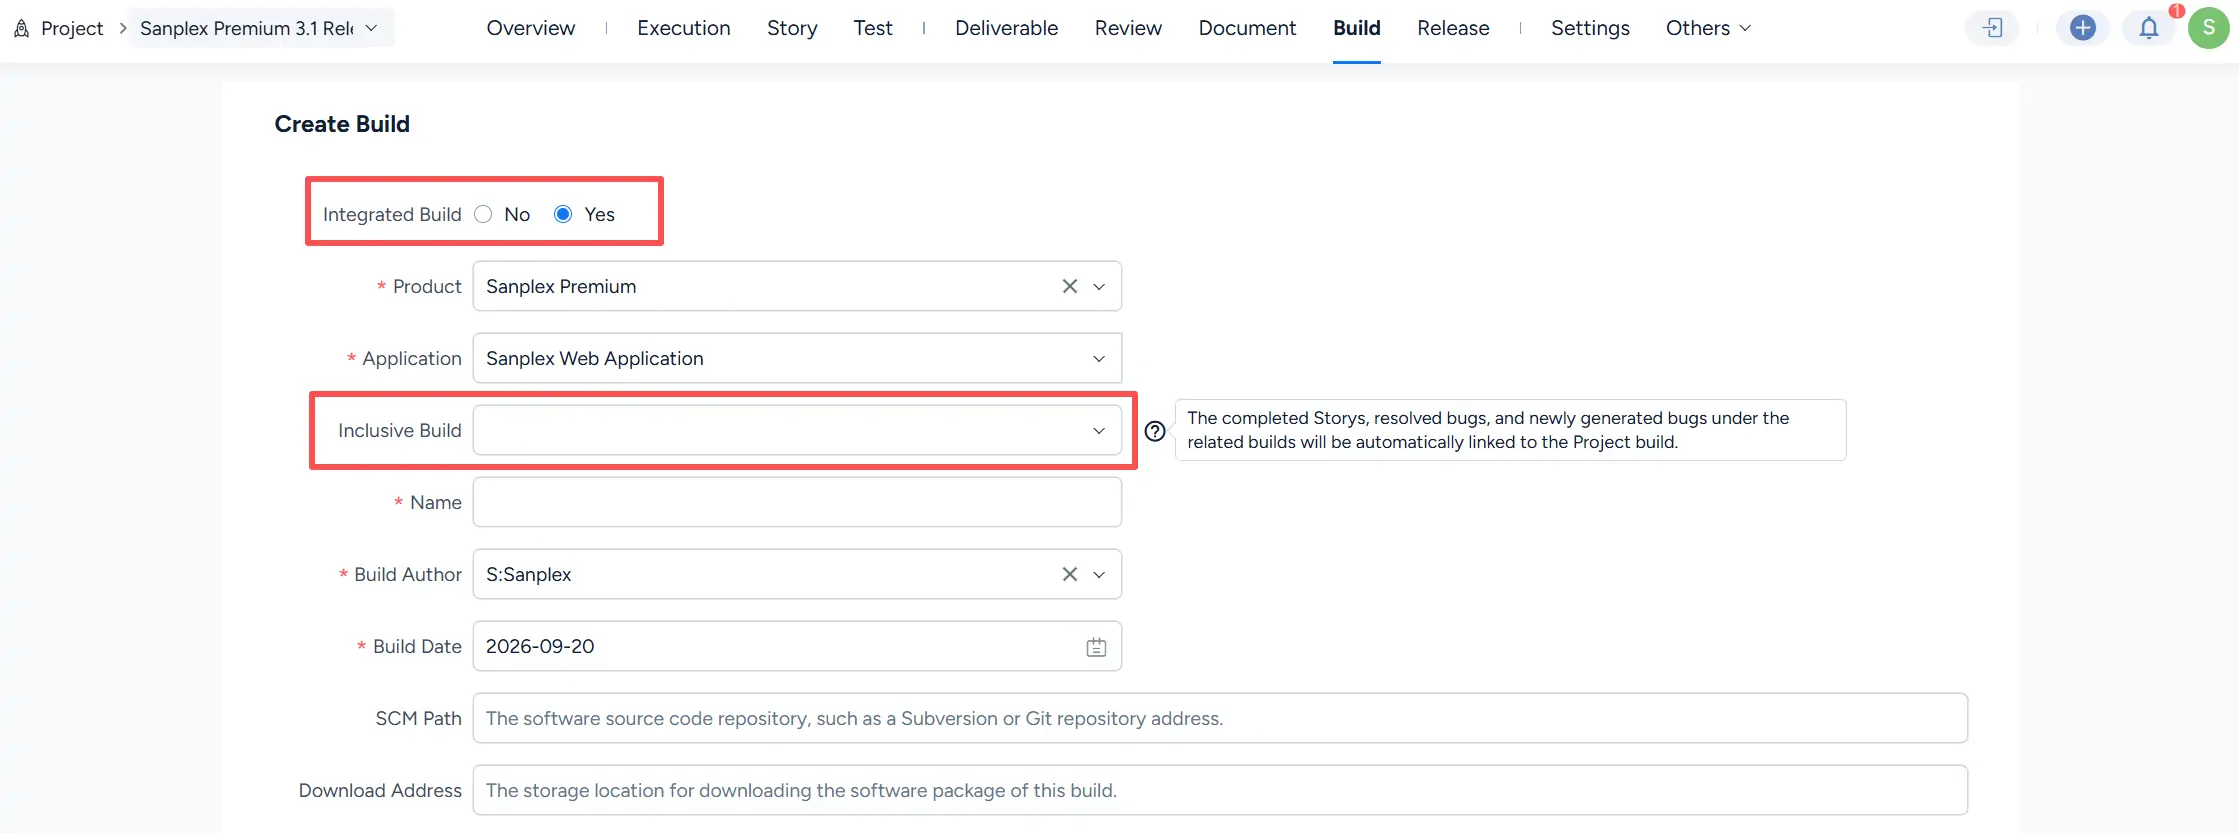
An integrated build can consolidate related build content for integration-level validation.
III. Submit a Test Request
After the build is ready for testing, click Submit Test Request in the build list.

On the Submit Request page, confirm or complete the test request information, including Product, Build, Type, Owner, Members, Start, End, Status, Test Report, Request Name, and Priority.
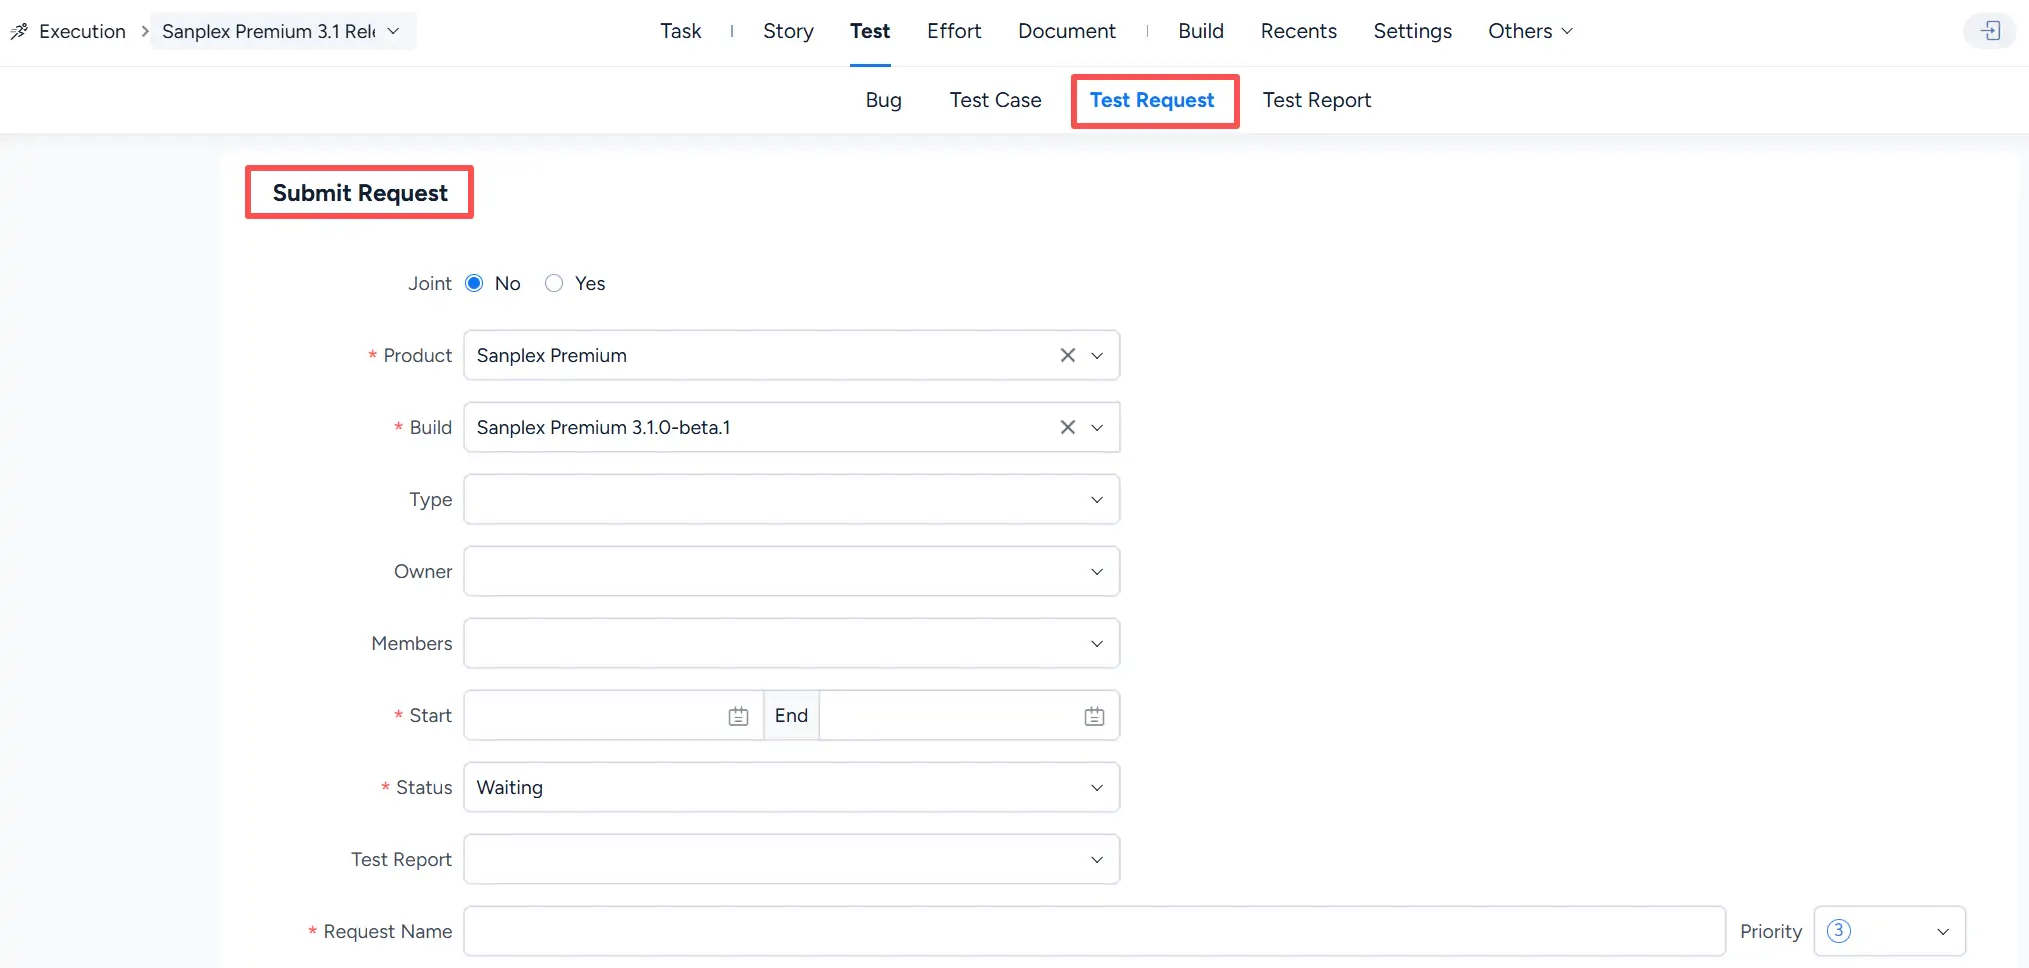
Created test requests can be viewed under Project/Execution > Test > Test Request. The list displays information such as the request name, priority, product, build, execution, owner, planned dates, and status.



