
Product
1. Introduction of Sanplex features
1.1. Core Management Framework
1.1.1 Program
1.1.2 Project
1.1.3 Product
1.1.4 Execution
1.1.5 Management Models
1.2. Dashboard
1.2.1 Getting Started with Tutorials
1.2.2 Quick Add
1.2.3 Notification Center
1.2.4 Effort Tracking
1.2.5 Dashboard - Project and Execution
1.2.6 Dashboard - My Work, Contribution, and Recents
1.2.7 Dashboard - Approval
1.2.8 Contacts
1.3. Program
1.3.1 Program List
1.3.2 Program Kanban
1.3.3 Create Program
1.3.4 Create Sub-Programs
1.3.5 Project Charter Management
1.4. Product
1.4.1 Create Product
1.4.2 Manage Modules
1.4.3 Multi-Branch and Multi-Platform Management
1.4.4 Manage Plans
1.4.5 Manage Requirements
1.4.6 Requirement Reviews
1.4.7 Requirement Status and Phase
1.4.8 Create Releases
1.4.9 Track Progress
1.4.10 Business Requirements and Multi-Level Requirements
1.5. Project
1.5.1 Scrum Project
1.5.2. Waterfall Project
1.5.2.1 Manage Project Phases
1.5.2.2 Project Design
1.5.2.3 Project Matrix
1.5.2.4 Project Reports and Earned Value Management
1.5.2.5 Project Baselines
1.5.2.6 Project Change
1.5.3. Kanban Project
1.5.3.1 Set Up Kanban Projects
1.5.3.2 Configure Kanban Boards
1.5.3.3 Use Kanban Boards
1.5.4 Hybrid Agile Project
1.5.5 Hybrid Waterfall Project
1.5.6. Project Settings
1.5.6.1 Project Setup
1.5.6.2 Project Executions
1.5.6.3 Project Requirements
1.5.6.4 Project Builds
1.5.6.5 Project Tests
1.6. Admin Settings
1.6.1 Confluence Data Import
1.7. Workflow

Manage Plans

2026-08-16 01:05:20
Sanplex Content
322
Last edited by Jing WANG on 2026-08-16 01:07:42
Share links
Summary: Learn how to create and manage Plans in Sanplex, control Plan statuses, perform batch operations, and use Kanban View to organize, update, and sort Plans.

Planning is an important part of product management. A clear Plan helps teams define priorities, organize work in sequence, and keep Product development aligned with its objectives.

Plans are useful in several ways. They help product managers organize Product development, define delivery schedules, and adjust priorities. They also provide other teams and stakeholders with visibility into planned work and Product progress. In addition, Plans can be linked to Stories, Projects, and Executions to support coordinated delivery.

1. Manage Plans

On the Product Plan page, you can view existing Plans and click Create Plan to create a new one. Click a Plan title to open its details page.

Product Plan List showing existing Plans with their statuses, dates, and related information, with the Create Plan button highlighted in the upper-right corner.

When creating a Plan, enter information such as the parent Plan, Platform or Branch, title, start and end dates, and description. The system also displays the title of the most recently created Plan as a reference.
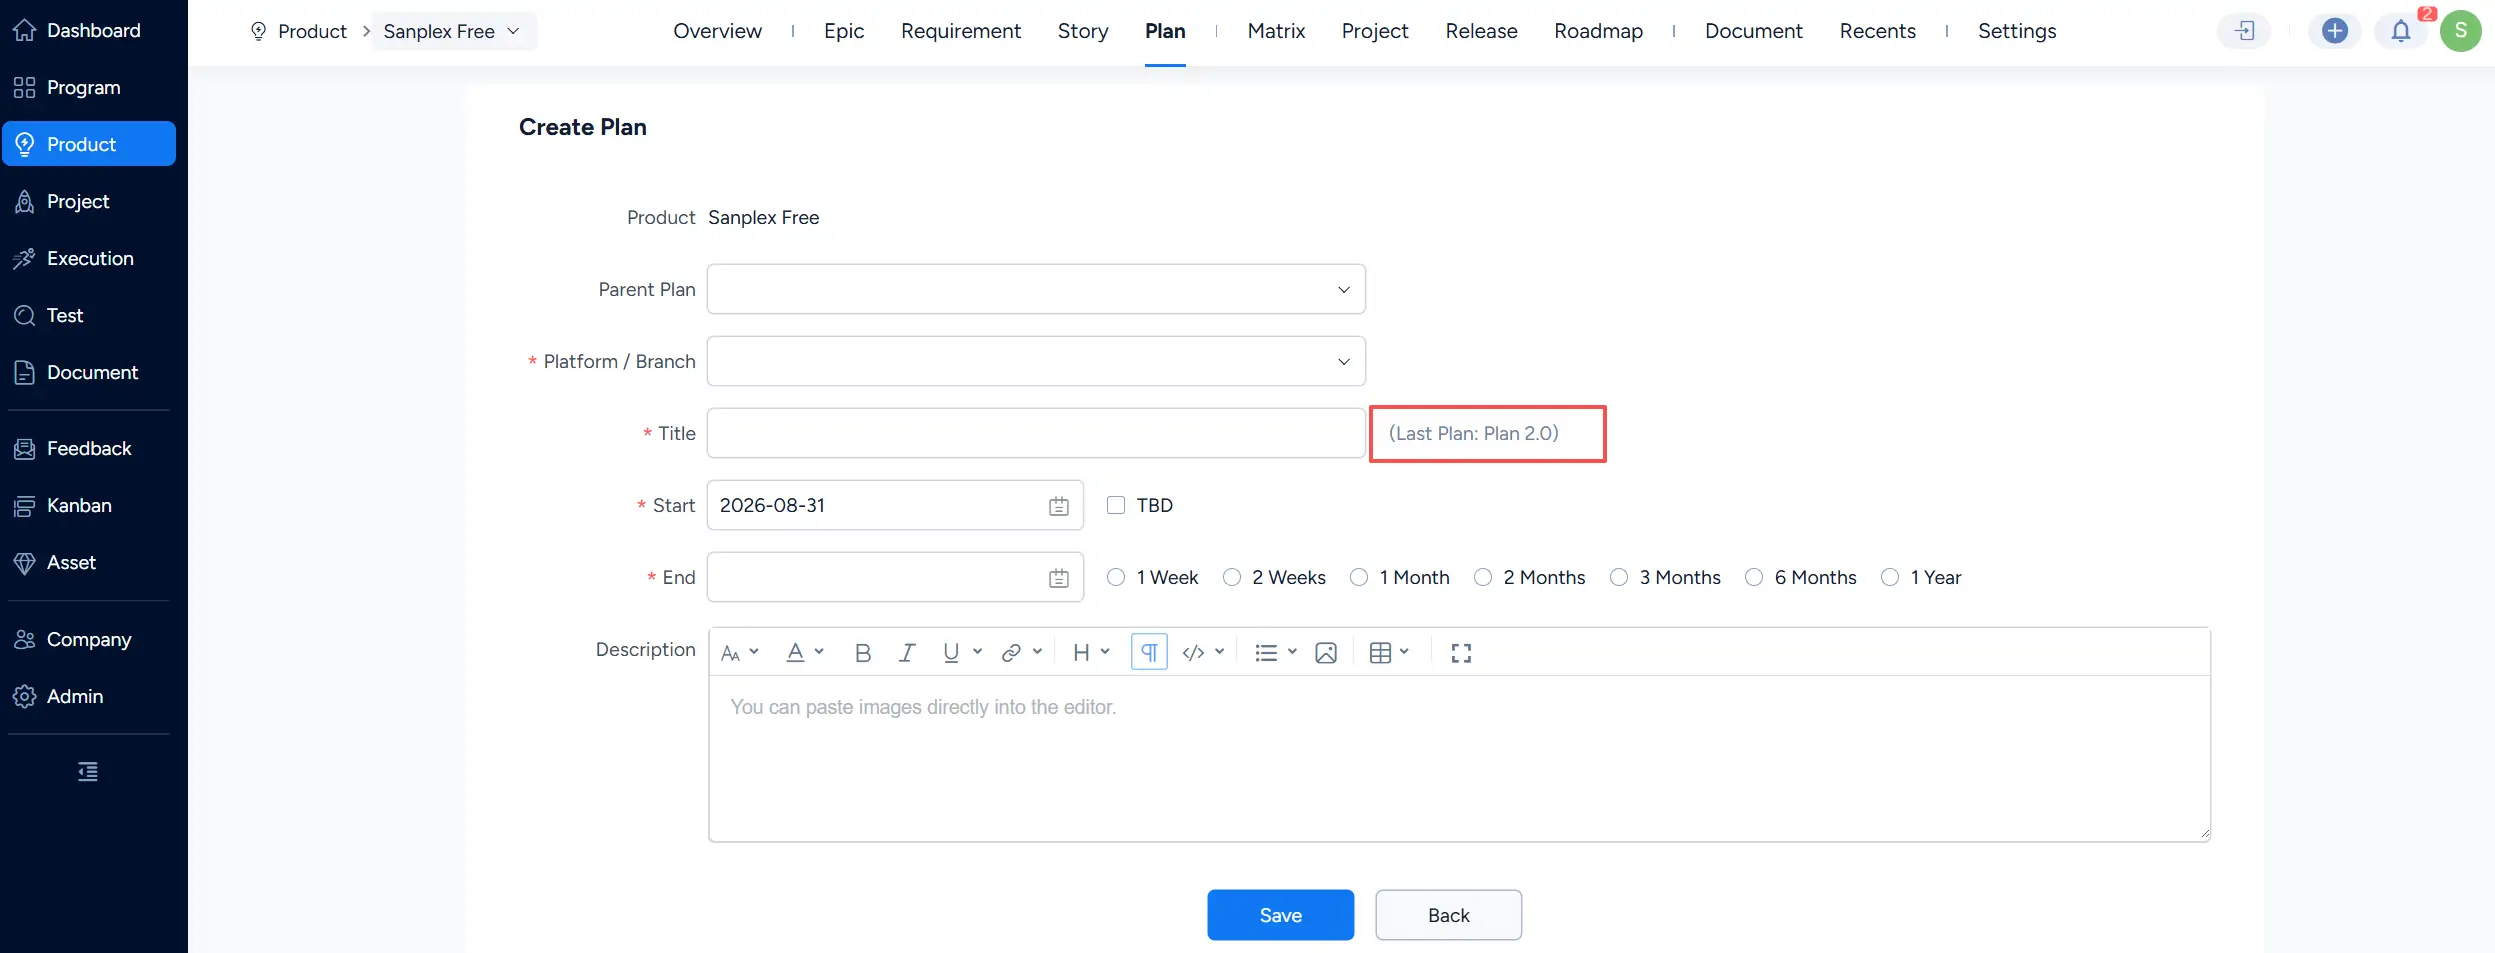
Create Plan page showing fields for Parent Plan, Platform or Branch, Title, Start and End dates, and Description, with the most recently created Plan displayed beside the Title field.

The actions available for a Plan include creating an Execution, linking Stories or Bugs, editing the Plan, changing its status, creating sub-plans, and deleting the Plan. Available actions vary depending on the current status of the Plan.

Plan List with the action menu expanded for a Plan, showing available actions such as Create Execution, Link Story, Link Bug, Edit Plan, Start Plan, Close Plan, and Delete Plan.

2. Plan Status Management

You can filter Plans by status using All, Uncompleted, Waiting, Doing, Completed, and Closed.

Plan List with status filters including All, Uncompleted, Waiting, Doing, Completed, and Closed, and the Status column showing Plans in Waiting and Doing states.

Completed and Closed Plans cannot be used to create Executions. When linking a Product Plan to a Project or Execution, only eligible Plans within the applicable time range can be selected.

Plan operation permissions can be configured through the corresponding permission settings in Admin.

For parent Plans, the status is determined by the statuses of their sub-plans, so status actions are not displayed directly for the parent Plan. For other Plans, available status actions depend on the current Plan status.

On the Plan details page, available operations are displayed in the action bar, including actions such as Start Plan, Close Plan, Create Subplans, Edit, and Delete.

Plan details page showing Linked Stories, Linked Bugs, and Details, with actions including Effort, Start Plan, Close Plan, Create Subplans, Edit, and Delete in the upper-right action bar.

Plans also support batch editing. Select multiple Plans and click Edit at the bottom of the Plan List.

Plan List with multiple Plans selected and the Edit button highlighted in the batch action bar at the bottom of the list.


On the Batch Edit page, you can update fields such as the Platform or Branch, title, status, start date, and end date for the selected Plans.
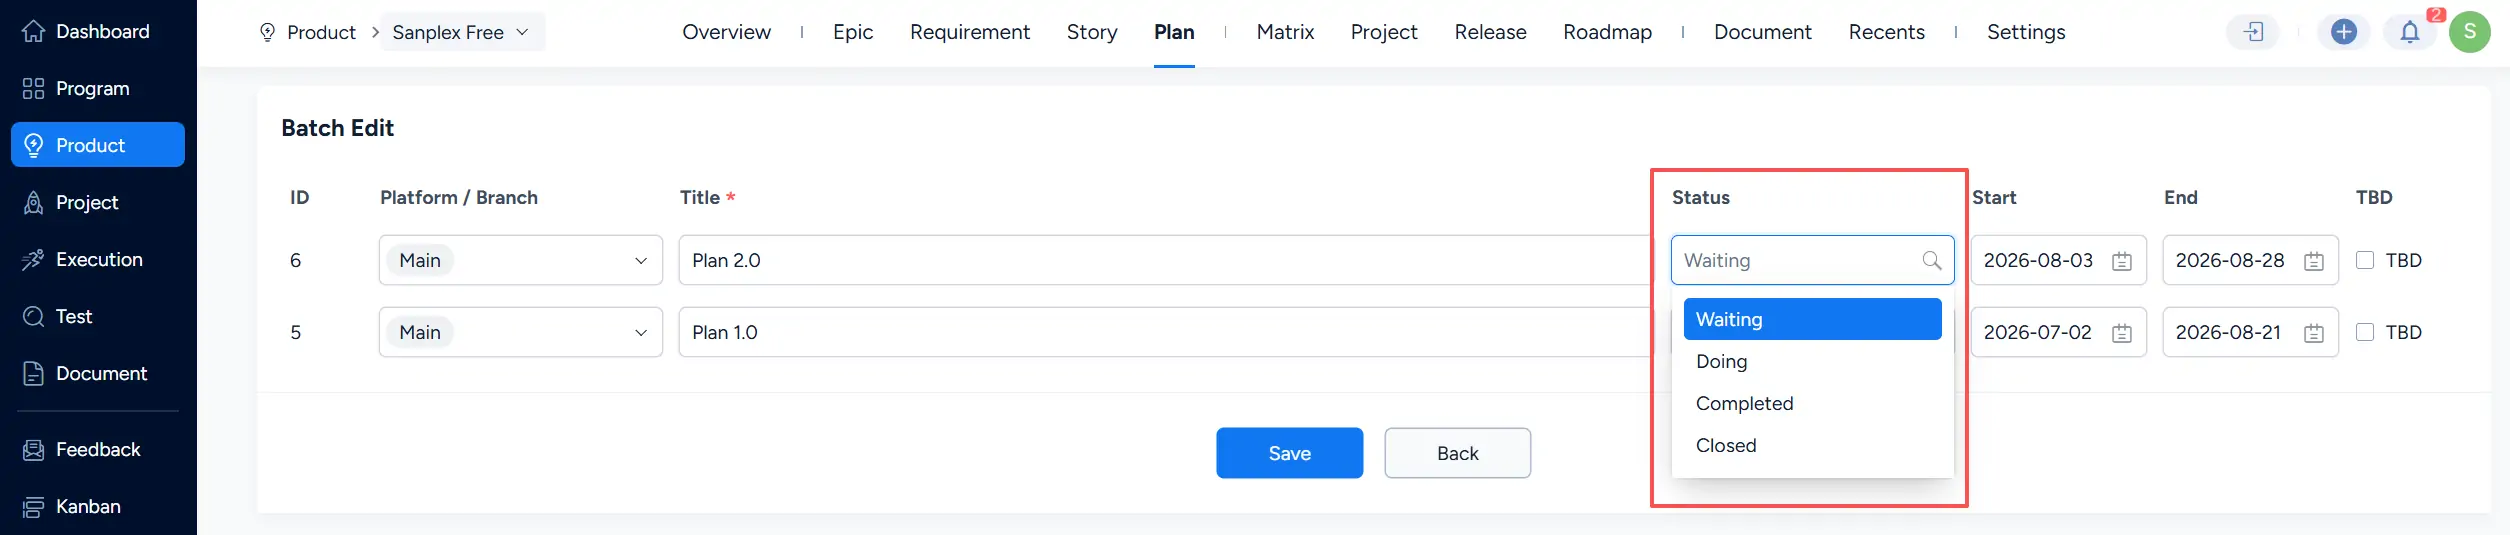
Batch Edit page for multiple Plans with the Status dropdown expanded, showing Waiting, Doing, Completed, and Closed as available status options.

3. Plan Kanban View

You can switch between List View and Kanban View using the view buttons in the upper-right corner of the Plan page. The Plan page uses List View for the standard tabular display.

Plan List showing the List View and Kanban View toggle buttons in the upper-right corner beside the Create Plan button.

In Kanban View, Plans are organized into columns according to their status, including Waiting, Doing, Completed, and Closed.

Plan Kanban displaying Plans in separate Waiting, Doing, Completed, and Closed columns.

Click the More menu on a Plan card to access additional actions. These actions correspond to the operations available for the Plan in List View.
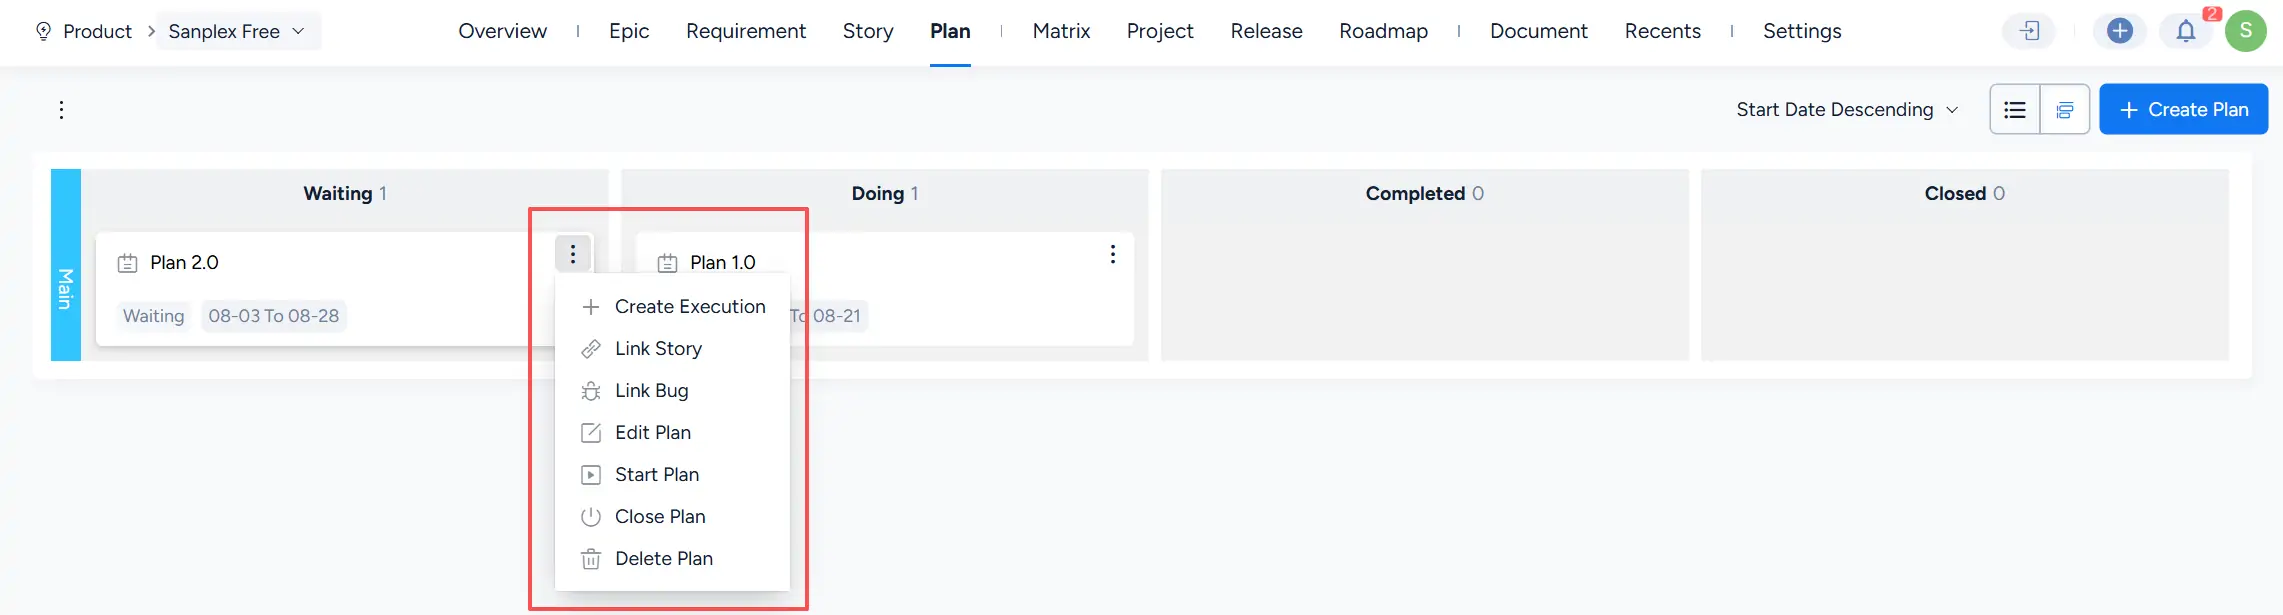
Plan Kanban with the More menu expanded for a Plan card, showing actions such as Create Execution, Link Story, Link Bug, Edit Plan, Start Plan, Close Plan, and Delete Plan.

You can also drag a Plan card between status columns to change its status.
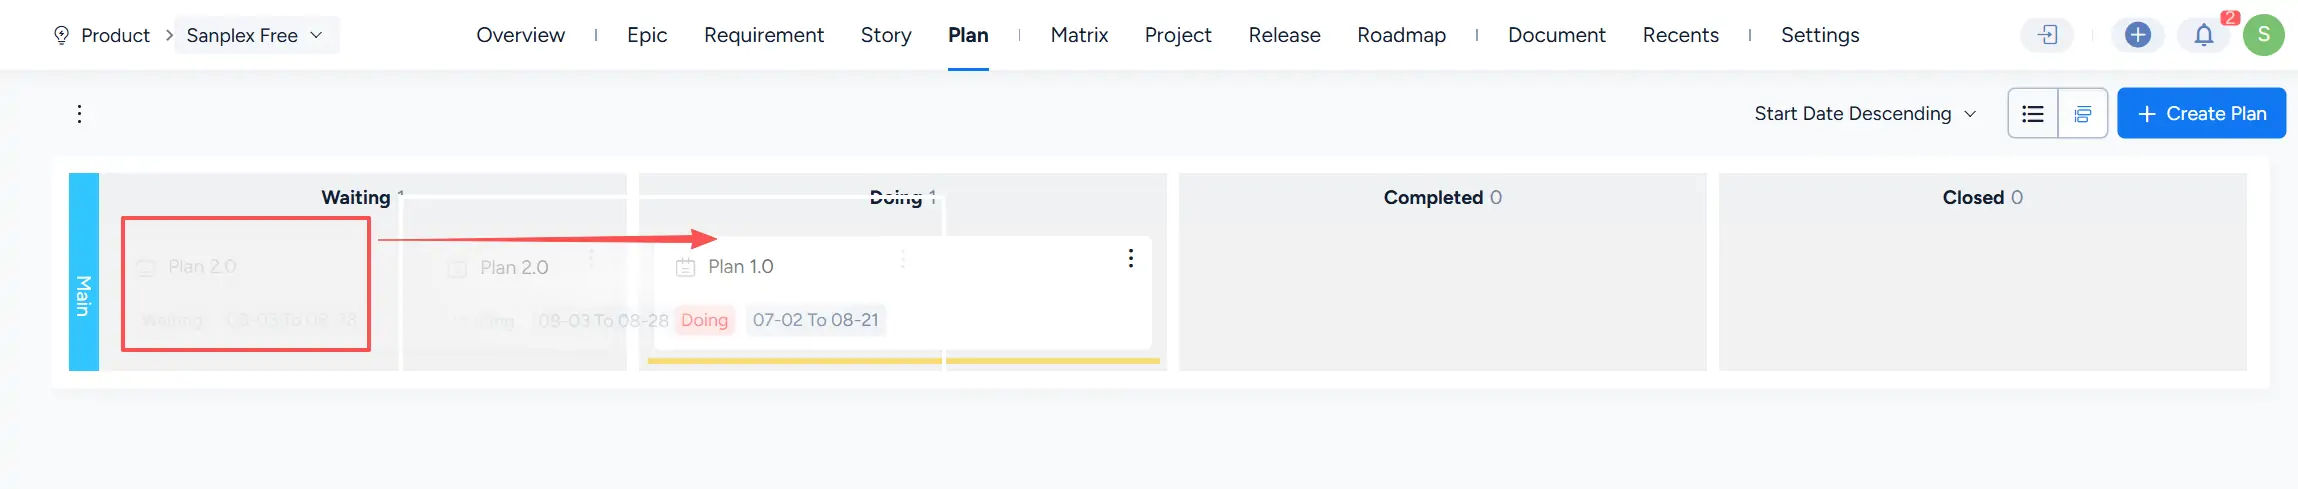
Plan Kanban showing Plan 2.0 being dragged from the Waiting column toward the Doing column, captured midway through the drag-and-drop operation before the status change is confirmed.

When a status change requires confirmation, Sanplex displays a confirmation dialog. For example, moving a Waiting Plan to Doing triggers a prompt asking whether you want to start the Plan.
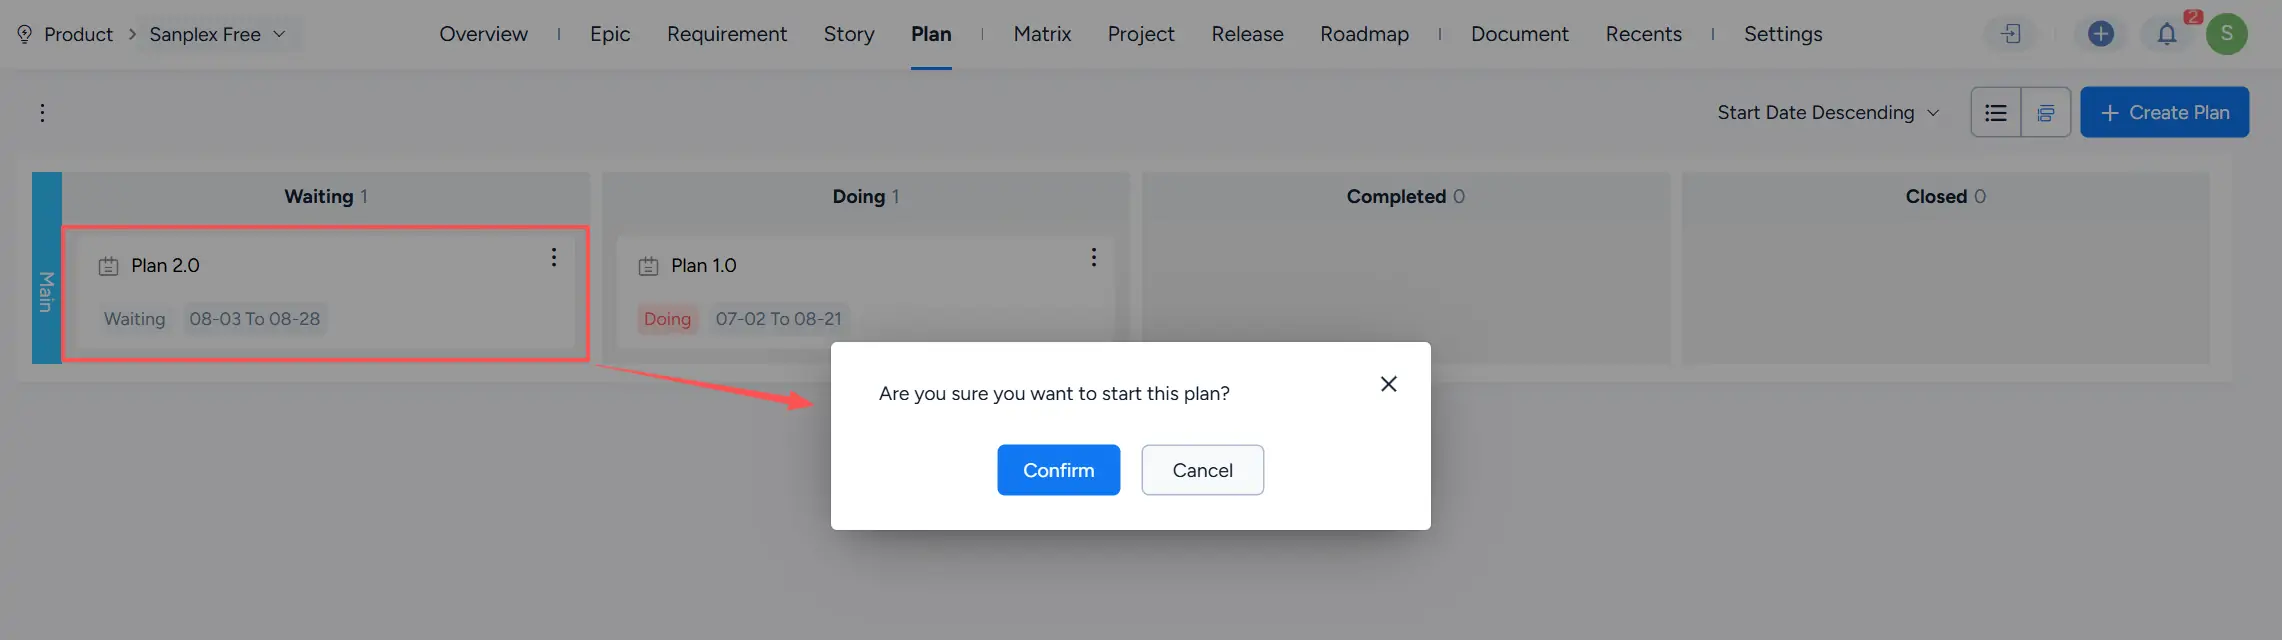
Confirmation dialog displayed after moving a Plan from Waiting toward Doing, asking whether the user is sure they want to start the Plan, with Confirm and Cancel buttons.

In Kanban View, Plans are sorted by Start Date Descending by default. You can change the sorting order to Start Date Ascending, Title Descending, or Title Ascending.

Plan Kanban with the sorting menu expanded, showing Start Date Descending, Start Date Ascending, Title Descending, and Title Ascending options.

Write a Comment
Comment will be posted after it is reviewed.
