

Catalog
Feature Overview
After the development team completes a set of Stories or bug fixes, they can create a Build and submit it for testing.
Using builds in software configuration management helps define the scope of testing, improve collaboration between developers and testers, and manage testing and bug-fix activities across different builds.
After a Build is ready for testing, the team can submit a Test Request for the Build. The request can then be tracked under Test > Test Request, while related test results can be viewed under Test Report.
Use Cases
- After the development team completes Stories or resolves bugs, Project Builds help define the scope of the corresponding testing activities.
- Completed Stories, resolved bugs, and reported bugs associated with a Build provide testers with clear information about the Build content and testing scope.
- Project teams can manage Builds associated with different Executions, Products, and Applications.
- For integration testing, multiple existing Builds can be included in an Integrated Build to support broader verification across development stages.
I. Create a Build
1. Create a Build
After the development team completes Stories or resolves bugs, the corresponding source code version can be prepared in the source code repository.
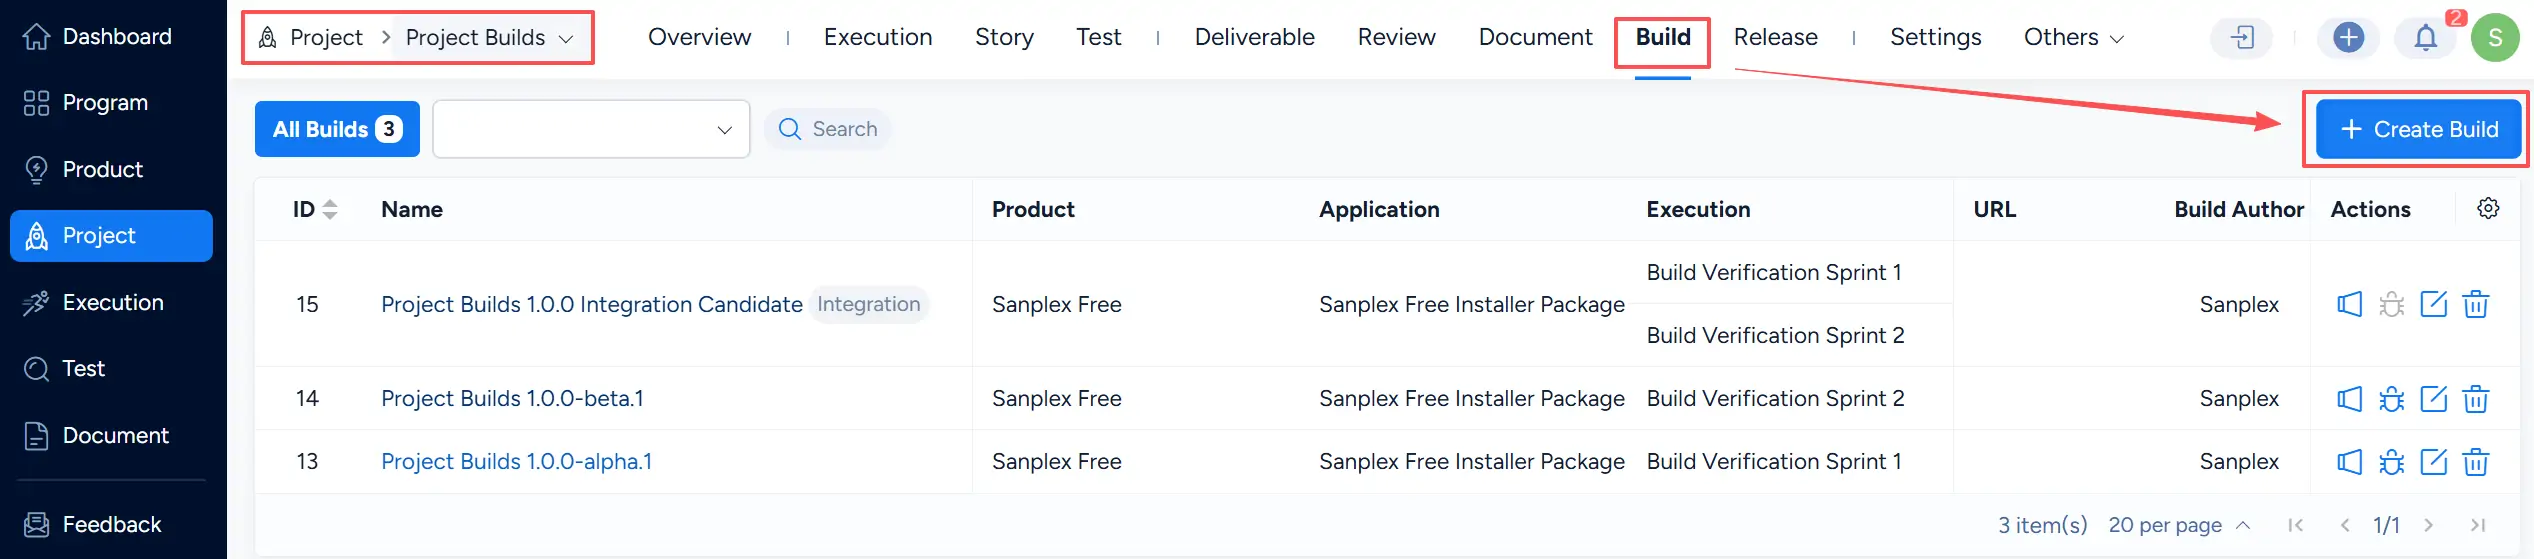
In a project, go to Build and click Create Build.
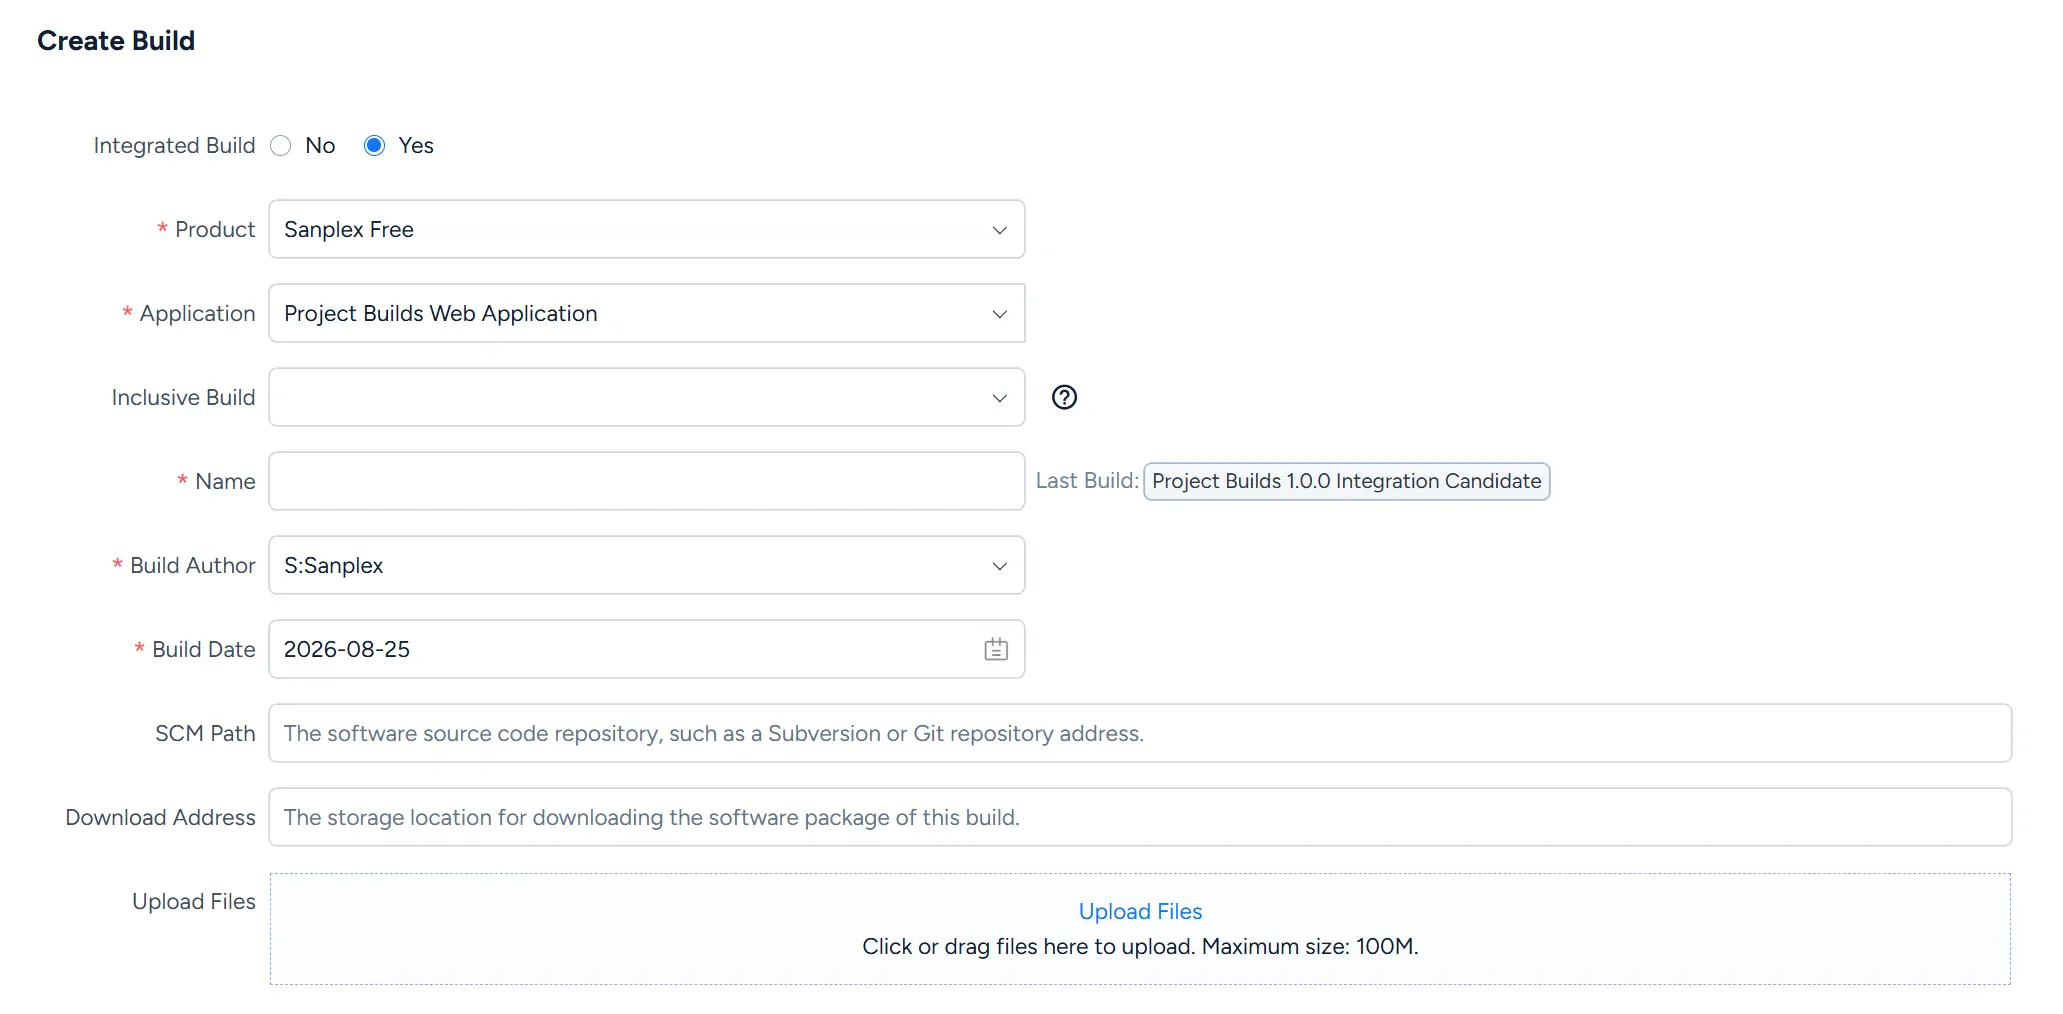
On the Create Build page, configure the Build information. Available fields include Integrated Build, Product, Application, Inclusive Build, Name, Build Author, and Build Date.
You can also provide an SCM Path, Download Address, and upload files related to the Build.
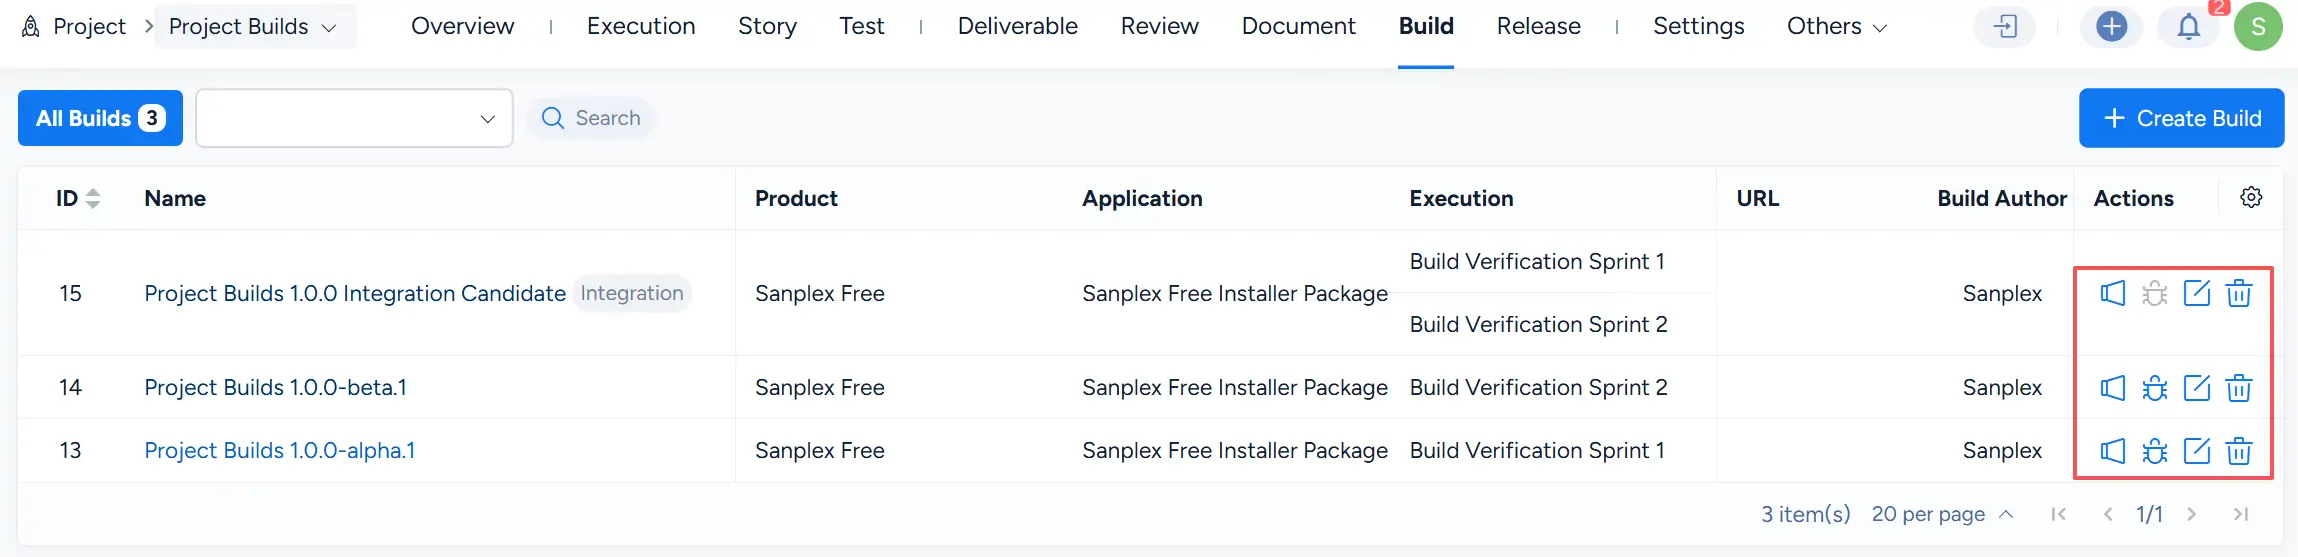
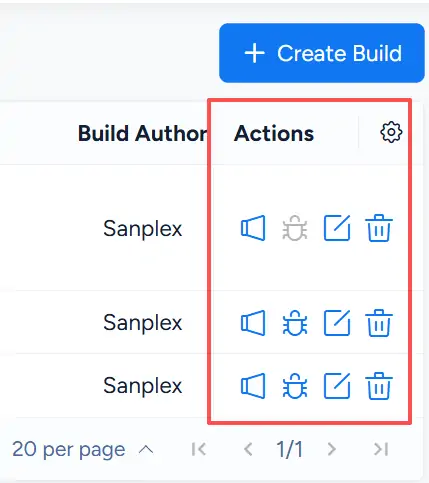
After the Build is created, it appears in the Build list. The Actions column provides the available operations for each Build.
2. Link Stories and View Bugs
Open a Build to view its related information. The Build details page organizes the content into four tabs:
- Completed Story
- Resolved Bugs
- Reported Bugs
- Basic Info
Under Completed Story, you can use the available filters to locate Stories associated with the Build.
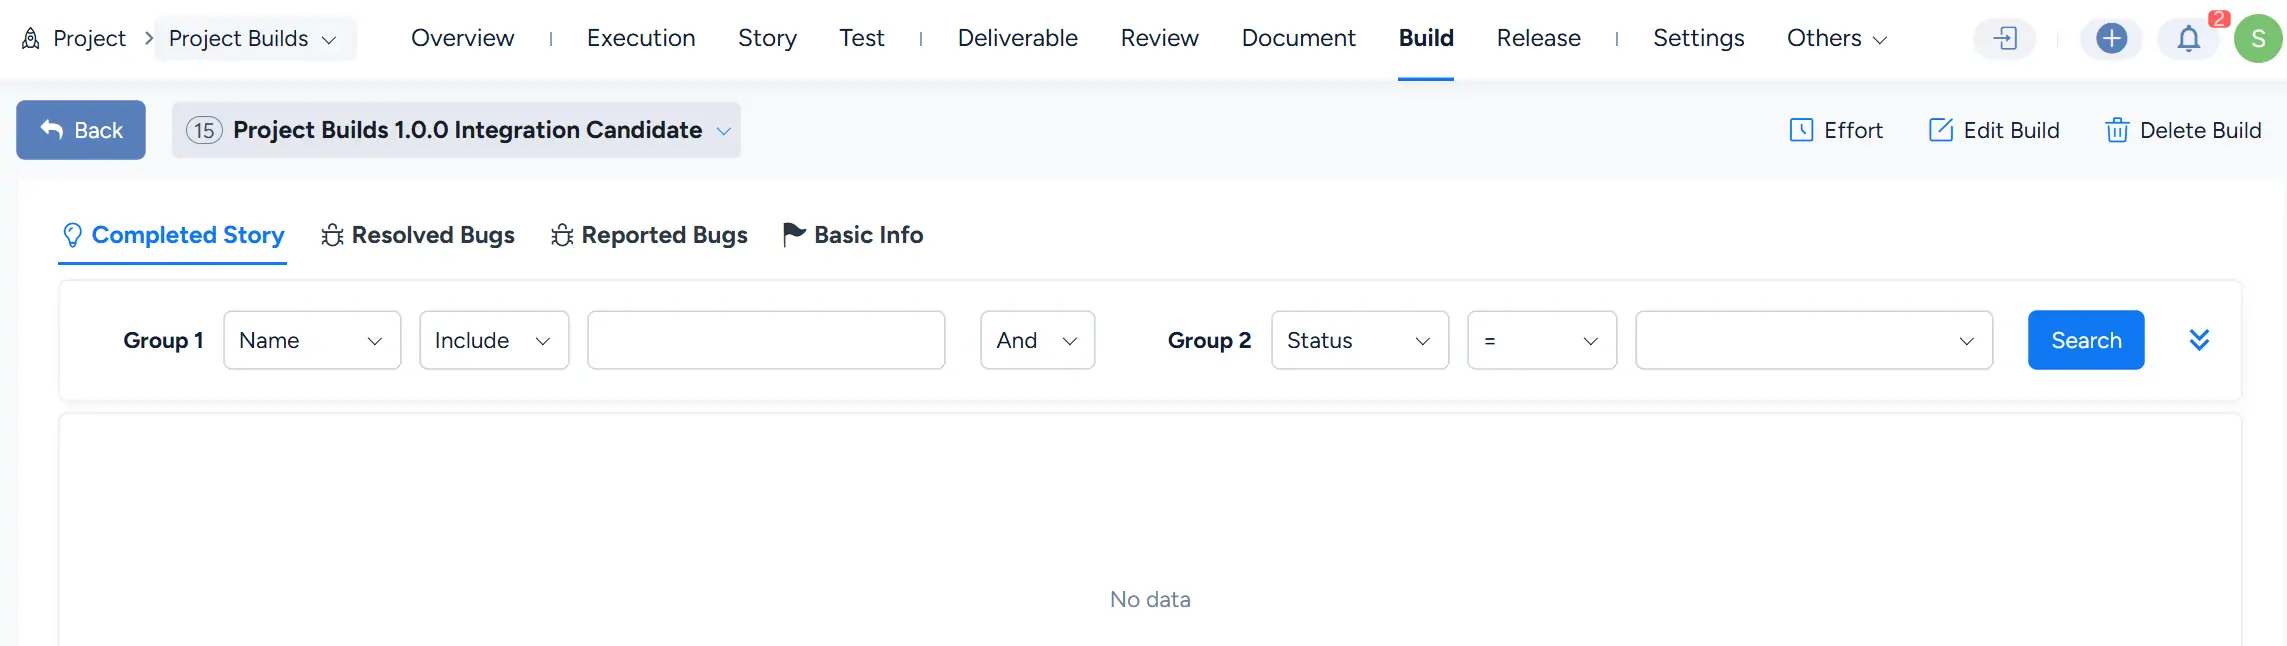
Click Link Story to associate additional completed Stories with the Build. Linked Stories are displayed in the Completed Story list together with their priority, status, creator, estimate, and phase information.
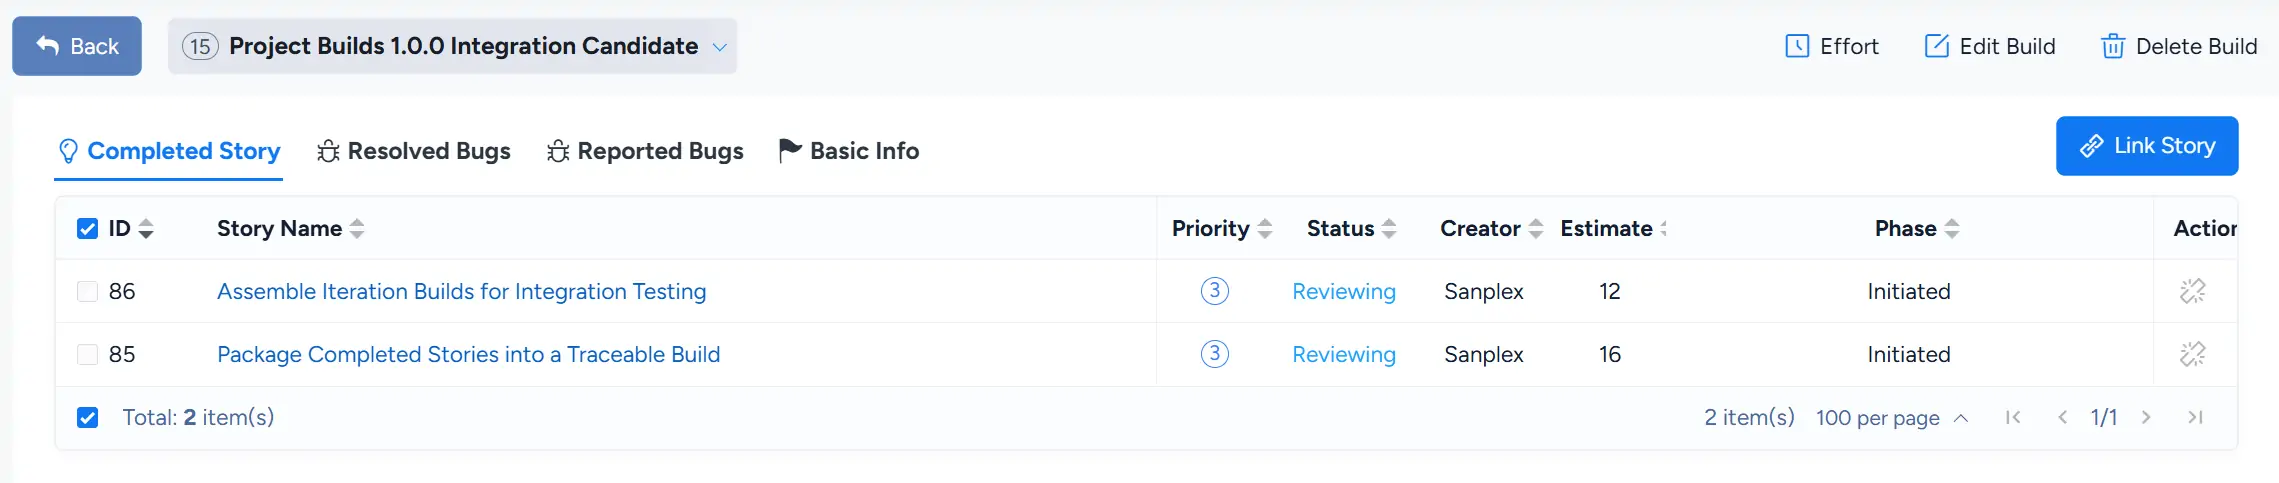
The other Build tabs provide related bug information:
- Resolved Bugs lists bugs associated with the Build as resolved bugs.
- Reported Bugs lists bugs associated with the Build as reported bugs.
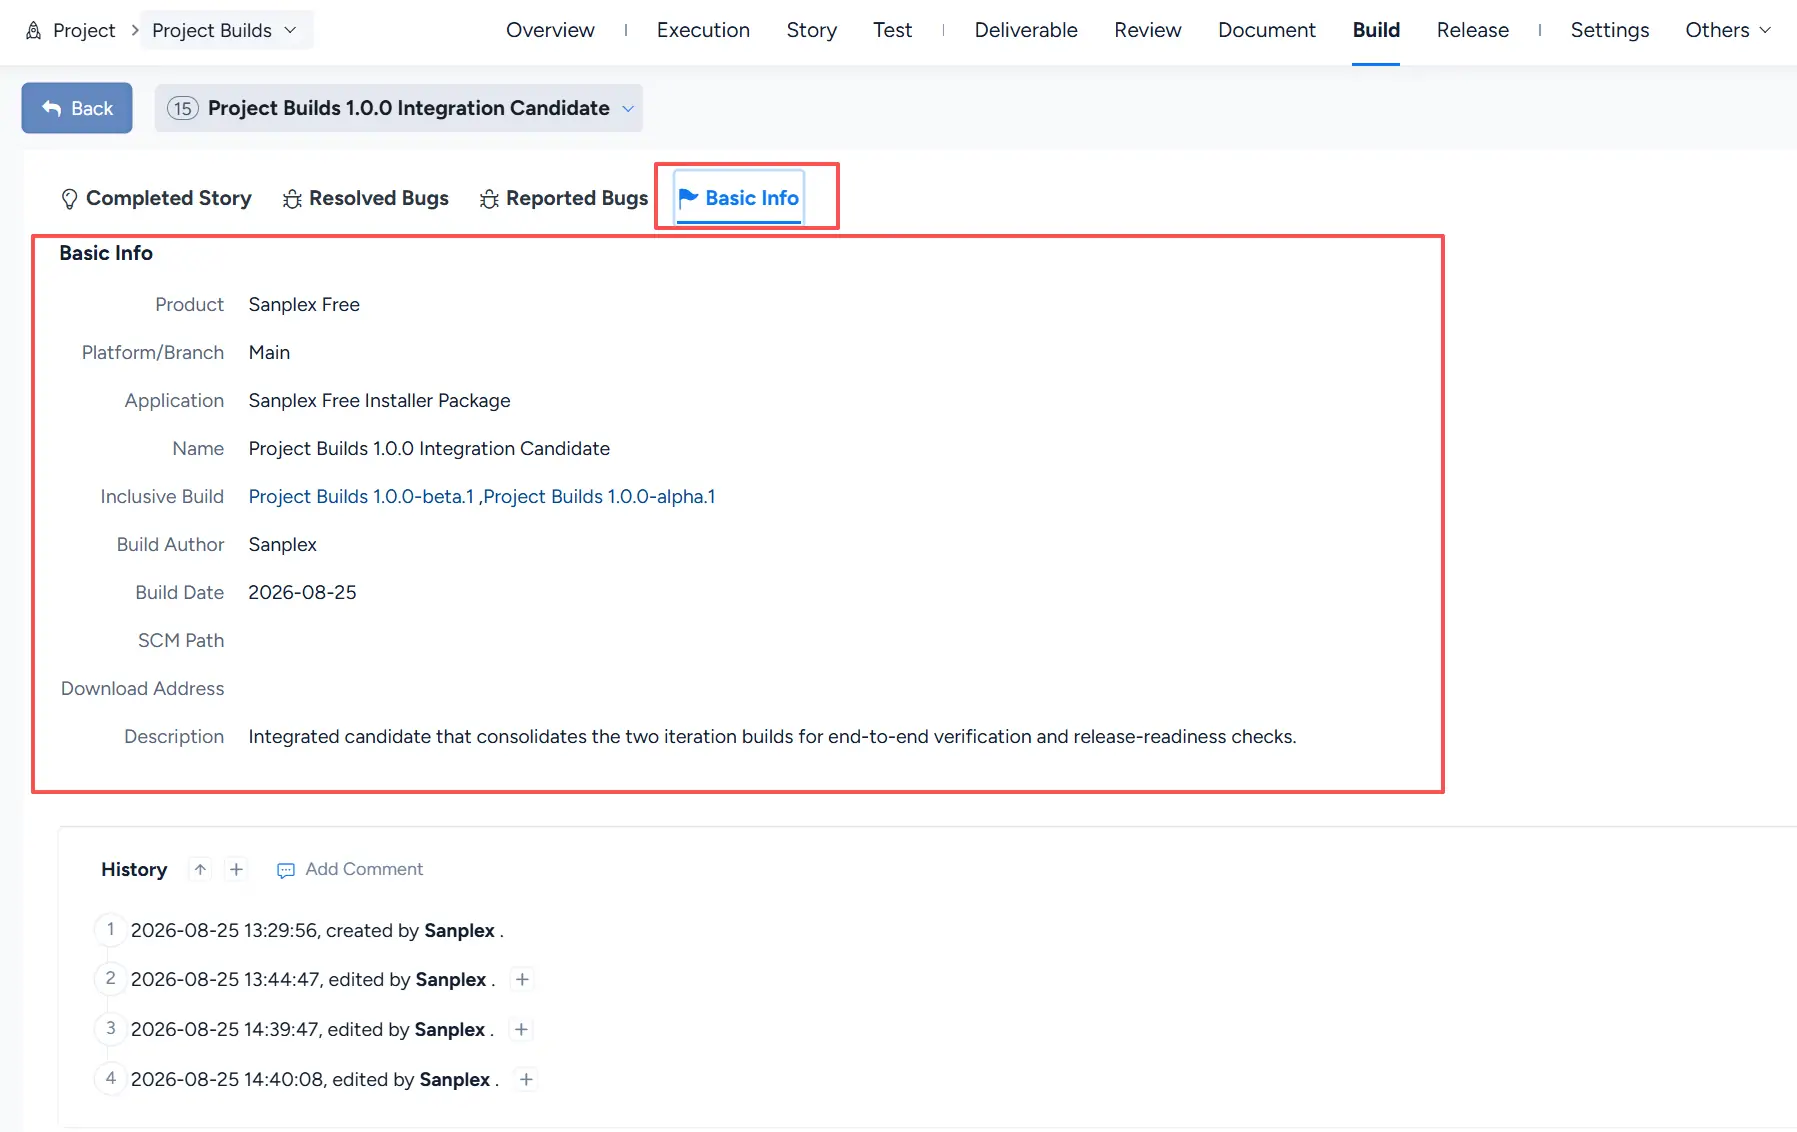
- Basic Info displays the main configuration and descriptive information for the Build.
3. Manage Builds
The Actions column provides operations for managing individual Builds, including submitting a Test Request, editing Build information, deleting a Build, and other available Build actions.
Click a Build name to open its details page. Under Basic Info, you can review information such as Product, Platform/Branch, Application, Name, Inclusive Build, Build Author, Build Date, SCM Path, Download Address, and Description.
II. Create an Integrated Build
A standard Build can be associated with a specific Execution. On the Create Build page, set Integrated Build to No, and select the required Execution and other Build information.
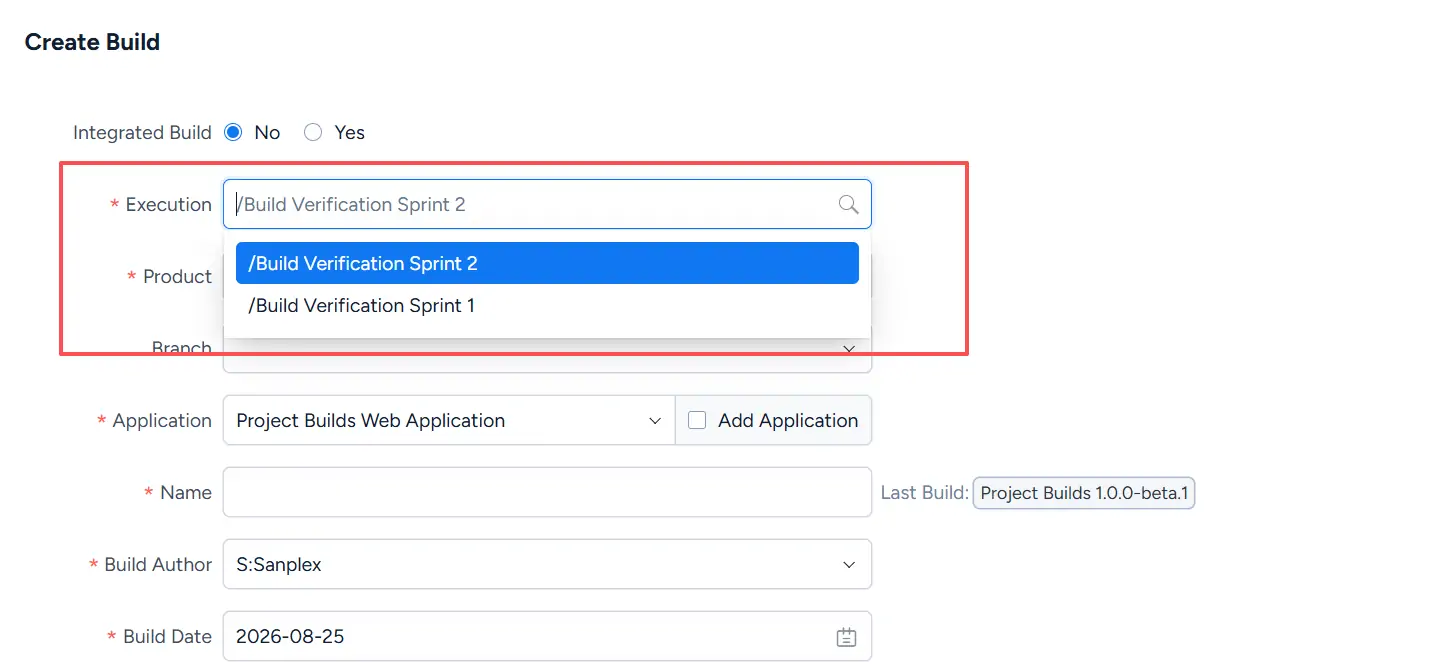
To consolidate existing Builds for broader integration testing, set Integrated Build to Yes.
Select the Product and Application, then use Inclusive Build to include the Builds that form part of the Integrated Build. Complete the remaining Build information and save the Build.
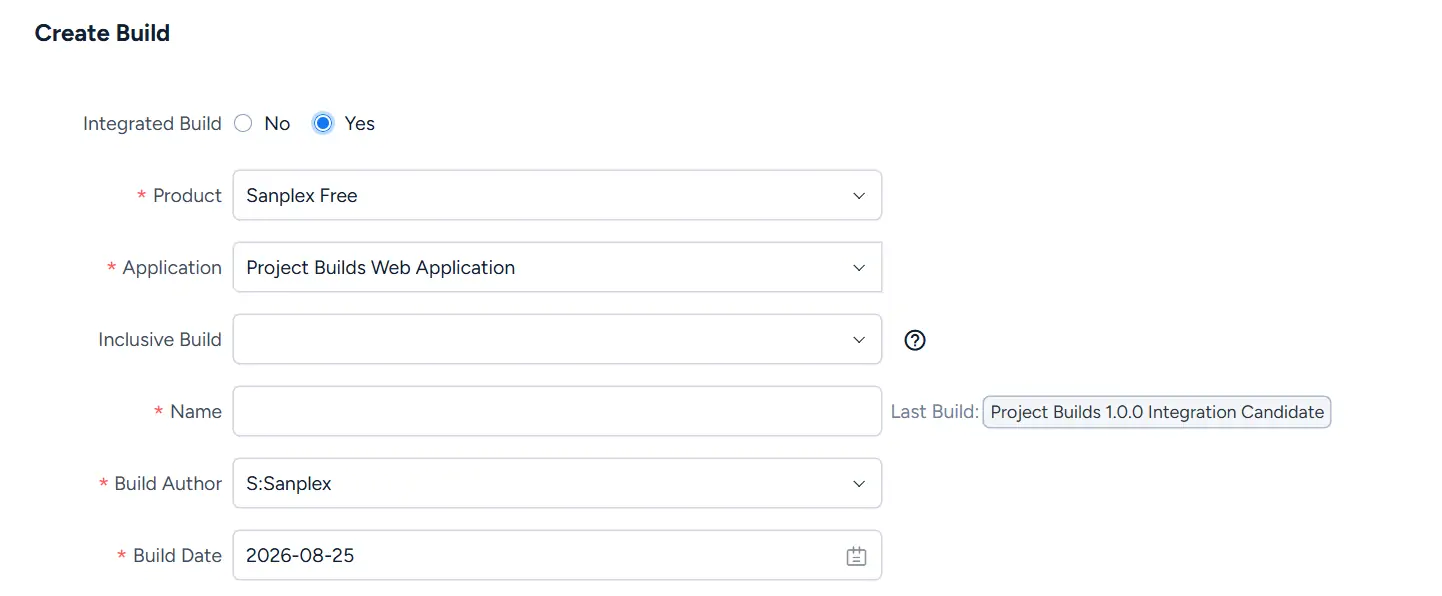
The resulting Integrated Build can be managed in the same Build list and provides access to its Completed Story, Resolved Bugs, Reported Bugs, and Basic Info.
III. Submit a Build for Testing
After the Build information and related Stories are ready, submit the Build for testing by creating a Test Request.
In the Build list, click the Submit Test Request action for the required Build.

On the Submit Request page, configure the testing information. The page provides fields including Product, Execution, Build, Type, Owner, Members, Start, End, Status, Test Report, Request Name, and Priority.
The selected Build is carried into the request so that the testing activity is associated with the correct Build.
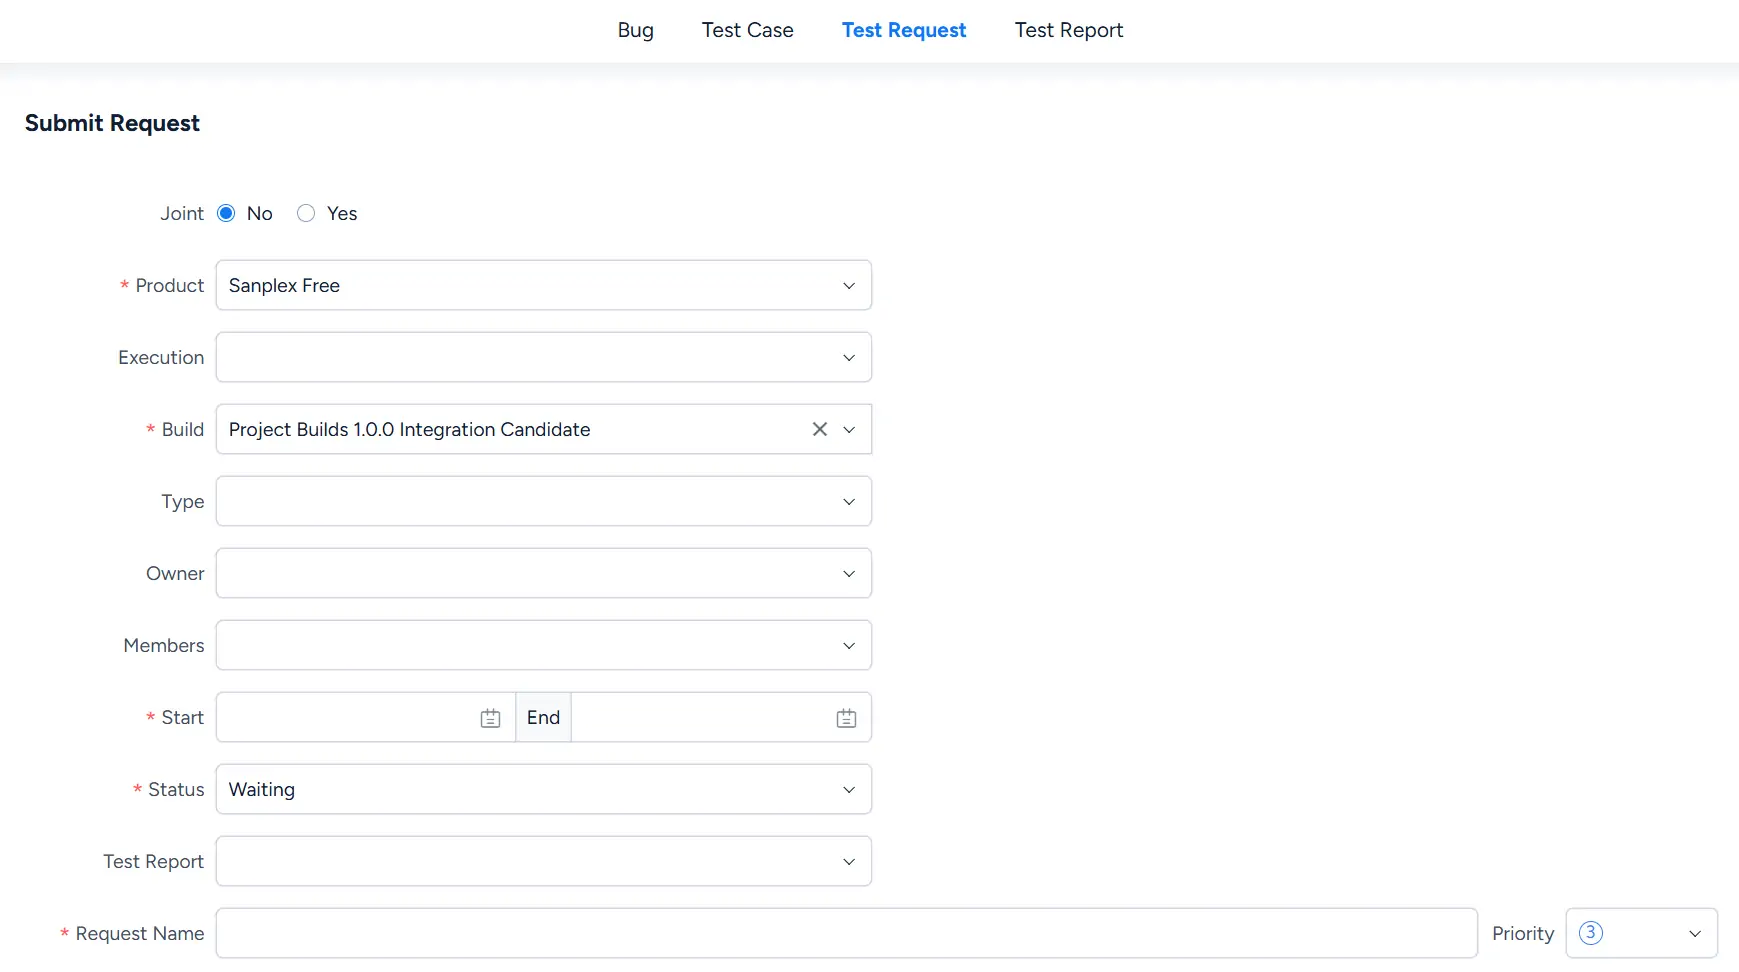
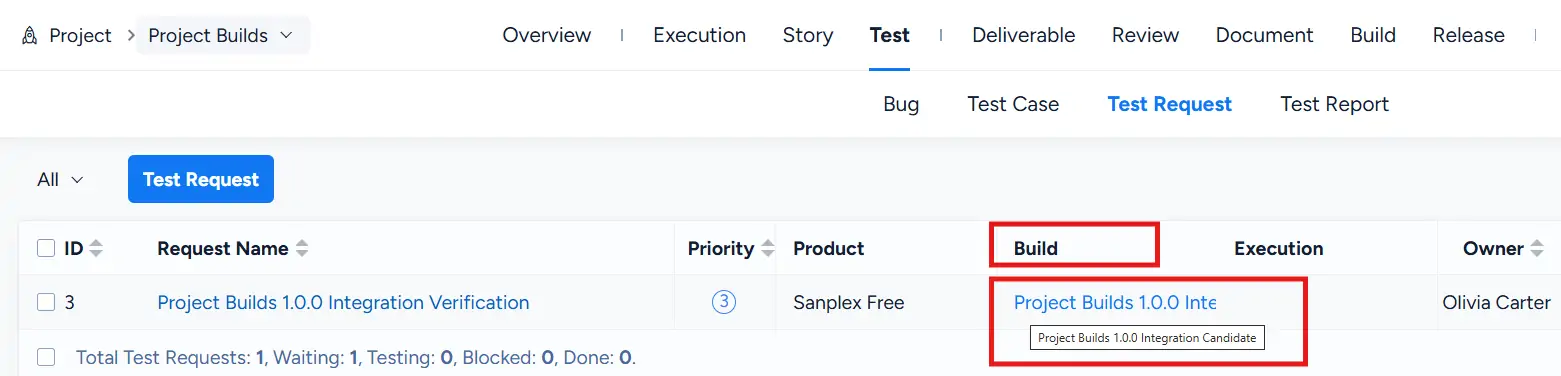
After the request is created, go to Project > Test > Test Request to view it. The list displays information such as the request name, priority, Product, Build, Execution, and owner.
Related test reports can be viewed under Project > Test > Test Report. The report list displays the report title, associated Project or Execution, Test Request, creator, creation date, and available actions.



