Catalog
Overview
The Release Management feature for Applications and Integrated Applications supports modular delivery and system integration. Delivery units under a Product can be defined as Applications, allowing each Application to maintain its own versions and release lifecycle. This provides clearer release boundaries, more flexible iteration, and better traceability.
Integrated Applications allow multiple Applications to be combined into a single delivery unit. This is useful for system integration, customer-specific delivery, and multi-application release scenarios where several independently managed Applications need to be delivered together.
Use Cases
- Modular delivery: In large Products, different deliverables may follow different release schedules and ownership models. By defining them as independent Applications, teams can manage their versions and releases separately while maintaining clear delivery boundaries.
- Customer-specific delivery or system integration: Multiple existing Applications can be combined into an Integrated Application, allowing teams to assemble different delivery packages for system-level or customer-specific releases.
- Release traceability and closed-loop management: Releases can be associated with Stories, Bugs, and Builds, helping teams identify the content included in a release and trace related changes and issues.
- Cross-team delivery coordination: Milestone releases can be used to identify important delivery checkpoints and align release planning with major product goals.
I. Application Management
1. Applications and Integrated Applications
A Product release may contain several independently deliverable components. For example, a release may include:
- an all-in-one installation package
- a Linux environment package
- a desktop client
Each deliverable can be defined as an independent Application and managed with its own versions and releases.
Multiple Applications can also be combined into an Integrated Application. This allows teams to manage an integrated delivery while retaining visibility into the individual Applications and versions included in it.
Go to Product > Release and click Manage Application to manage Applications.

II. Product (Application) Releases
After the Requirements in a Product Plan have been completed, tested, and accepted, the product manager can create a Release to record the delivered version.
For accepted Development Requirements, the Phase is set to Accepted before the corresponding Product release is prepared.
Go to Product > Release and click Create Release to create a Release.
1. Create a Release
Click Create Release, select the Application to be released, enter the Application Version, and select the relevant Build when applicable.
Sanplex can associate completed Development Requirements and resolved Bugs from the selected Build with the Release.
You can also mark the Release as a Milestone when it represents an important delivery checkpoint.
2. Link Stories and Bugs
After the Release is created, open the Release details page to review and manage its related delivery content.
The page provides separate tabs for:
- Completed Story
- Fixed Bug
- Active Bug
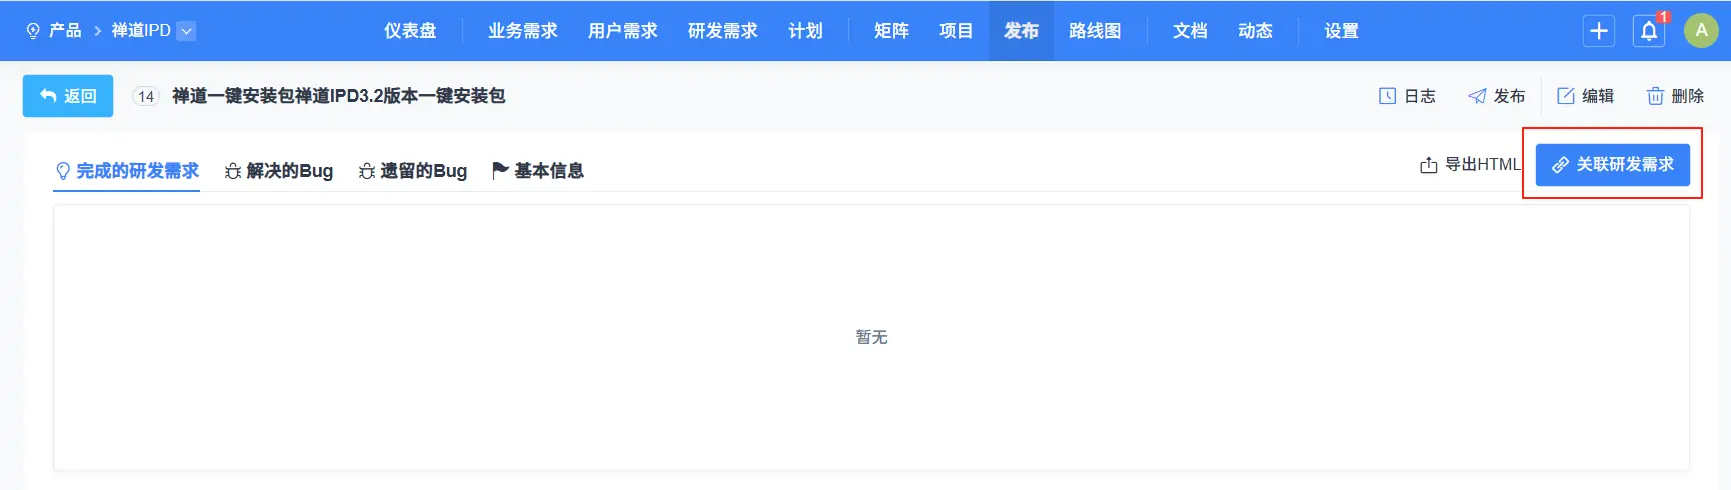
Use Link Story to link completed Stories to the Release.
III. Multi-Application (Integrated Application) Releases
To create an integrated release containing multiple Applications, first create the required individual Applications and then combine them into an Integrated Application.
1. Create Applications for Individual Deliverables
Go to Product > Release, click Manage Application, and then click Create Application.
When creating an individual Application:
- Set Integrated Application to No.
- Enter the Application name.
- Save the Application.
Repeat these steps for each independently managed deliverable.
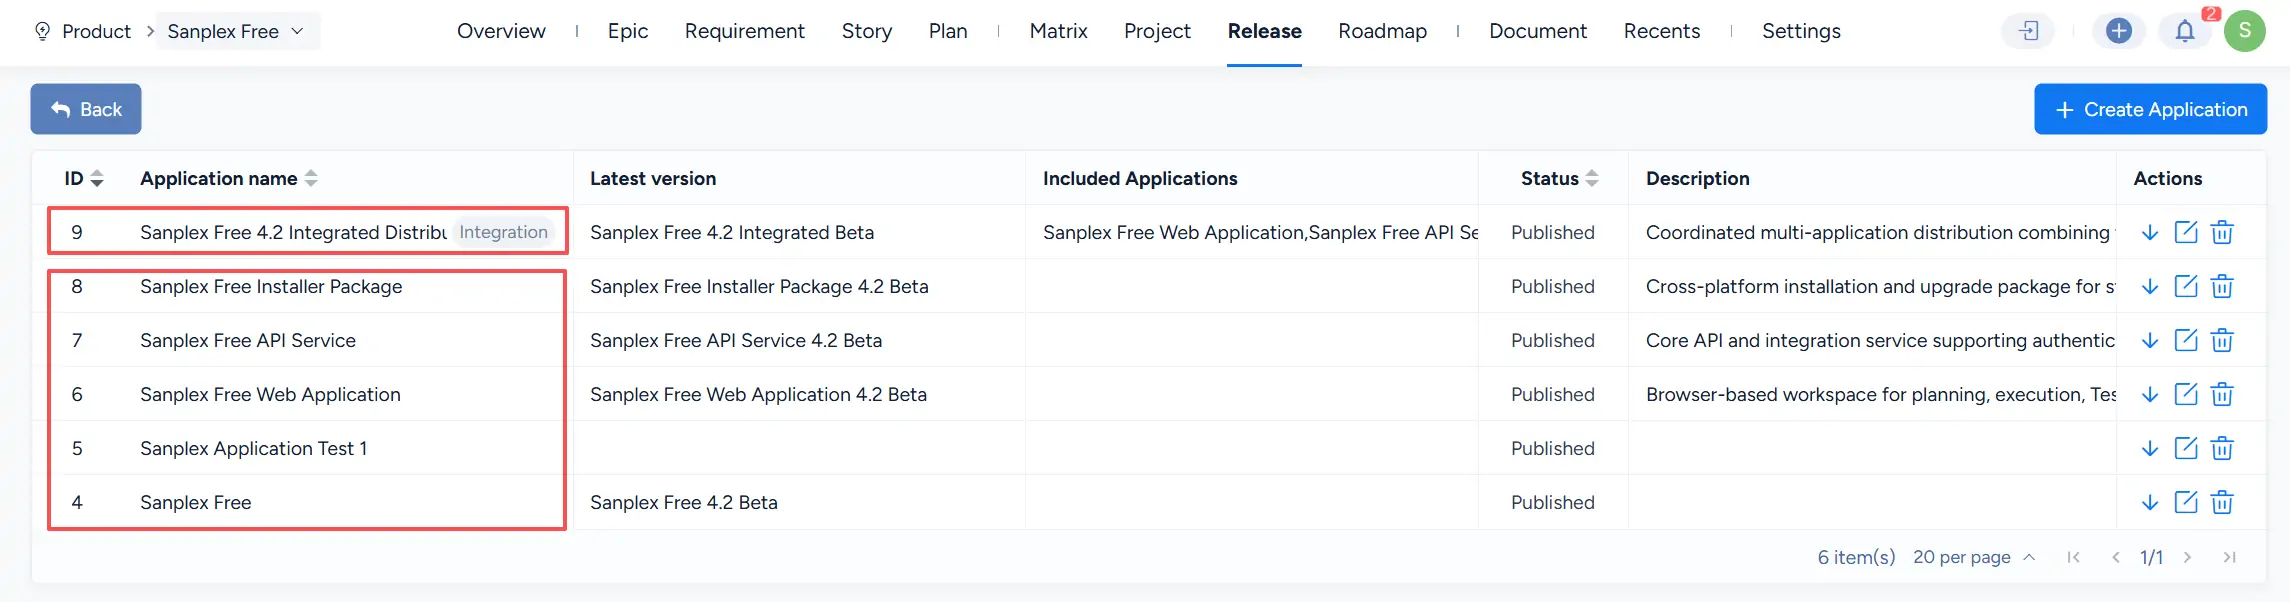
The Application management page displays standalone Applications together with their latest versions and status.
2. Create an Integrated Application
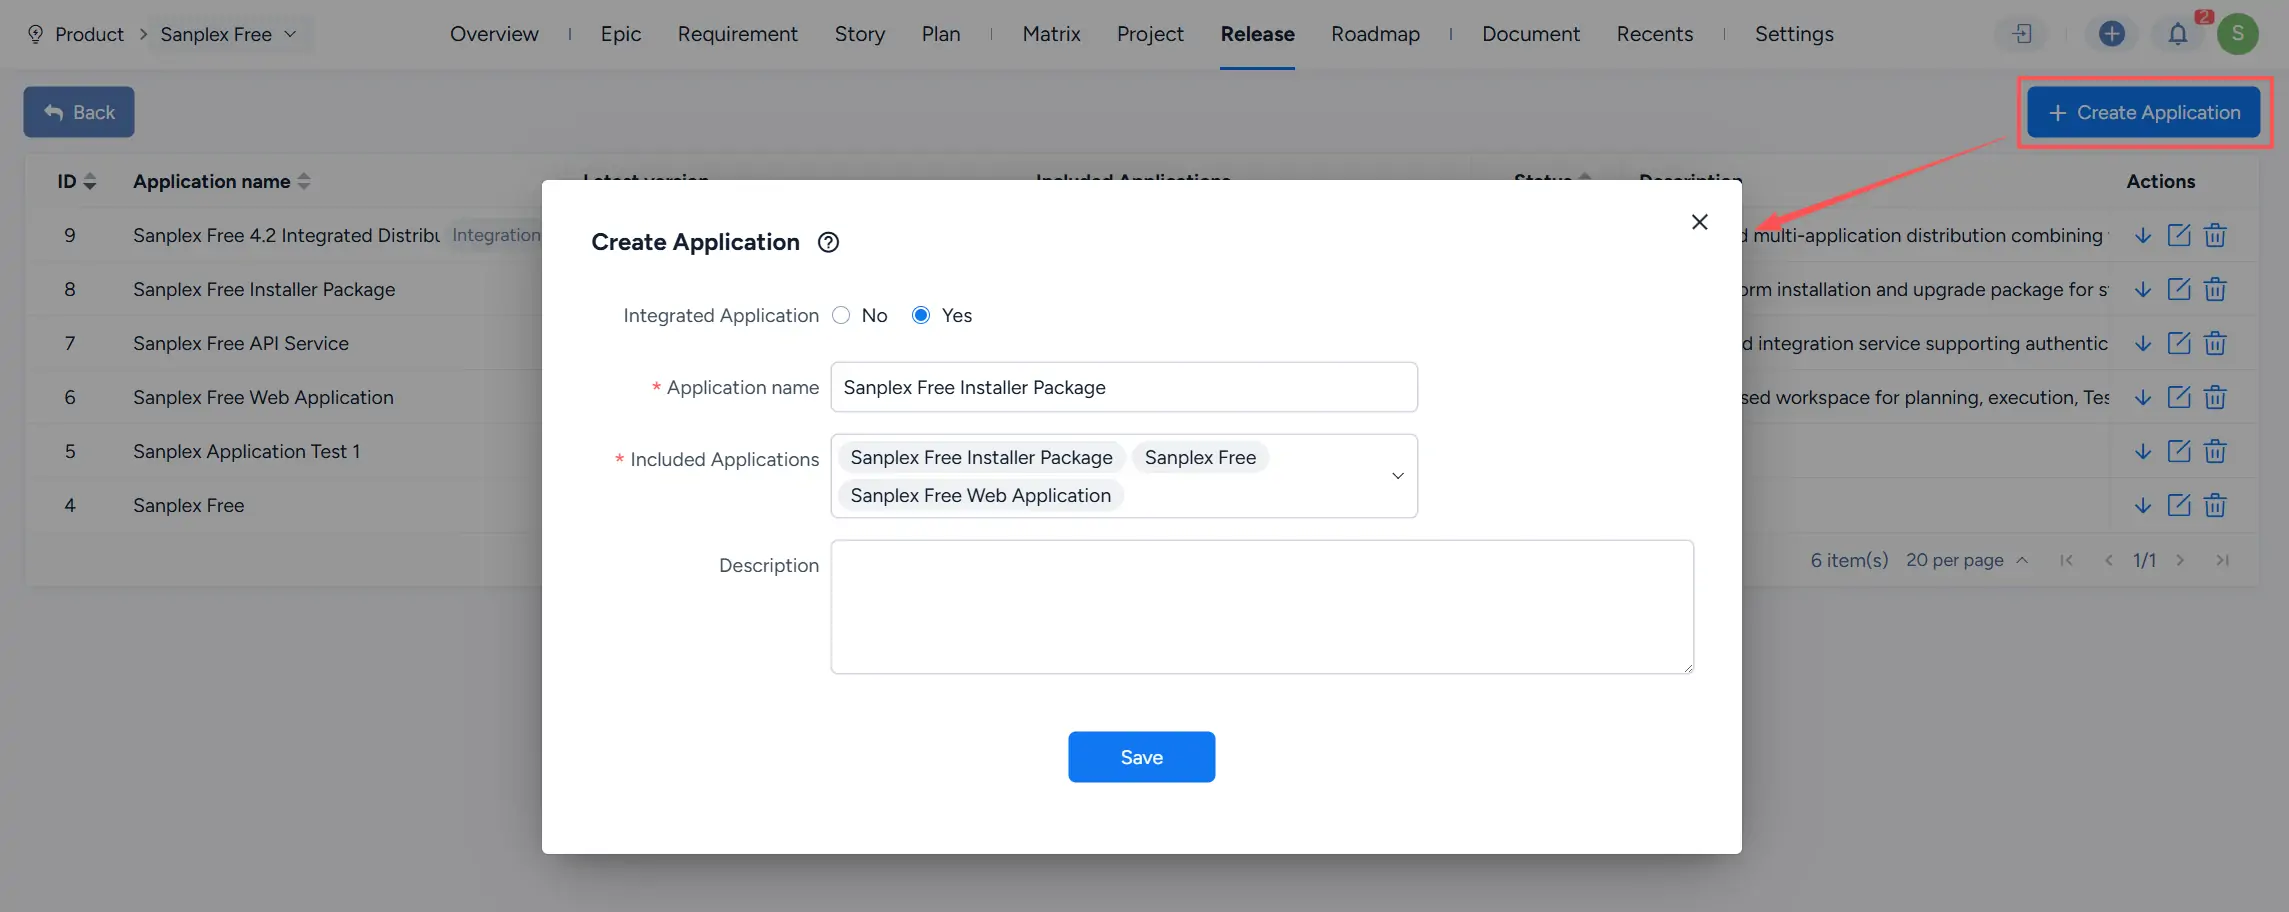
Click Create Application again and set Integrated Application to Yes.
Enter the Application name and select the individual Applications to include under Included Applications, then save the Integrated Application.
The Integrated Application can then be used together with the standalone Applications during release management.
3. Release an Individual Application
Go to Product > Release and click Create Release.
Select the standalone Application in the Application field and enter its Application Version. Each Application can have multiple releases and version numbers over time.
These released Application versions can later be selected when preparing an Integrated Application release.
4. Release an Integrated Application
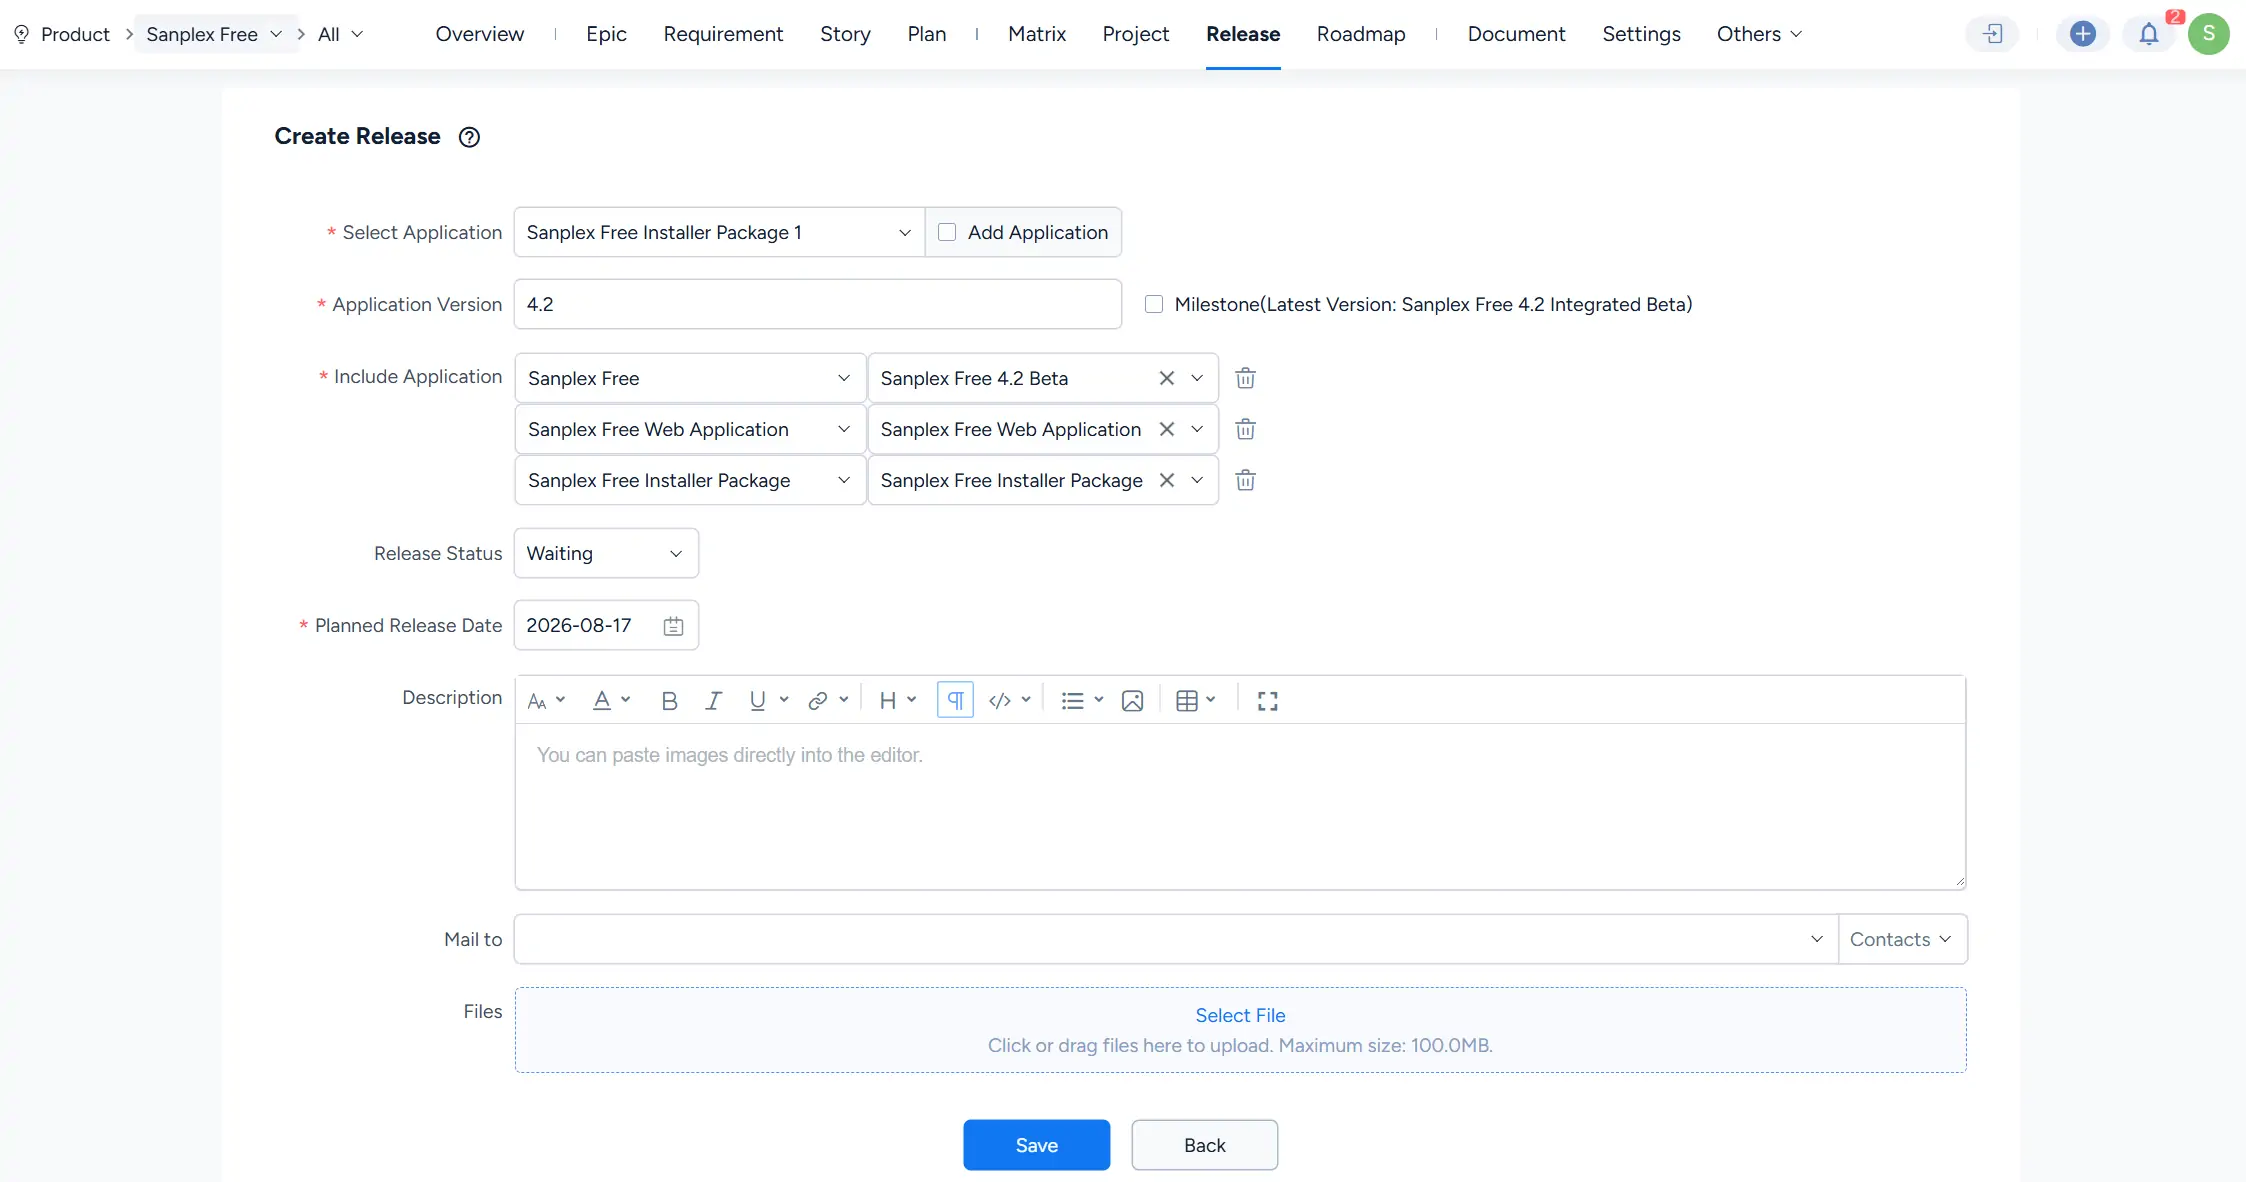
After the required individual Application versions are available, click Create Release again.
Select the Integrated Application in the Application field and enter the new Application Version.
Under Include Application, select the required version for each Application included in the integrated delivery. You can also configure the Release status, planned release date, description, recipients, and attachments as needed.
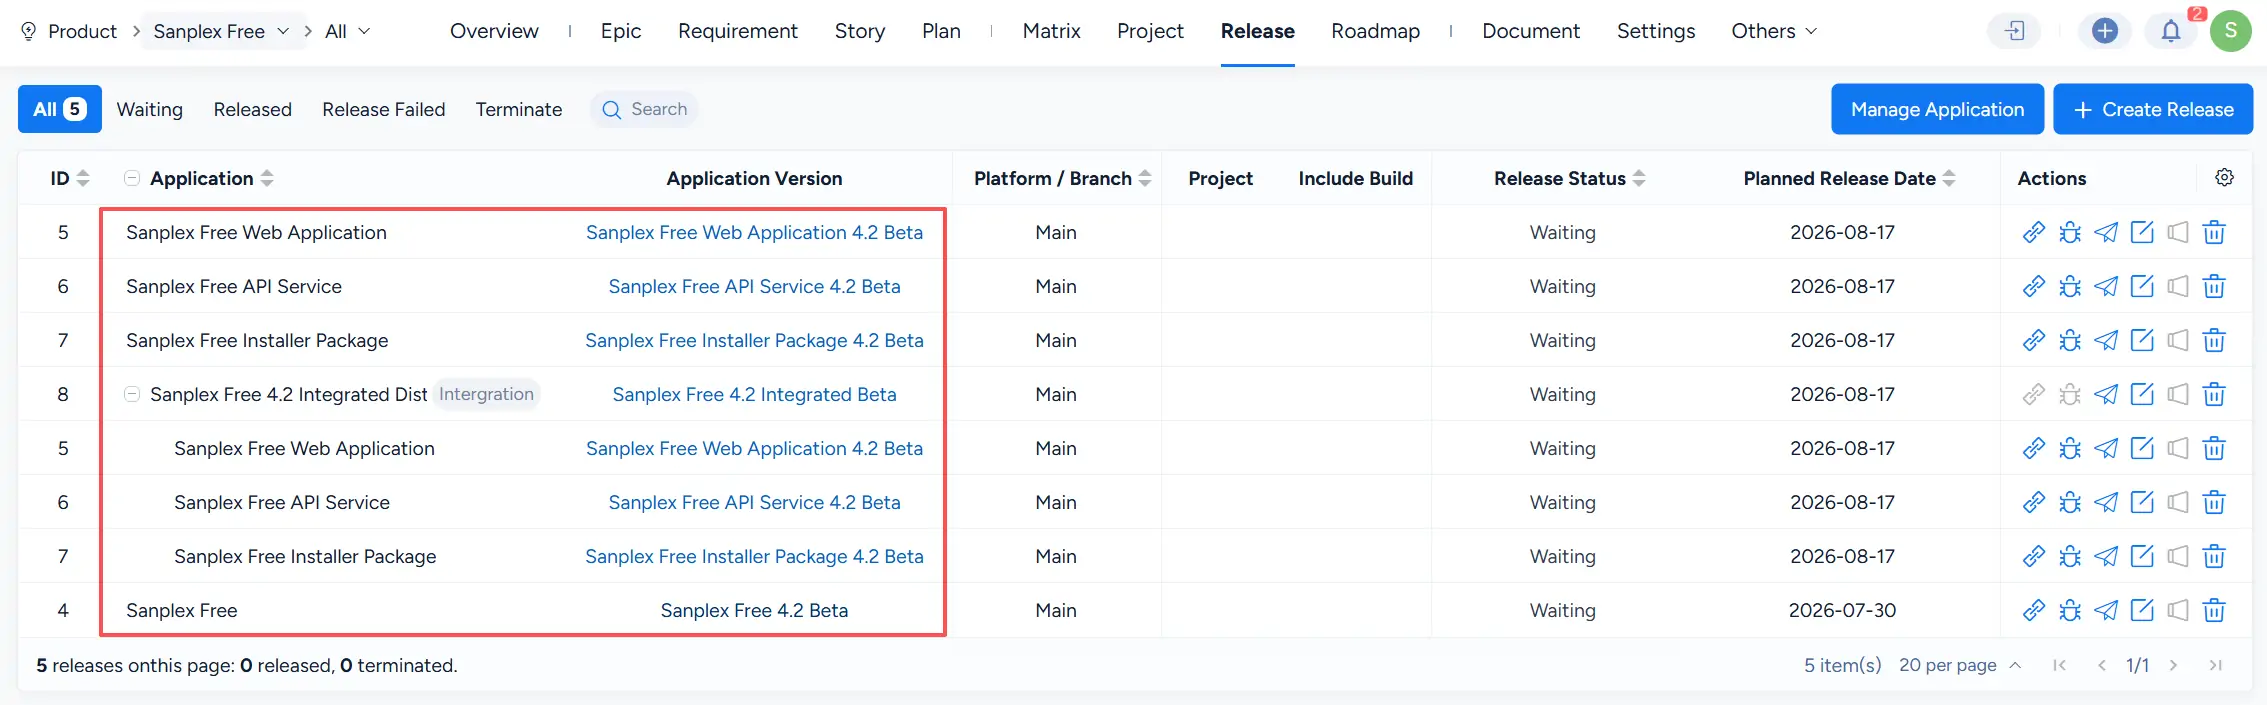
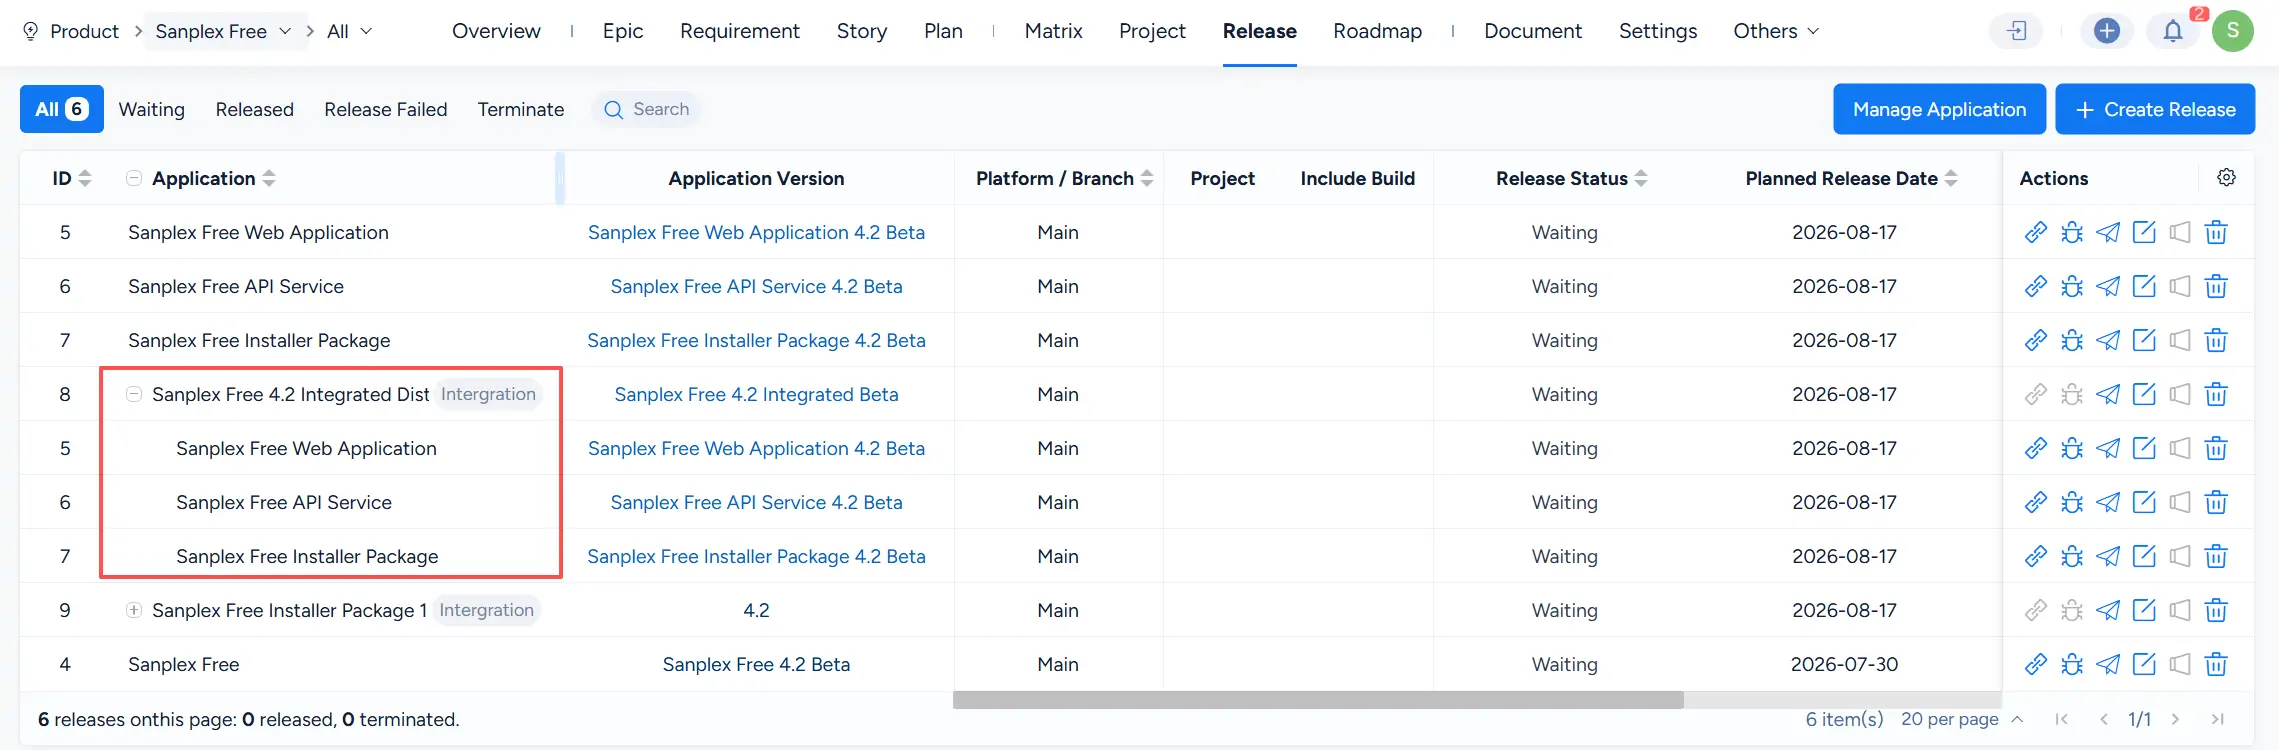
After the Integrated Application Release is created, the Release list can display the Integrated Application together with its included Application releases.
IV. Release Management
1. Edit, Delete, or Update a Release
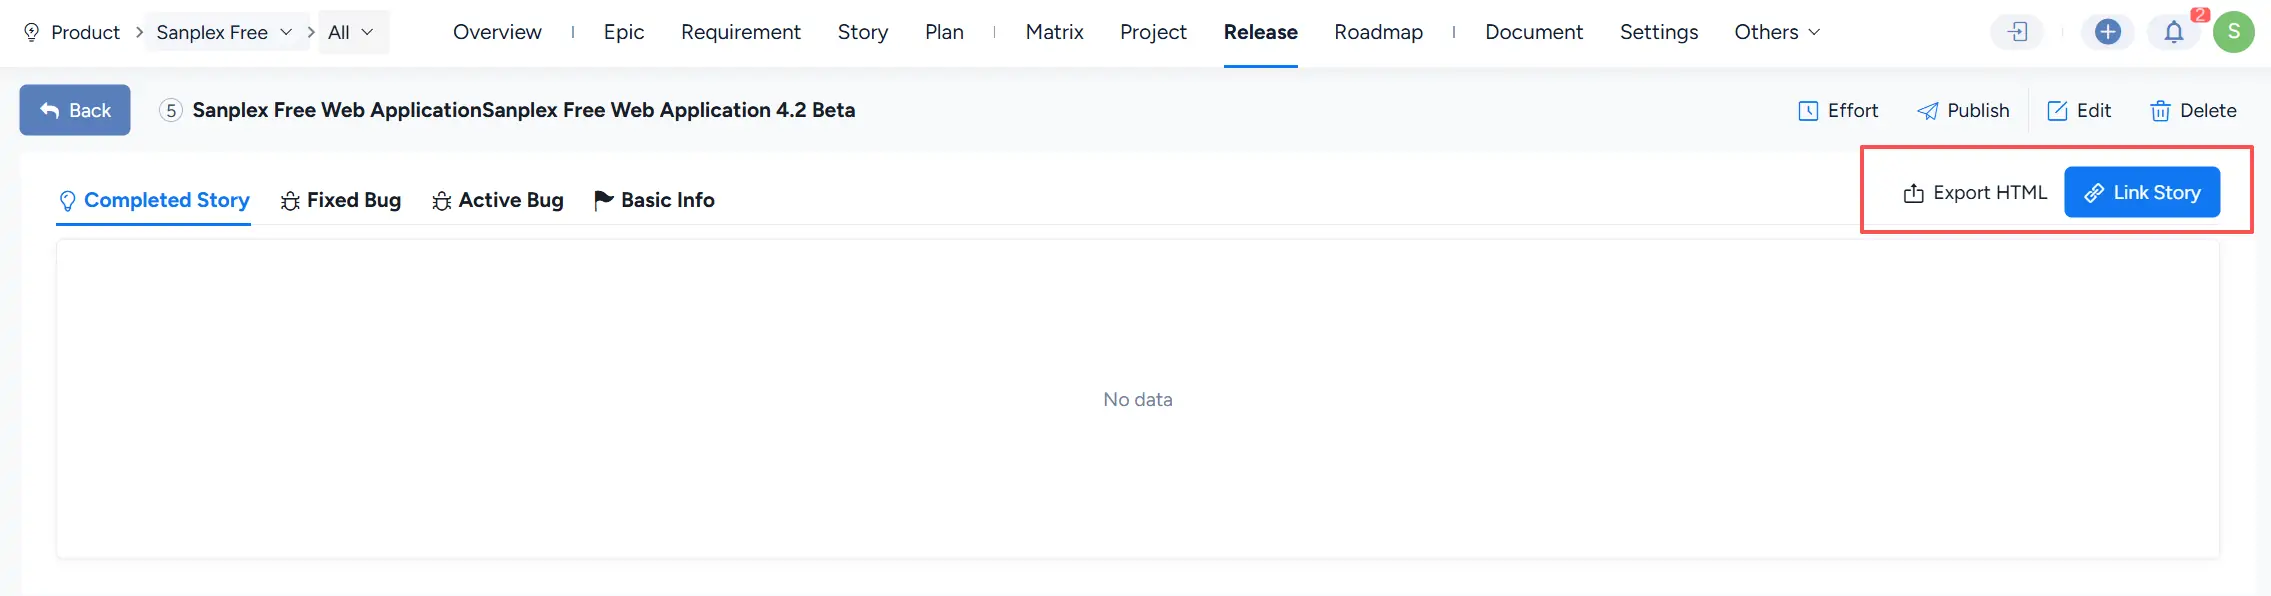
Open a Release to access its details page.
From this page, you can:
- record Effort
- Publish the Release
- Edit the Release
- Delete the Release
- manage related Stories and Bugs
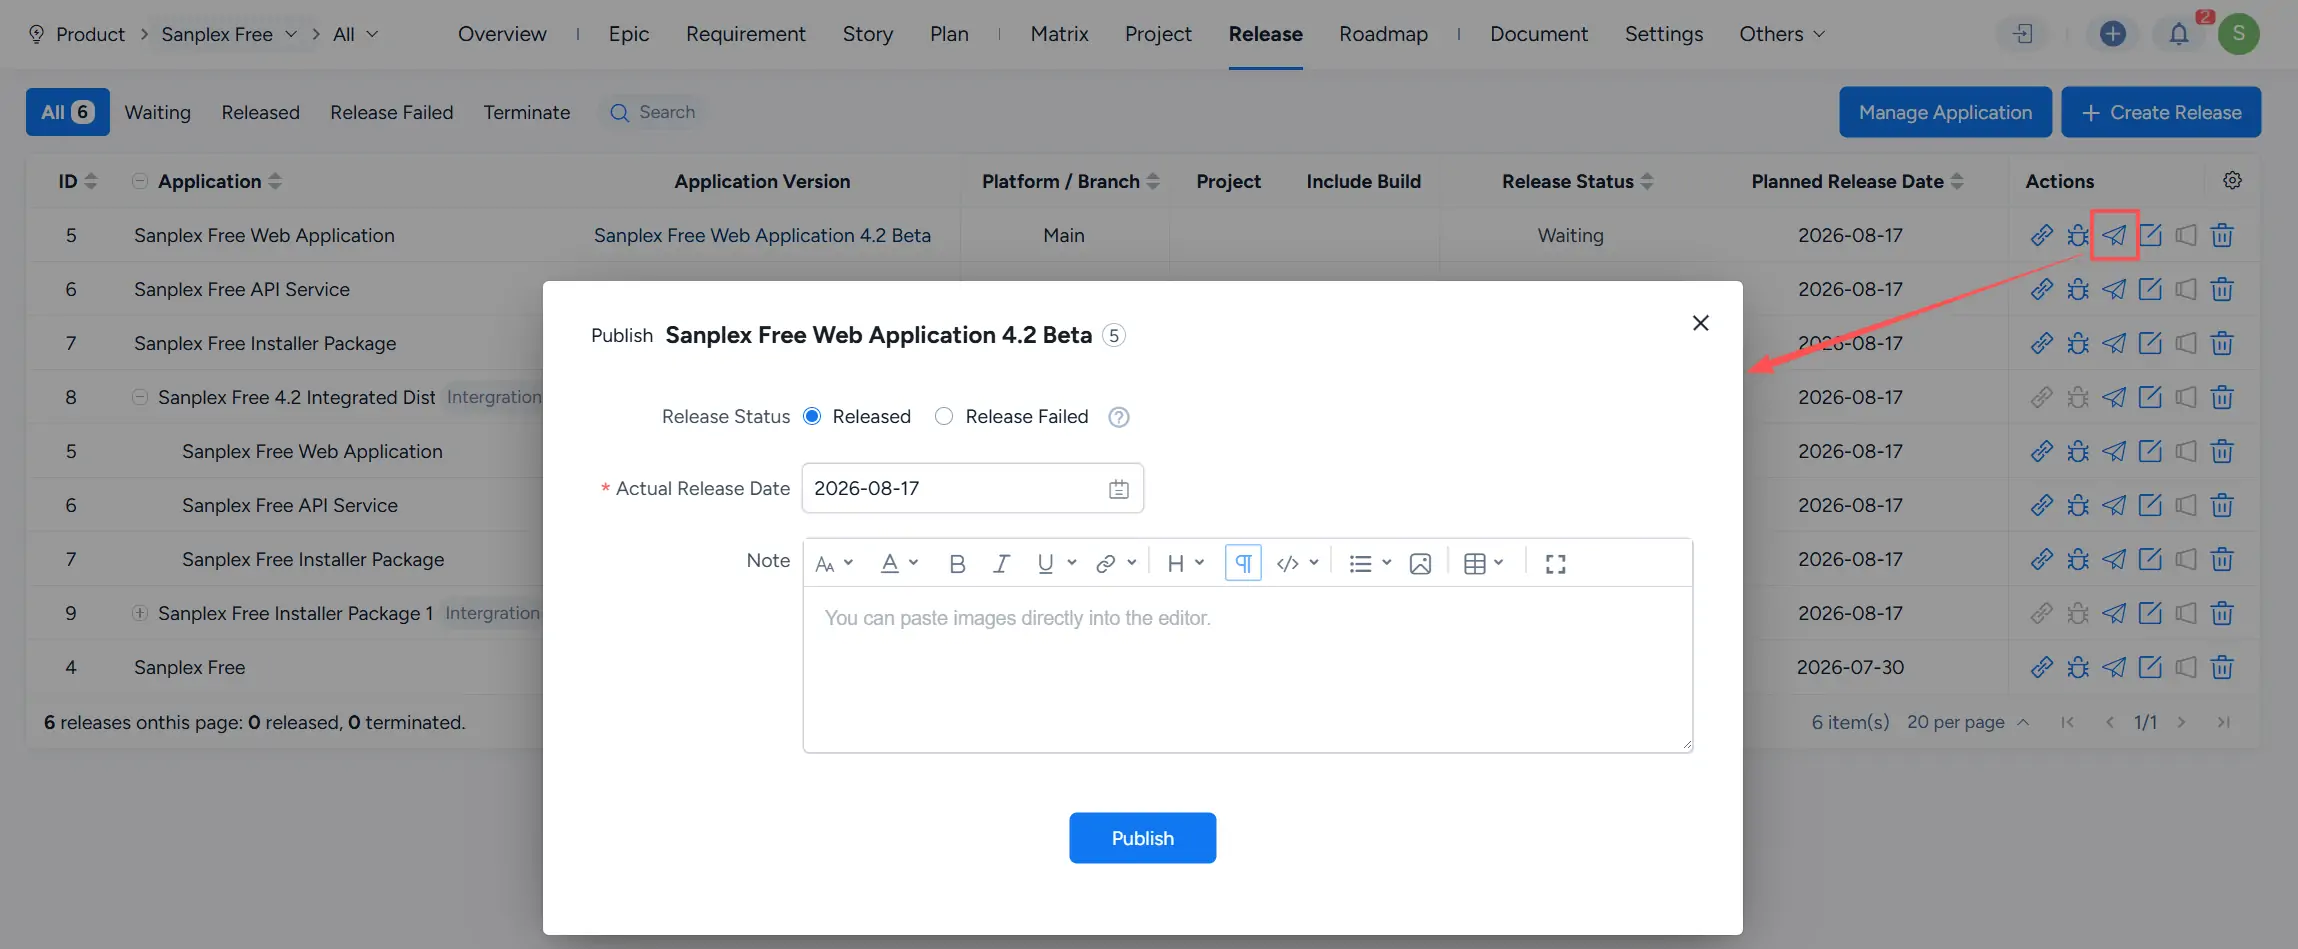
2. Publish a Release
For a Release in Waiting status, click Publish.
In the Publish window, select the release result:
- Released
- Release Failed
Enter the Actual Release Date and add a Note if needed, then click Publish.
If Released is selected, the Release status becomes Released. If Release Failed is selected, the status becomes Release Failed.
3. Terminate a Release
A published Release can be terminated when it is no longer maintained.
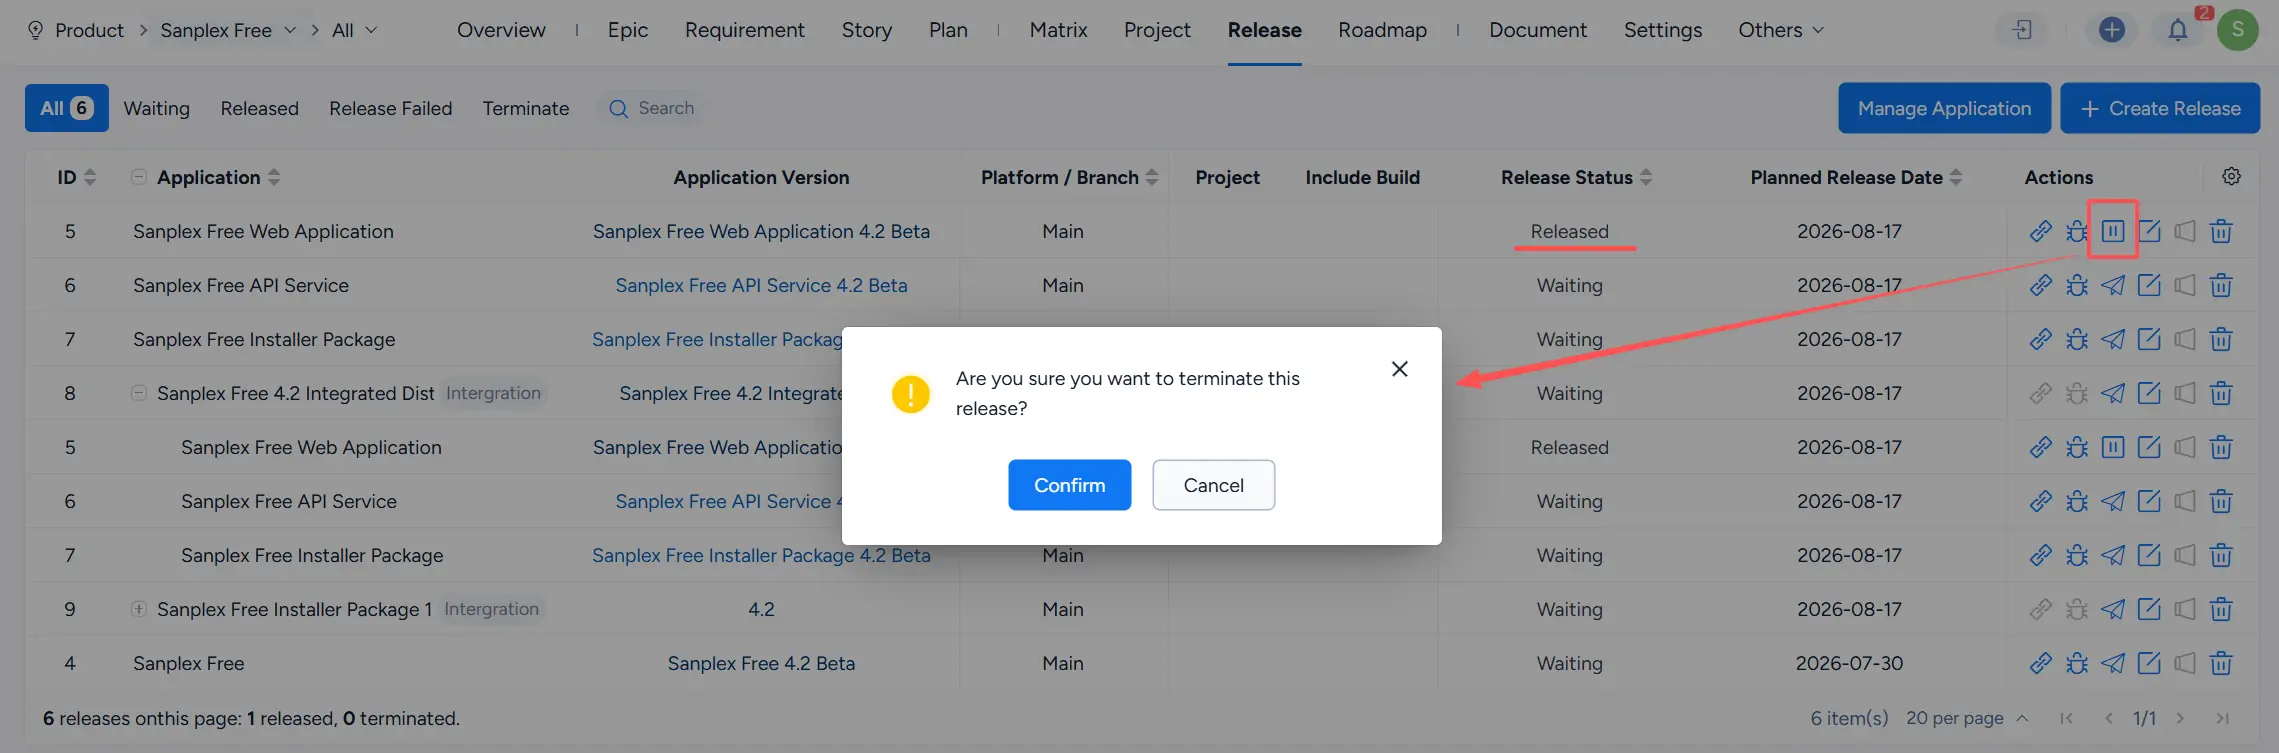
Use the Terminate action for the Release and confirm the operation in the confirmation dialog.