
Product
1. Introduction of Sanplex features
1.1. Core Management Framework
1.1.1 Program
1.1.2 Project
1.1.3 Product
1.1.4 Execution
1.1.5 Management Models
1.2. Dashboard
1.2.1 Getting Started with Tutorials
1.2.2 Quick Add
1.2.3 Notification Center
1.2.4 Effort Tracking
1.2.5 Dashboard - Project and Execution
1.2.6 Dashboard - My Work, Contribution, and Recents
1.2.7 Dashboard - Approval
1.2.8 Contacts
1.3. Program
1.3.1 Program List
1.3.2 Program Kanban
1.3.3 Create Program
1.3.4 Create Sub-Programs
1.3.5 Project Charter Management
1.4. Product
1.4.1 Create Product
1.4.2 Manage Modules
1.4.3 Multi-Branch and Multi-Platform Management
1.4.4 Manage Plans
1.4.5 Manage Requirements
1.4.6 Requirement Reviews
1.4.7 Requirement Status and Phase
1.4.8 Create Releases
1.4.9 Track Progress
1.4.10 Business Requirements and Multi-Level Requirements
1.5. Project
1.5.1 Scrum Project
1.5.2. Waterfall Project
1.5.2.1 Manage Project Phases
1.5.2.2 Project Design
1.5.2.3 Project Matrix
1.5.2.4 Project Reports and Earned Value Management
1.5.2.5 Project Baselines
1.5.2.6 Project Change
1.5.3. Kanban Project
1.5.3.1 Set Up Kanban Projects
1.5.3.2 Configure Kanban Boards
1.5.3.3 Use Kanban Boards
1.5.4 Hybrid Agile Project
1.5.5 Hybrid Waterfall Project
1.5.6. Project Settings
1.5.6.1 Project Setup
1.5.6.2 Project Executions
1.5.6.3 Project Requirements
1.5.6.4 Project Builds
1.5.6.5 Project Tests
1.6. Admin Settings
1.6.1 Confluence Data Import
1.7. Workflow

Manage Modules

2026-03-10 16:27:03
Sanplex Content
388
Last edited by Jing WANG on 2026-08-15 13:10:38
Share links
Summary: Learn how to create and maintain Product modules and sub-modules, duplicate module structures, and configure how module information is displayed in the Story list.

Requirement modules help product managers organize requirements into a clear structure, making it easier to categorize, locate, and manage related work within a Product.
Story list showing module abbreviations before Story names to identify their associated modules.

1. Manage Modules

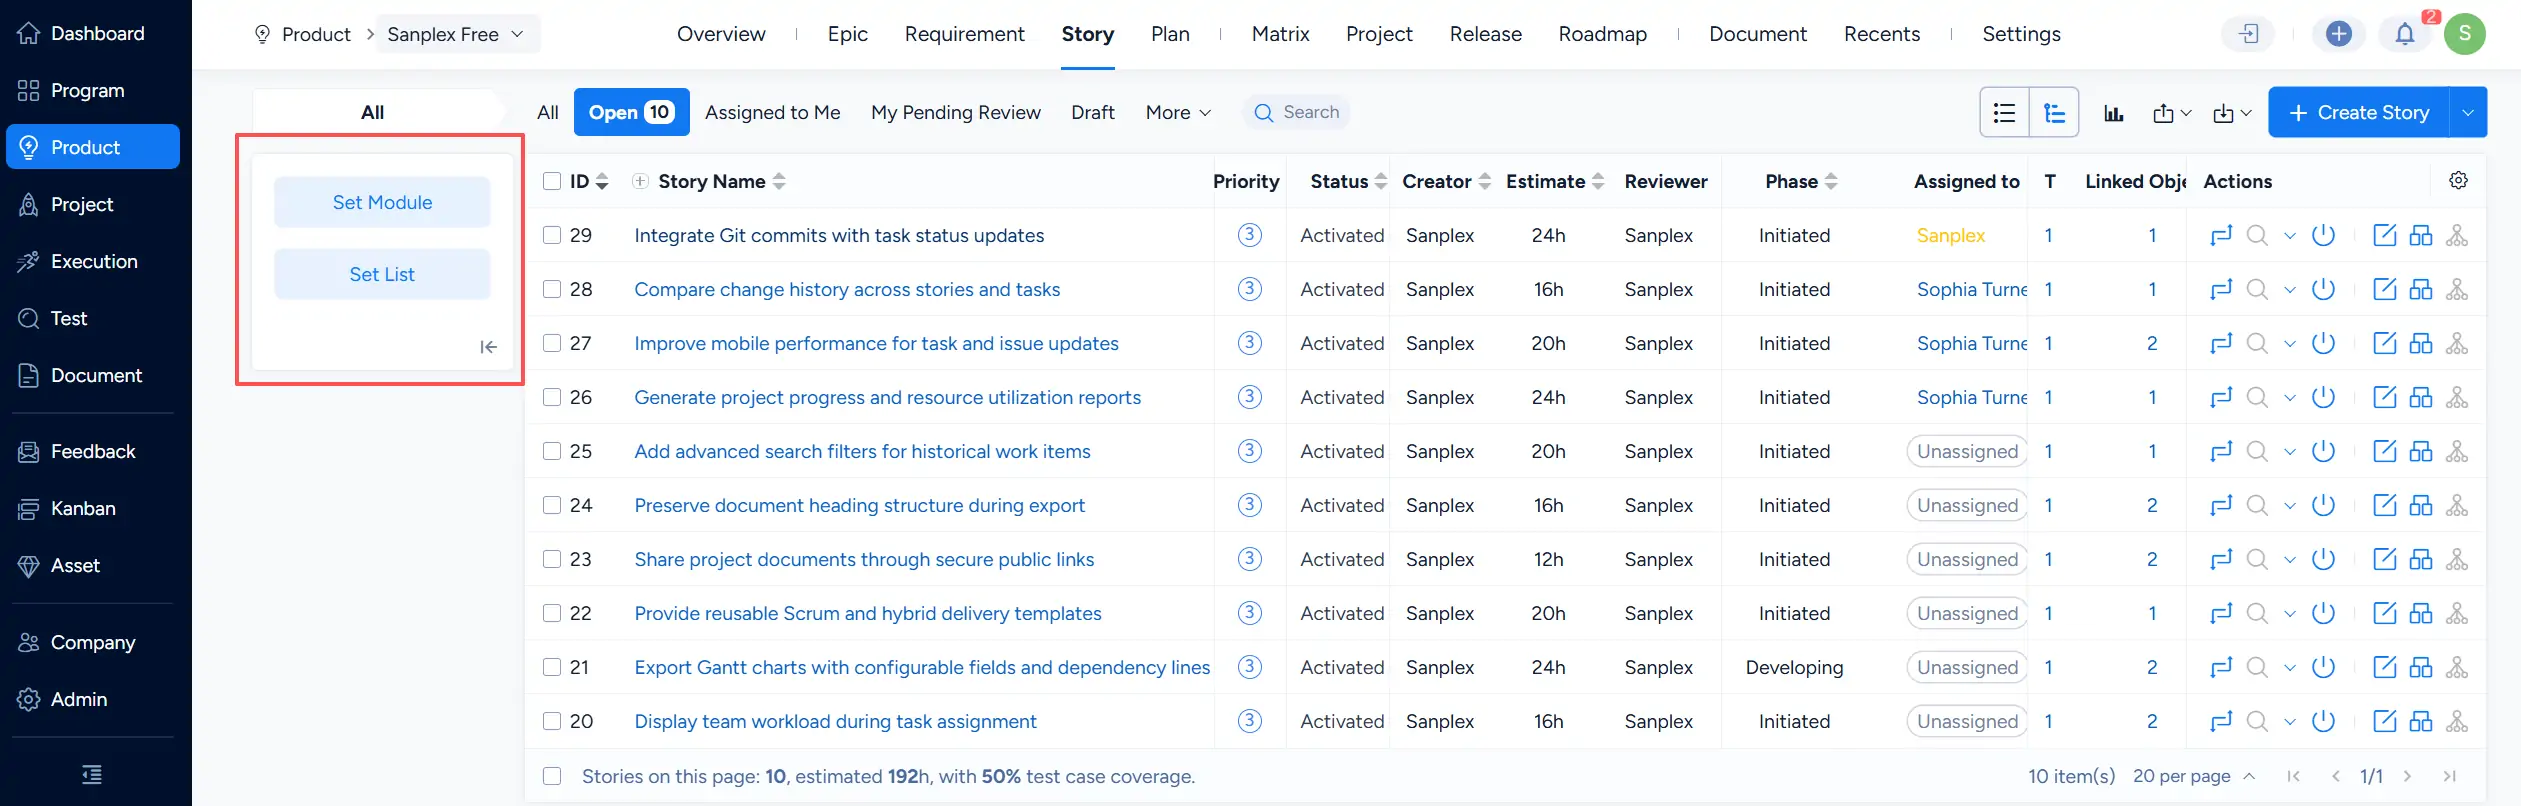
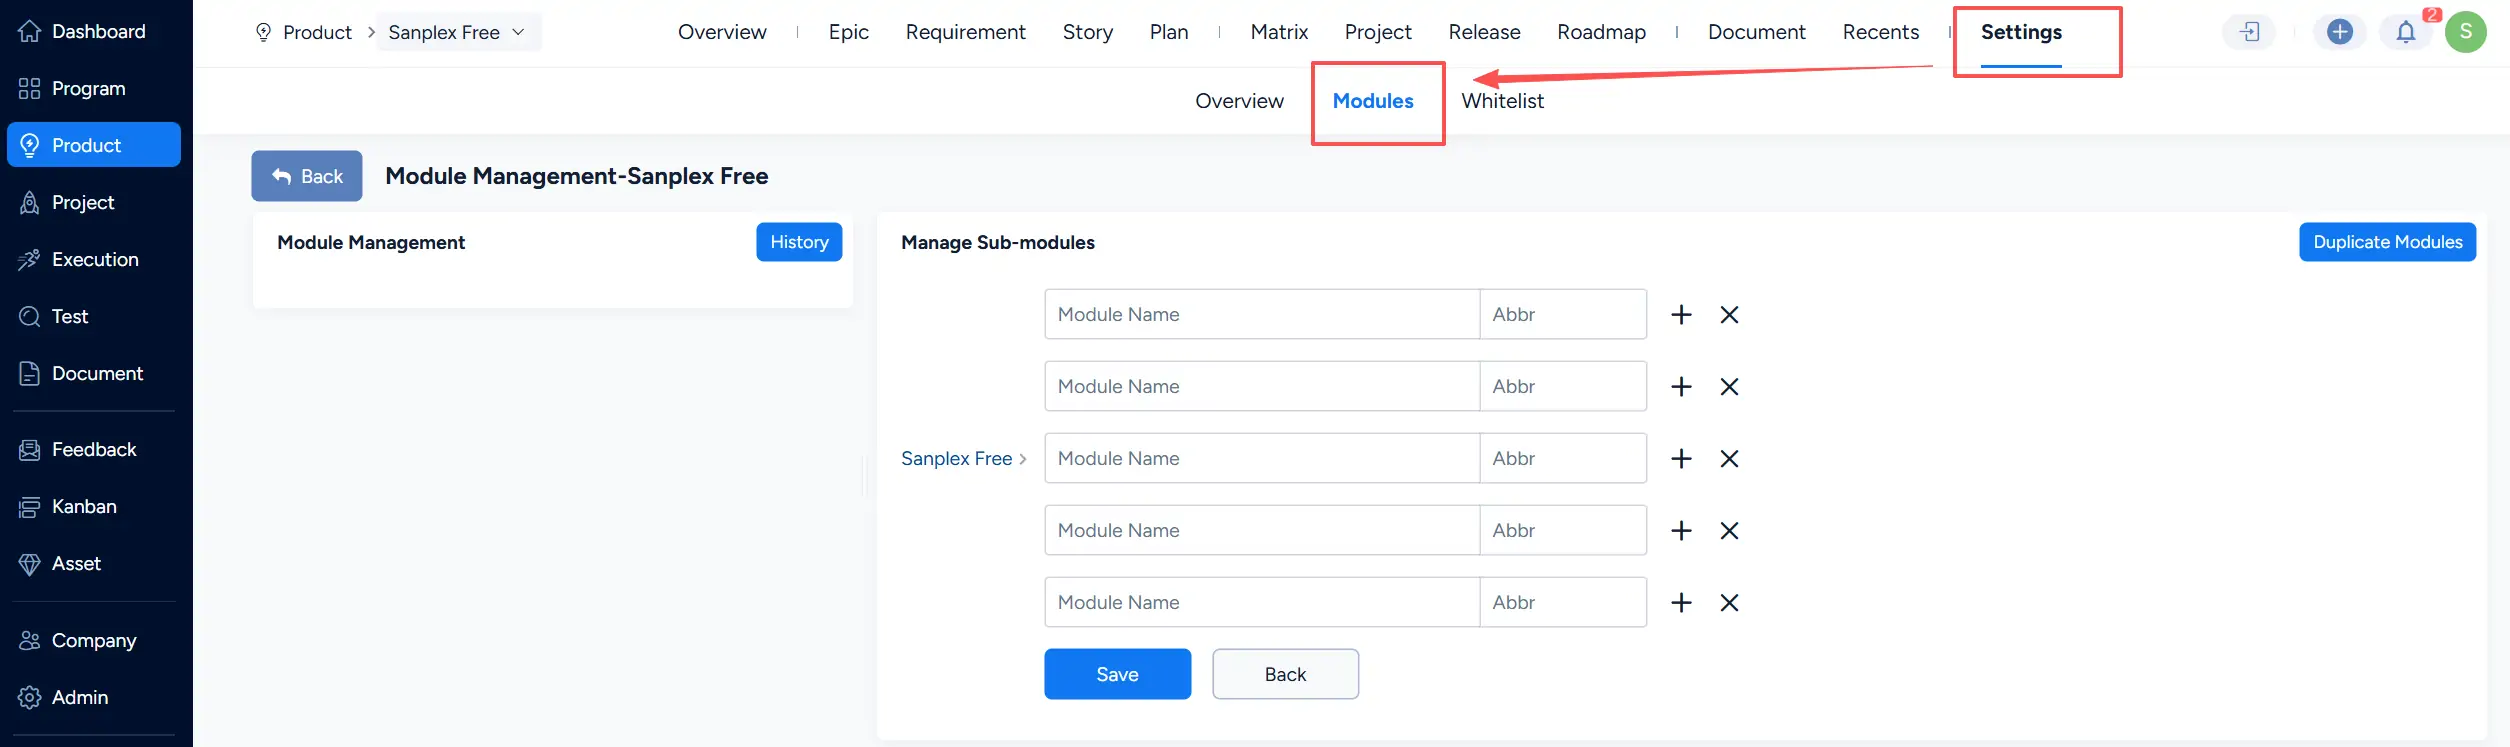
On the Story page for a specific Product, use the settings menu in the module panel and select Set Module. You can also manage modules by going to Settings > Modules within the Product.
Module panel settings menu on the Story page with options for Set Module and Set List.

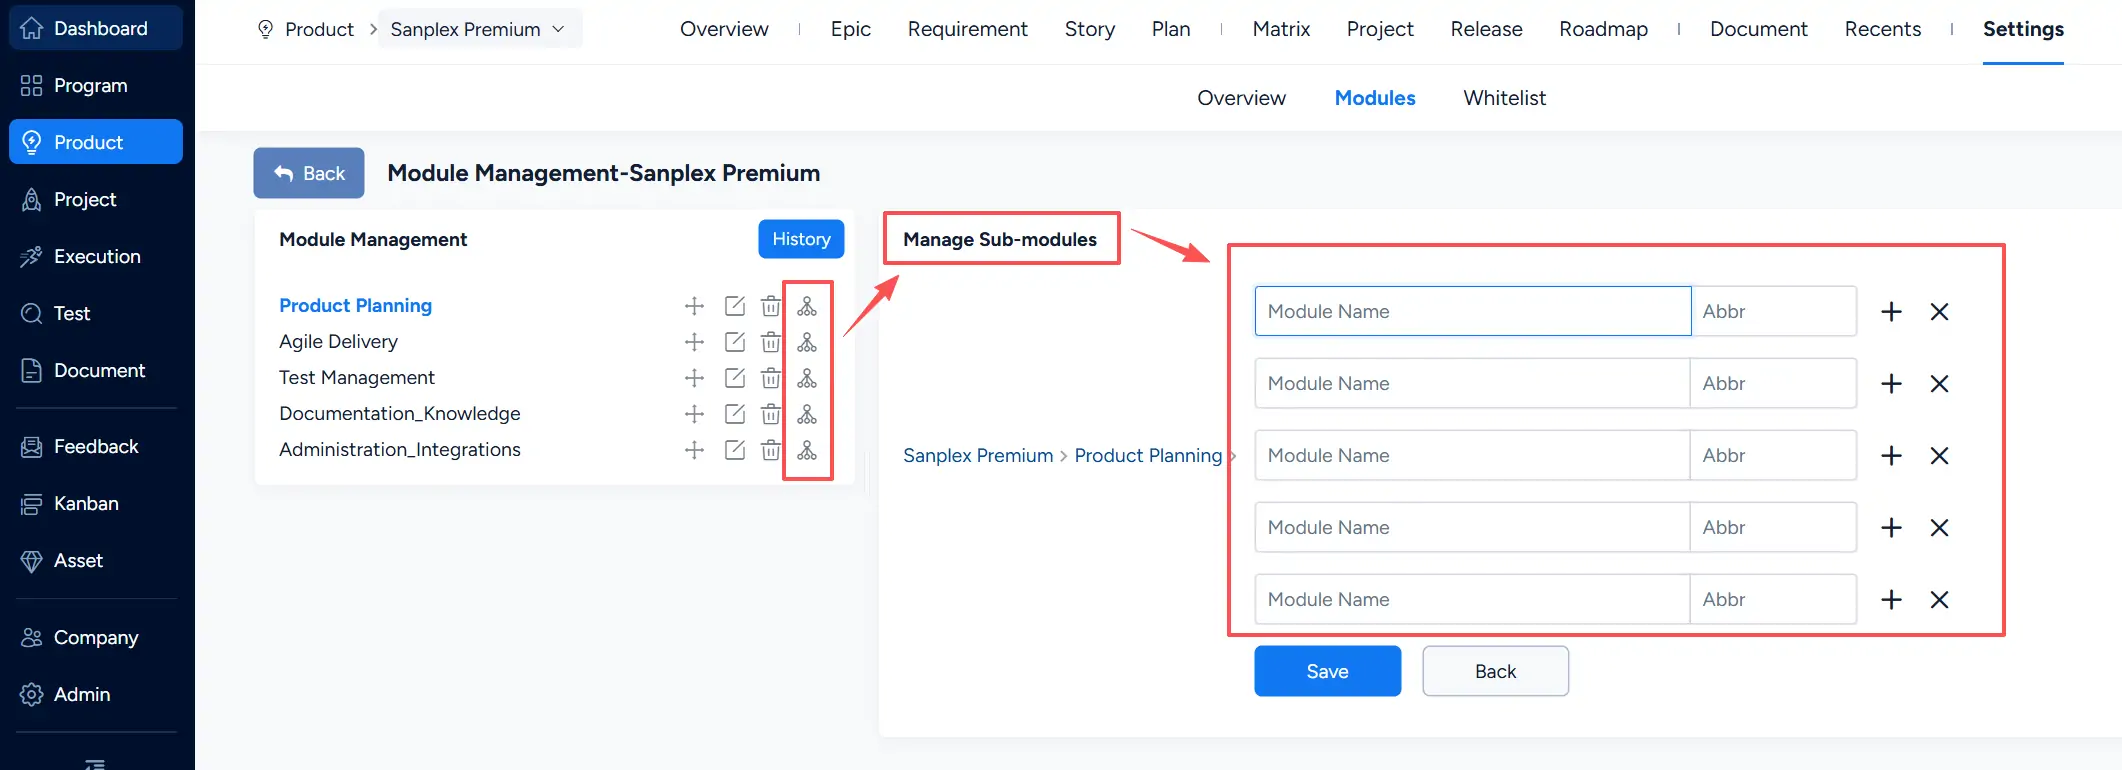
On the module management page, you can add, edit, or delete modules as needed. To create or maintain lower-level modules under an existing module, use Manage Sub-modules for the corresponding module.
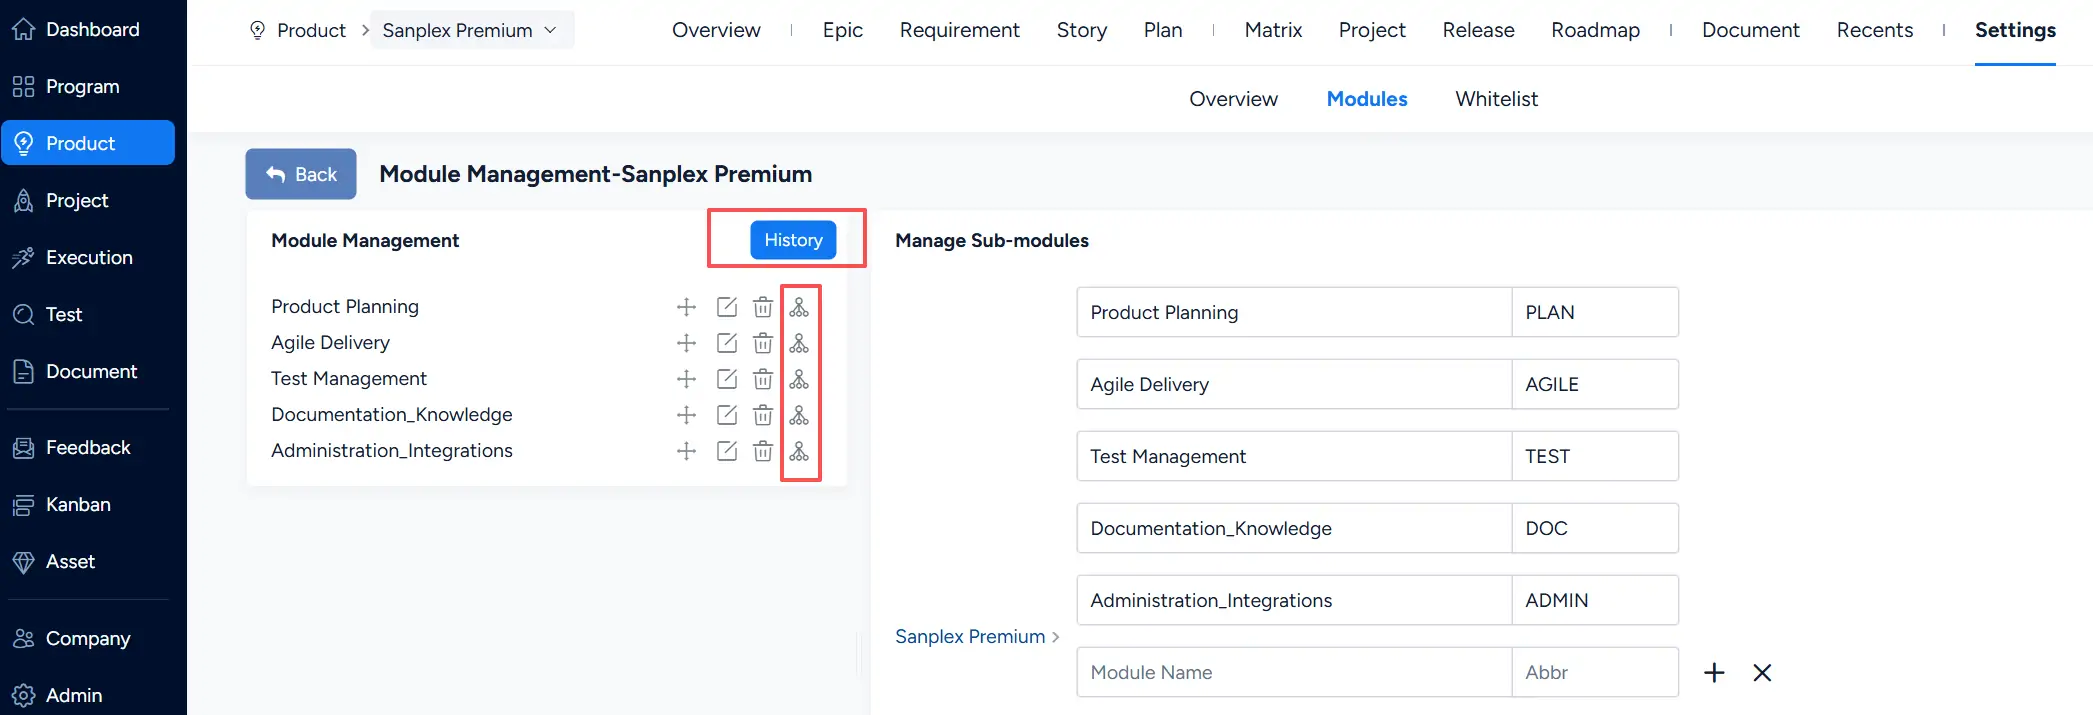
Module Management page showing existing Product modules and controls for managing sub-modules.

You can also use Duplicate Modules to reuse an existing module structure from another Product, reducing the effort required to create similar module structures manually.
Product module management page with the Duplicate Modules option for reusing a module structure.

2. Configure Module Display

From the module panel on the Story page, open the settings menu and select Set List.

Module panel on the Story page with the Set List option available from the settings menu.

In the Set List dialog, you can specify how modules are displayed in the Story list. The available options include N/A, Base Node, and End Node.
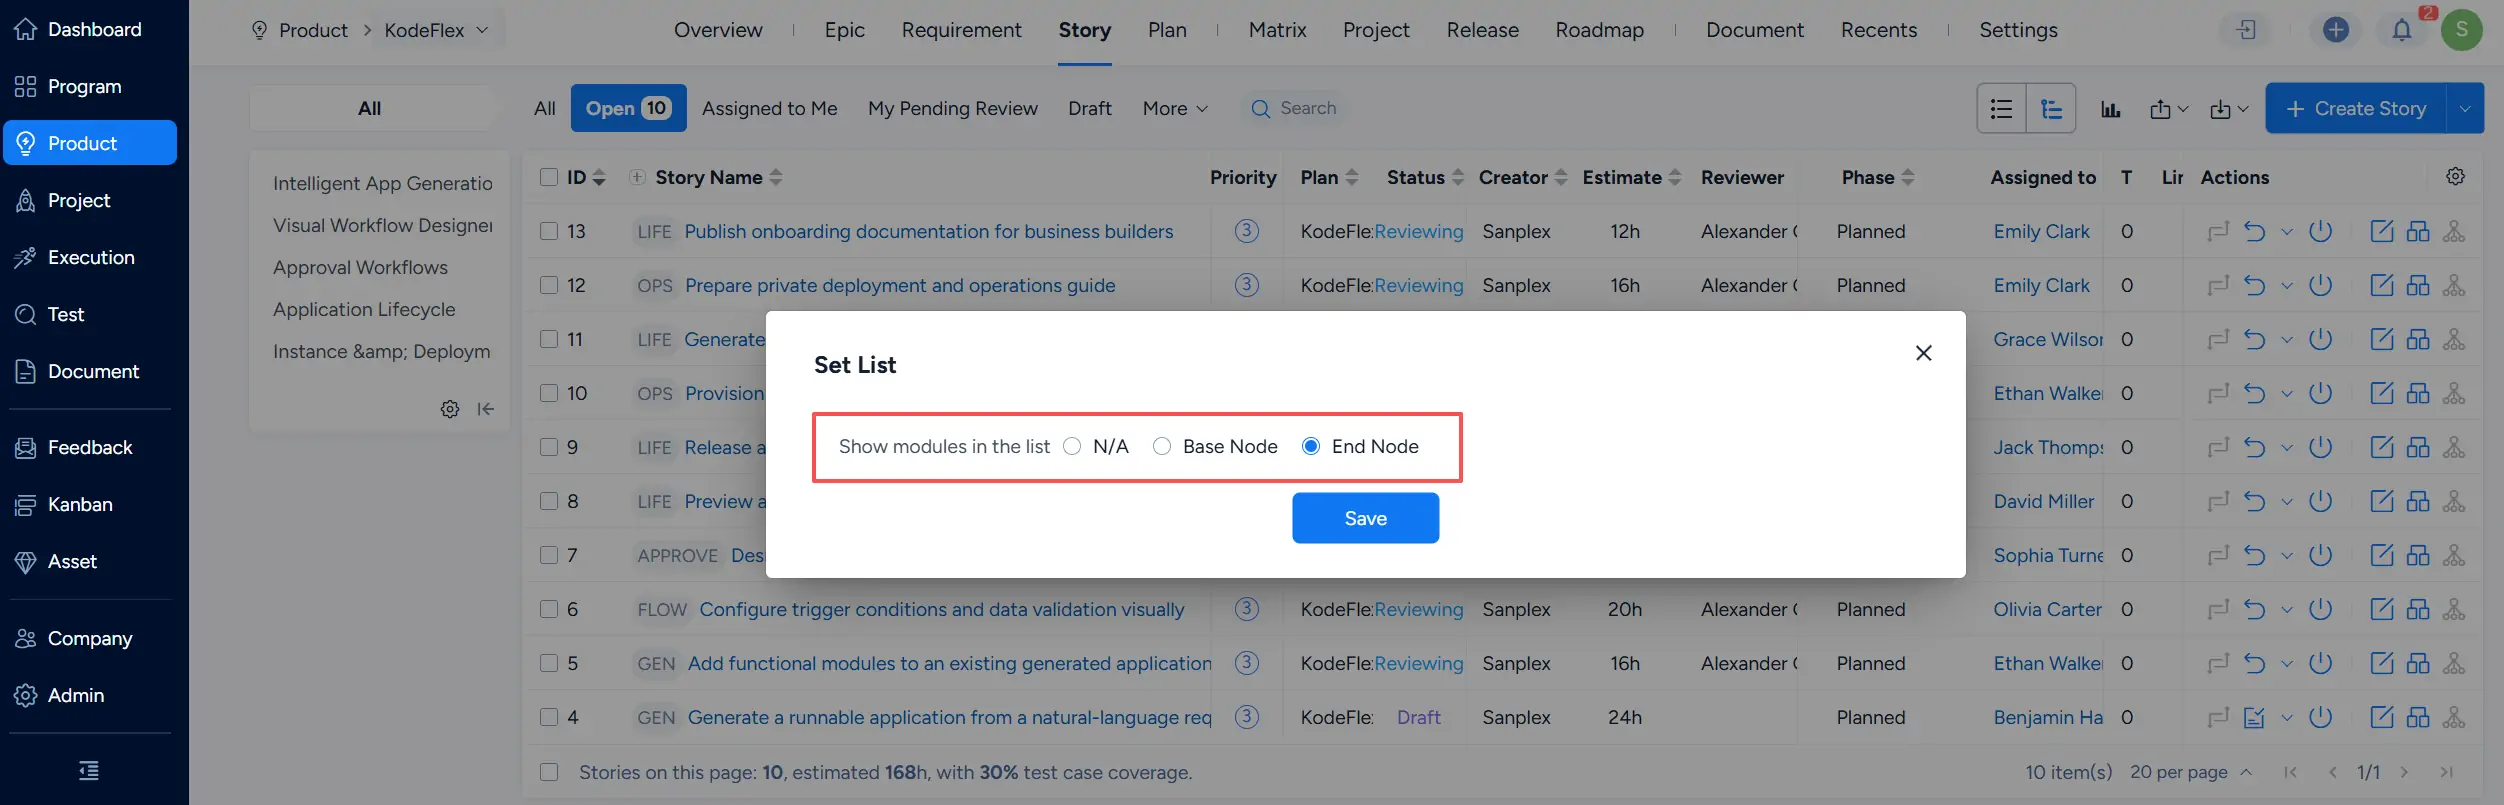
Set List dialog with N/A, Base Node, and End Node options for controlling module display in the Story list.

For example, when End Node is selected, the abbreviation of the applicable end-node module is displayed before the corresponding Story name, making it easier to identify the module associated with each Story directly from the list.
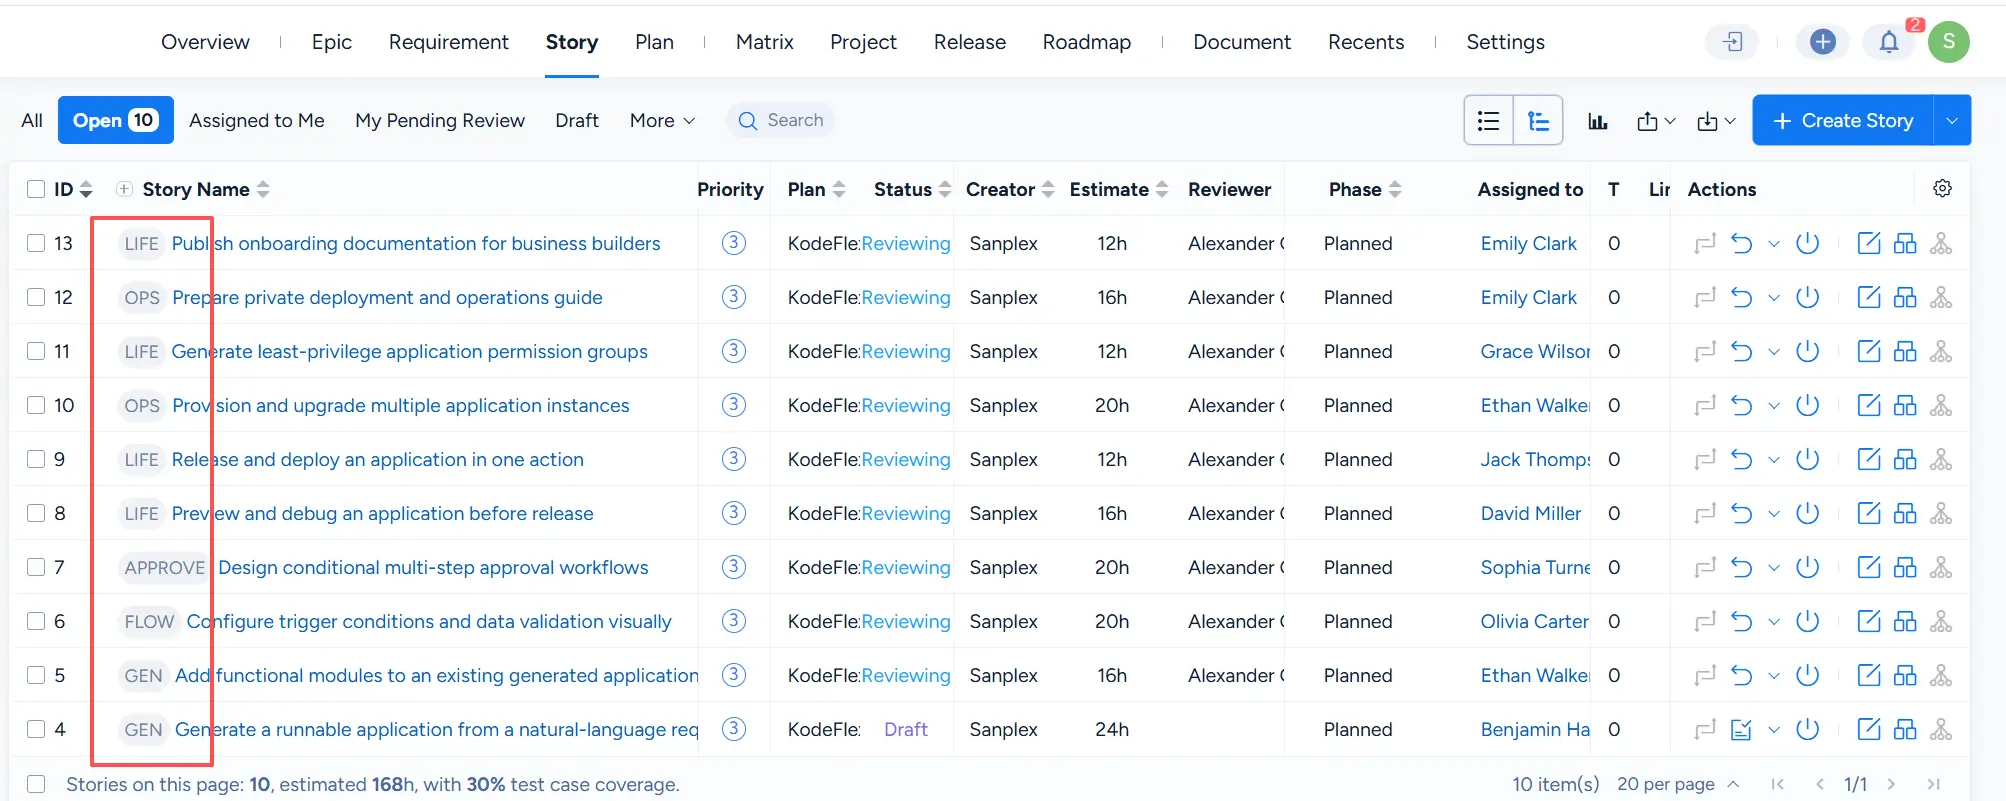
Story list displaying abbreviated end-node module labels before Story names.

Write a Comment
Comment will be posted after it is reviewed.
