Catalog
After a Kanban board is created, teams can configure its board views, create or link work items, organize Areas and lanes, adjust the board layout, and use Work in Progress (WIP) limits to manage workflow capacity.
This section explains the main configuration options available in the Development Kanban Board.
I. Switch Board Views and Manage Work Items
Open a Kanban board. Use the board selector in the upper-left corner to switch between:
- All KanBan Boards
- Parent Story KanBan
- Story KanBan
- Task KanBan
- Bug KanBan
You can also select Show Parent Task to display parent tasks on the board.

1. Create and Link Work Items
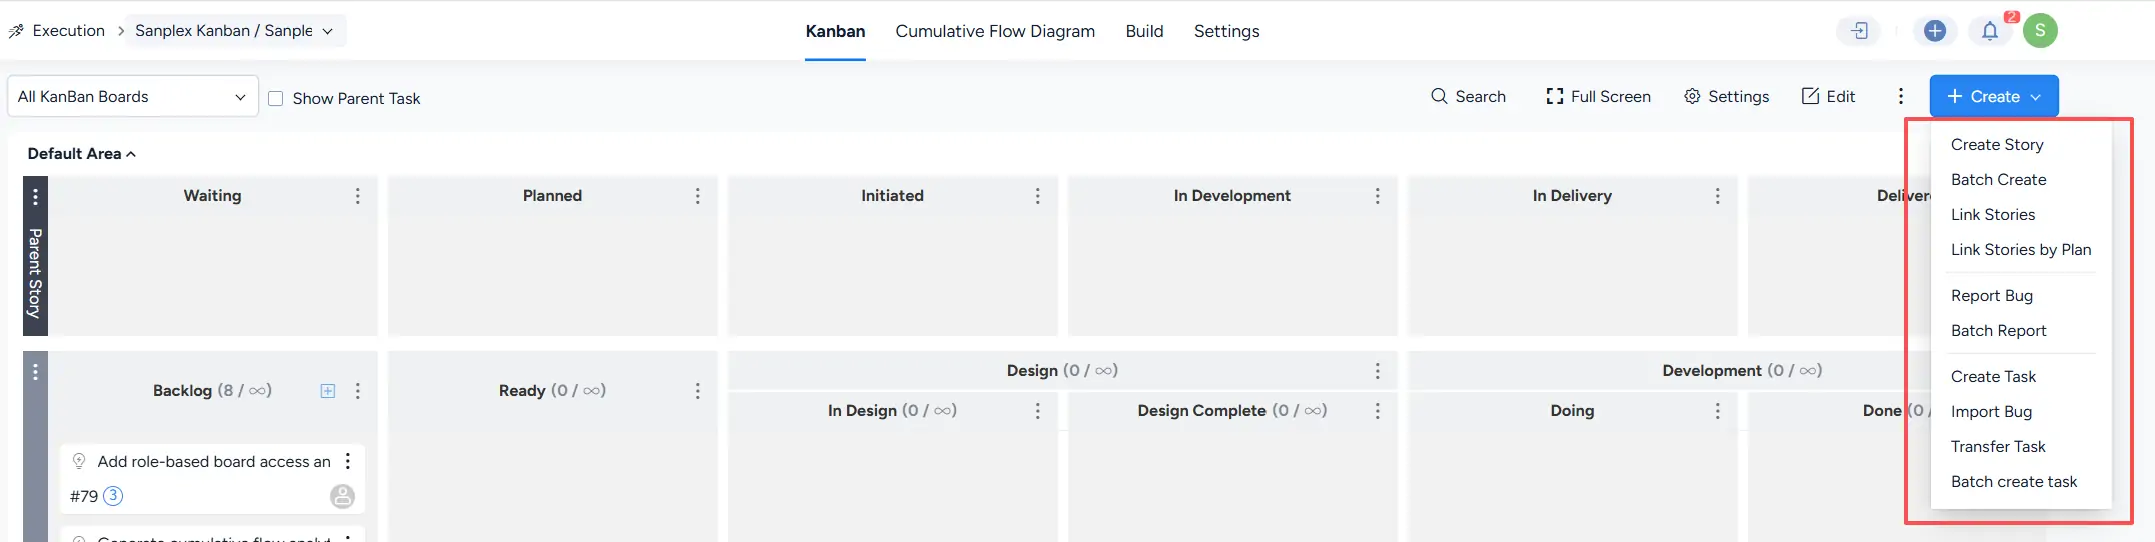
The Create menu in the upper-right corner provides actions for creating and linking work items, including:
- Create Story
- Batch Create
- Link Stories
- Link Stories by Plan
- Report Bug
- Batch Report
- Create Task
- Import Bug
- Transfer Task
- Batch create task
After items are created, imported, or linked successfully, they appear in the corresponding board lane and column.
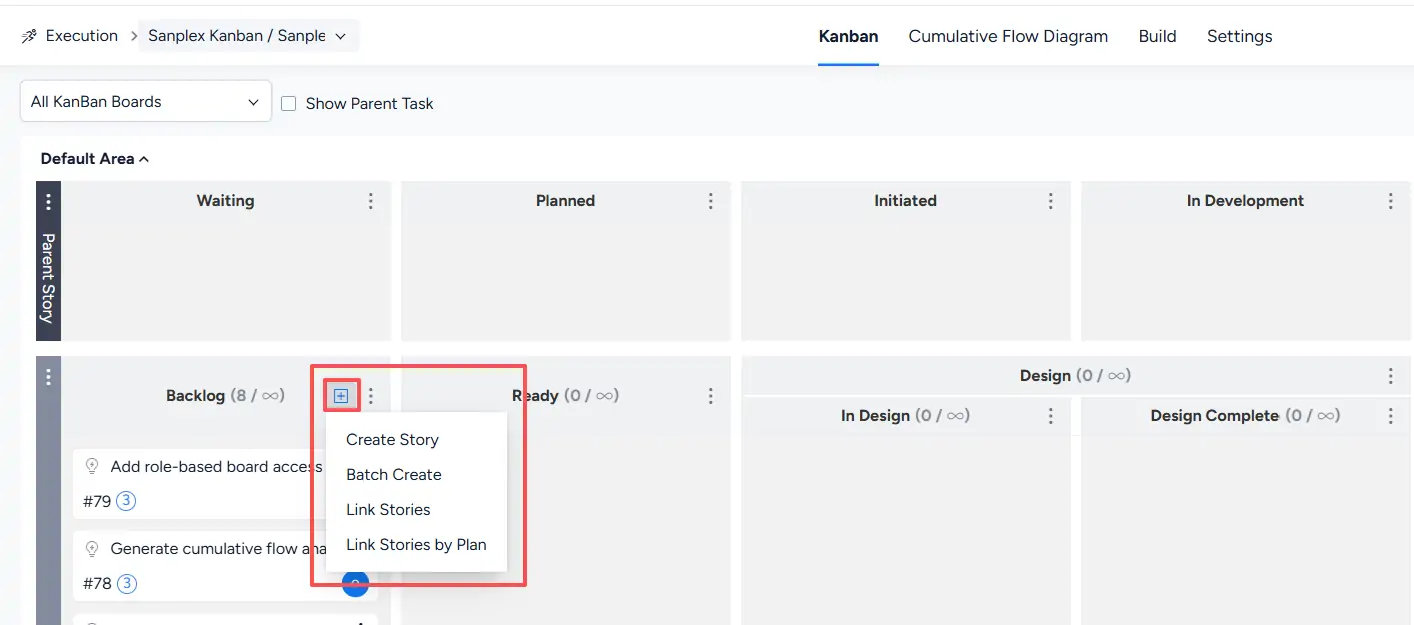
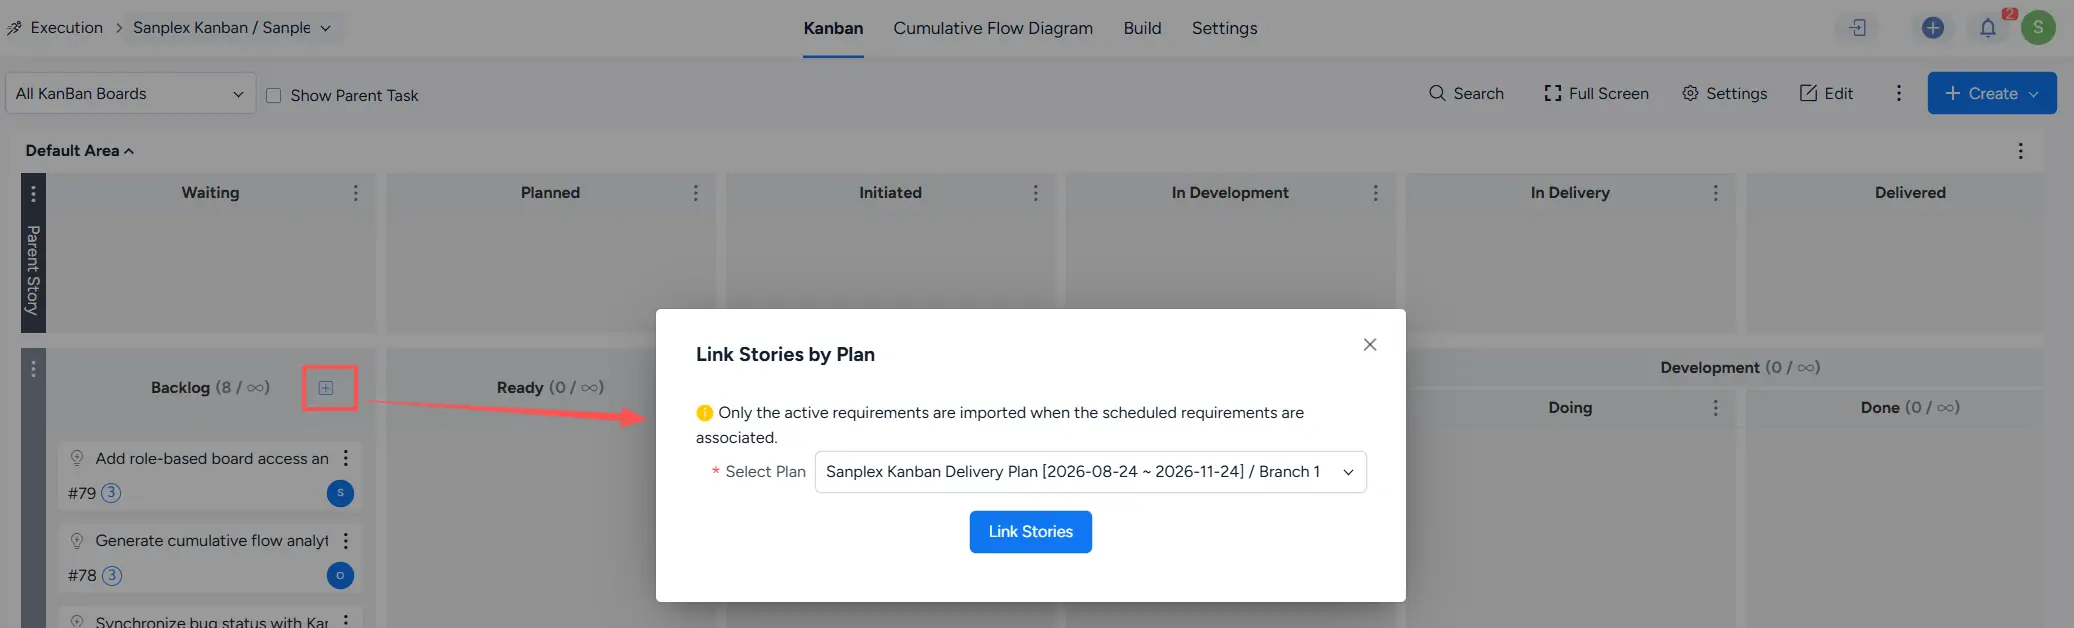
Story-related actions are also available directly from the Backlog column. Click the + button to access Create Story, Batch Create, Link Stories, and Link Stories by Plan.
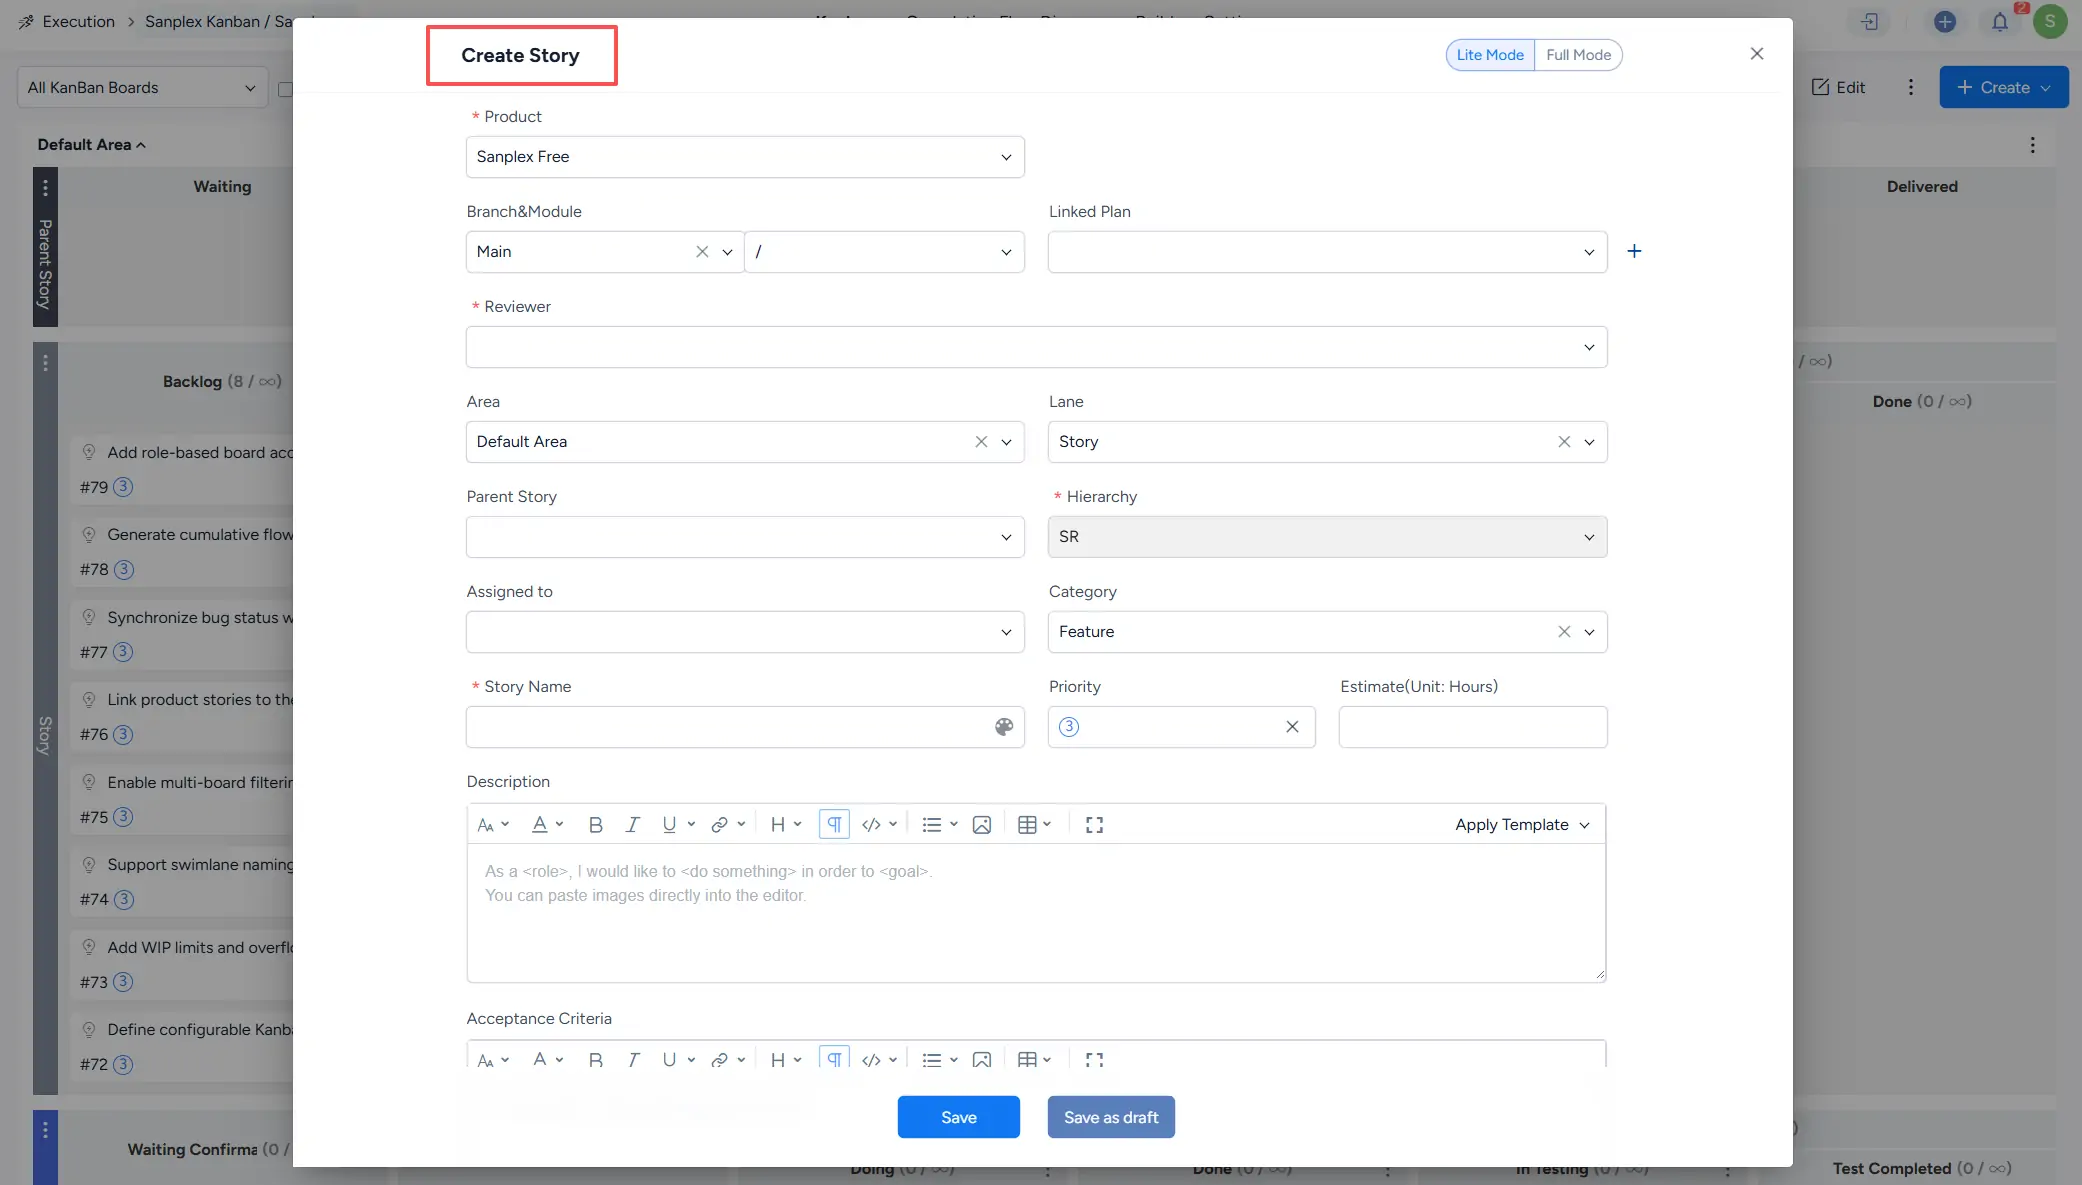
The following example uses Create Story.
Complete the required Story information on the creation page, such as the linked product, reviewer, Area, lane, hierarchy, Story name, priority, estimate, description, and acceptance criteria.
When linking Stories by plan, select the required plan and click Link Stories. Active requirements associated with the selected plan are linked to the board.
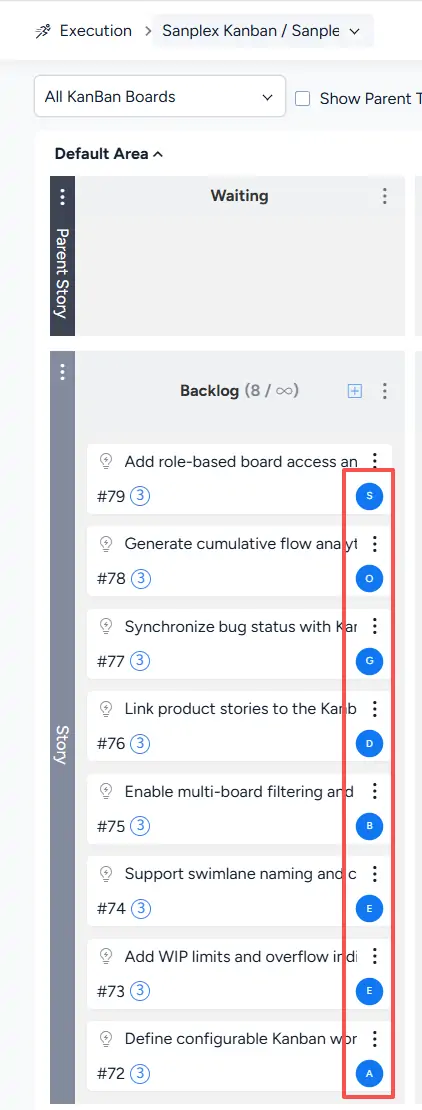
Stories created or linked to the board are displayed as cards. The avatar in the lower-right corner of a Story card indicates its assignee.
II. Configure the Board Layout
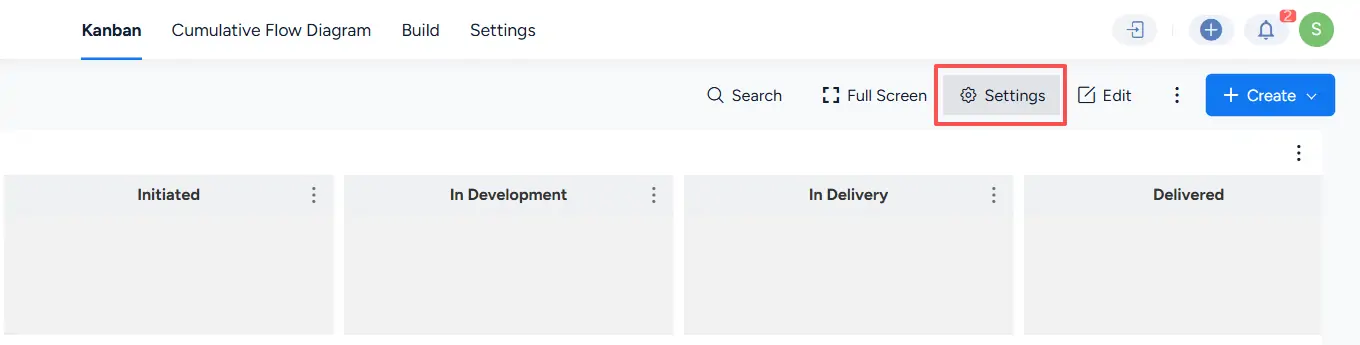
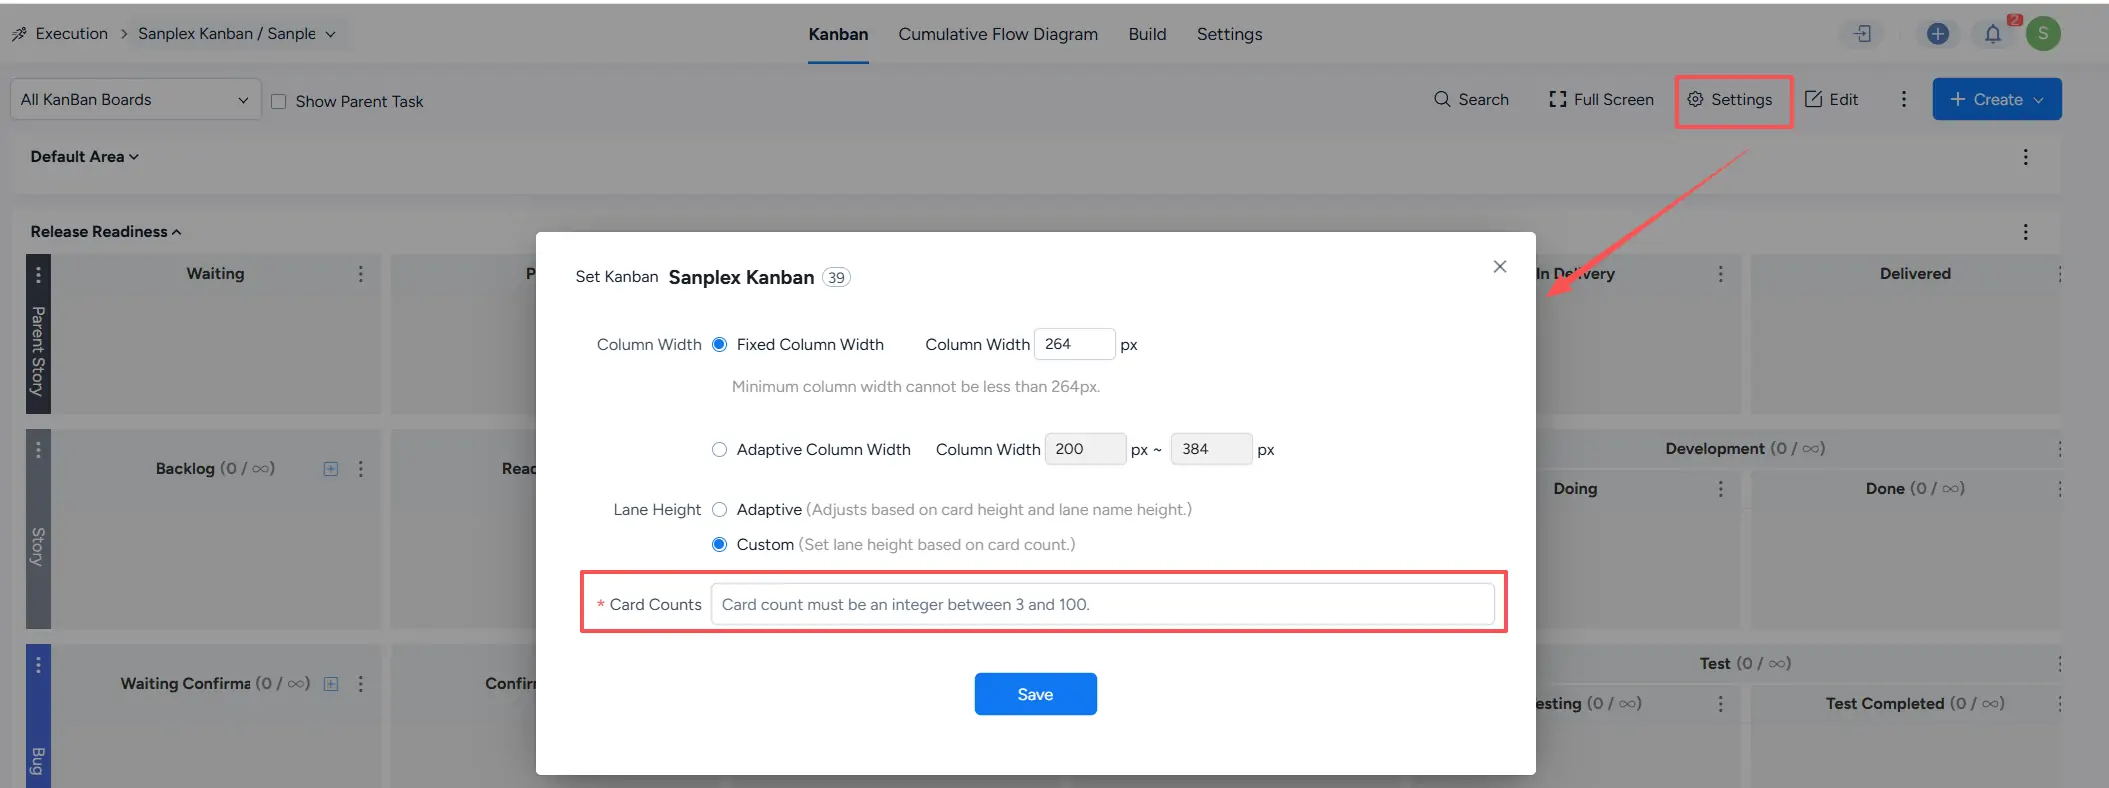
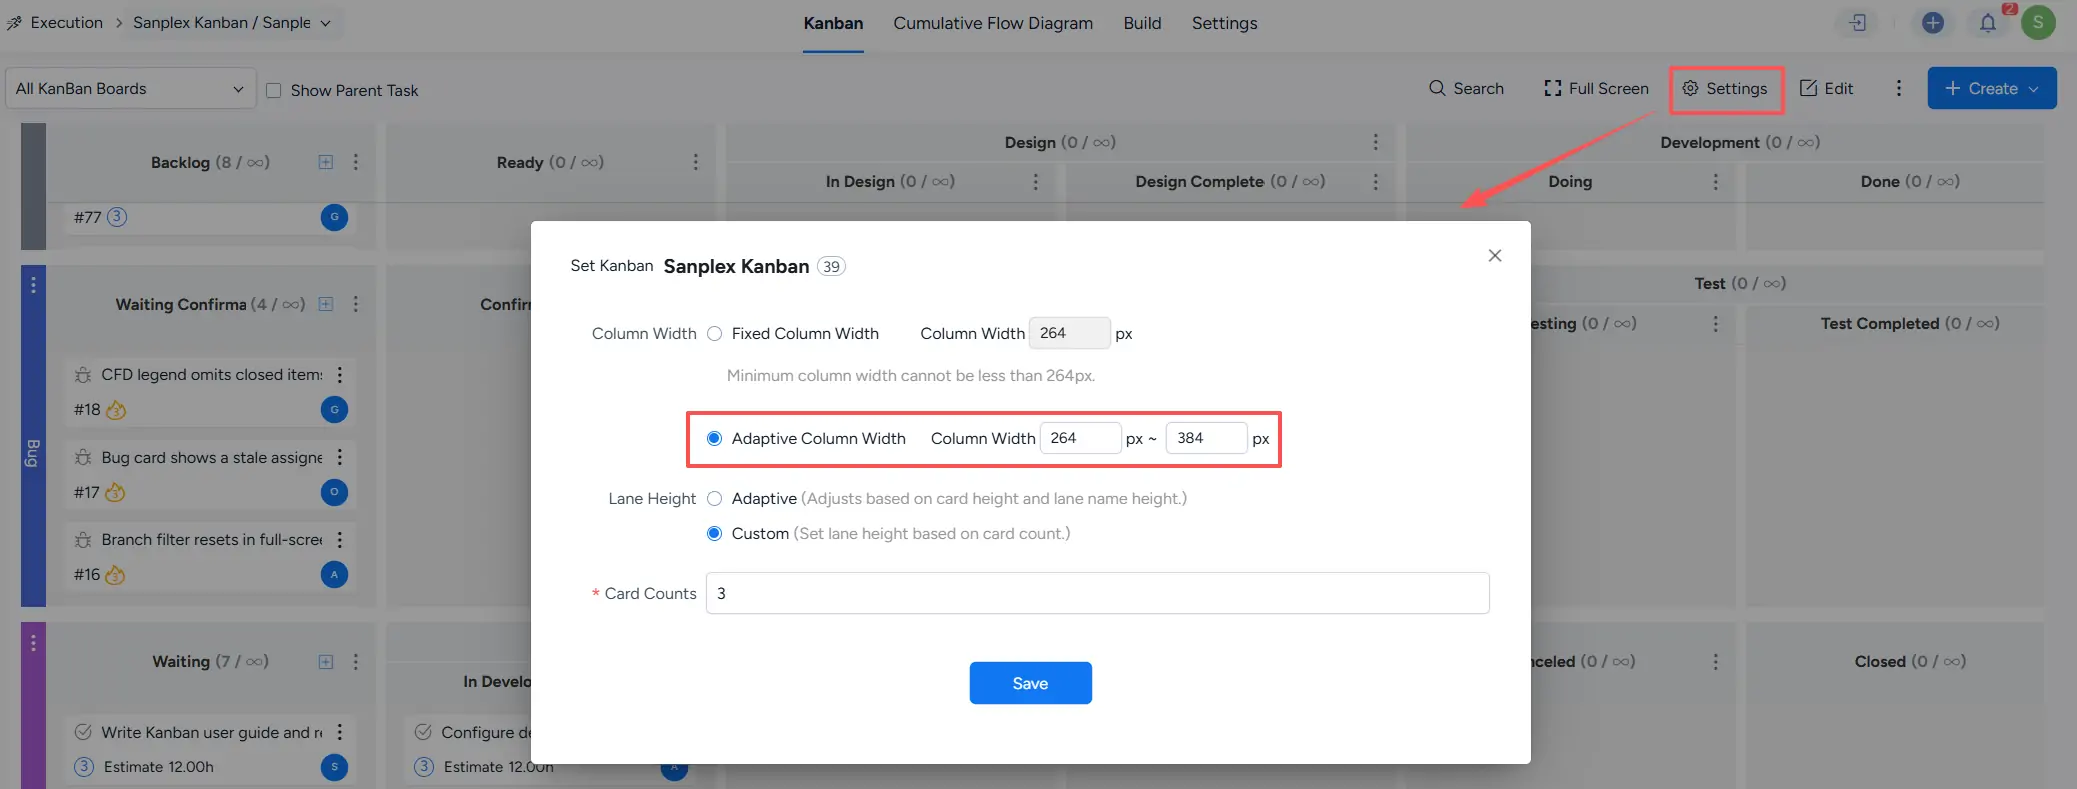
Click Settings in the upper-right corner of the Kanban Board to configure board display settings.
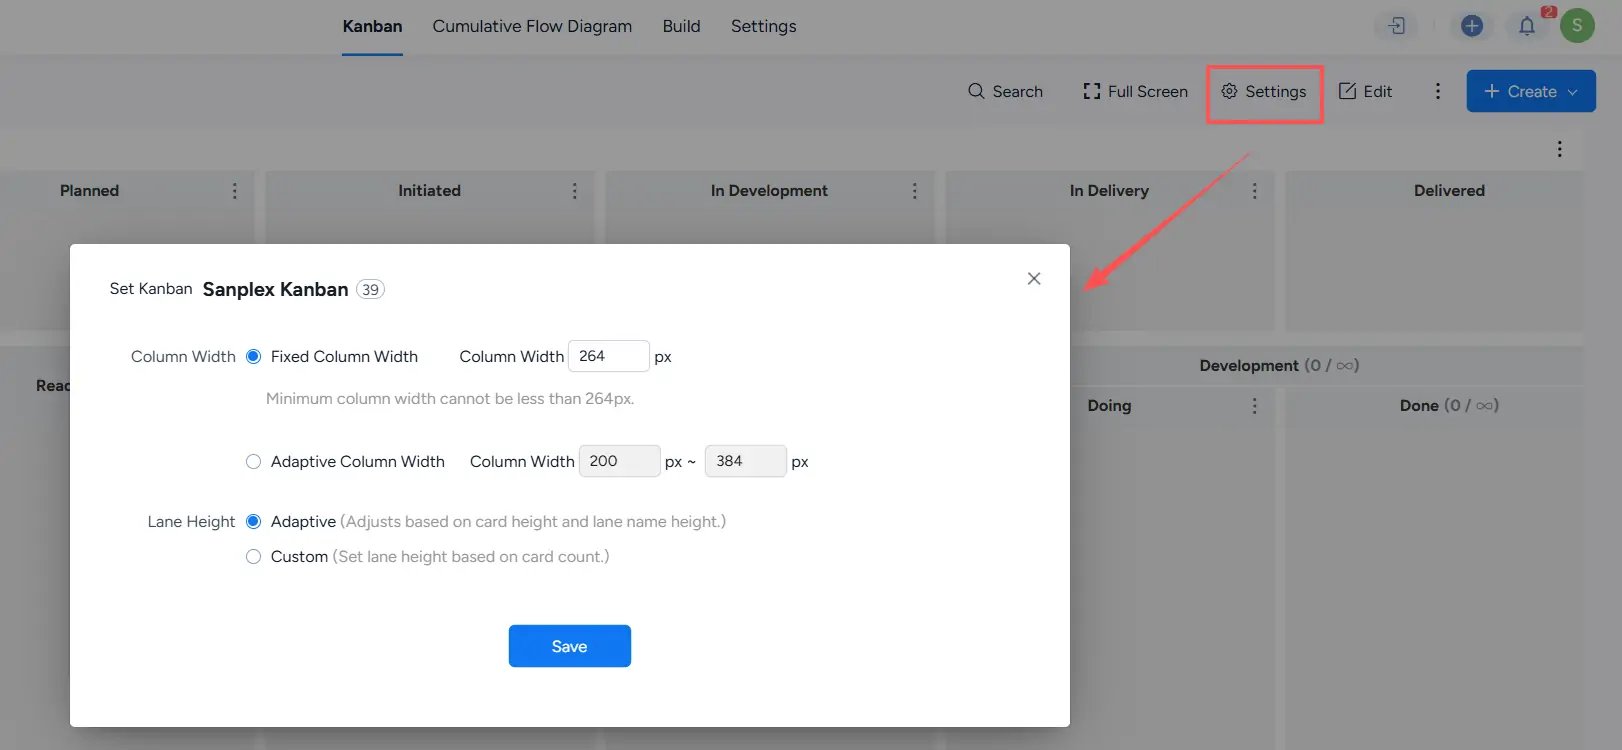
The Set Kanban dialog provides settings for Column Width and Lane Height.
1. Manage Areas
A Kanban board can contain multiple Areas. Open the board-level more actions menu and select Create Area.
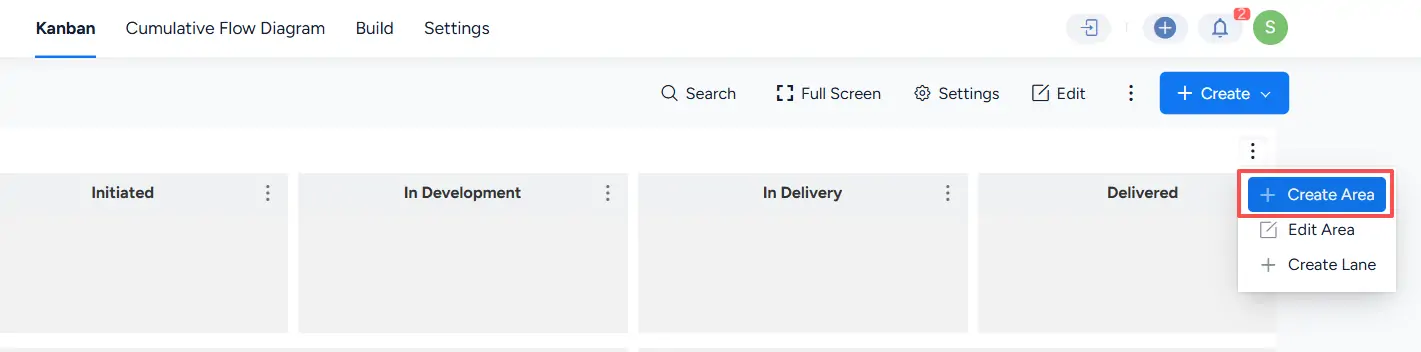
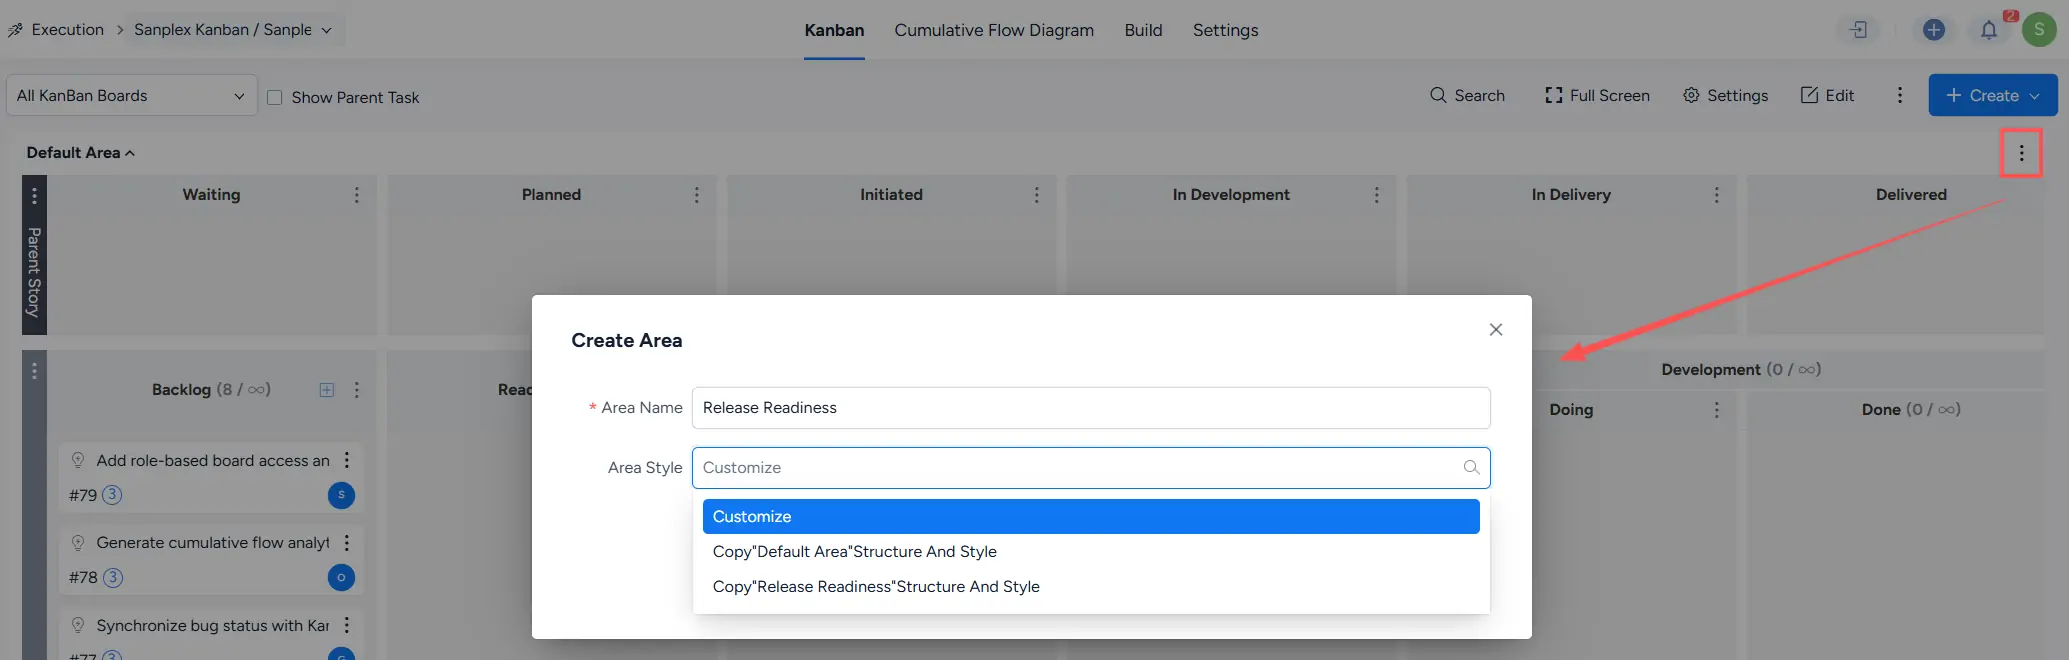
Enter an Area Name and select an Area Style.
You can create a customized Area or copy the structure and style of an existing Area.
After an Area is created, use its more actions menu to manage it. Available actions include Create Area, Edit Area, Create Lane, and Delete Area.

2. Set Lane Height and Card Count
Under Settings > Lane Height, select Adaptive to let Sanplex adjust the lane height based on card and lane-name height.
Select Custom to control the lane height by the number of visible cards. The Card Counts value must be an integer between 3 and 100.
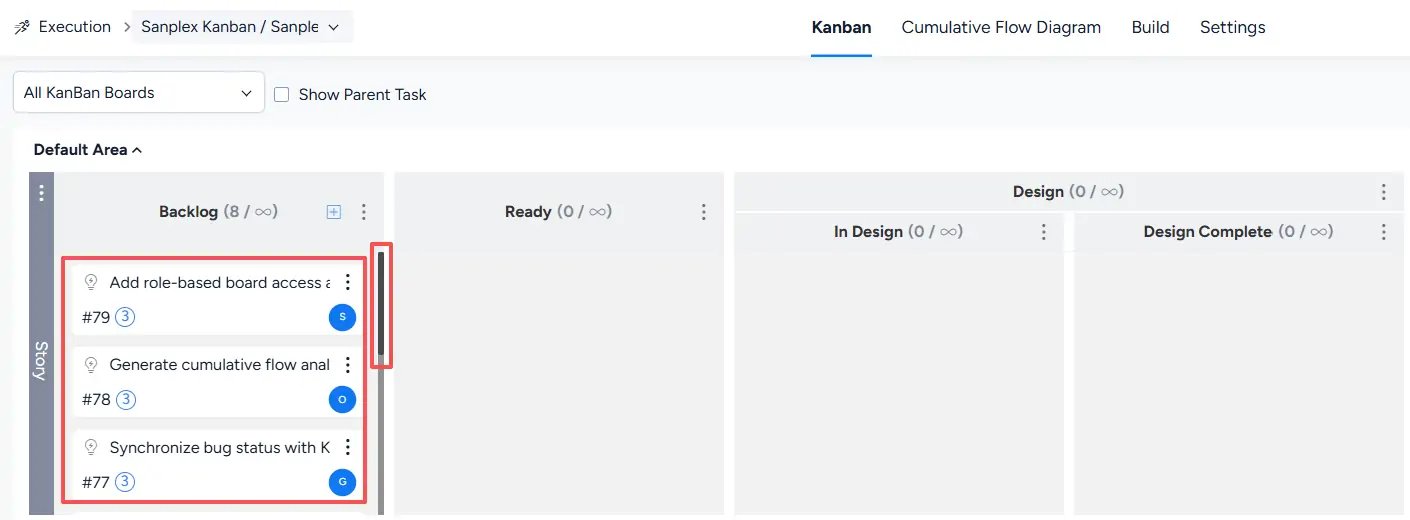
When the number of cards exceeds the configured visible card count, a scrollbar is displayed so that additional cards can be viewed within the lane.
3. Set Column Width
Sanplex provides two column-width modes:
- Fixed Column Width uses one configured width value.
- Adaptive Column Width uses a configurable minimum and maximum width range.
These settings control how board columns use the available display space. Select the mode and width values that fit the current board layout.
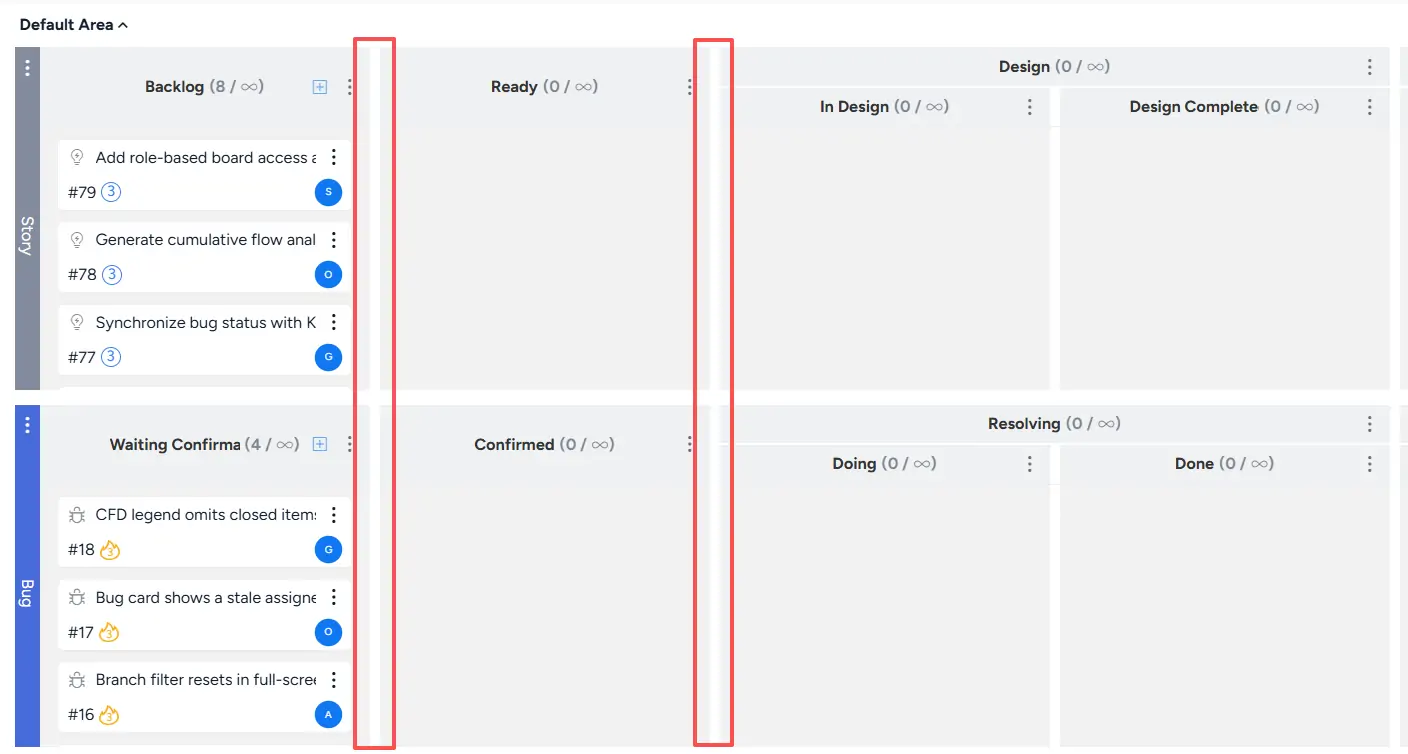
After the width setting is applied, the board displays its columns using the selected column-width configuration and the available board space.
4. Configure Column Names and Colors
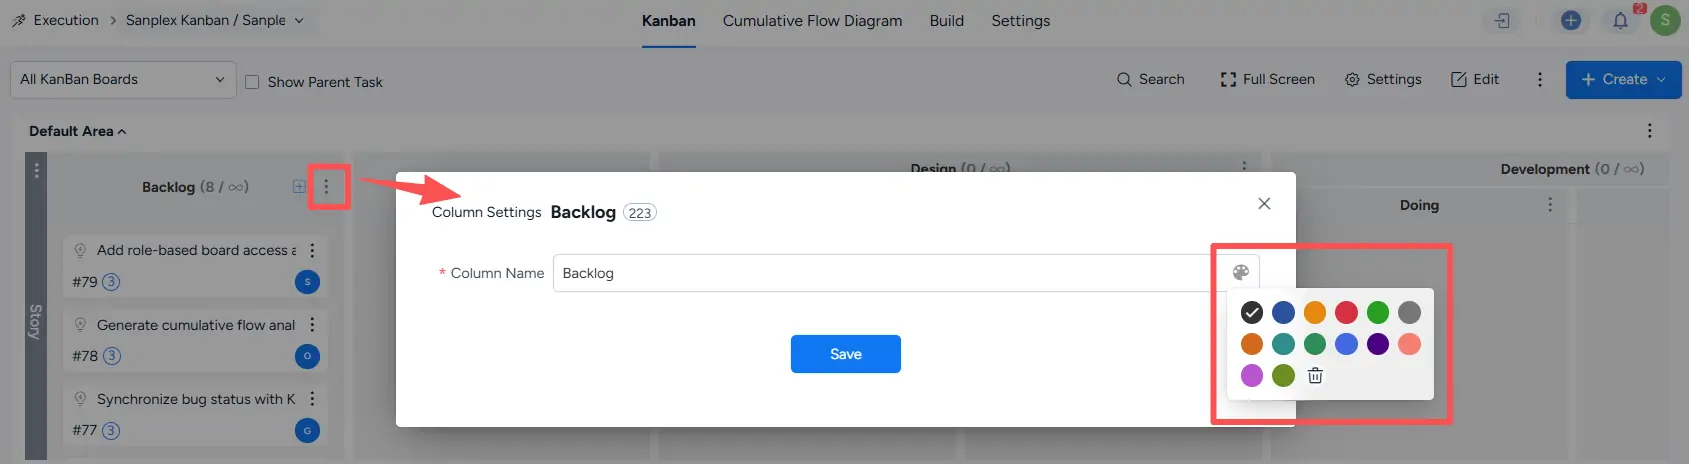
Open the more actions menu for a board column to edit the column settings.
You can change the Column Name and select a display color for the column.
5. Set WIP Limits for Board Columns
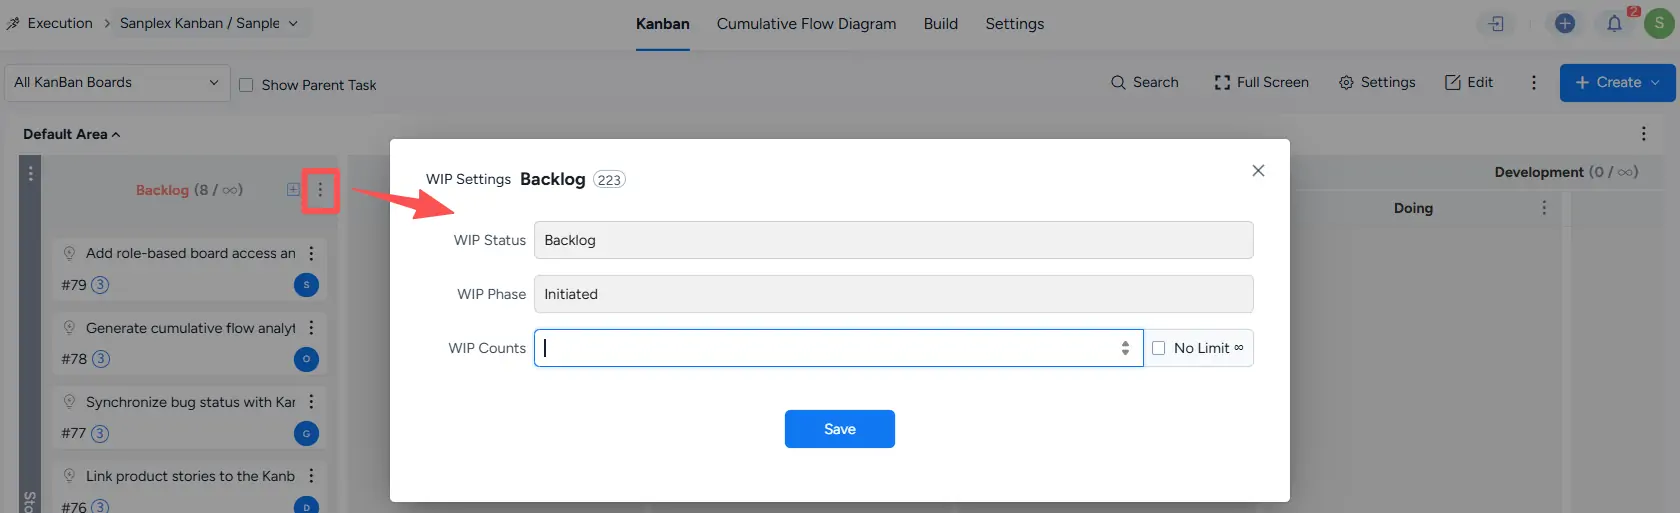
Open the WIP Settings for a column to configure its Work in Progress (WIP) limit.
Enter a value in WIP Counts, or select No Limit when the column does not require a WIP limit.
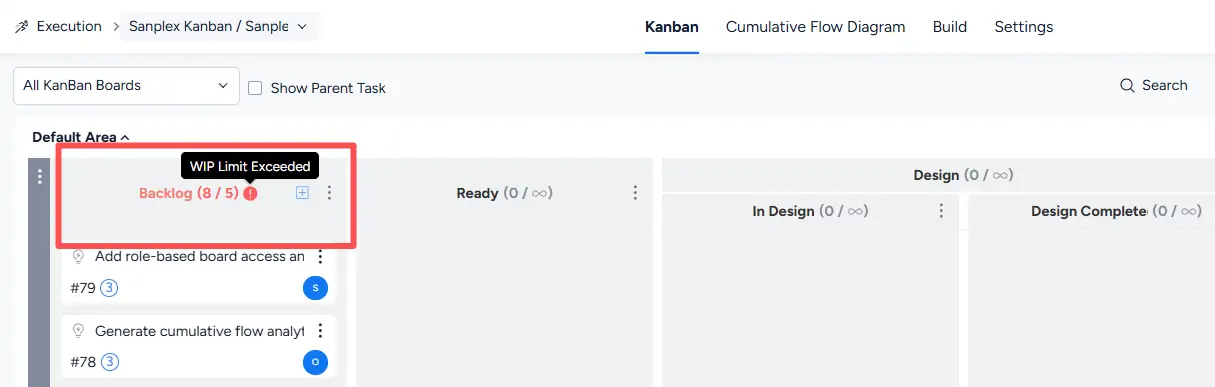
When the number of items in a column exceeds its WIP limit, Sanplex highlights the WIP count and displays a warning indicator. Hover over the indicator to view the WIP Limit Exceeded message.
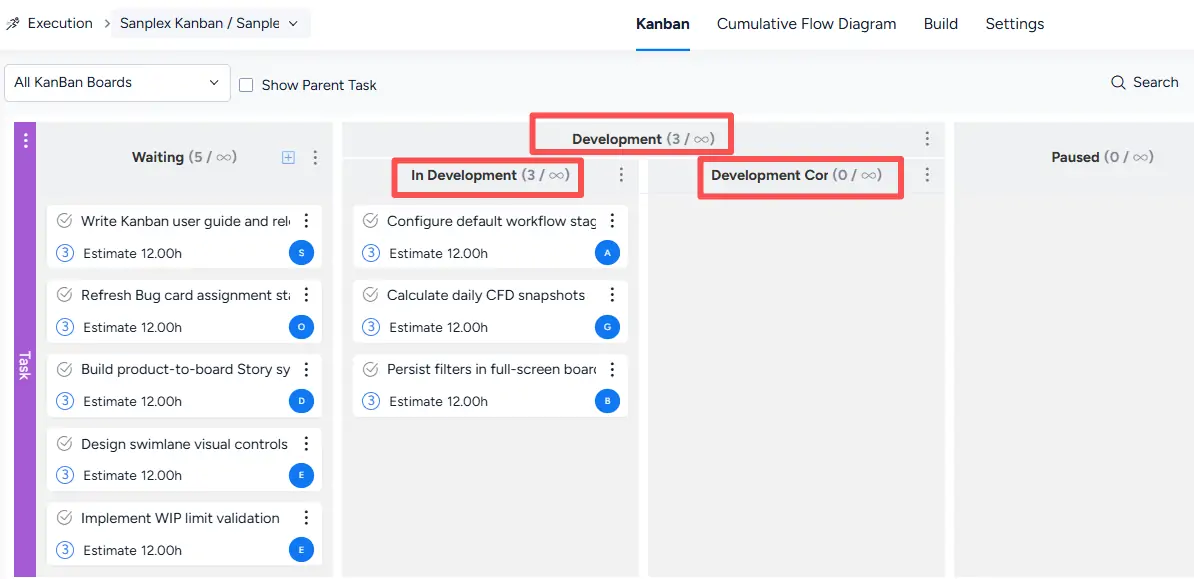
For columns that contain subcolumns, WIP information is displayed at both the parent-column and subcolumn levels.
The following example shows the parent Development column with its development subcolumns.
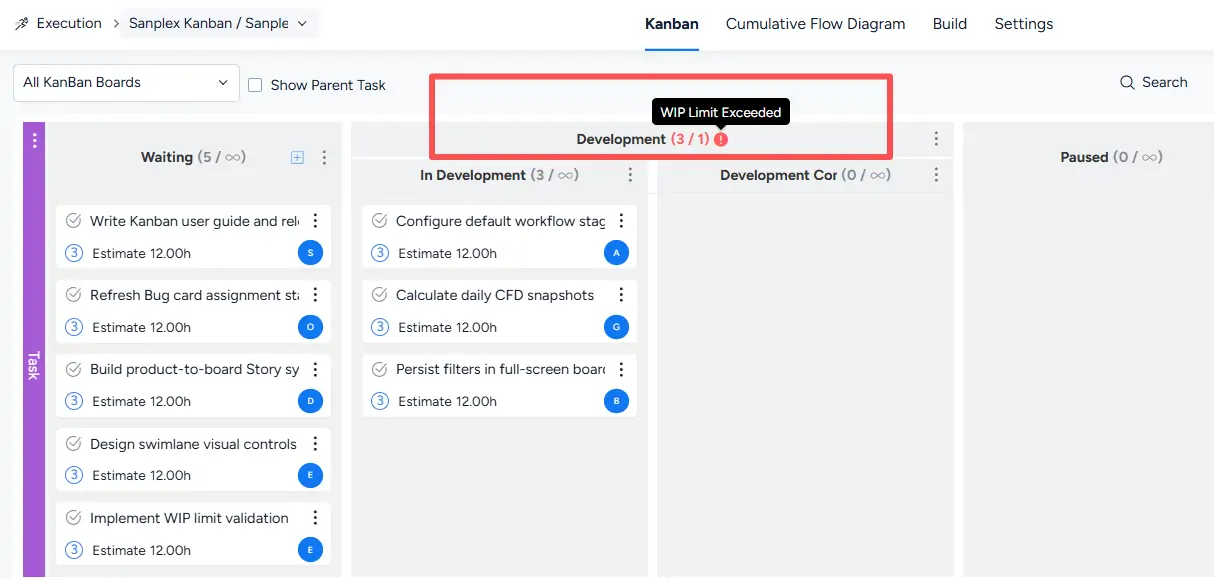
When the number of items in the parent column exceeds its configured WIP limit, the parent column displays the corresponding WIP warning.
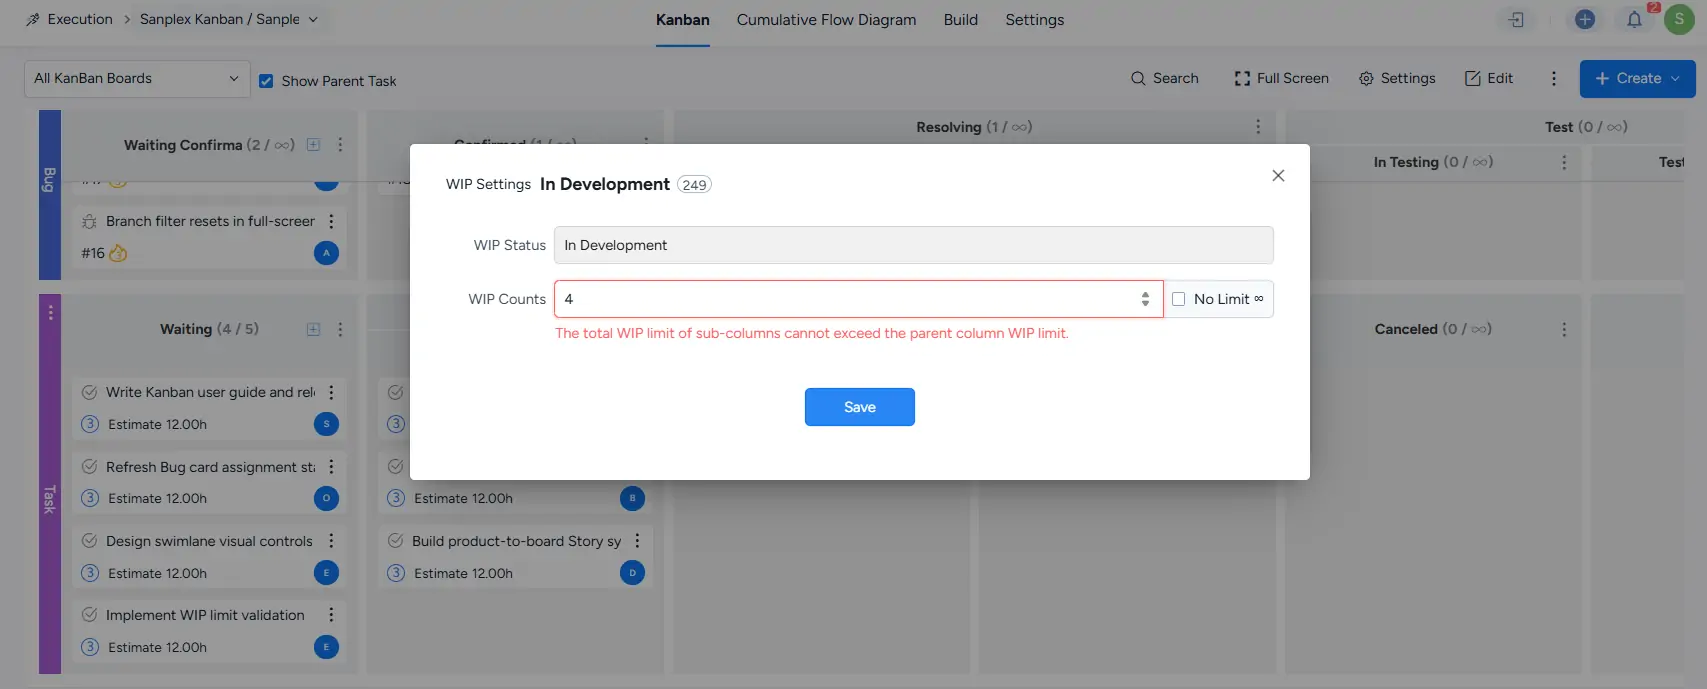
When configuring WIP limits for subcolumns, the total WIP limit of the subcolumns cannot exceed the WIP limit of the parent column. Sanplex displays a validation message when the configured values do not meet this rule.
6. Manage Lanes
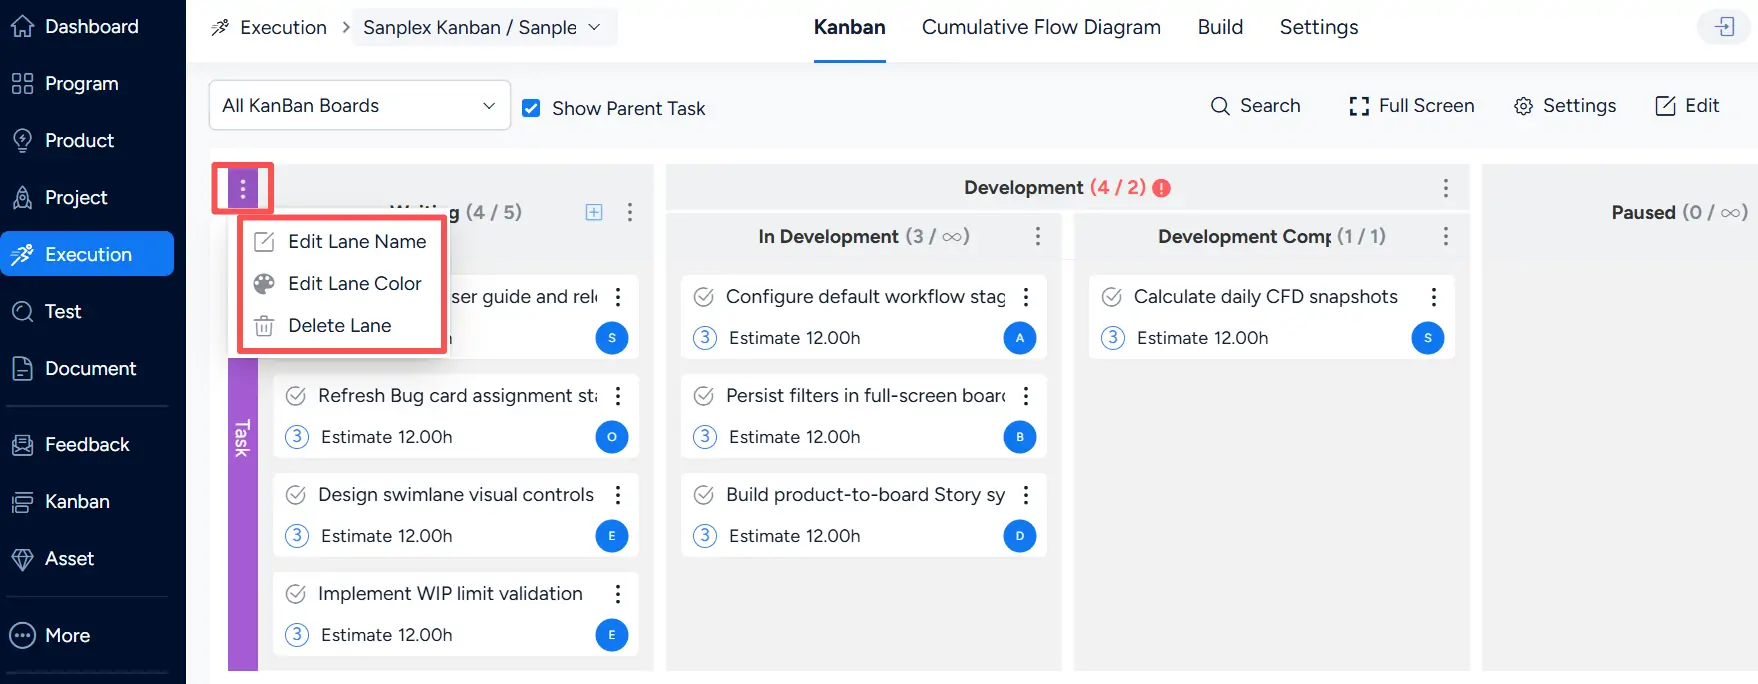
Open the more actions menu on the left side of a lane to manage it.
Available actions include Edit Lane Name, Edit Lane Color, and Delete Lane.
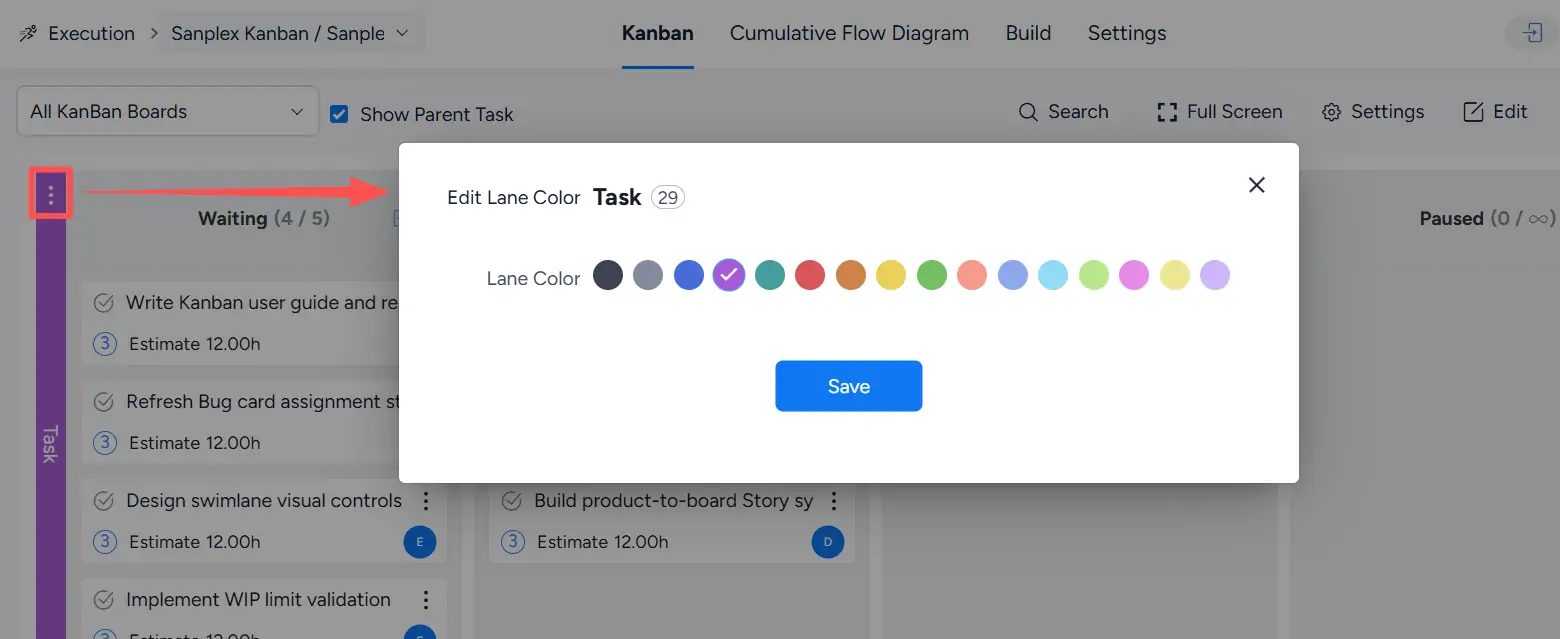
Select Edit Lane Color to choose a display color for the lane.
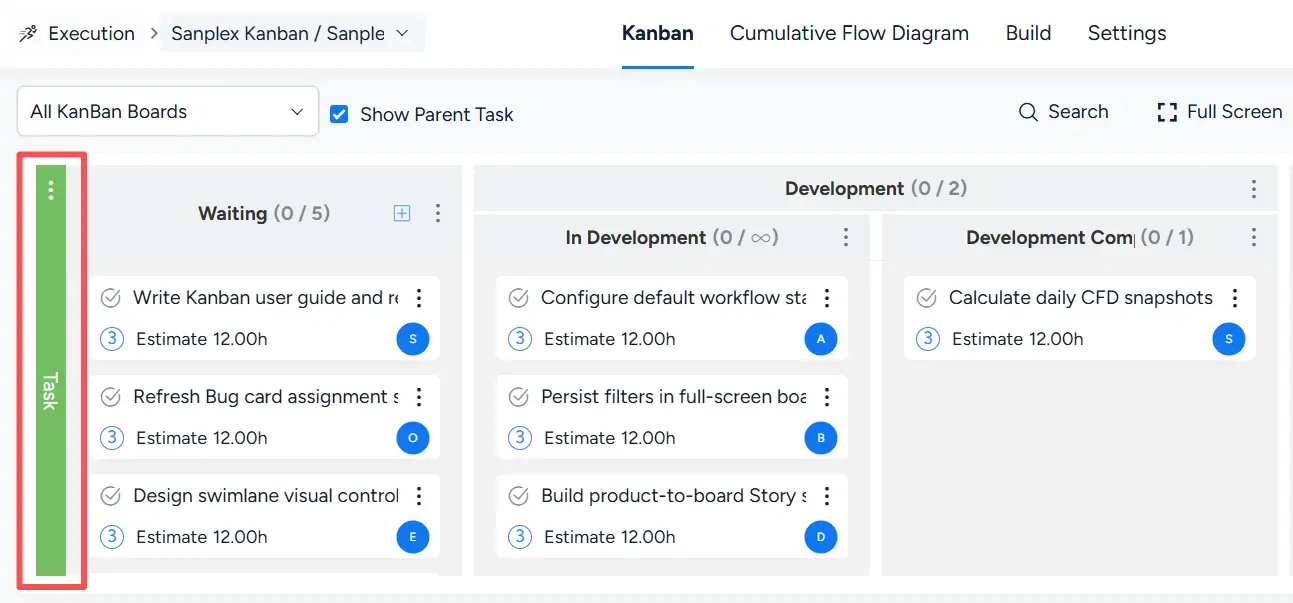
After the setting is saved, the selected color is applied to the lane indicator on the left side of the board.
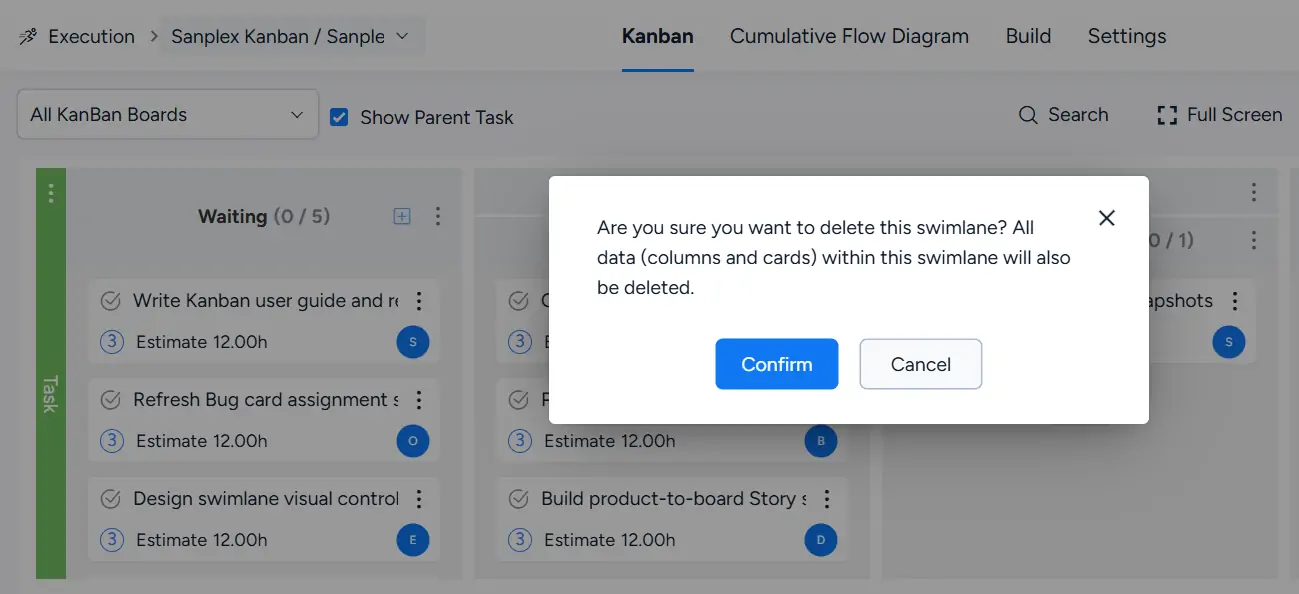
When deleting a lane, Sanplex displays a confirmation dialog indicating that the columns and cards contained in the lane will also be deleted. Click Confirm to continue or Cancel to keep the lane.