
Waterfall Project
1. Introduction of Sanplex features
1.1. Core Management Framework
1.1.1 Program
1.1.2 Project
1.1.3 Product
1.1.4 Execution
1.1.5 Management Models
1.2. Dashboard
1.2.1 Getting Started with Tutorials
1.2.2 Quick Add
1.2.3 Notification Center
1.2.4 Effort Tracking
1.2.5 Dashboard - Project and Execution
1.2.6 Dashboard - My Work, Contribution, and Recents
1.2.7 Dashboard - Approval
1.2.8 Contacts
1.3. Program
1.3.1 Program List
1.3.2 Program Kanban
1.3.3 Create Program
1.3.4 Create Sub-Programs
1.3.5 Project Charter Management
1.4. Product
1.4.1 Create Product
1.4.2 Manage Modules
1.4.3 Multi-Branch and Multi-Platform Management
1.4.4 Manage Plans
1.4.5 Manage Requirements
1.4.6 Requirement Reviews
1.4.7 Requirement Status and Phase
1.4.8 Create Releases
1.4.9 Track Progress
1.4.10 Business Requirements and Multi-Level Requirements
1.5. Project
1.5.1 Scrum Project
1.5.2. Waterfall Project
1.5.2.1 Manage Project Phases
1.5.2.2 Project Design
1.5.2.3 Project Matrix
1.5.2.4 Project Reports and Earned Value Management
1.5.2.5 Project Baselines
1.5.2.6 Project Change
1.5.3. Kanban Project
1.5.3.1 Set Up Kanban Projects
1.5.3.2 Configure Kanban Boards
1.5.3.3 Use Kanban Boards
1.5.4 Hybrid Agile Project
1.5.5 Hybrid Waterfall Project
1.5.6. Project Settings
1.5.6.1 Project Setup
1.5.6.2 Project Executions
1.5.6.3 Project Requirements
1.5.6.4 Project Builds
1.5.6.5 Project Tests
1.6. Admin Settings
1.6.1 Confluence Data Import
1.7. Workflow

Project Design

2026-03-22 16:40:00
Sanplex Content
309
Last edited by Jing WANG on 2026-08-25 14:55:26
Share links
Summary: Learn how to create, link, search, and manage Designs in Waterfall Projects and configure Design Development activities in Project Flow.

Feature Overview

The Design feature in Waterfall Projects helps teams manage design information throughout the design process. It supports different types of design work, including High-Level Design, Detailed Design, Database Design, and Interface Design.

Designs can be linked to Product Stories to maintain traceability between requirements and design work. Users can create, update, search, and manage Designs from the Project workspace, while Project Flow settings provide corresponding design development activities for the Waterfall process.

I. Create a Design

Go to Project > Design and click Create Design.

Project Design page showing the All, High-Level Design, Detailed Design, Database Design, and Interface Design tabs, with the Create Design button in the upper-right corner. 

On the Create Design page, select the Linked Product and, when applicable, select a Linked Story to associate the Design with related requirement work.

Select the required Type, enter the Name, and add a Description as needed. You can also link a Doc or upload an Attachment.

Click Save to create the Design.
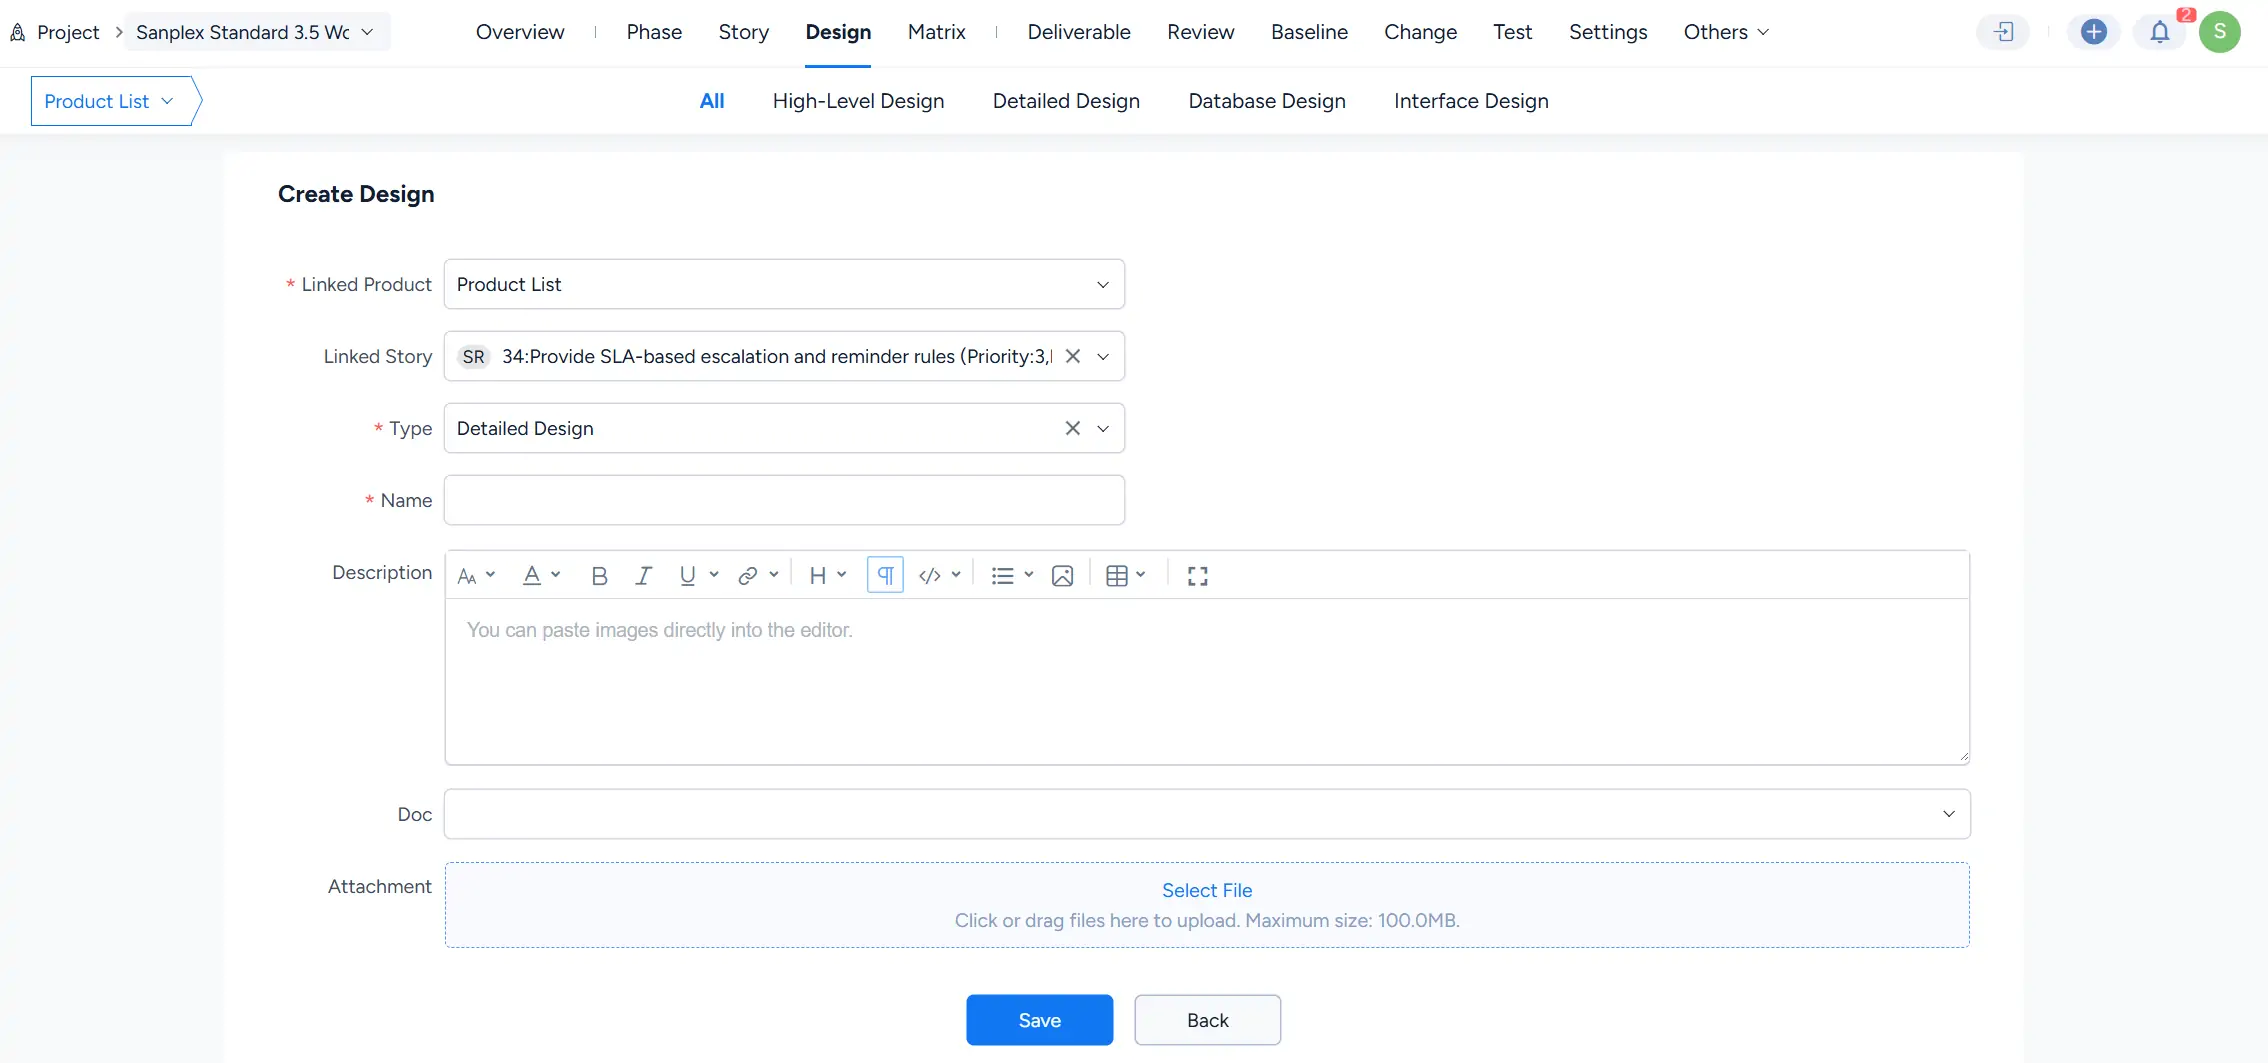
Create Design page showing Linked Product, Linked Story, Type, Name, Description, Doc, and Attachment fields, with Detailed Design selected as the Design type.

After the Design is created, it appears in the Design list.

Use the tabs to view Designs by type:

  • All
  • High-Level Design
  • Detailed Design
  • Database Design
  • Interface Design

You can also use Search to locate Designs more precisely. Available search criteria include fields such as Type, Name, Creator, Created Date, Assigned to, Linked Story, and ID.
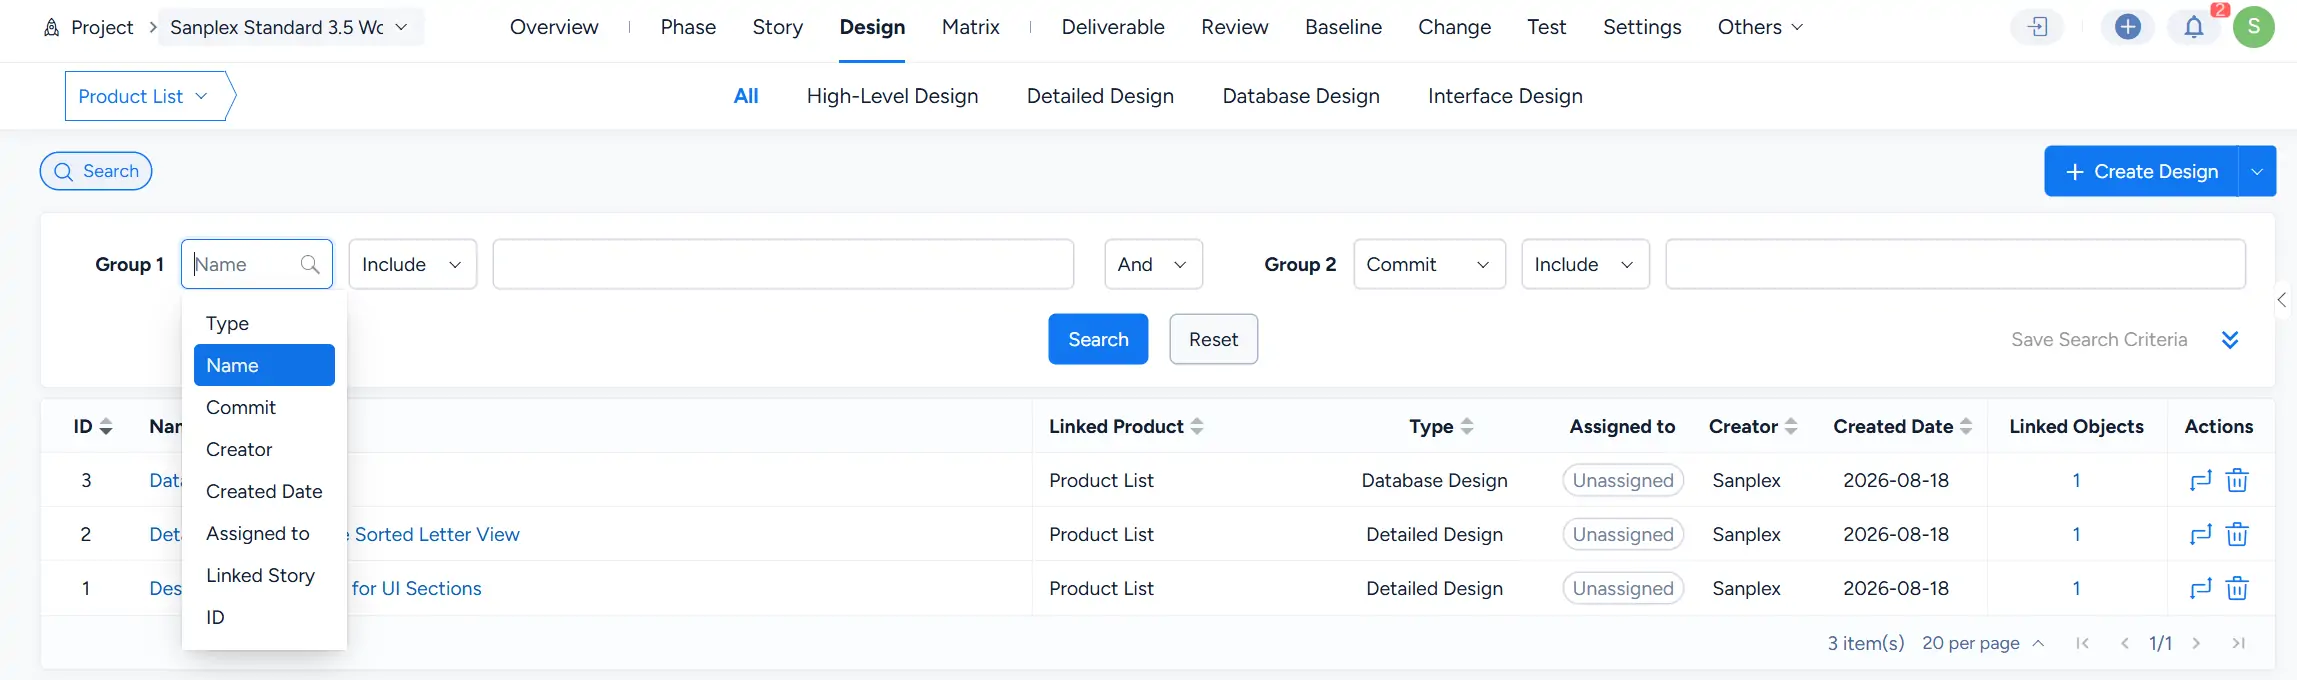
Project Design page with the Search panel expanded, showing searchable fields including Type, Name, Creator, Created Date, Assigned to, Linked Story, and ID.

II. Change or Delete a Design

After a Design is created, the Design list displays information such as its Linked Product, Type, Assigned to, Creator, Created Date, and Linked Objects.

Use the available actions to change or delete a Design as needed.

A Design change allows the existing design information to be revised while maintaining the Design within the project workflow.
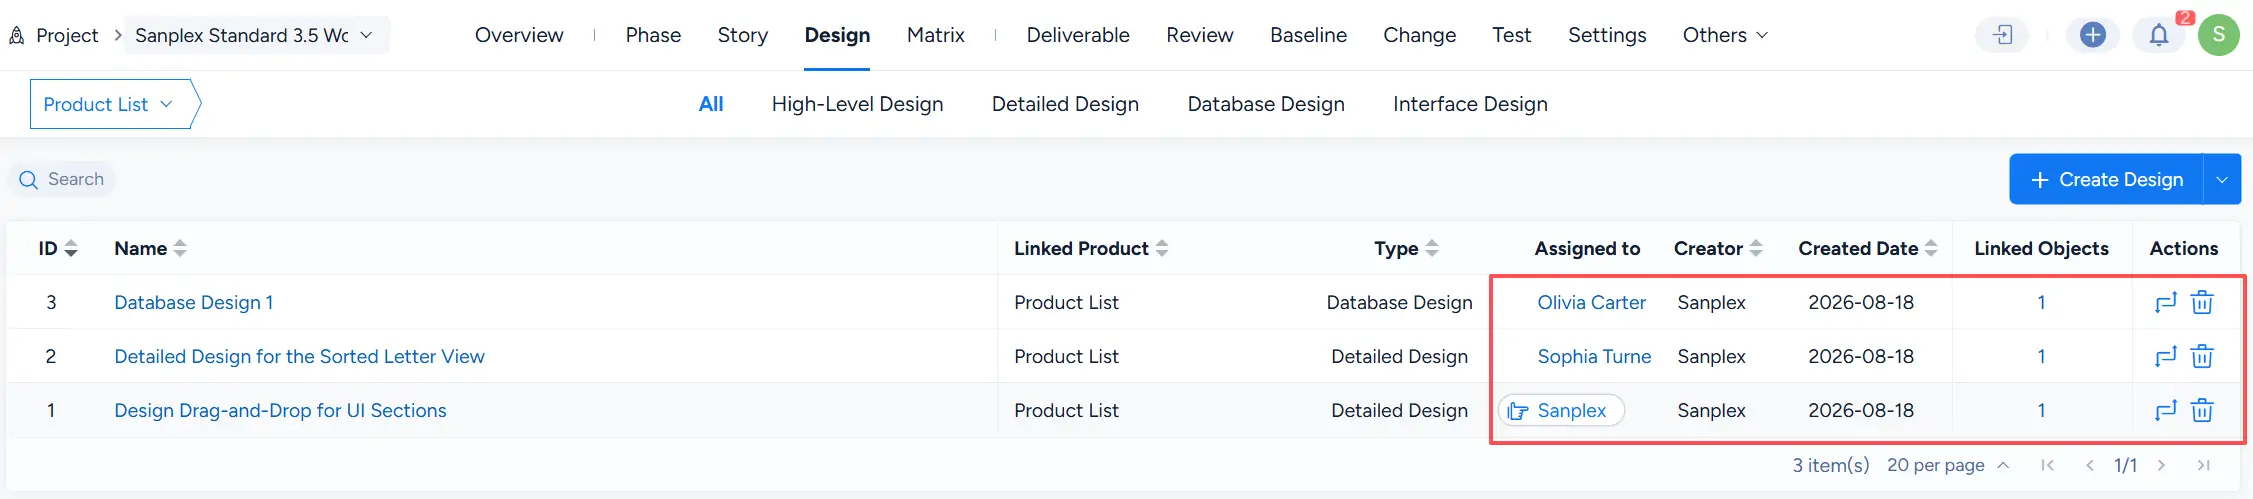
Project Design list showing three Designs with Linked Product, Type, Assigned to, Creator, Created Date, Linked Objects, and Actions columns, with the assignee information and action buttons highlighted.

III. Configure Design Development Activities

Waterfall Project Flows can define the activities used during the design development process.

To view or maintain these activities, go to:

Admin > Project Flow > [Waterfall Project Flow] > Process > Activity

Then select Design Development.

The current Design Development process includes activities such as:

  • Overview Design
  • Review the Overview Design
  • Detailed Design
  • Review the Detailed Design
  • Database Design
  • Interface Design

In the Project Design workspace, the corresponding design categories include High-Level Design, Detailed Design, Database Design, and Interface Design.

Administrators can use the Activity List to review, create, edit, or delete Design Development activities according to the Project Flow.
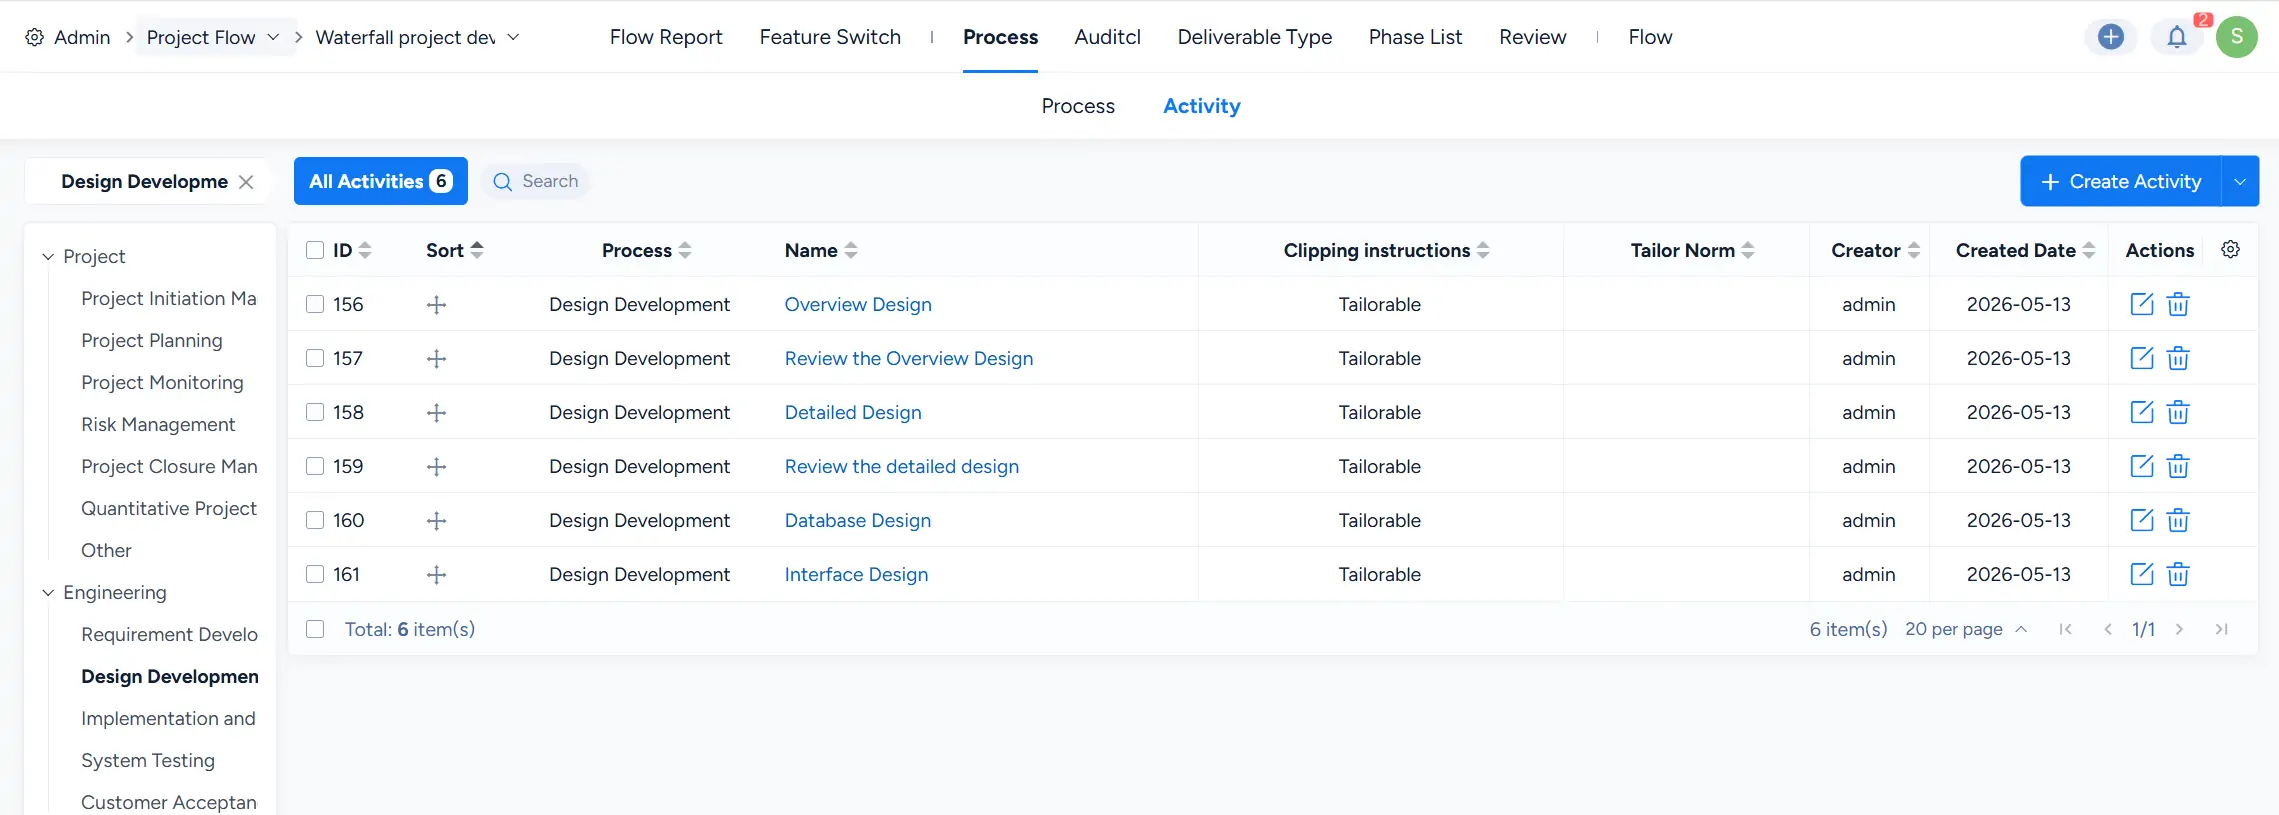
Admin Project Flow Activity page with Design Development selected, showing six activities: Overview Design, Review the Overview Design, Detailed Design, Review the detailed design, Database Design, and Interface Design, together with Create Activity and edit and delete actions.

Write a Comment
Comment will be posted after it is reviewed.
