

Catalog
Sanplex LDAP relies on the PHP LDAP extension, so the LDAP extension must be enabled/loaded.
I. Installing LDAP on Windows
- If php_ldap.dll is already present in your PHP installation, open php.ini, find the line ;extension=php_ldap.dll, delete the leading semicolon, and save the file.
- If php_ldap.dll is missing, download the build that matches your PHP version, place the file in your PHP extension directory, and repeat the step above.
- Restart the Apache service.
Verifying the Installation
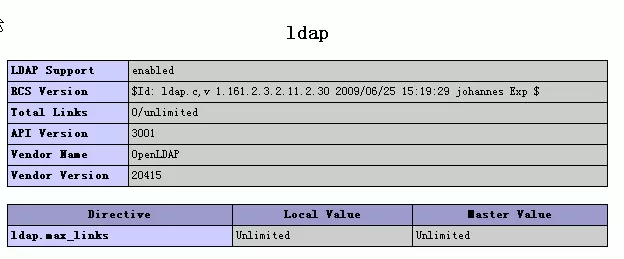
Open the phpinfo() page. If it displays the screen shown below, the PHP LDAP extension has been enabled successfully.
By configuring LDAP, Sanplex supports automatic authentication against an LDAP server. Sanplex also supports importing users from LDAP, addressing user import and single sign-on needs in Windows domains (Windows AD).
II. LDAP Server Configuration
Configure LDAP in Admin > System > LDAP.

If the configuration is correct, users can log in with their LDAP username and password. Sanplex will authenticate automatically and add the user to the database.
If Anonymous is enabled, the admin account and password fields will be hidden and do not need to be filled in.
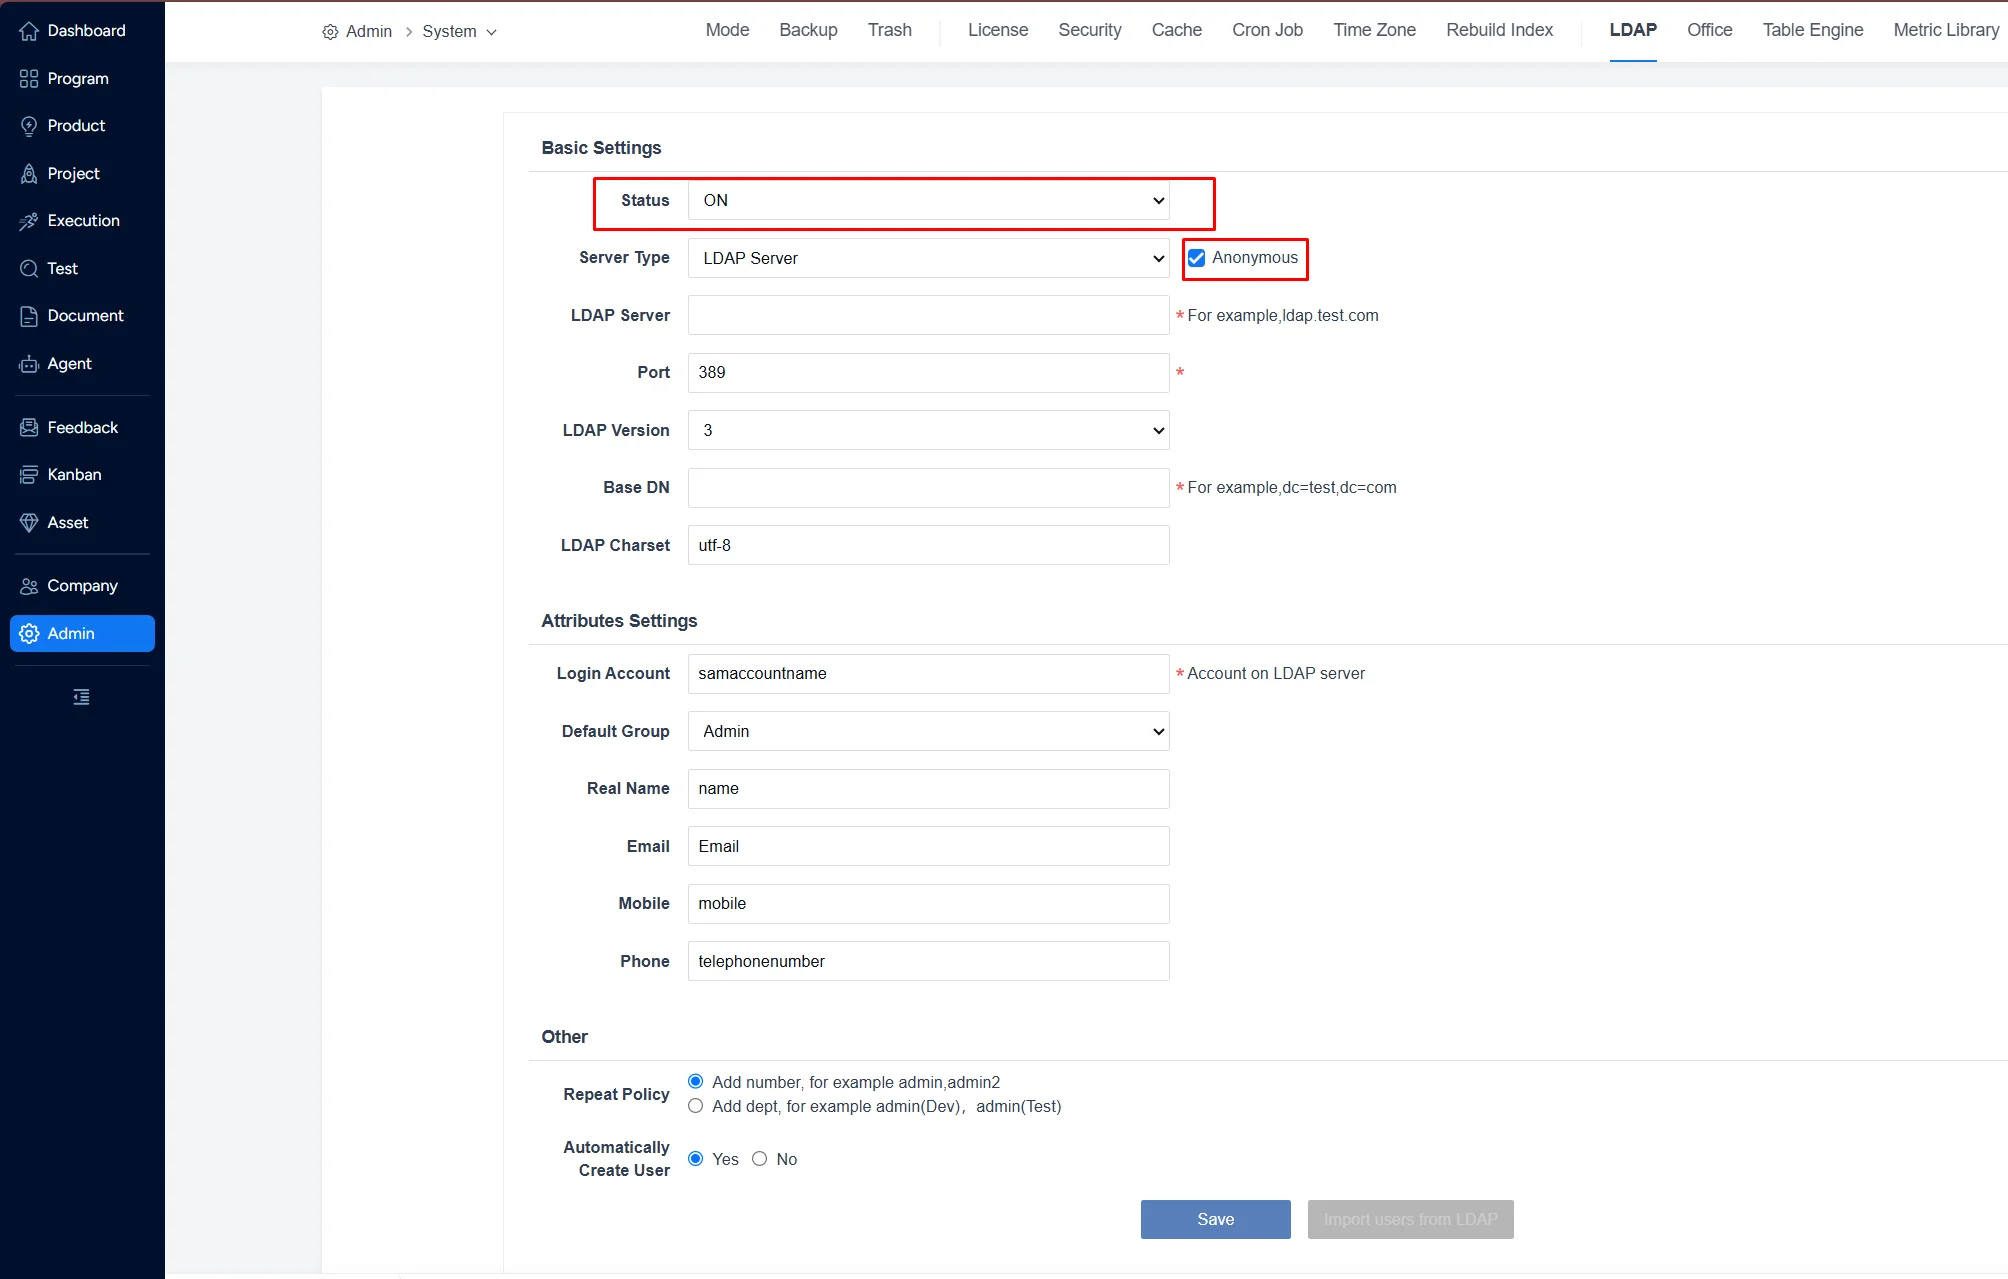
Notes:
-
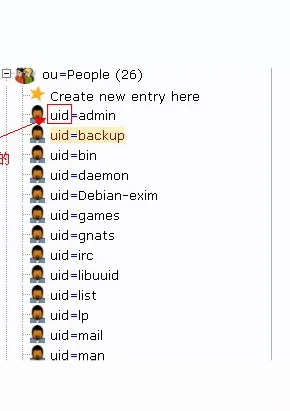
Base DN should be filled in as shown below.

-
Login Name should be set to the username attribute used by the LDAP server, as shown below.
III. Active Directory Configuration
Set the server type to Active Directory. Since Active Directory does not allow anonymous login, you must enter the admin account and password.
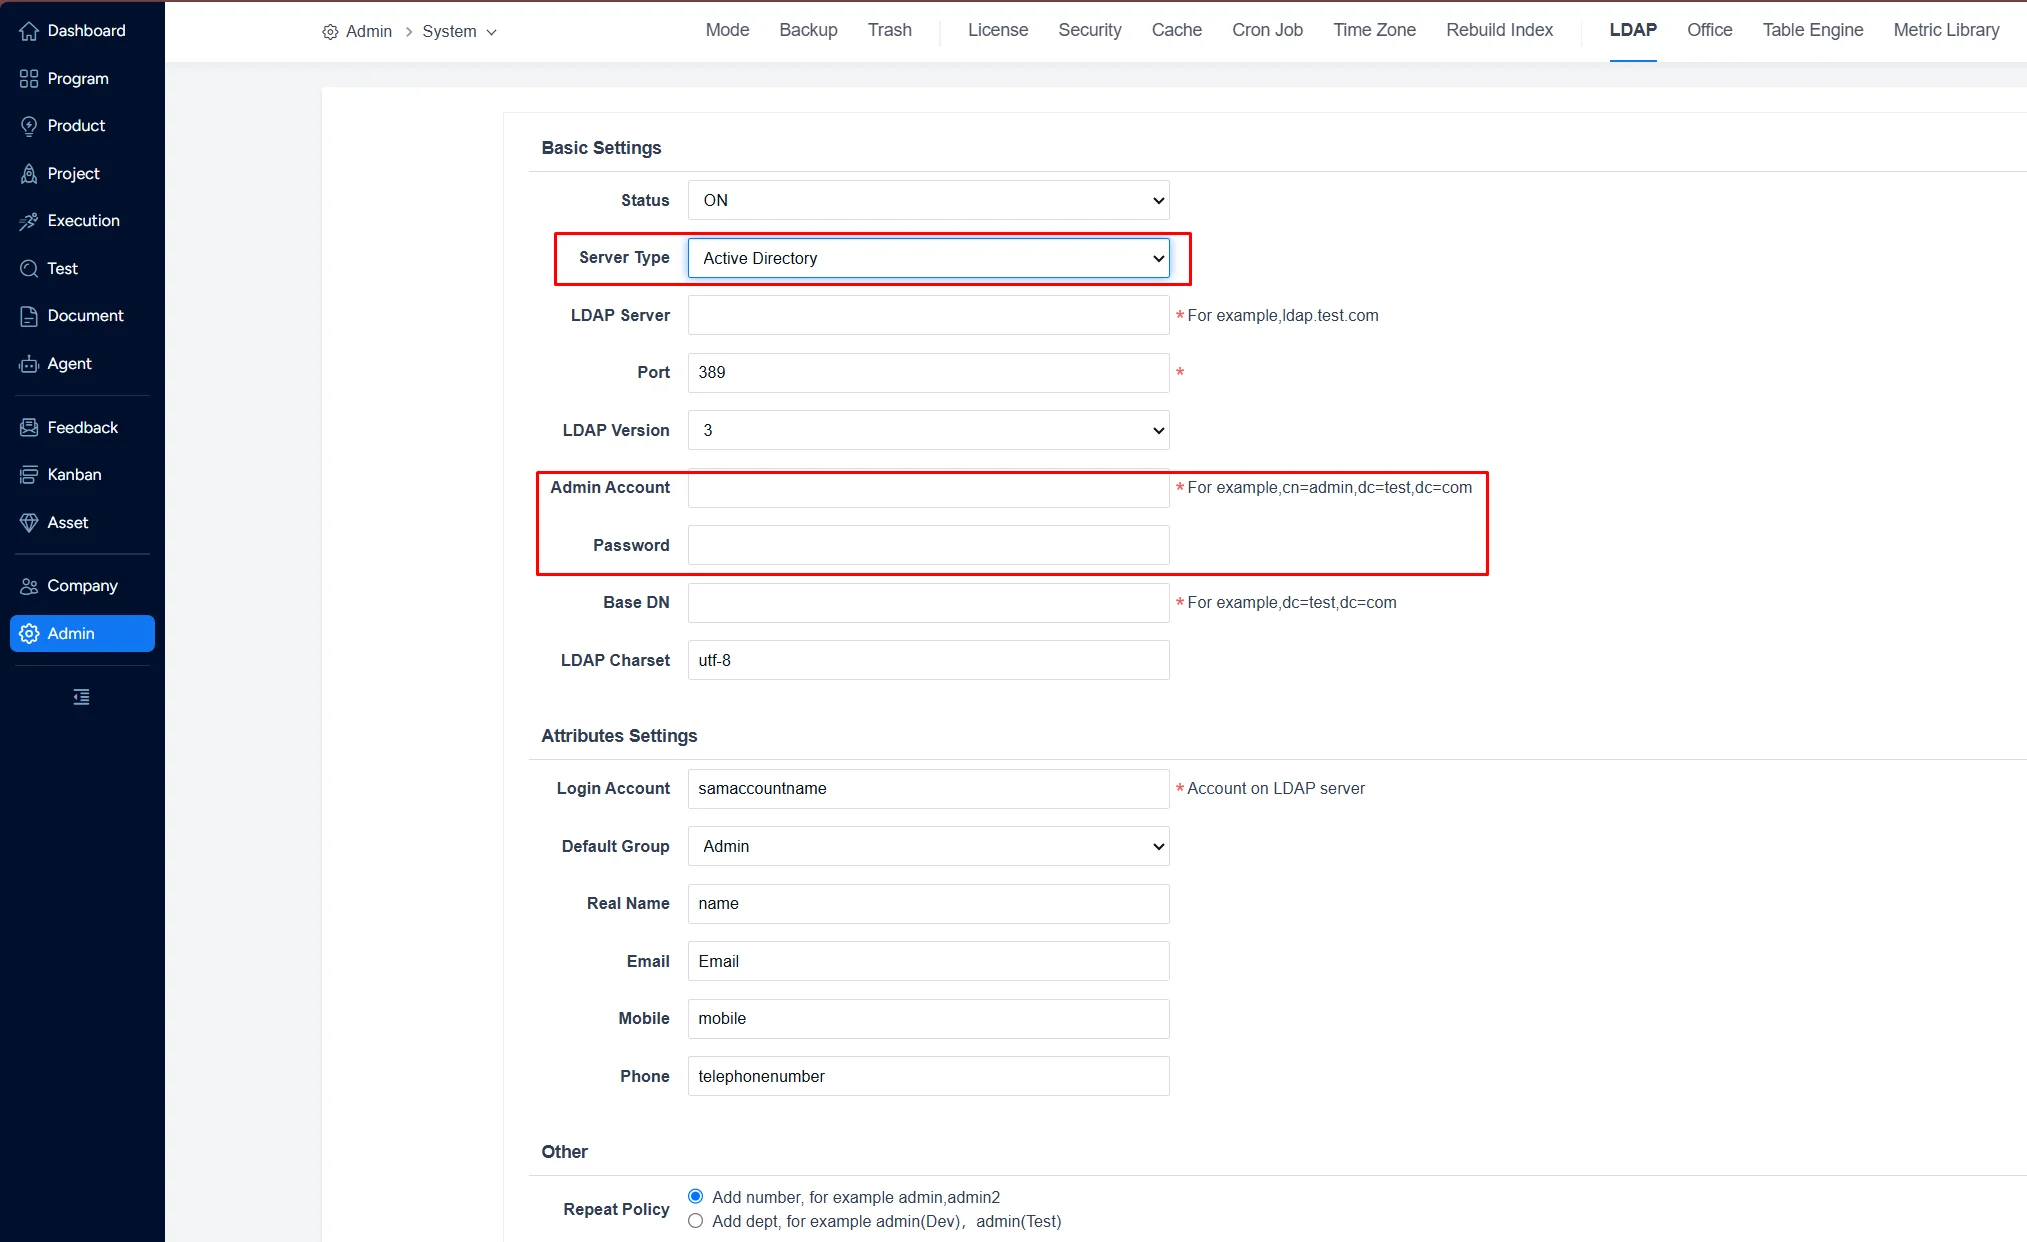
Note: The admin account must have sufficient permissions for the domain; otherwise, queries may fail.
Fill in the admin account. Ensure access is allowed in the Active Directory configuration; otherwise, users will not be able to log in.
IV. Import Users
After the LDAP configuration, click Import Users from LDAP to import users.
When associating local accounts, select a local account to bind the LDAP user to that account. You can use search filters and duplicate-name handling rules to distinguish users with the same real name.
1. Search
In Admin > Users > User, click Import Users from LDAP to enter the import page, where you can see the search button.
Click Search to find users you want to import.
Search conditions can include the attributes configured during LDAP setup, such as Login Account, Real Name, Mobile, Phone, and Email. In addition, Sanplex provides a custom attribute search.
LDAP servers may contain additional attributes beyond the defaults. You can search these via the custom field by entering the attribute name and value using LDAP filter syntax.
Here is an example:
- To search for users where attribute
snis not equal towang, enter:!(sn=wang) - To search for users where attribute
snequalswang, enter:sn=wang
You can search other attributes in the same way.
2. Duplicate-Name Check and Display Options
When importing users from LDAP, if an LDAP user’s Real Name duplicates an existing Sanplex user’s real name, you can configure how to distinguish them in LDAP settings:
- Append a number after the real name, e.g., “Jhon”, “Jhon2”.
- Append the department after the real name, e.g., “Jhon (Dev)”, “Jhon(Test)”.
The default behavior is to append a number.
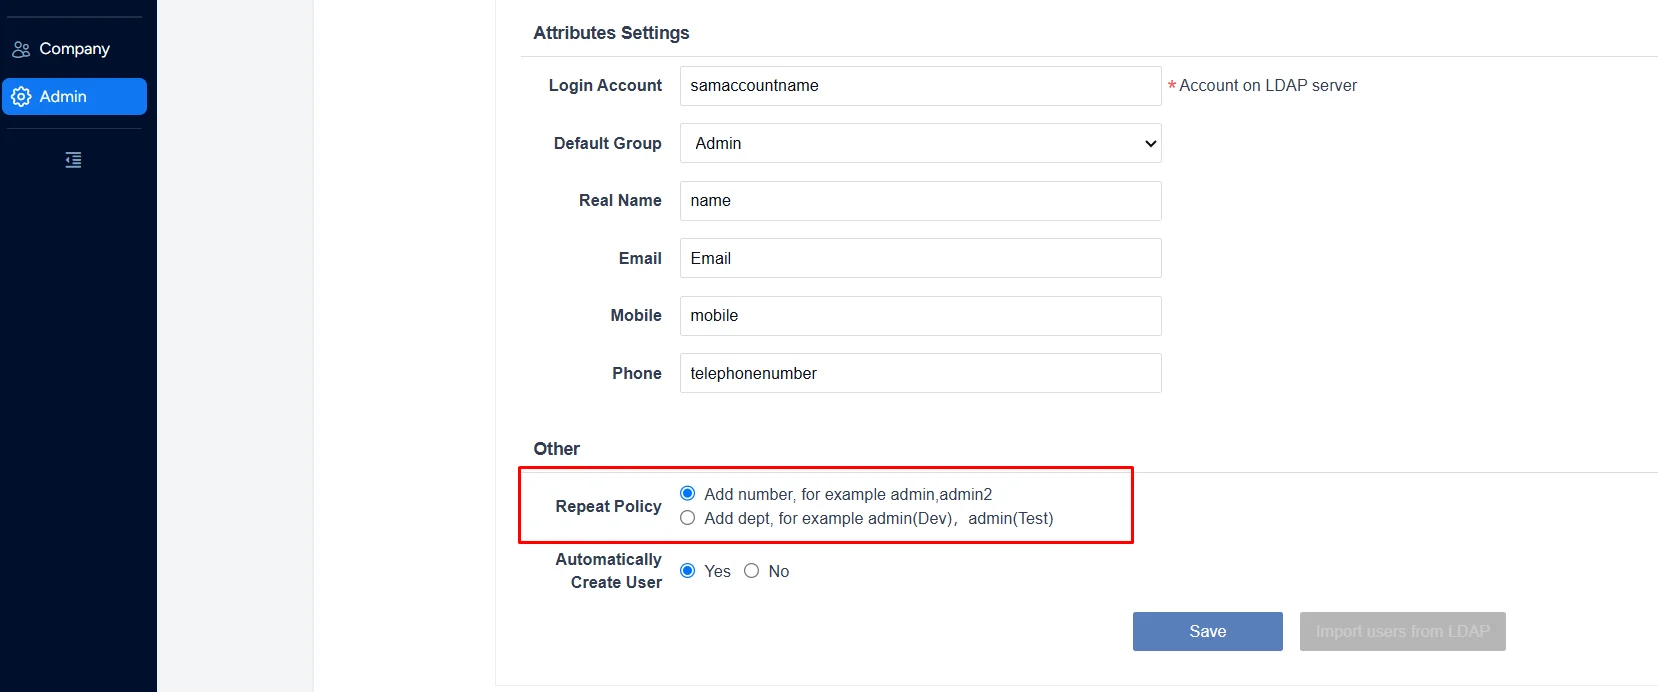
If you choose to append the department, you must select the target department during import. If no department is selected, it will display as “Jhon (0)”.


