

Catalog
Feature Overview
The Ticket feature helps teams submit, assign, track, and resolve internal and external issues through a standardized workflow. Tickets provide clear ownership and status tracking from creation through processing and closure.
Tickets can be handled directly or converted to a Story or Bug for further follow-up. Configurable modules, ticket fields, types, priorities, close reasons, and action permissions help teams manage tickets consistently across products.
Use Cases
- IT maintenance: Employees can submit tickets for device, network, or system issues and assign them to the appropriate team for processing and resolution.
- Customer service: Support teams can record customer issues as tickets, assign handlers, track progress, and convert product-related issues to Bugs when further defect tracking is required.
- Internal coordination: Teams can use tickets to manage cross-team requests, assign responsible users, and track each request through processing and closure.
I. Configure Ticket Permissions
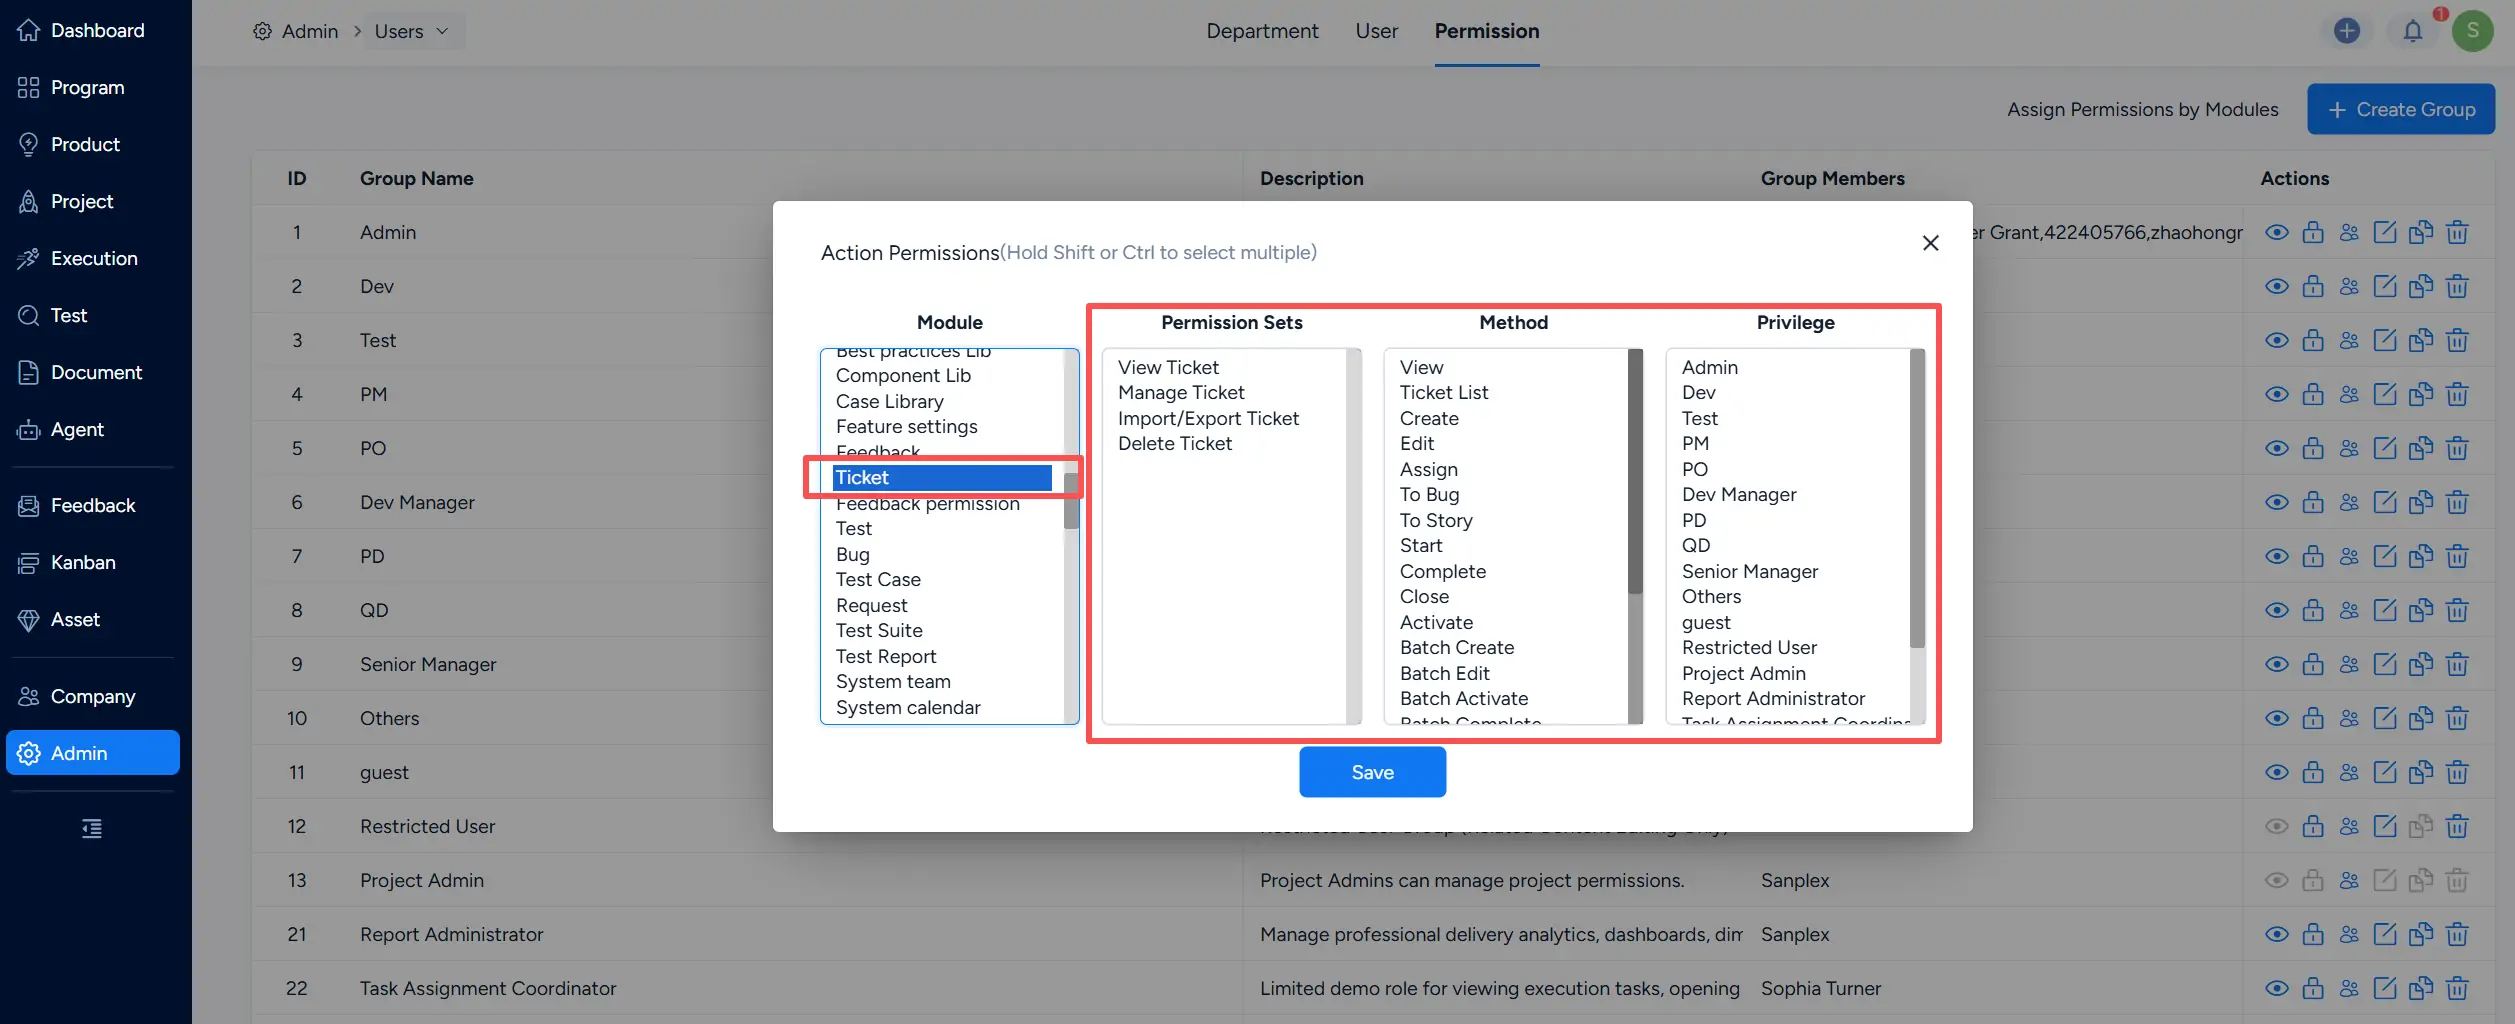
Ticket permissions can be configured in Admin > Users > Permission.
Select the Ticket module to configure permission sets and available actions for the appropriate permission groups. Ticket permissions include viewing and managing tickets as well as actions such as creating, editing, assigning, starting, completing, closing, activating, and converting tickets.
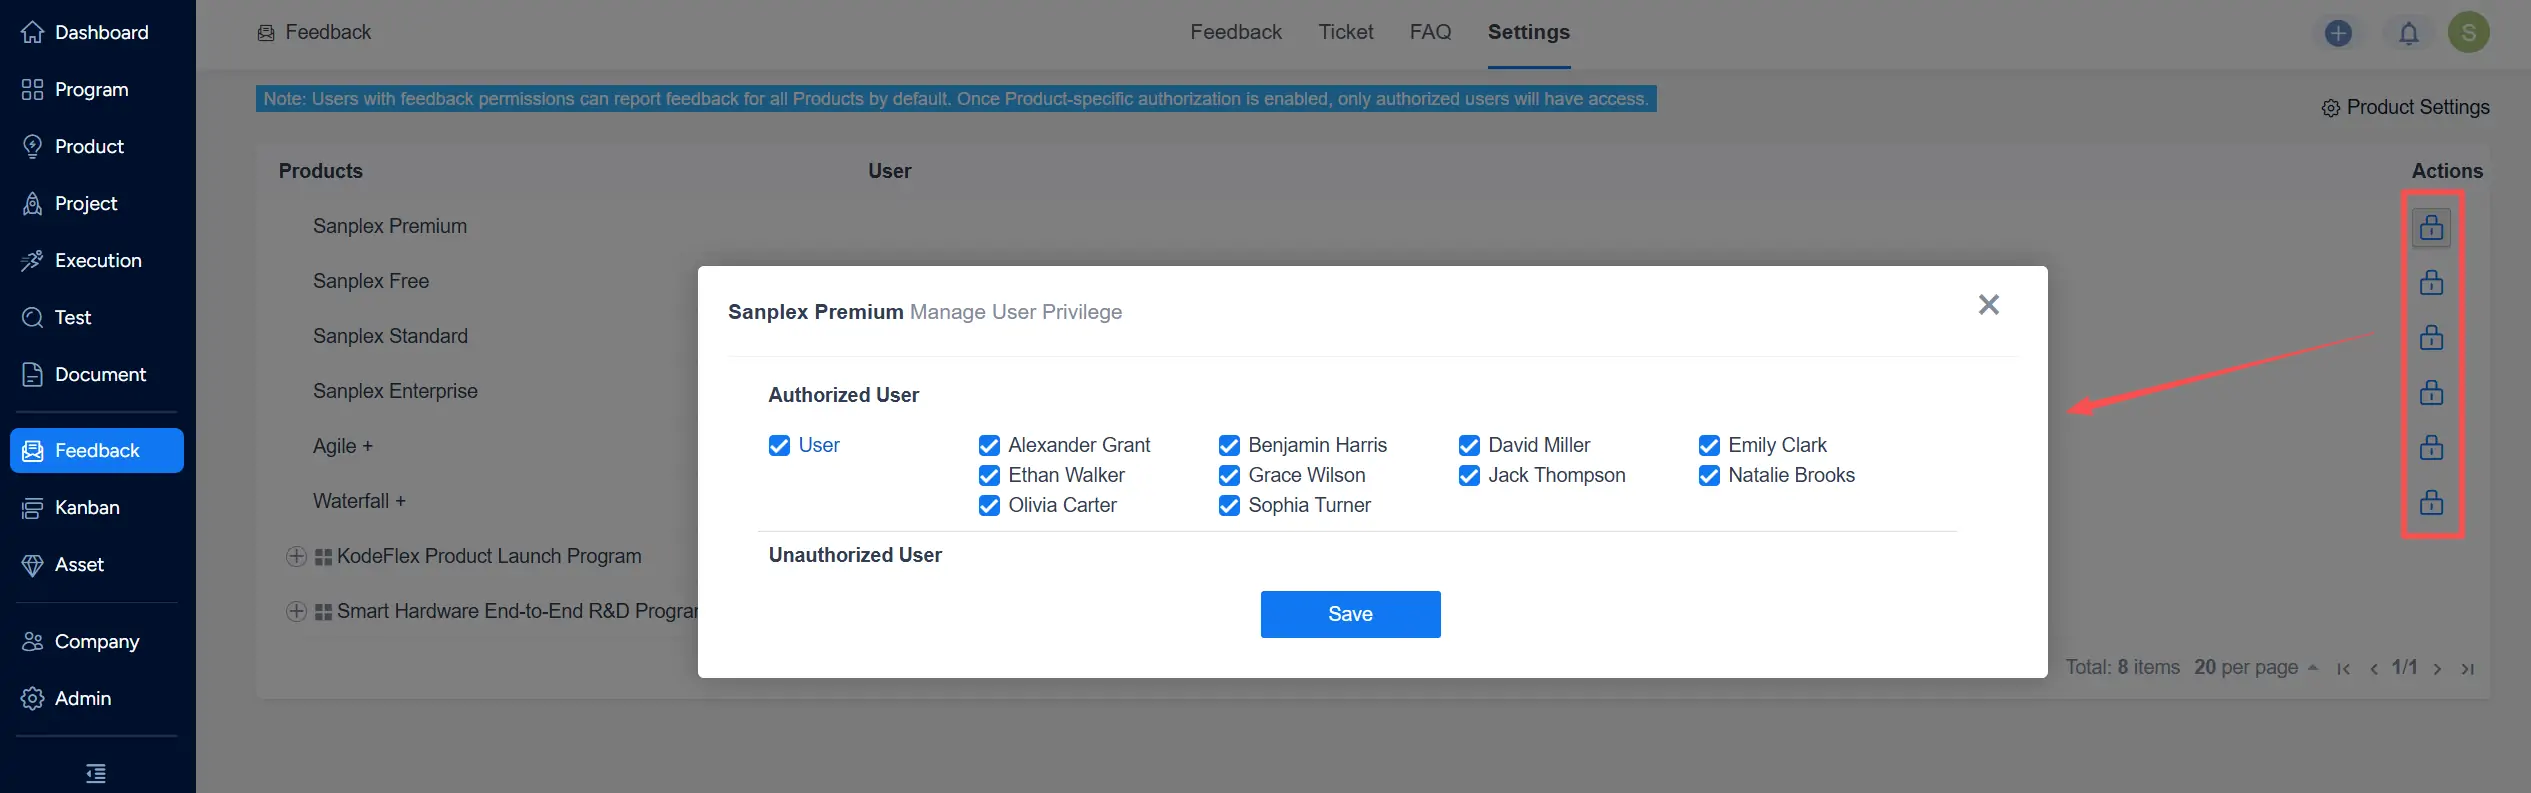
Product-specific access can also be configured in Feedback > Settings. Click the authorization icon in the Actions column for a product, select the users who can access that product, and click Save.
II. Create Tickets
1. Maintain Product Modules for Tickets
Tickets can be organized by product module. On the Ticket page, click the settings icon at the bottom of the module panel and select Set Module.

On the Module Management page, add, edit, delete, or organize ticket modules as needed.
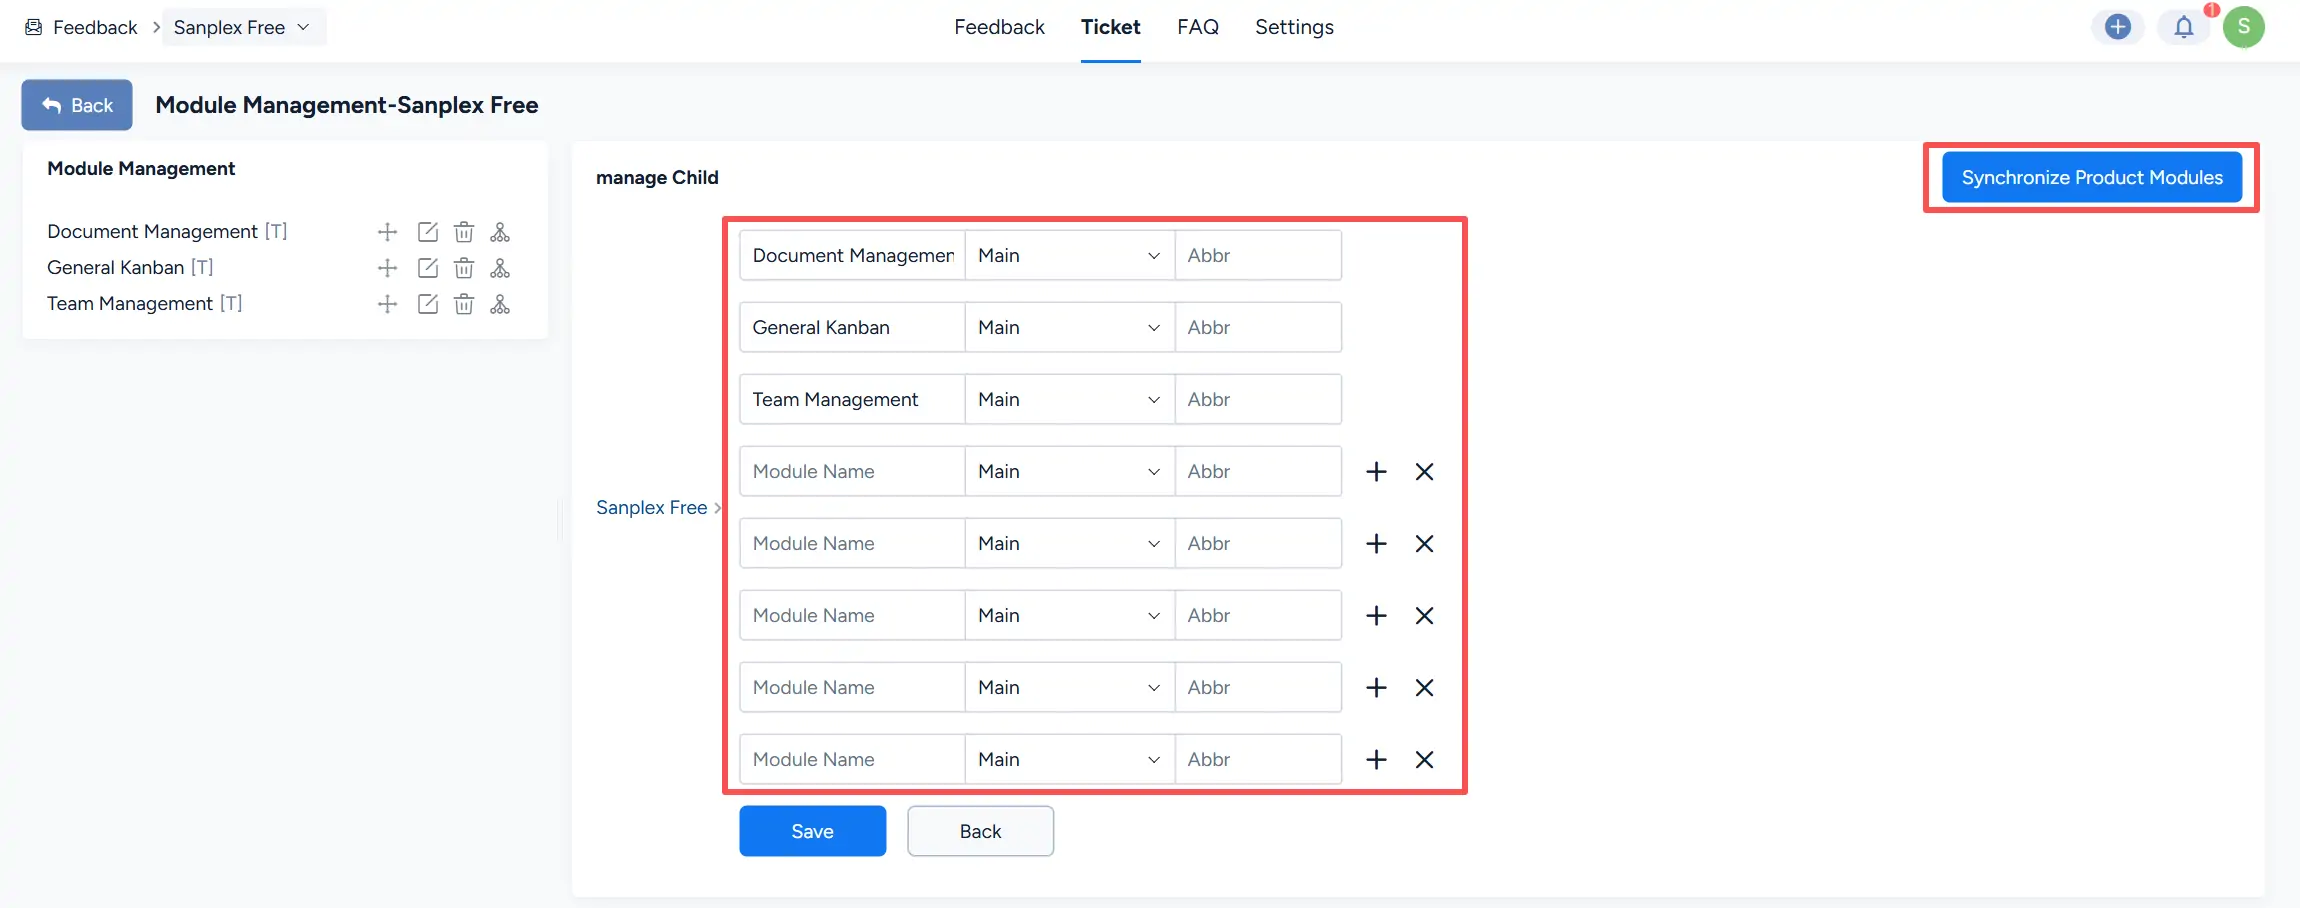
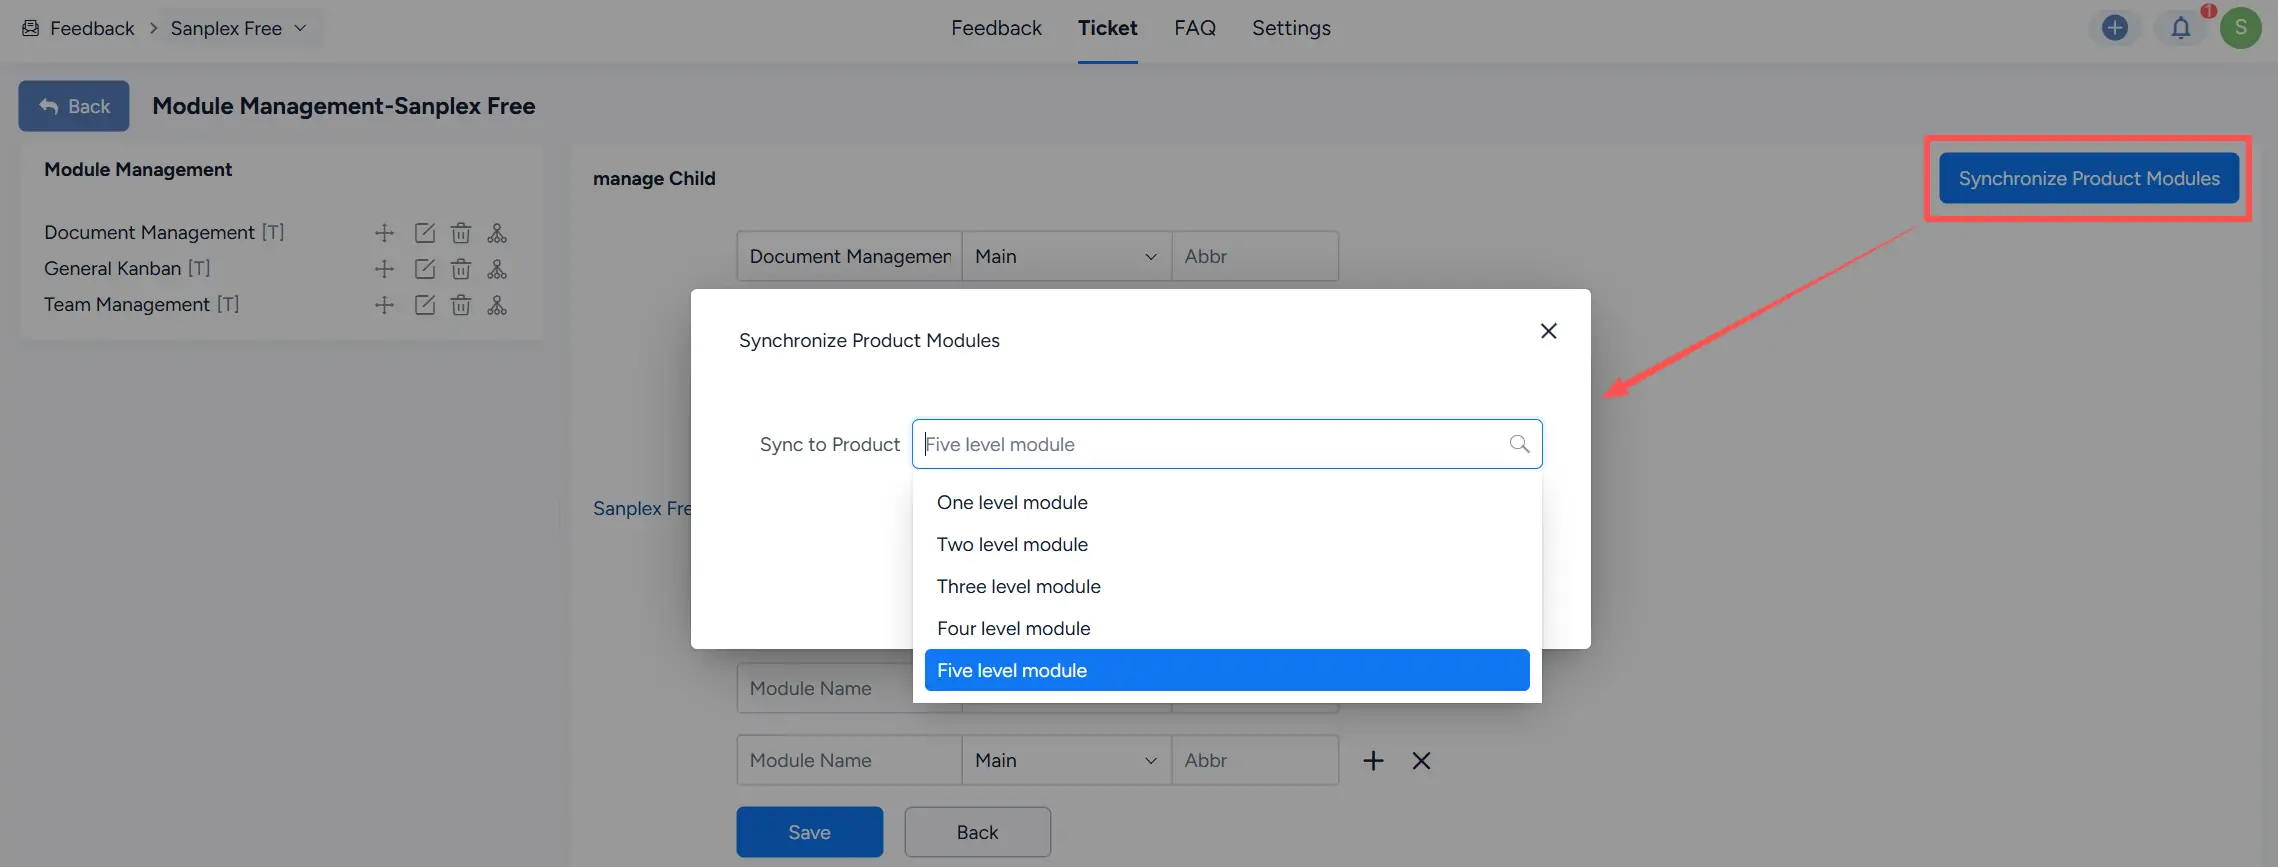
Ticket modules can also be synchronized from product modules. Click Synchronize Product Modules, then select the number of module levels to synchronize.
Sanplex provides synchronization options from one level through five levels.
After the module structure is configured, return to the Ticket page. The available modules are displayed in the left-side navigation panel.

2. Create a Ticket
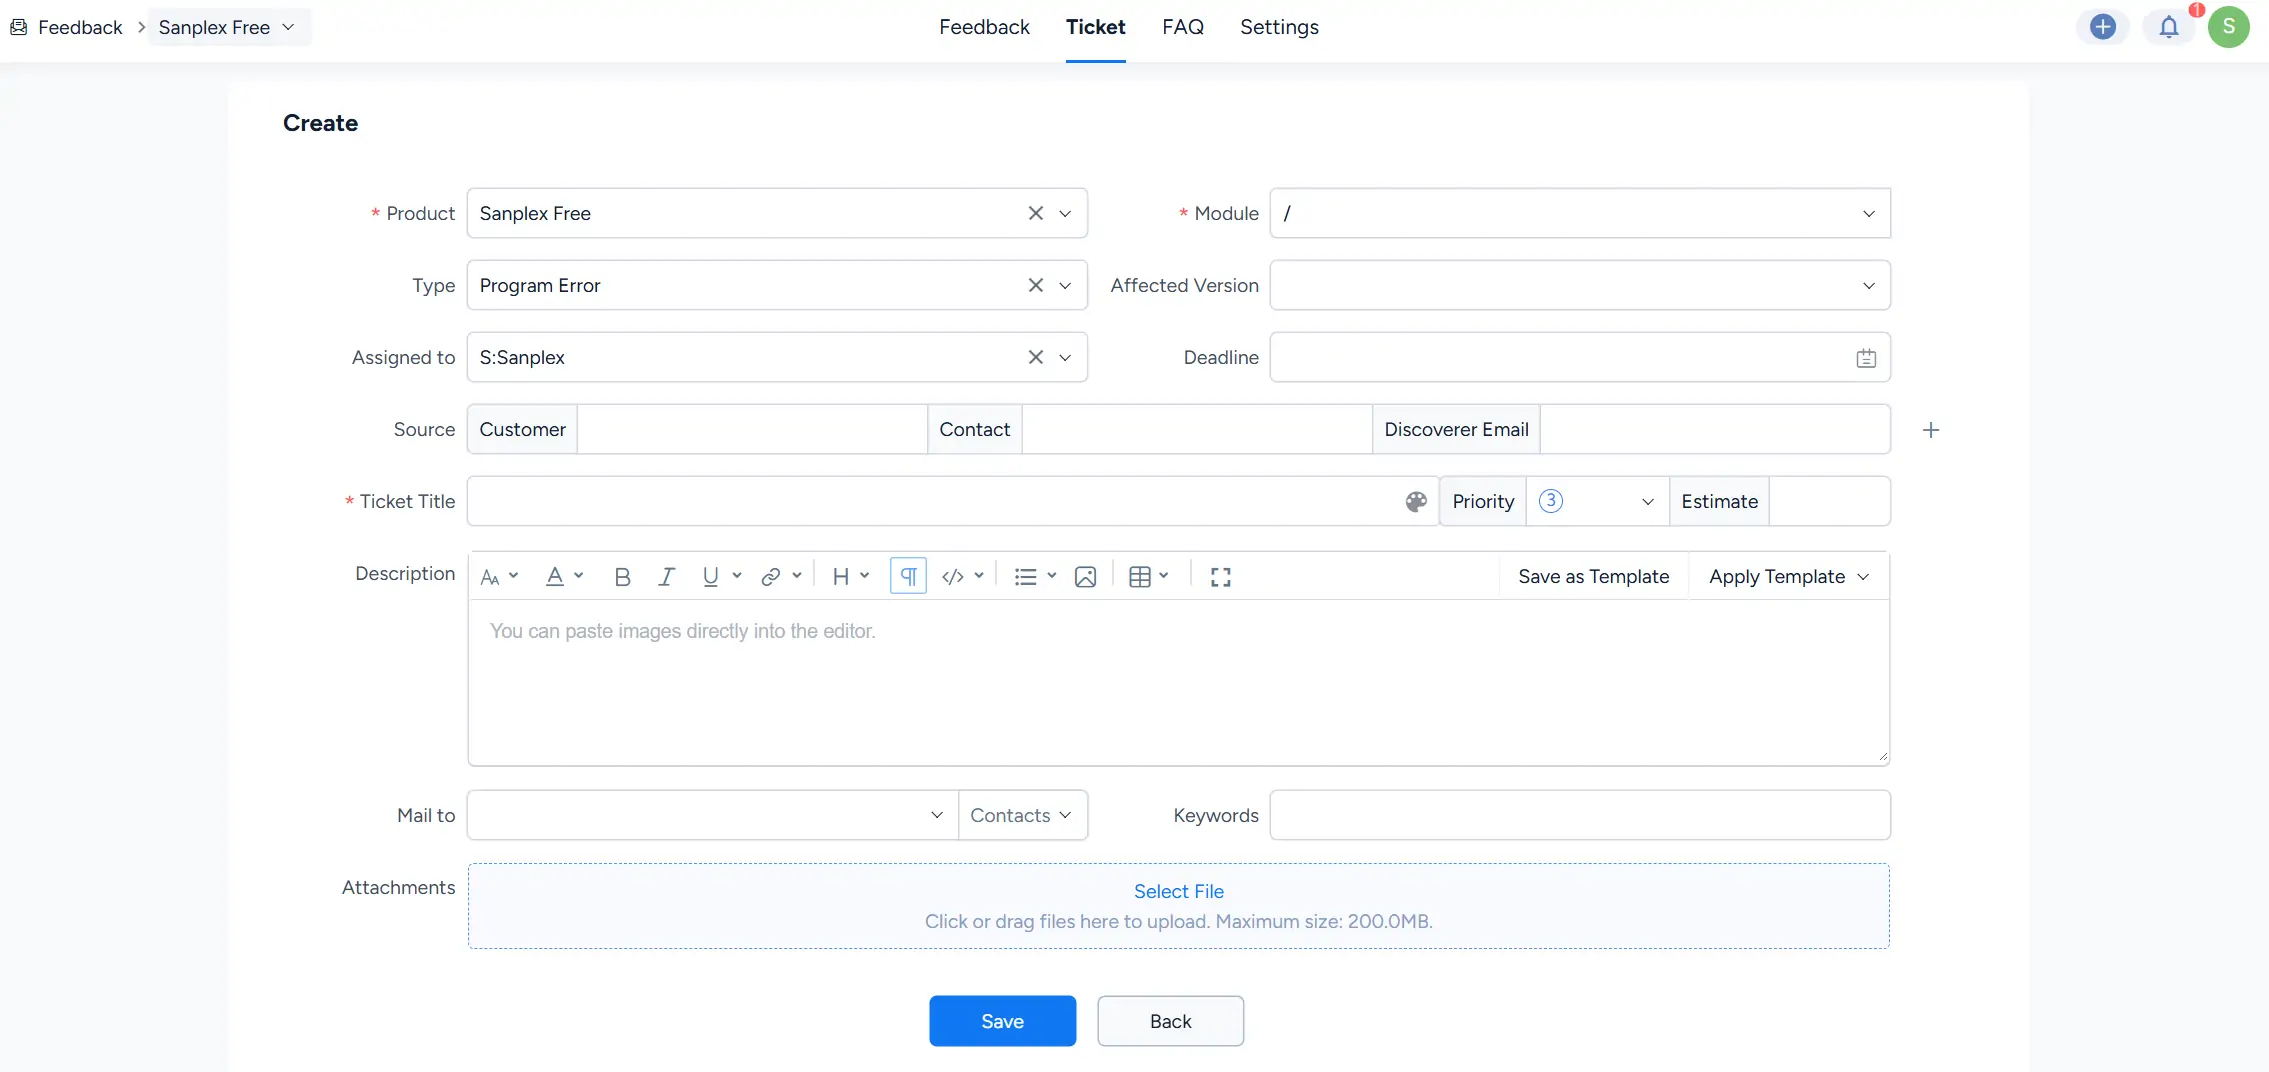
Open the Create menu in the upper-right corner of the Ticket page.
Select:
- Create to add a single ticket.
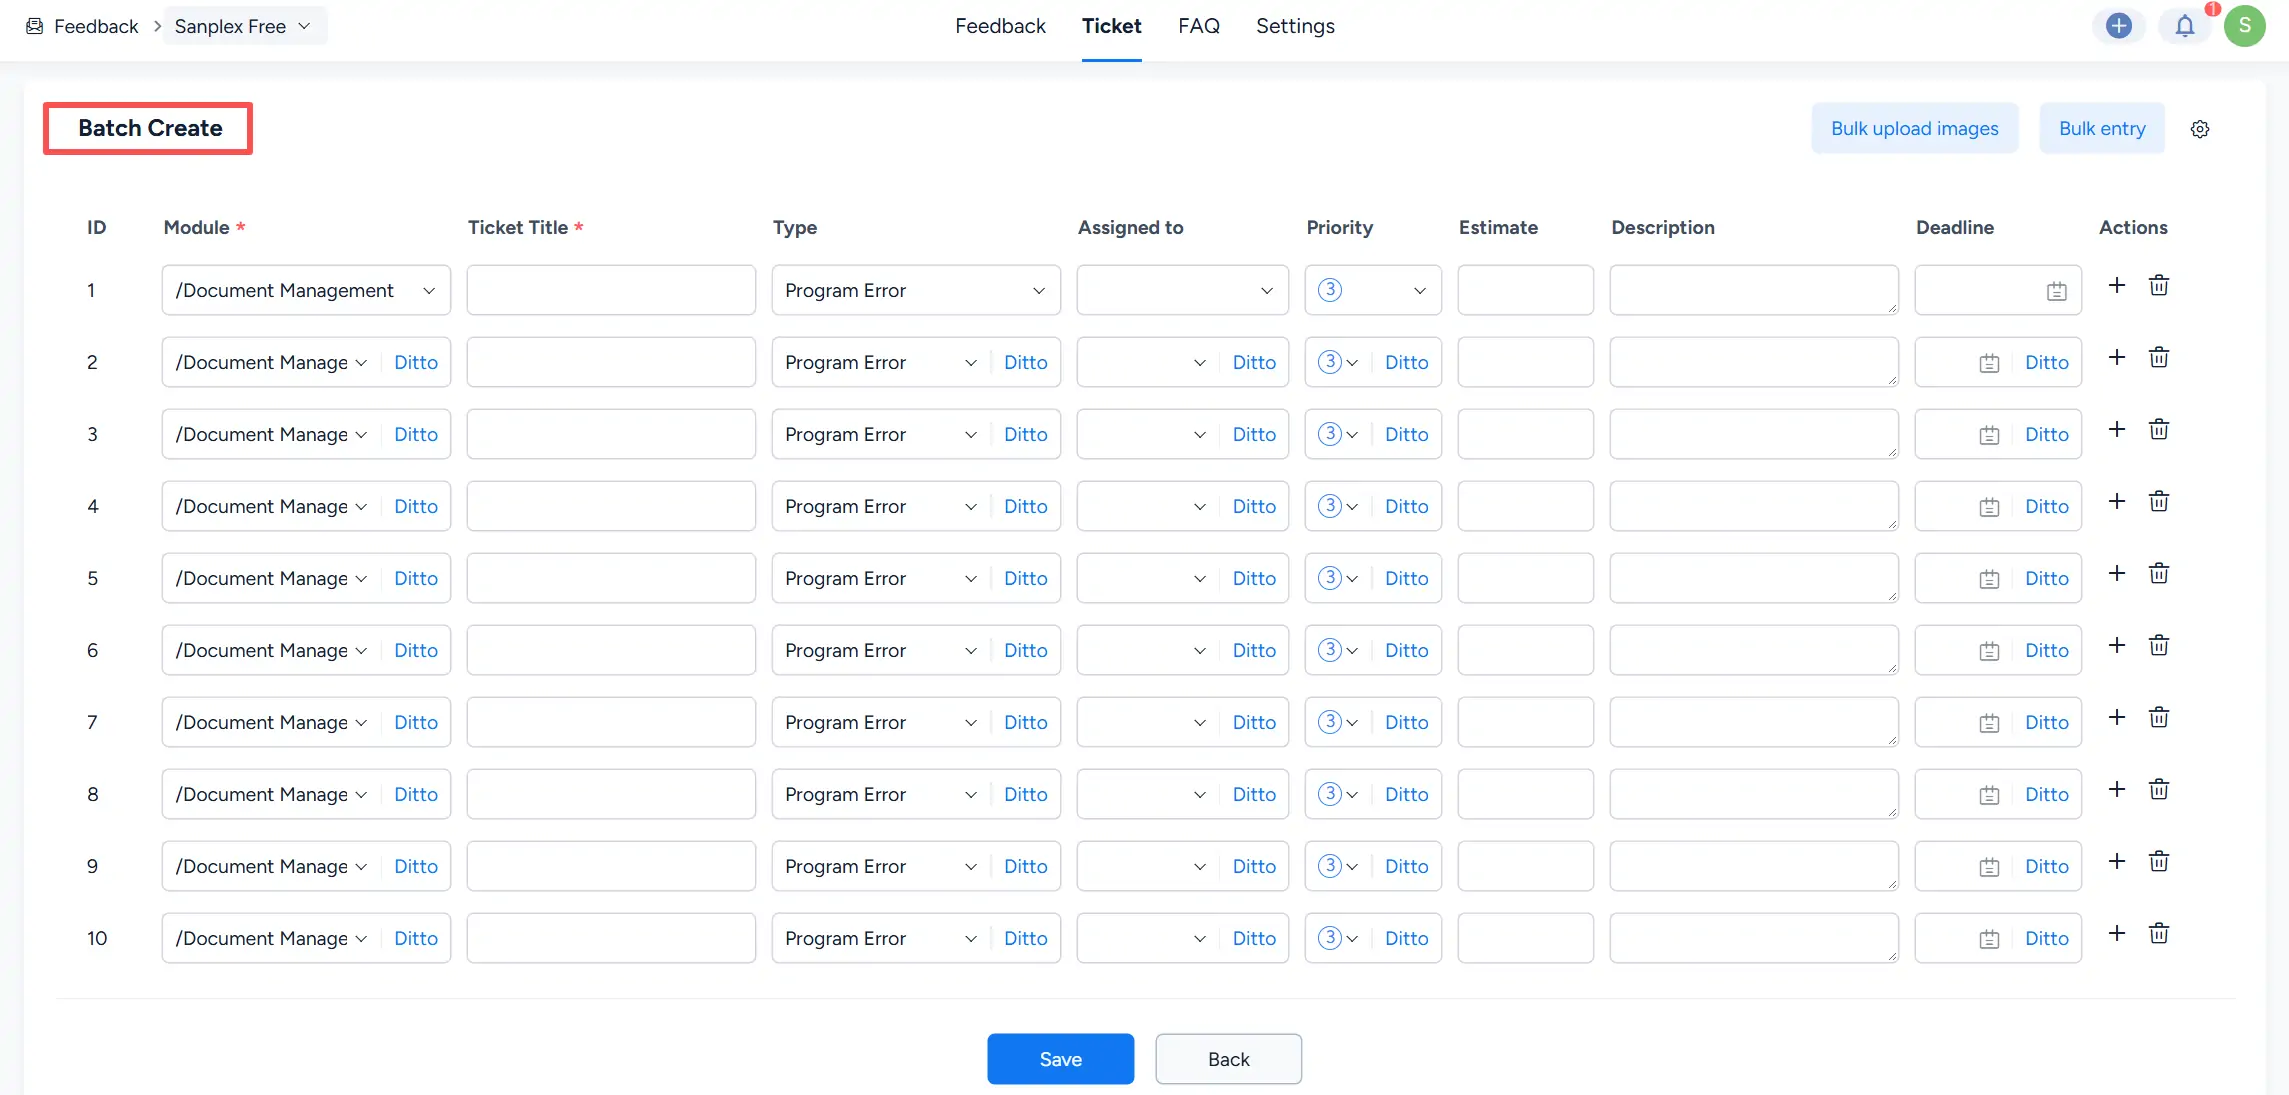
- Batch Create to add multiple tickets.

On the Create page, select the product and module, then enter the ticket information. Available fields include Type, Affected Version, Assigned to, Deadline, Source, Ticket Title, Priority, Estimate, Description, Mail to, Keywords, and Attachments.
If a Ticket Manager is configured for the selected product, the responsible user can be populated in the ticket workflow.
For multiple tickets, select Batch Create. The batch creation page provides multiple rows for entering ticket information such as module, ticket title, type, assignee, priority, estimate, description, and deadline.
After creation, tickets appear in the Ticket list, where you can view their priority, source, status, type, assignee, and available actions.

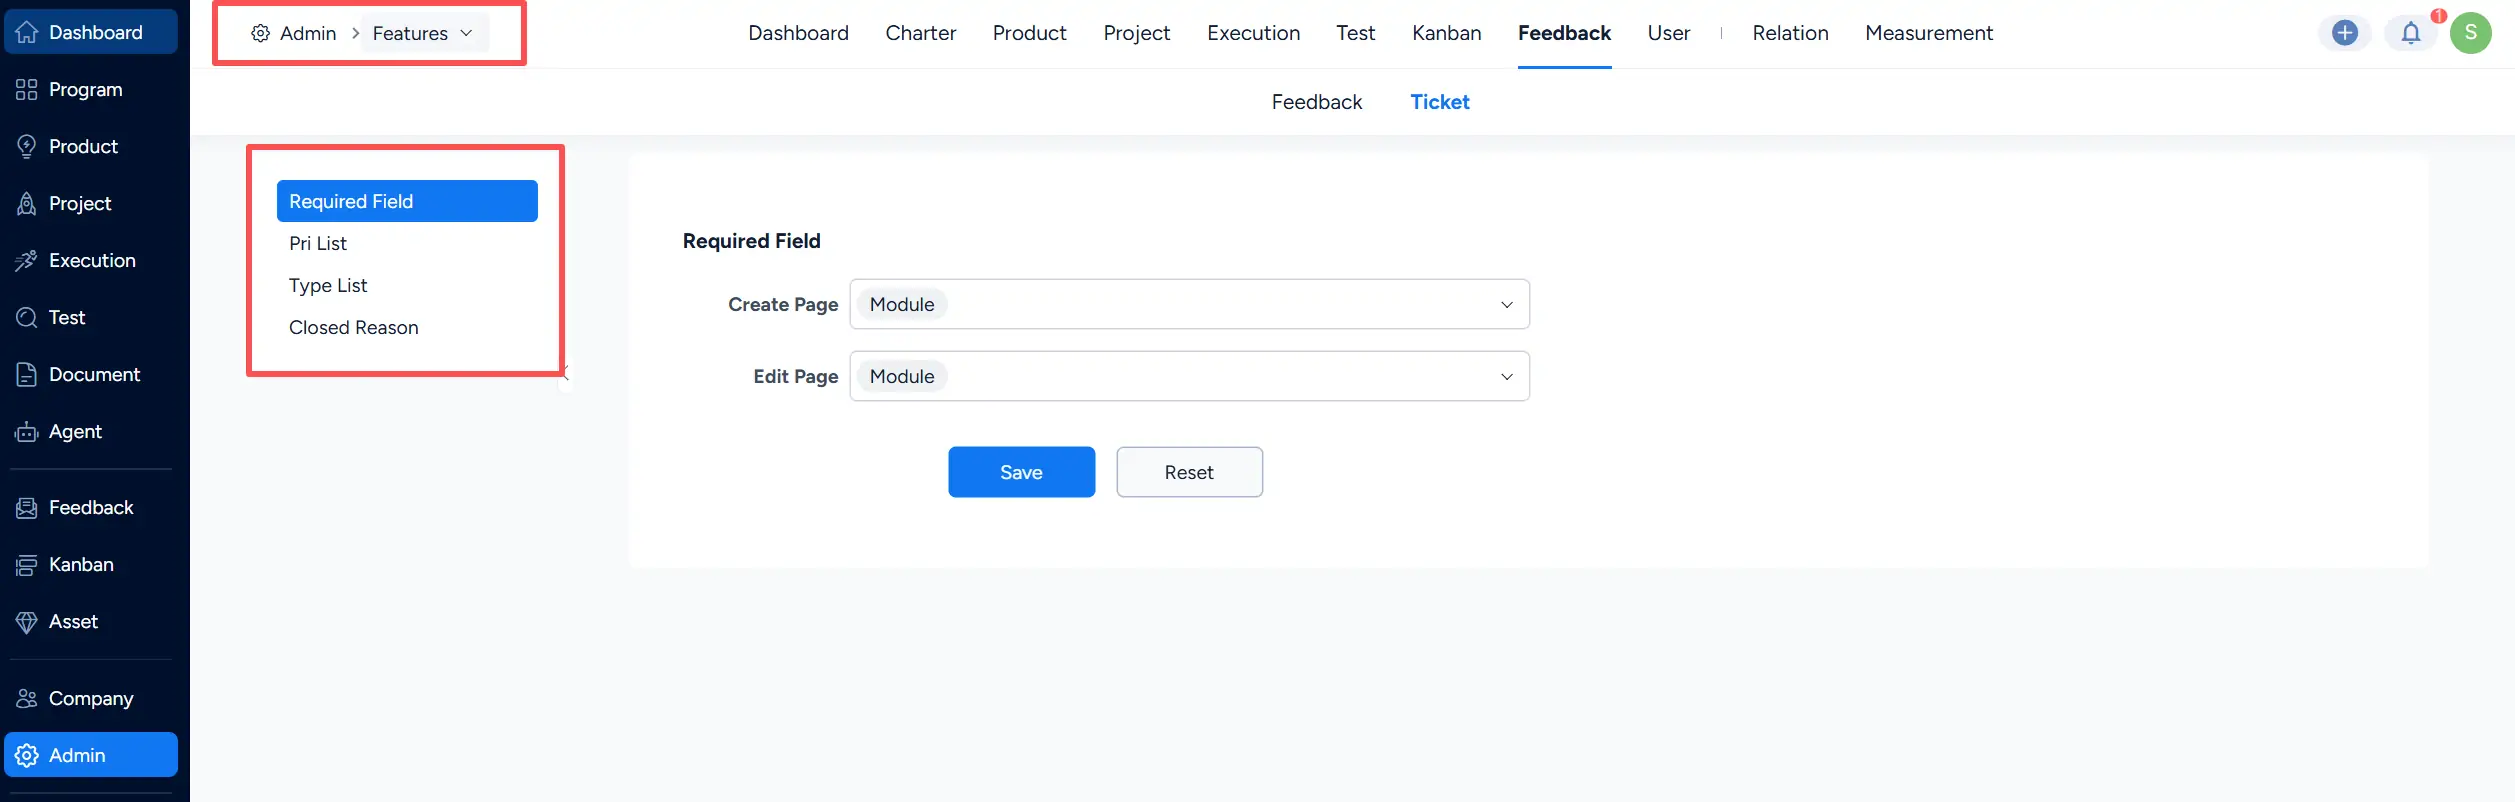
Ticket settings can be configured in Admin > Features > Feedback > Ticket. Available configuration sections include Required Field, Pri List, Type List, and Closed Reason.
Under Required Field, you can specify required fields for the ticket Create Page and Edit Page.
III. Process Tickets
Tickets can be processed using the actions available in the Ticket list or on the ticket details page. The available actions depend on the current ticket status and the user's permissions.
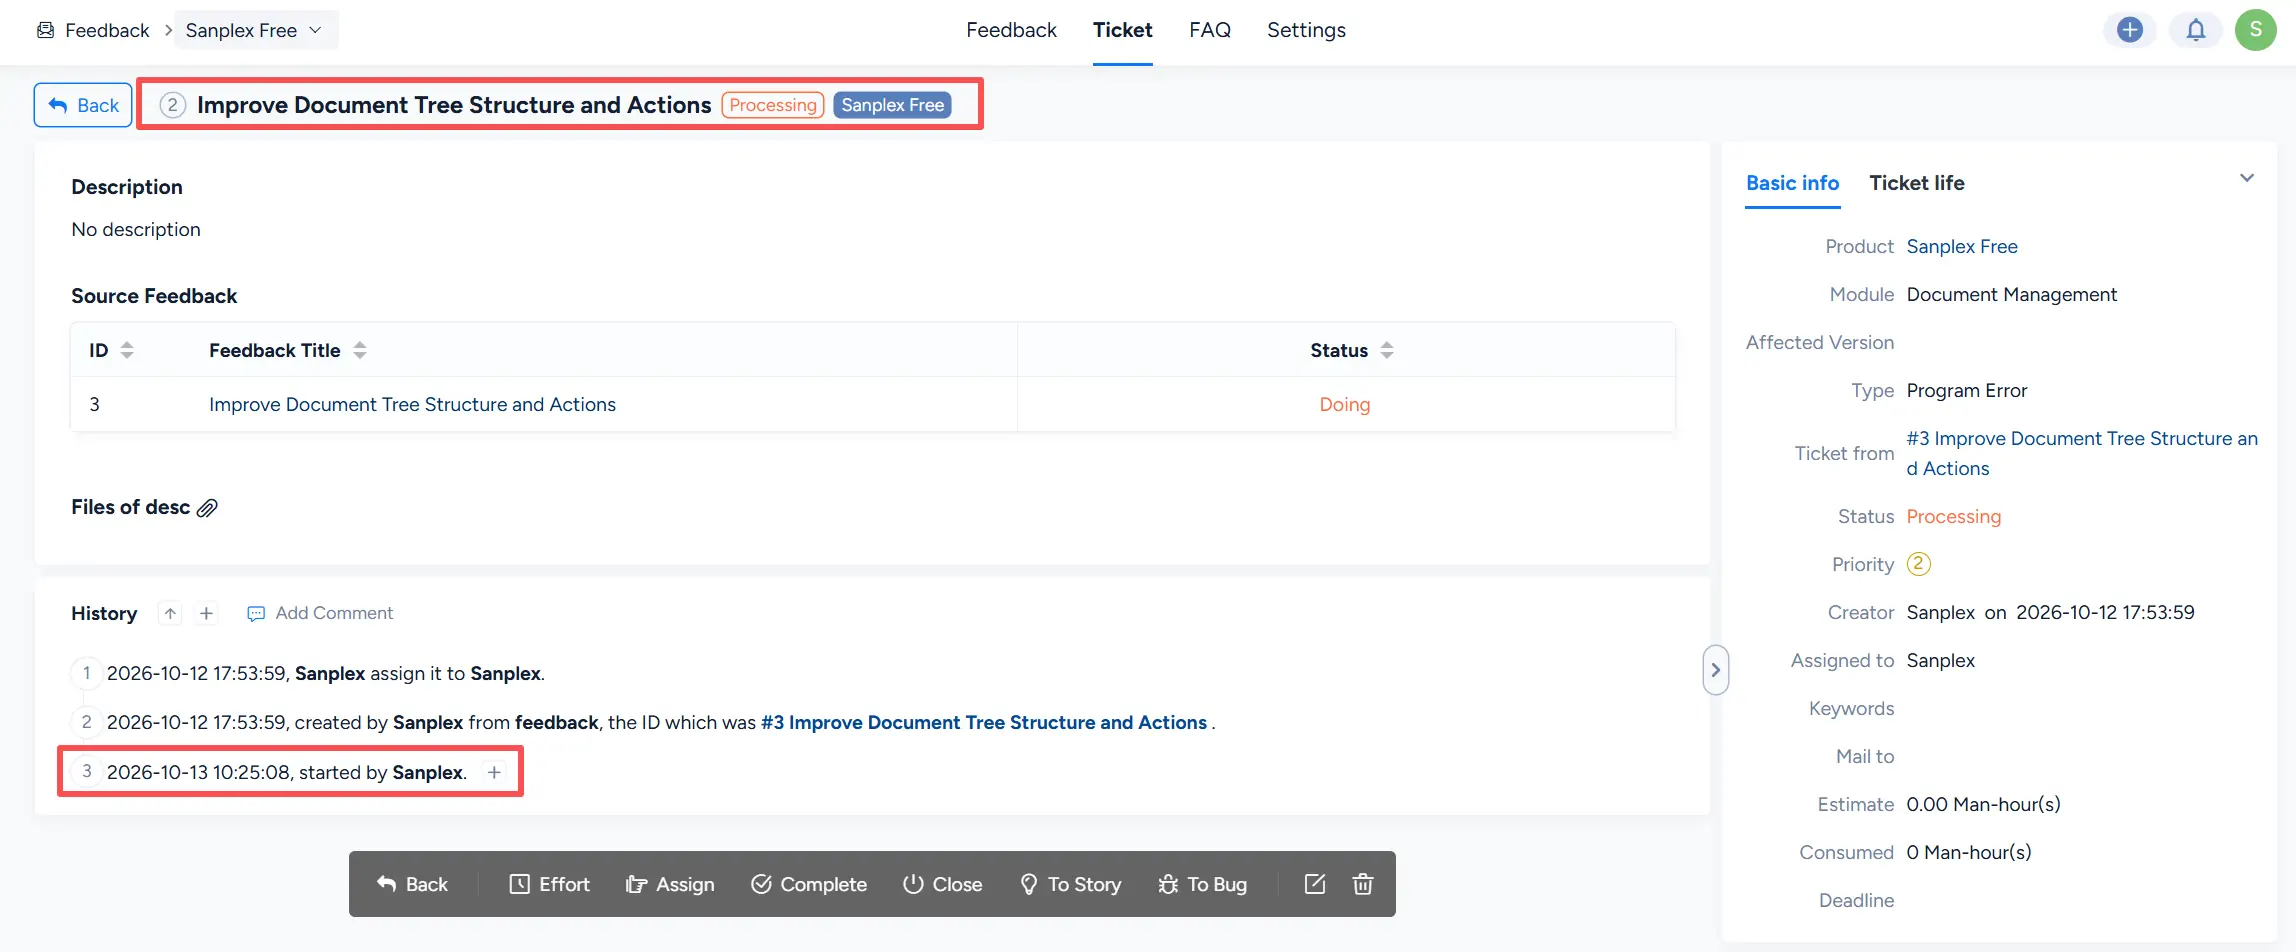
1. Start Processing
For a ticket in Waiting, click Start.
In the Start dialog, confirm the Assigned to user and optionally add a note, then click Start.
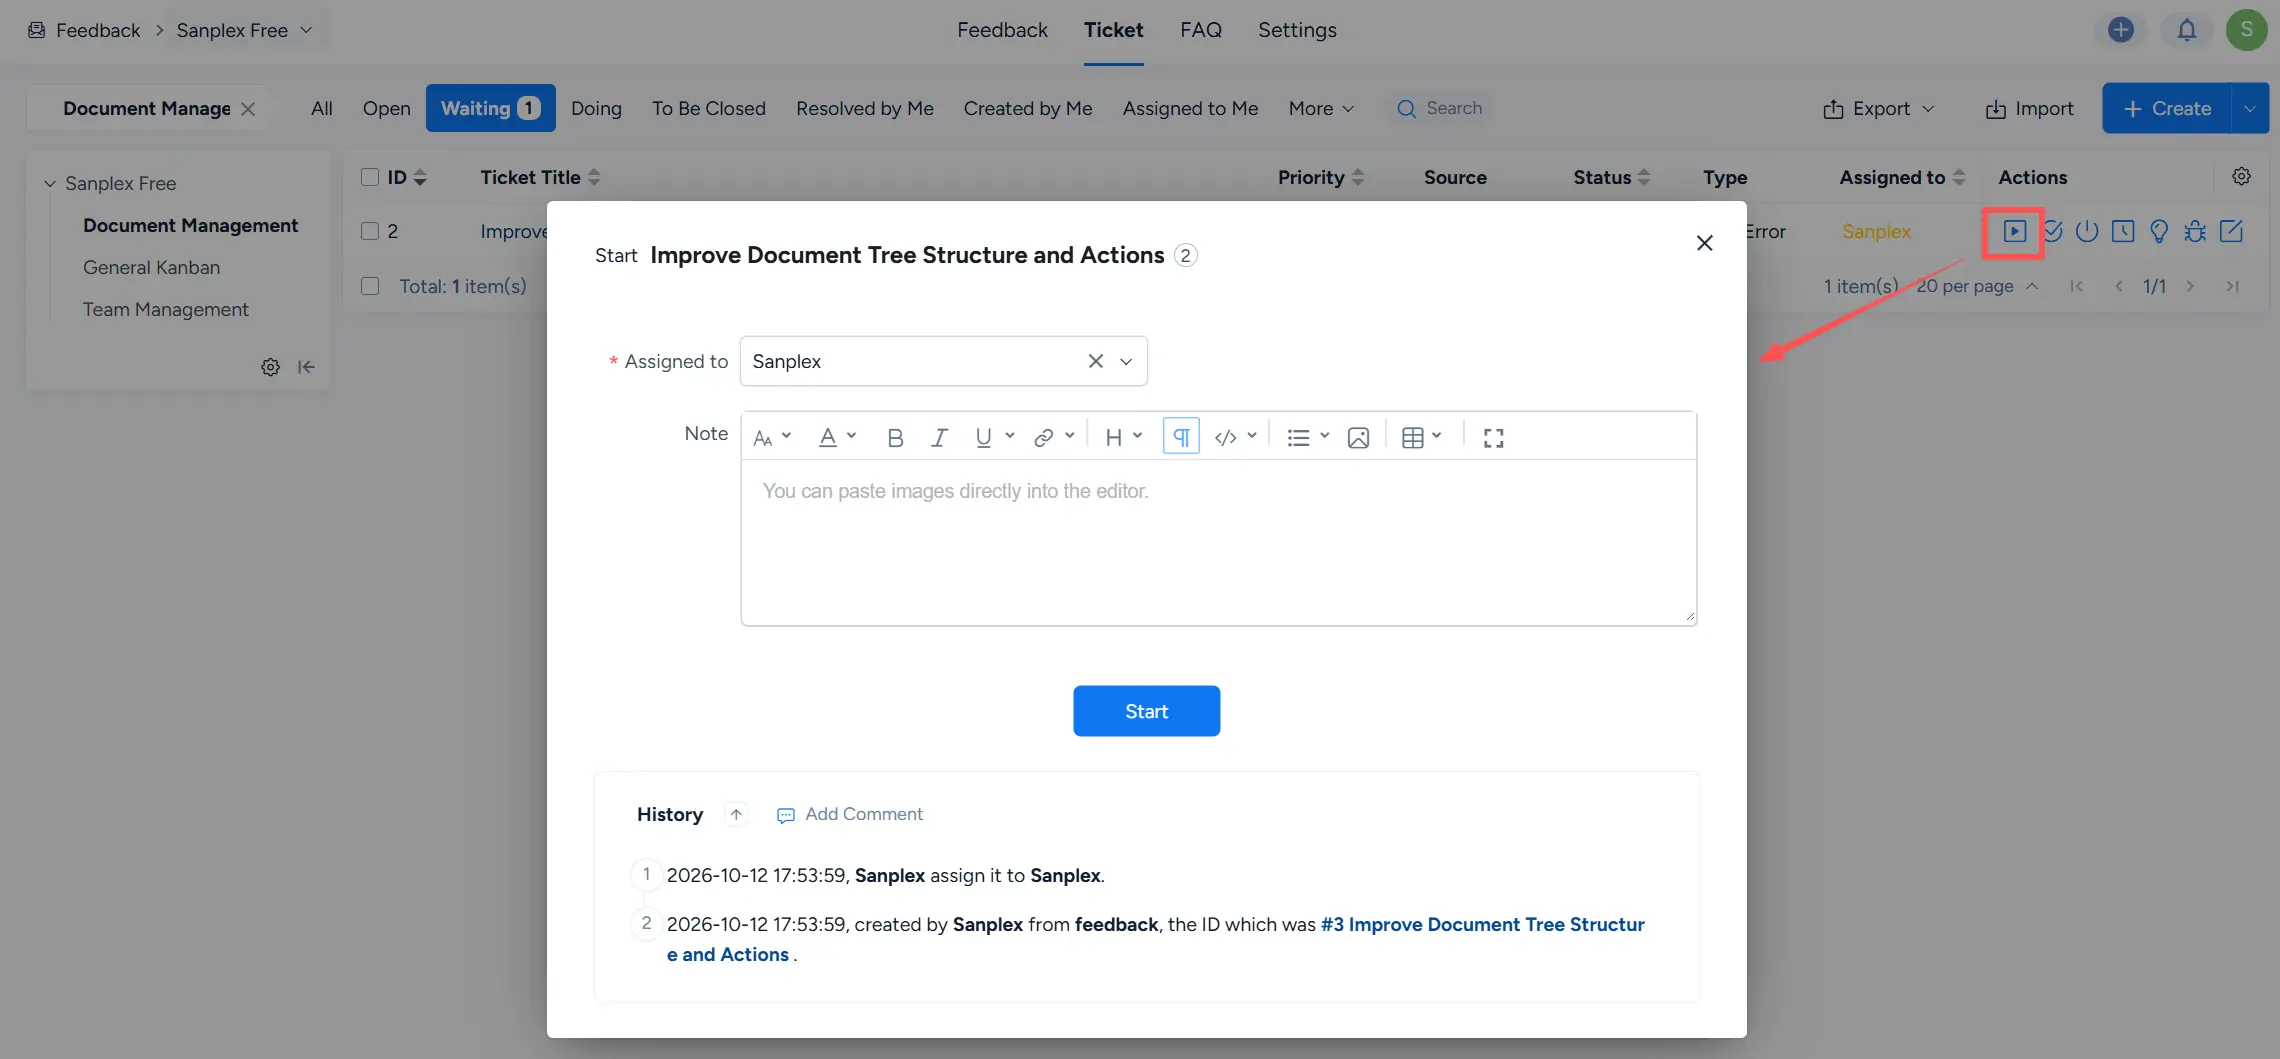
After the ticket is started, its status changes to Processing. The start action is recorded in the ticket history.
2. Complete Processing
For a ticket in Processing, click Complete after the work has been completed.
In the Complete dialog, record the work consumed and resolution information. The dialog includes fields such as Current consumed, Resolved by, Resolved Date, Attachments, Resolution, and Note.
Enter the required resolution information, then click Complete.
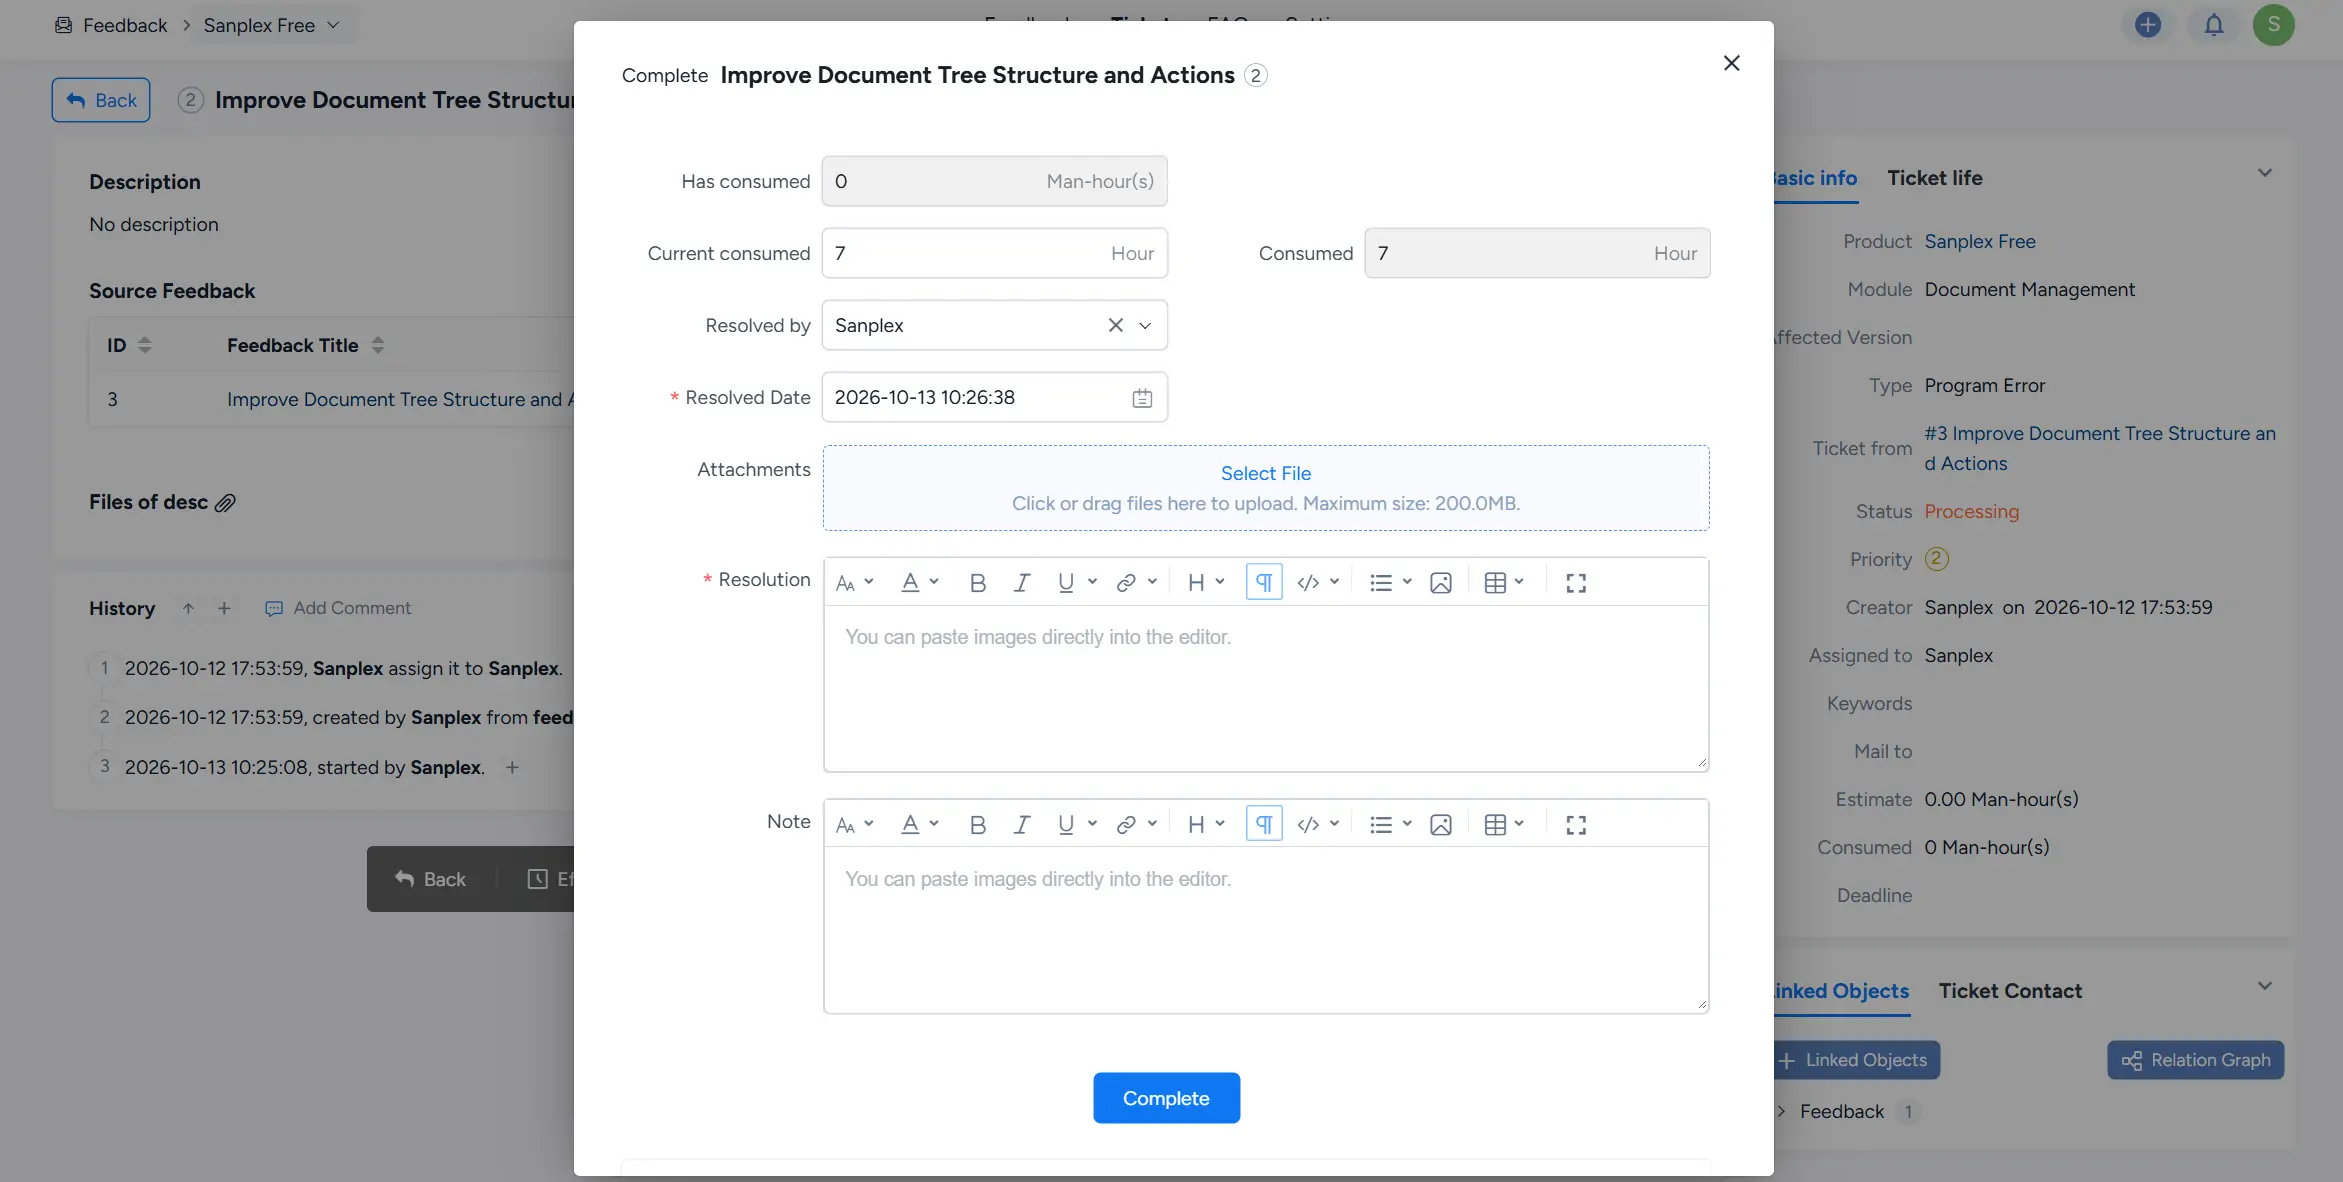
After completion, the ticket status changes to Processed.
3. Close a Ticket
A processed ticket can be closed after its resolution has been confirmed.
Click Close, then confirm the operation.
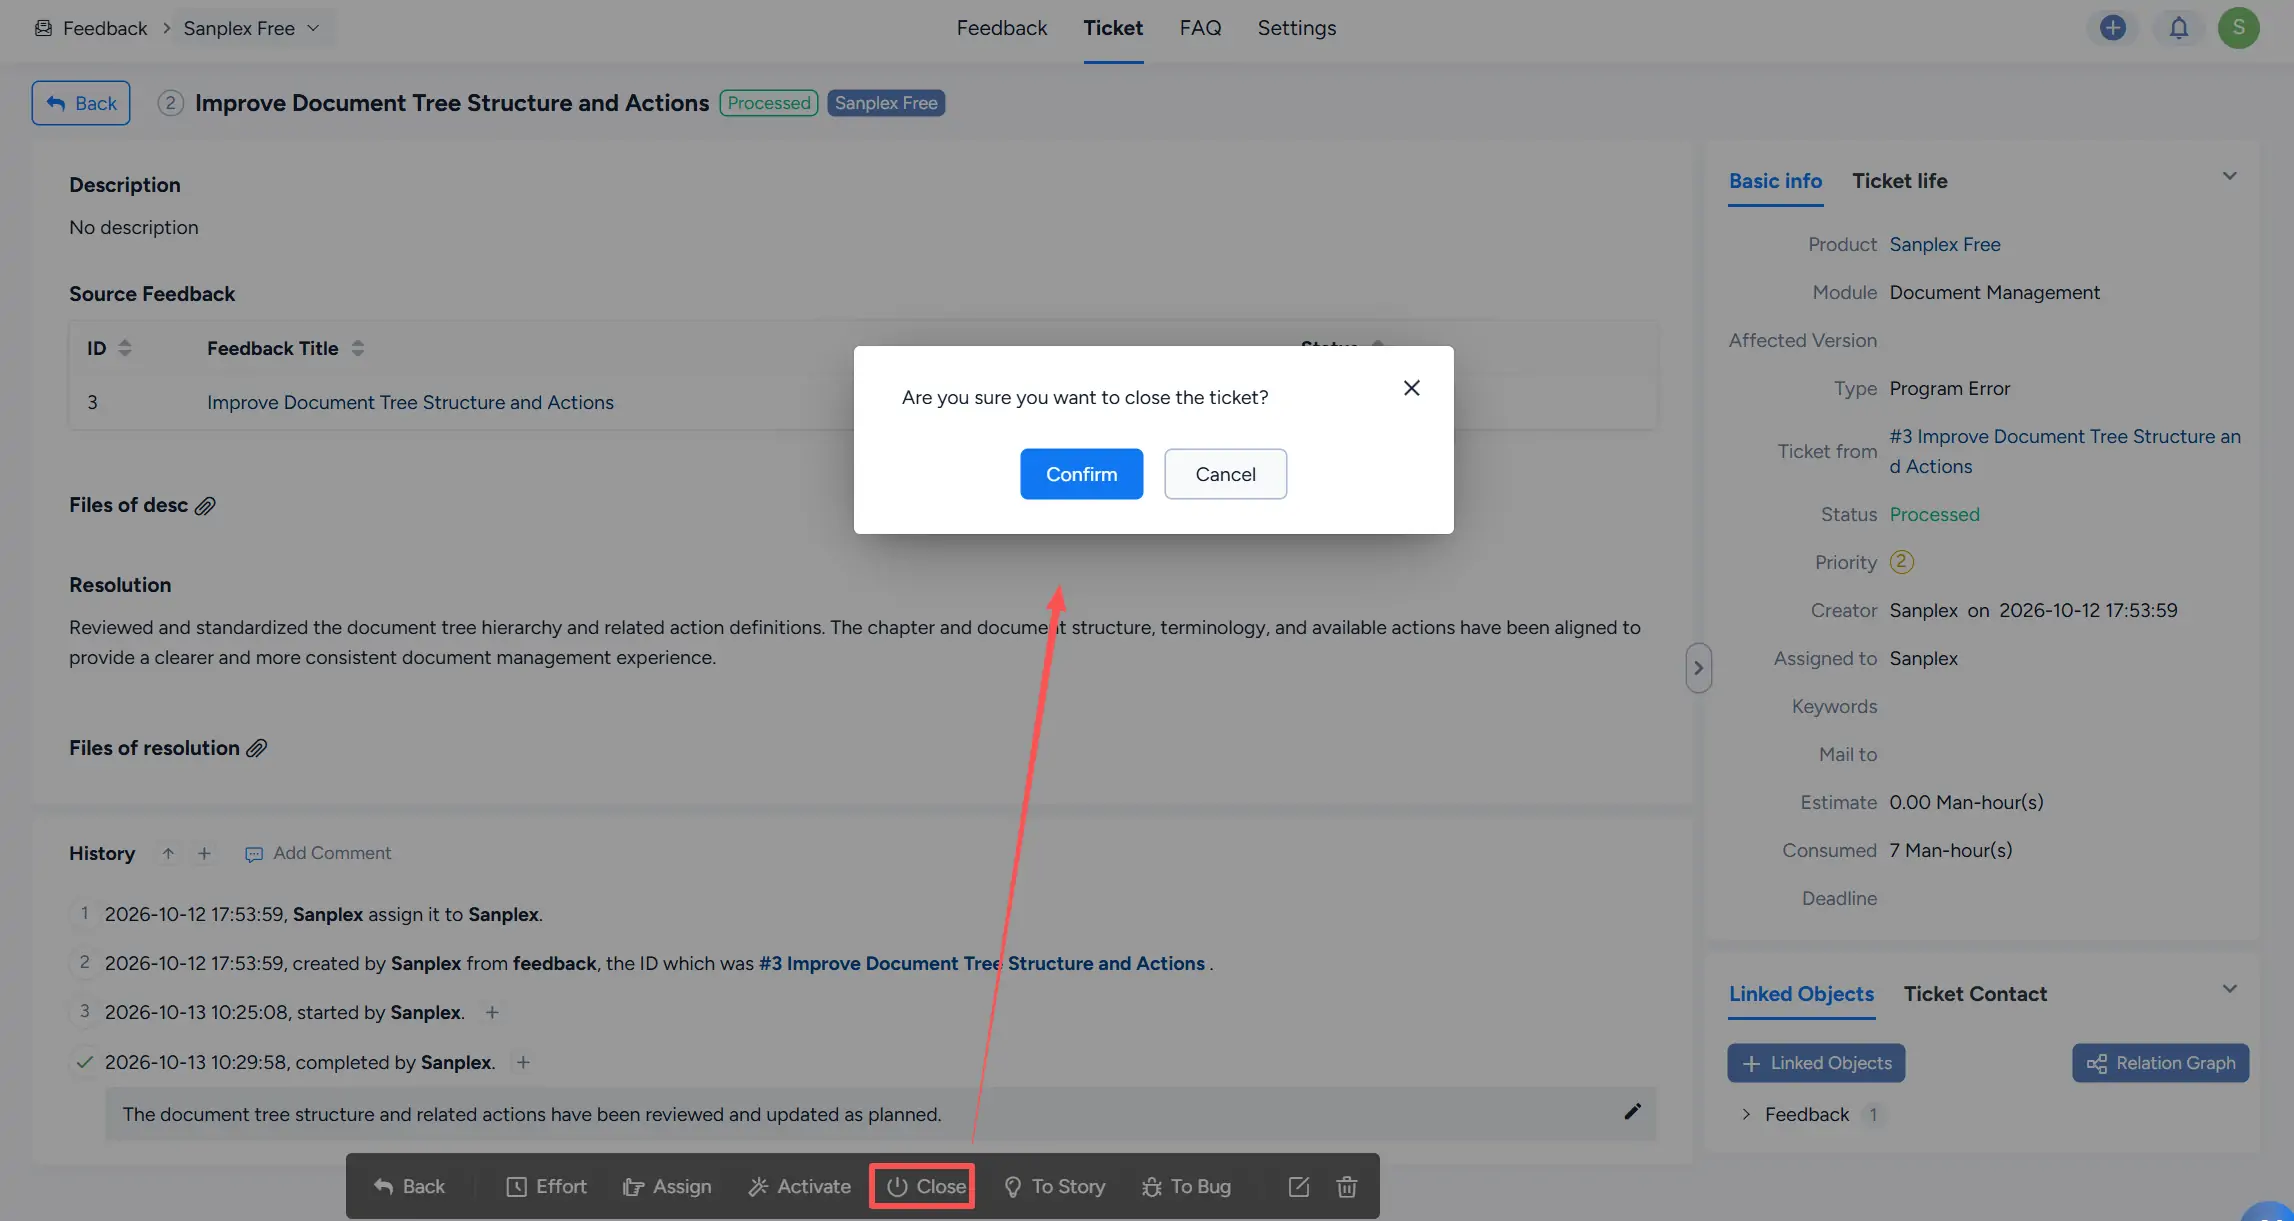
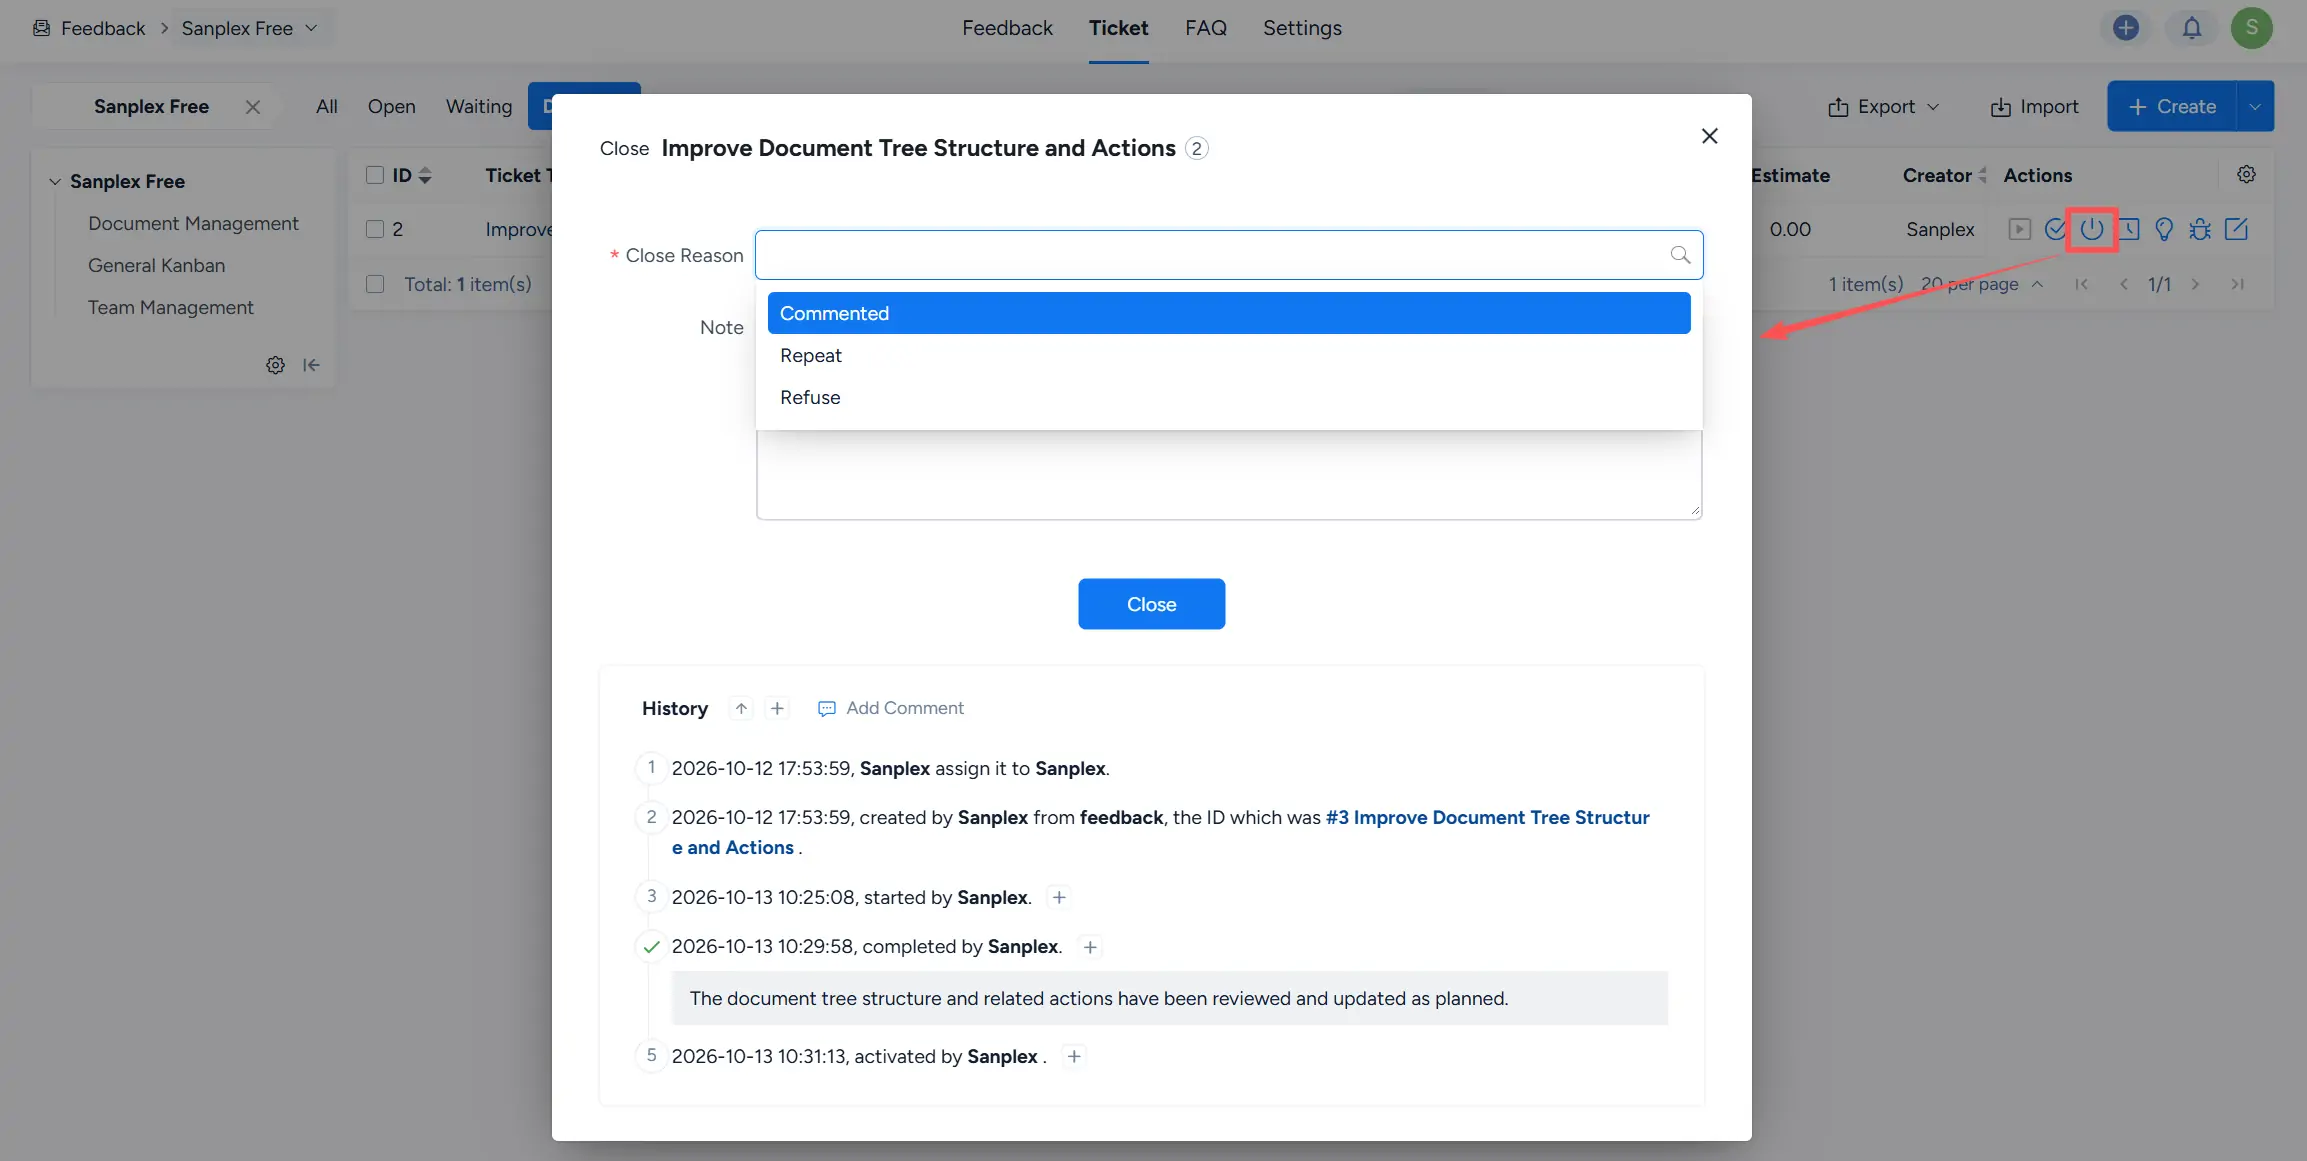
When a close reason is required, select the appropriate Close Reason and add a note as needed.
Available close reasons shown in the current configuration include Commented, Repeat, and Refuse.
4. Activate a Ticket
A Processed ticket can be activated when further work is required.
Click Activate, confirm the Assigned to user, add a note if needed, and click Activate.
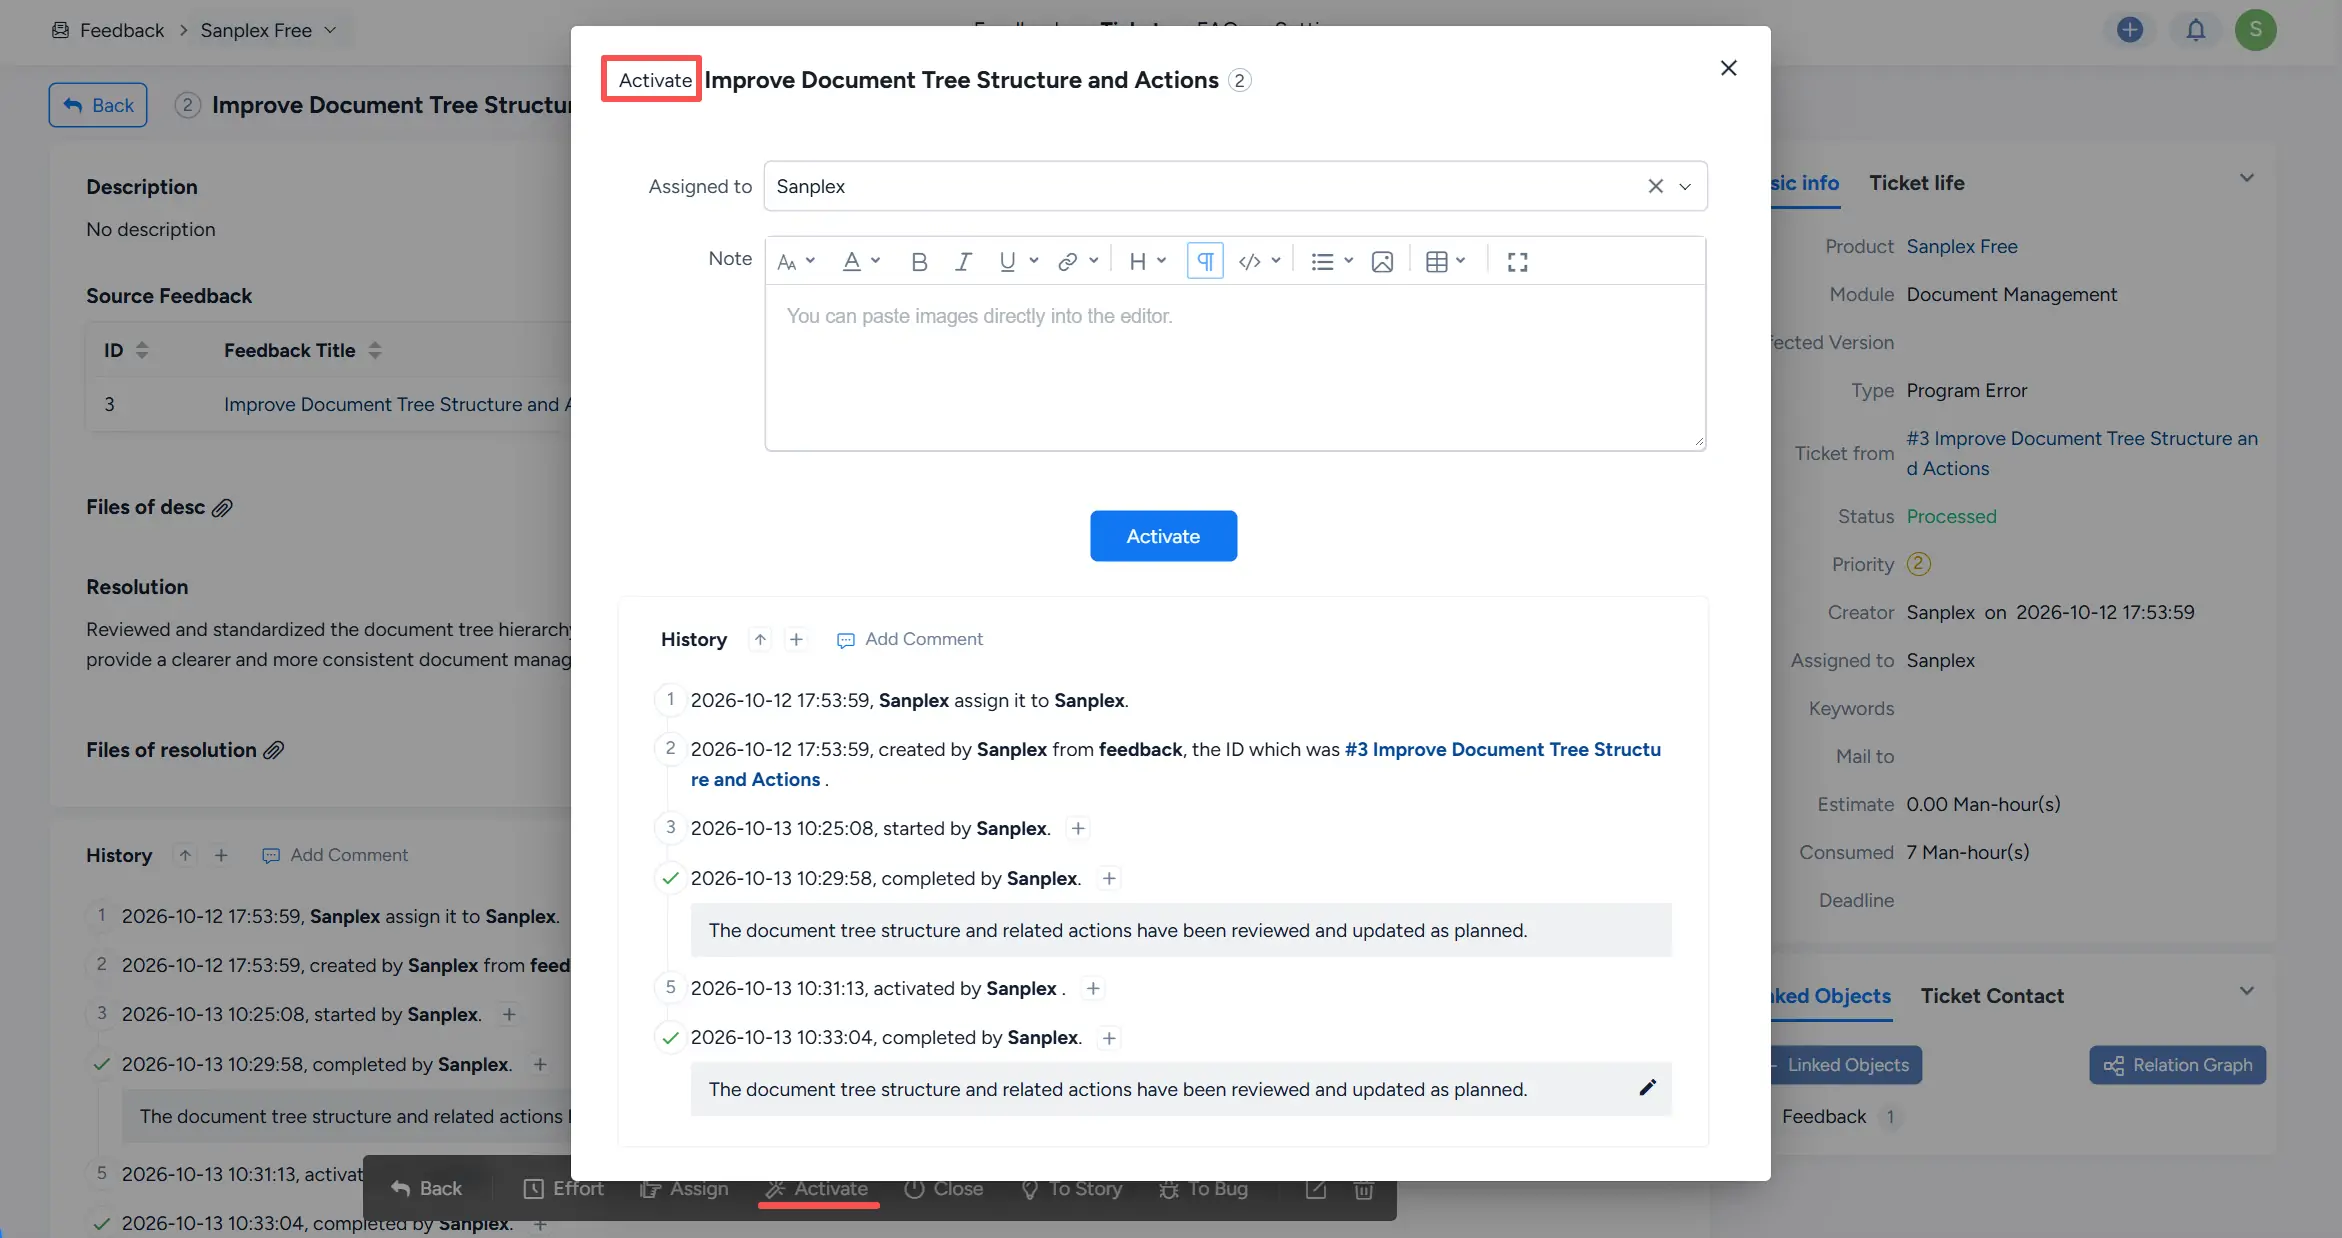
After activation, the ticket returns to the processing workflow.
5. Convert a Ticket to a Story or Bug
Tickets can be converted into a Story or Bug when the issue requires further product or development work.
On the ticket details page, click To Story or To Bug.
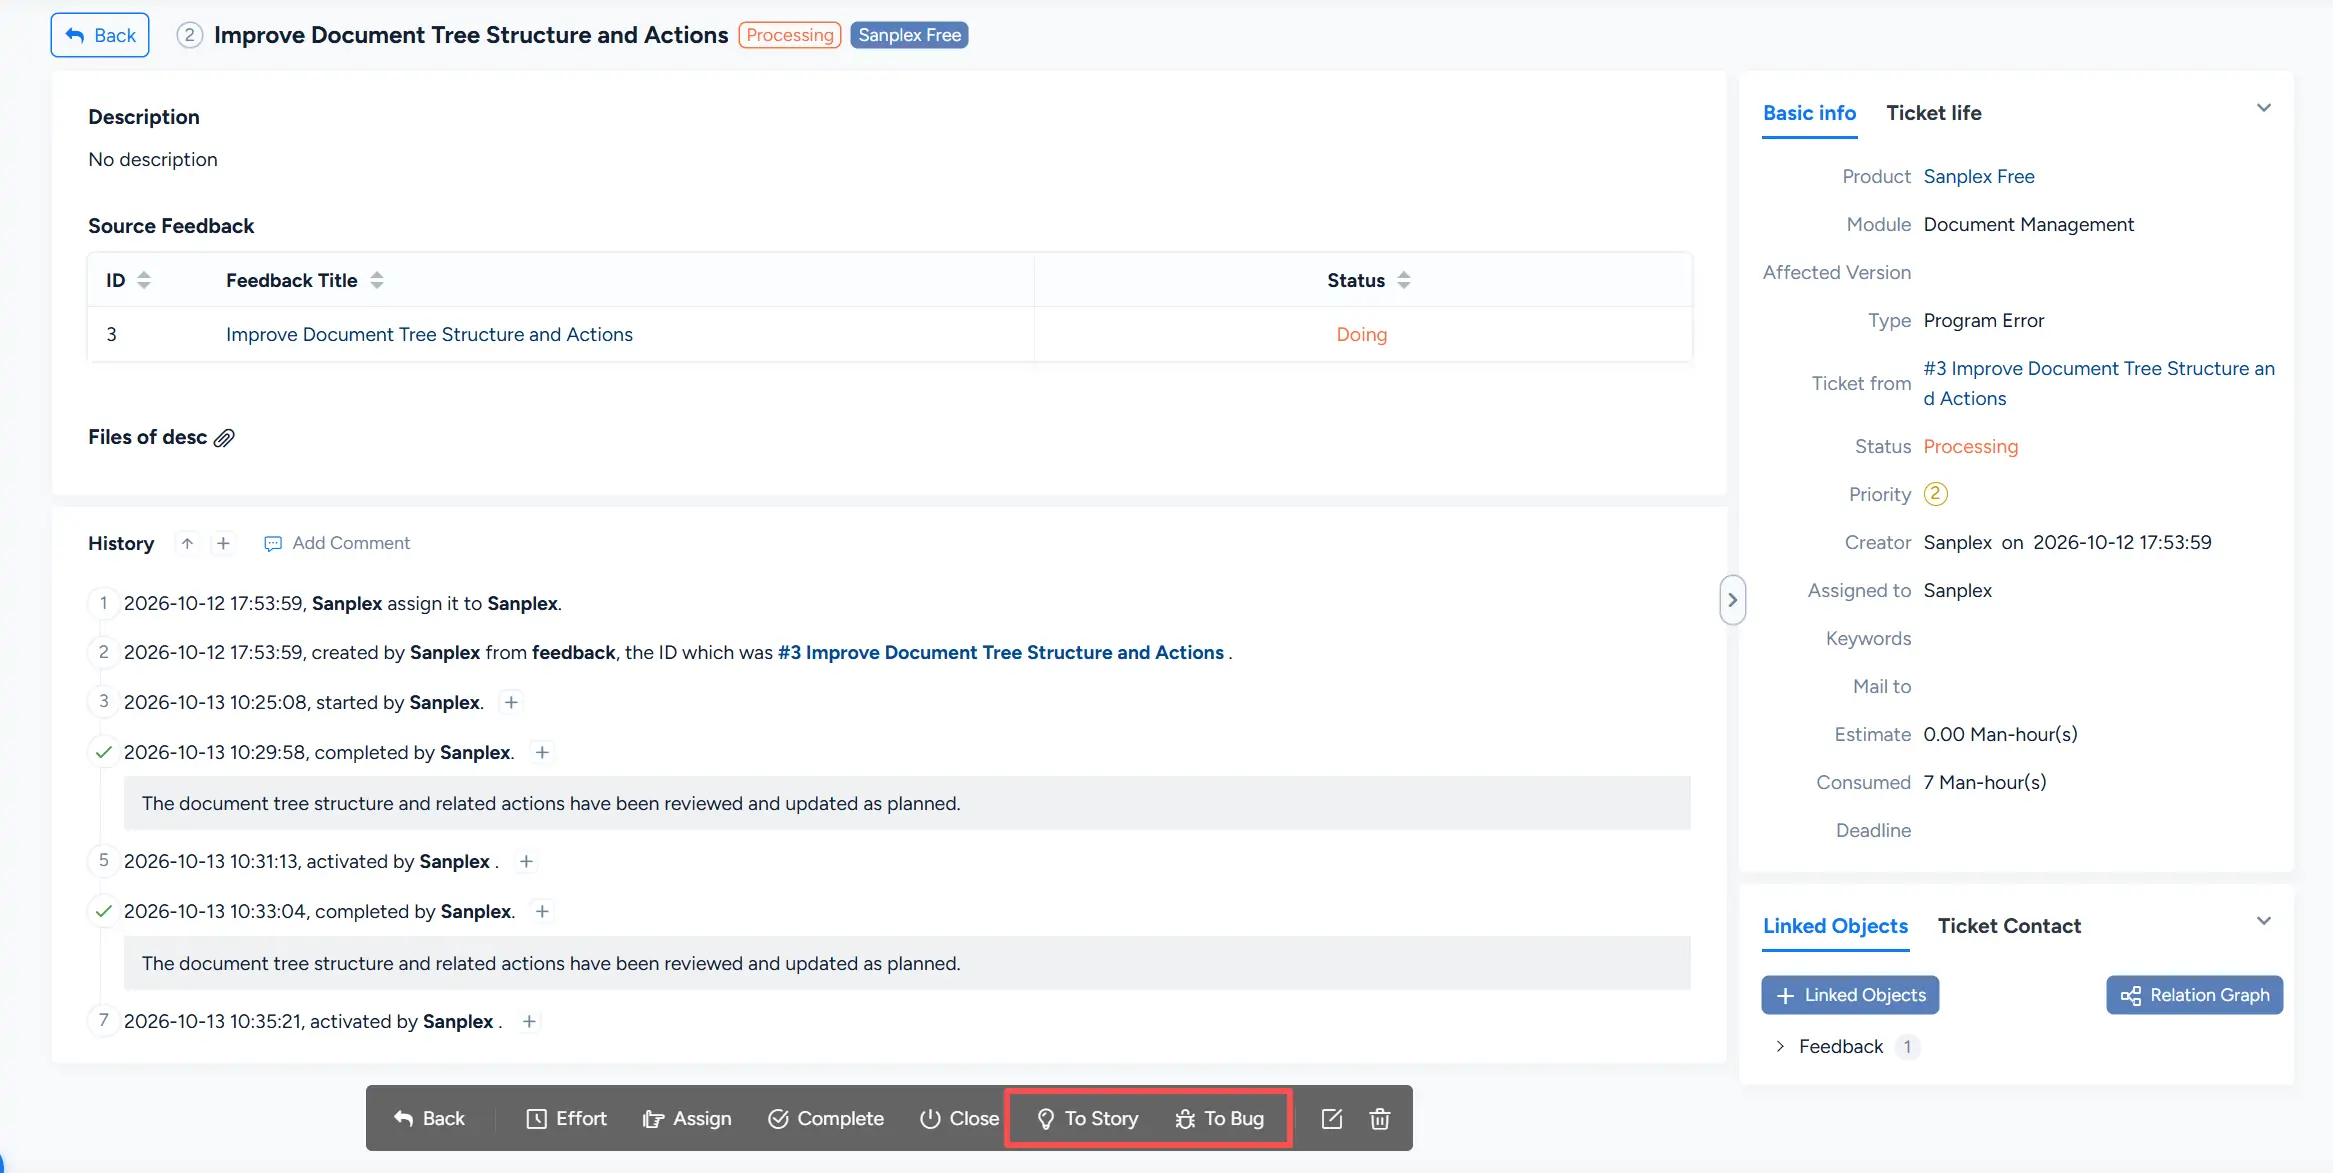
6. Configure Ticket Action Permissions
Ticket actions can be controlled through permission settings.
In Admin > Users > Permission, configure the actions available to each permission group. Ticket actions include:
- Create
- Edit
- Assign
- Start
- Complete
- Close
- Activate
This allows administrators to control which users can perform each step of the ticket workflow.

IV. View Tickets
The Ticket page provides status and user-based views for locating and tracking tickets.
Available tabs include:
- All
- Open
- Waiting
- Doing
- To Be Closed
- Resolved by Me
- Created by Me
- Assigned to Me
The More menu provides additional views, including:
- Assigned by Me
- Closed by Me
You can also use Search, product modules, and list columns to locate specific tickets.



