

Catalog
I. Applicable Versions
- Available for self-hosted deployments of Sanplex Standard Version and above.
- Confluence versions: Confluence 6.x, 7.x, and 8.x (Server) are supported. If your environment falls outside this range, please contact us.
- Deployment types: data can be migrated from Confluence Server / Data Center and Confluence Cloud into a self-hosted Sanplex deployment.
II. Confluence Migration Overview
2.1 Import Data Compatibility
| Confluence data type | Supported | Imported as |
|---|---|---|
| Space | Yes | Document library |
| Page | Yes | Document |
| Folder | Yes | Chapter (the original structure and titles are preserved) |
| Attachment | Yes | Attachments uploaded to pages are preserved |
| Macro | Yes | See 2.2 |
| Blog post | Yes | Document |
| User | Yes | All users are imported, with their nicknames and email addresses preserved |
| Permission | Yes | Space, folder, page, and blog permission settings are preserved, together with the user data in those settings |
2.2 Supported Macros and Plugins
| Confluence macro / plugin | Imported as | Notes |
|---|---|---|
| Attachments macro | Attachment data is preserved and remains downloadable, rendered in the Sanplex attachment style | Cross-page attachment references need their links updated manually |
| Link-type macros | Preserved as regular hyperlinks or attachment links | Internal links remain traceable; check that external links are still valid |
| Columns macro | The column layout and its content are preserved | |
| Jira issue macro | Converted into a hyperlink to a single issue; the link remains traceable | Real-time status synchronization is not supported yet |
| Children display macro | Converted into a static list of hyperlinks; the links remain traceable | |
| Include / excerpt macro | The text and some of its functions are preserved | Some styles may be lost |
| Attachments list macro | Converted into a static attachment list; the files remain downloadable | |
| Code macro | Code snippets are preserved; syntax highlighting must be configured manually, and only basic code blocks are rendered | |
| HTML macro | HTML code is converted to plain text or removed | Scripts are blocked by security policy, so styles may be lost |
| Markdown macro | Markdown text is preserved as plain text | Complex layouts need to be adjusted in the Sanplex editor |
| Expand macro | Text content is preserved, along with the collapsible interaction | |
| Info panel macro | Text content is preserved, along with visual cues such as colors and icons | |
| Blog macro | Converted into a Sanplex document | |
| Draw.io plugin | Images are preserved, and the source file is stored as an attachment and remains downloadable | Diagrams must be edited and re-uploaded manually to be updated |
| @mention macro | Mentions are converted to plain text |
III. Before You Migrate
3.1 Import Method
- Confluence data is imported by calling API endpoints, which brings Confluence pages, attachments, and page structure into the Sanplex Docs module.
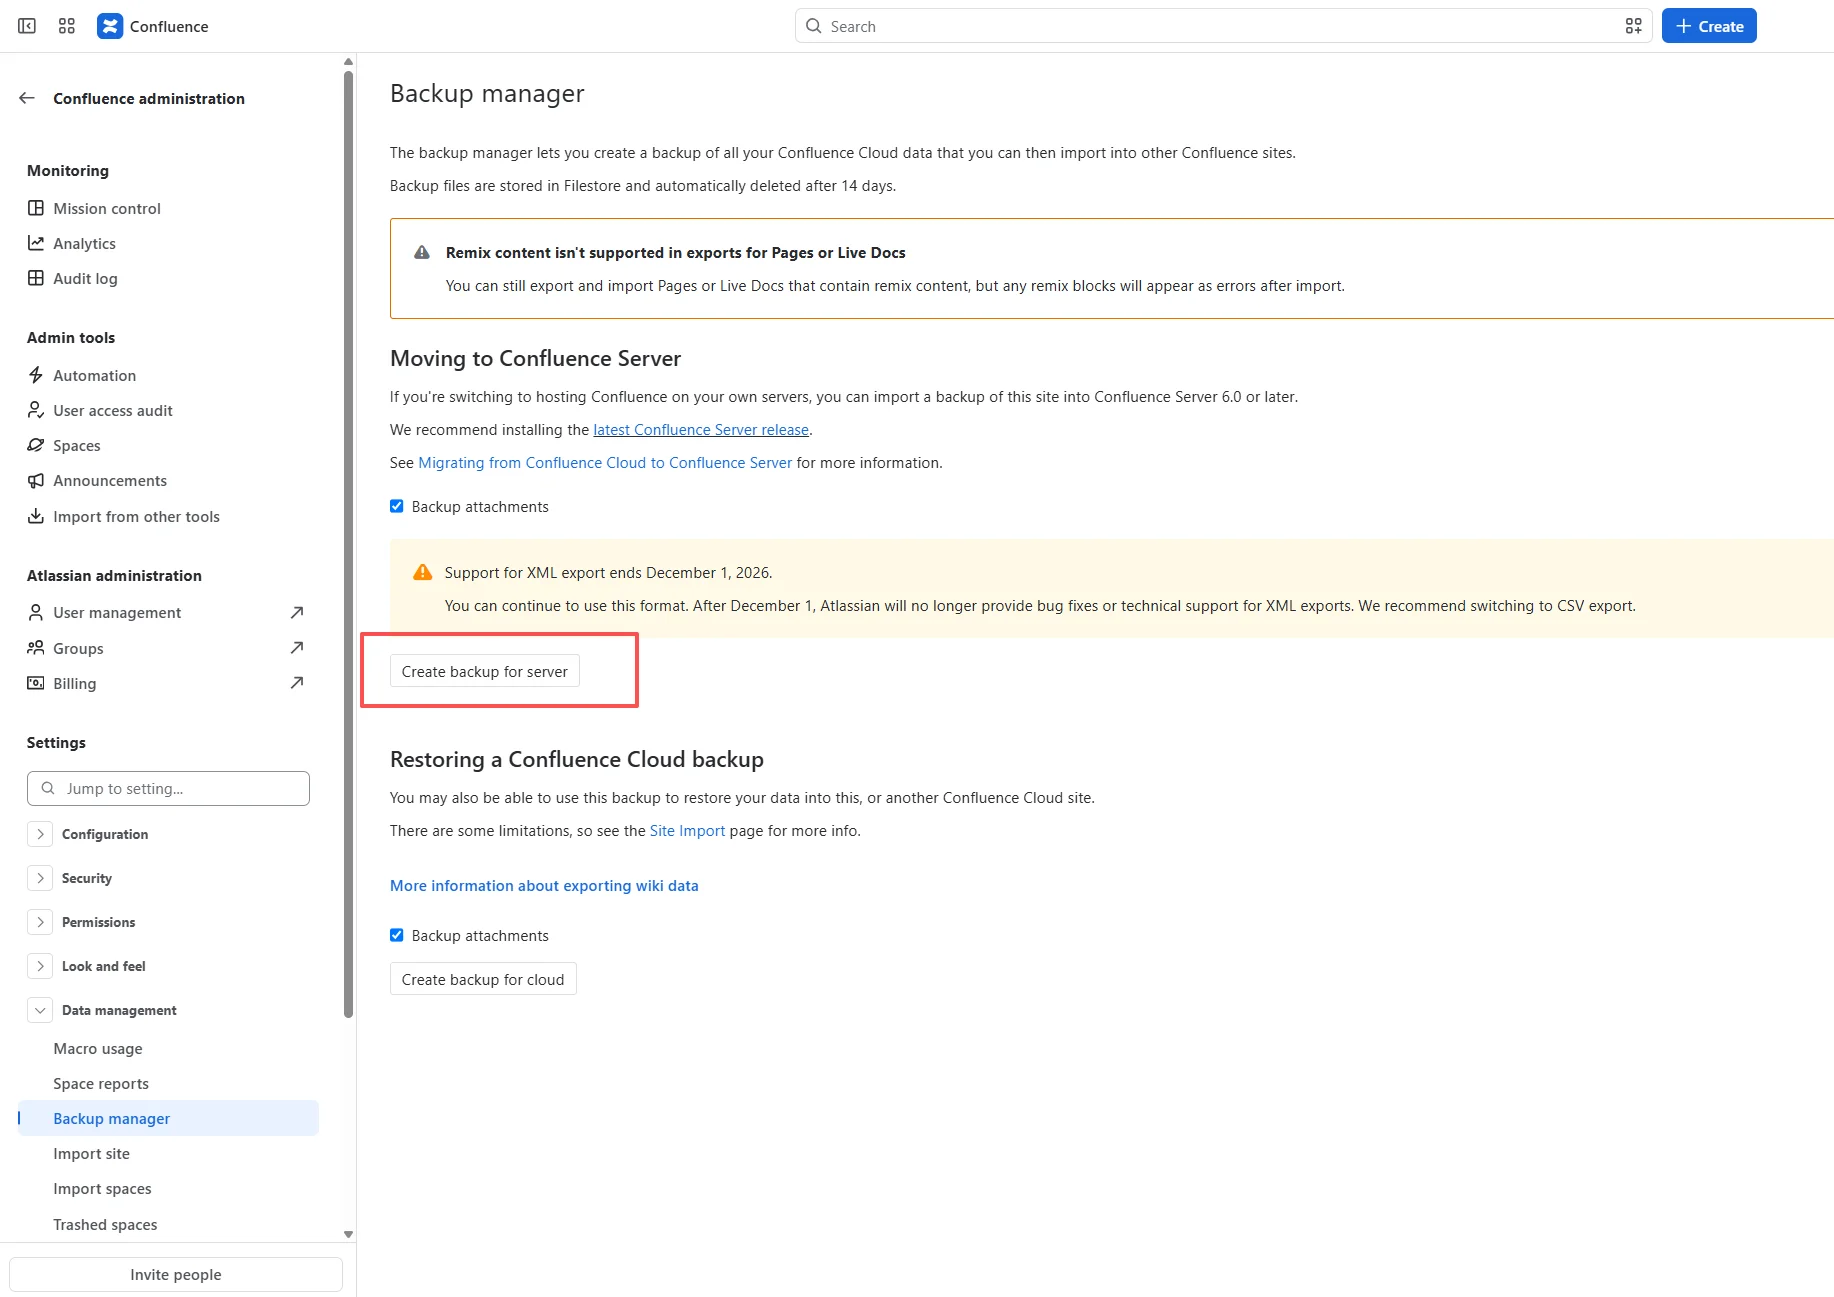
- Export a backup of the Confluence attachments first. The backup method is shown below:
3.2 Import Limits
- No data volume limit: Sanplex places no limit on how much Confluence data you can import.
- Import time: because the data must be parsed and processed, import time grows with the volume of data. For large migrations, run the import during off-peak hours so that system performance is not affected.
3.3 What Gets Imported
- Spaces: all Confluence spaces and their user access permissions.
- Pages: page content and the page tree structure in each Confluence space, together with page-level access permissions.
- Attachments: all attachments.
- Users: all Confluence users are imported. Importing Confluence user groups and their permissions is not supported yet.
Notes
- Confirm that your Confluence version and deployment type match your Sanplex version and deployment type, so that the import can run properly.
- Check the Confluence data format to make sure it meets the requirements of the Sanplex import API.
- If you are planning a single unified migration, sign in with a dedicated migration account that has the required permissions.
- Obtain API permissions so that the account you use can call Sanplex APIs.
- Back up your existing Sanplex data before importing, to prevent data loss or conflicts.
- If Confluence is still running, switch it to maintenance mode before exporting, so that no new data is created during the export.
- Import time: API-based import involves data transfer and parsing, so import time grows with the volume of data. For large migrations, run the import during off-peak hours.
- Network stability: API import depends on network transfer, so work in a stable network environment to avoid interrupted data transfer.
IV. Start the Migration
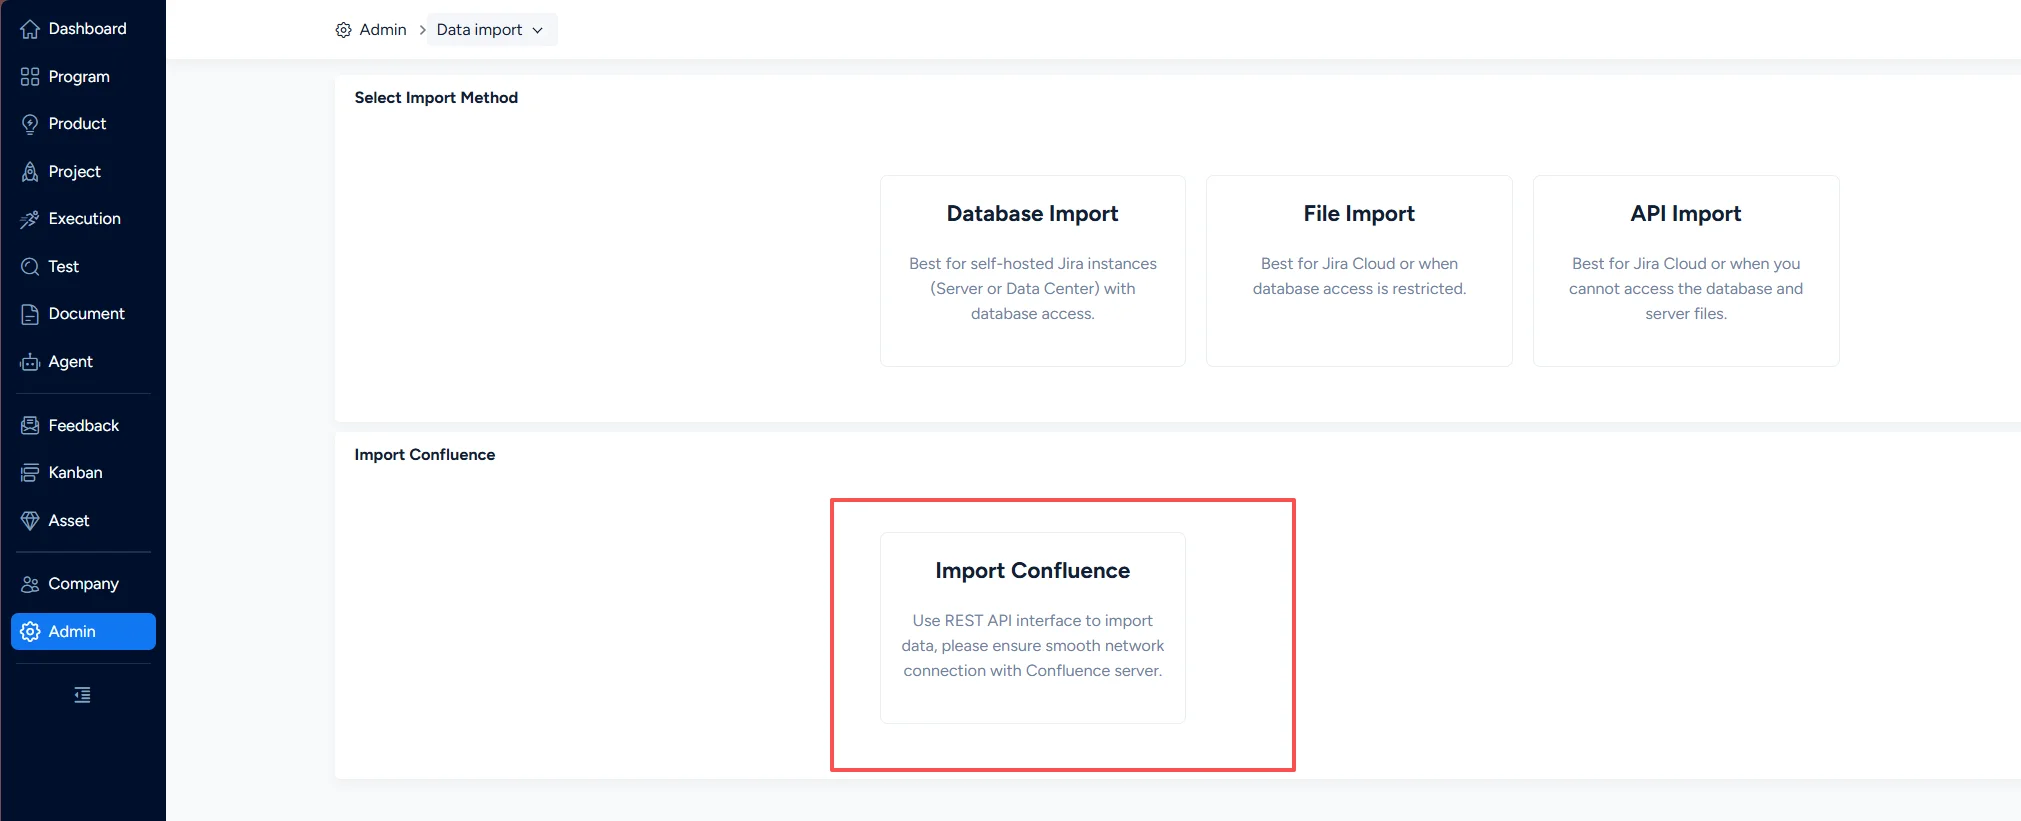
Sign in to Sanplex with an administrator account, then go to Admin > Data Import and select Confluence Import.
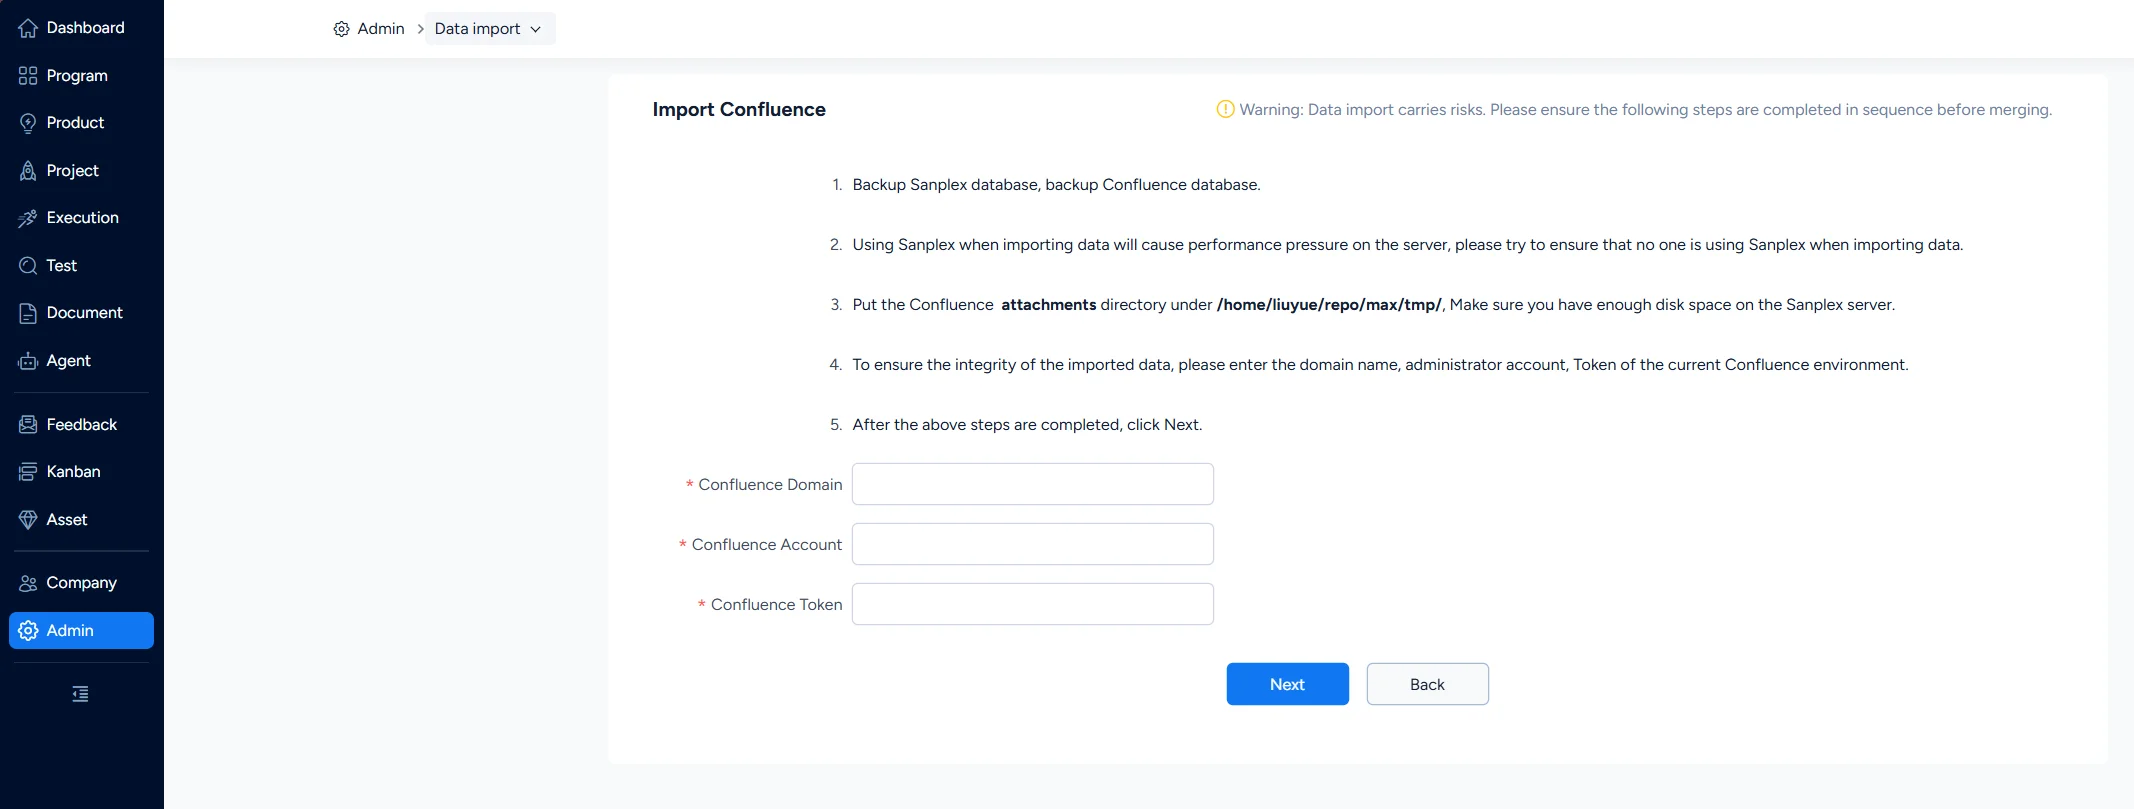
4.1 Connect to Confluence
4.1.1 Enter Confluence Information (Confluence Cloud)
- Confluence domain: the domain you enter in the browser address bar to reach the Confluence Cloud service.
- Confluence administrator account: an account with site administrator privileges.
- Confluence password / token: the API token used to call Confluence's internal APIs. Create one on the Confluence API token management page, then paste it into the input field. For step-by-step instructions, see How to create a Confluence API token.
4.1.2 Enter Confluence Information (Server / Data Center)
- Confluence domain: for a self-hosted Confluence, the domain is usually made up of the server IP, hostname, or a custom domain (for example,
http://confluence.yourcompany.com:8090), depending on how the deployment's network is configured.- Default address: after installation, Confluence is reached through the server IP or hostname, for example
http://<server-ip>:<port>(such ashttp://192.168.1.100:8090). - Custom domain: if a domain has already been bound, confirm it with your deployment team or IT department, and check the server's reverse proxy configuration (Nginx/Apache) or DNS records.
- Default address: after installation, Confluence is reached through the server IP or hostname, for example
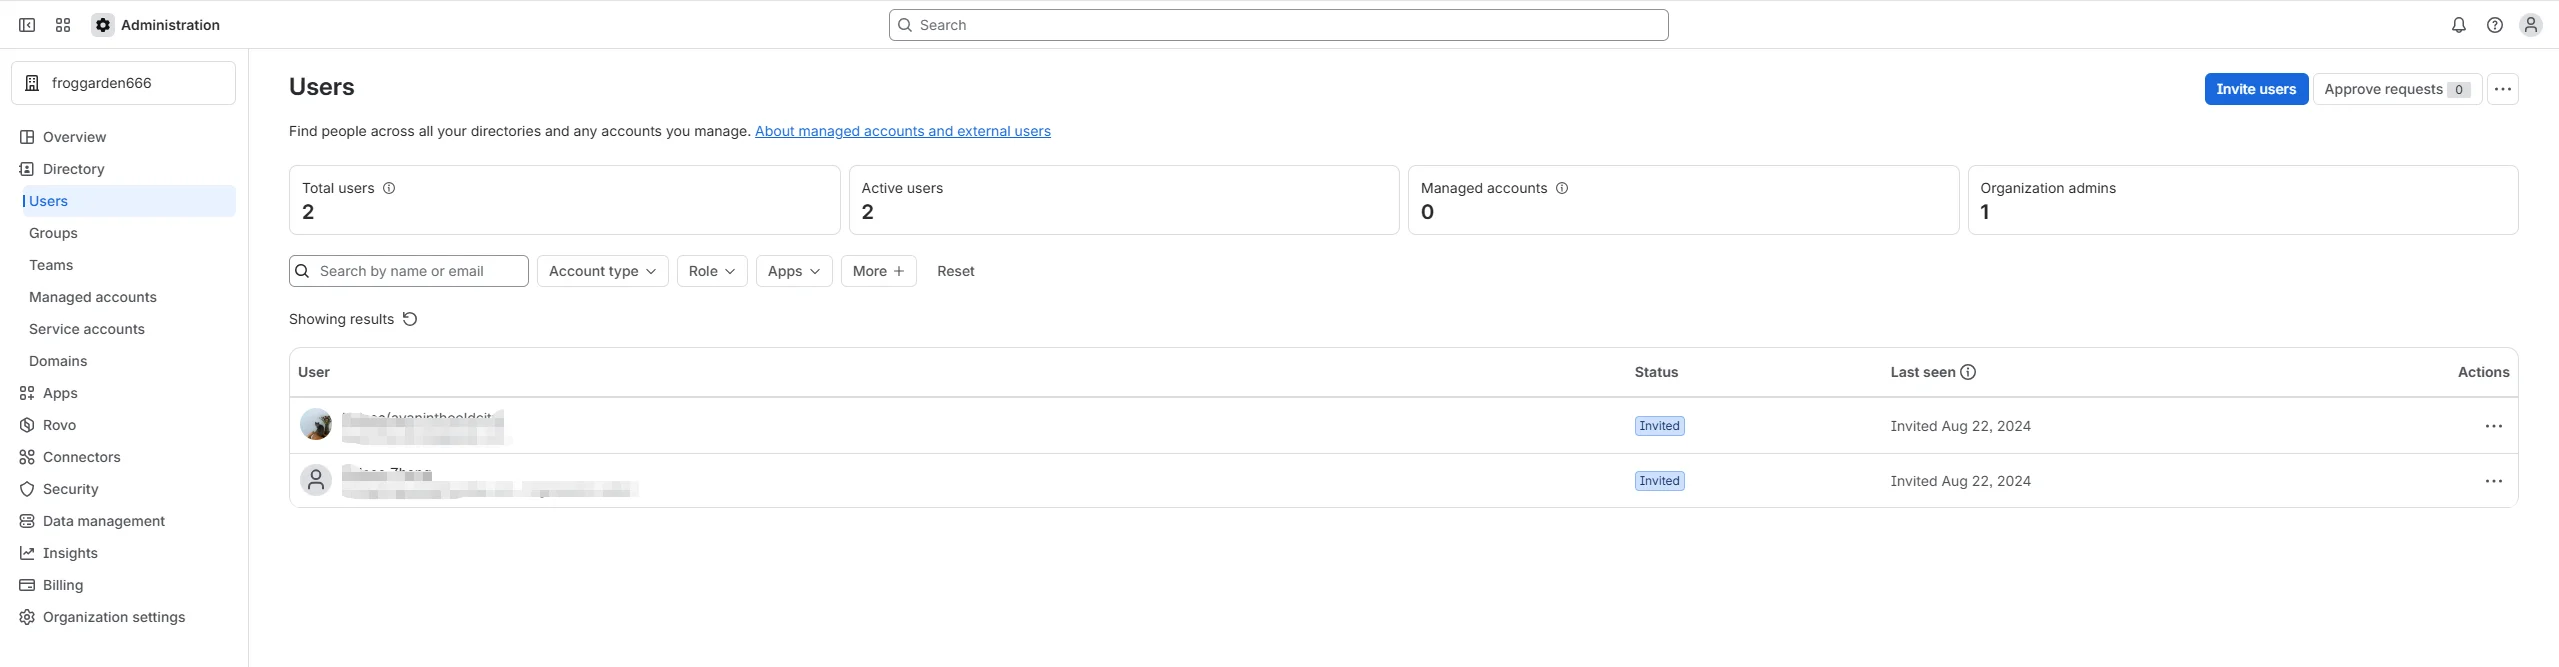
- Confluence administrator account: the administrator account is usually created during installation, or created later during management. When Confluence is first installed, it prompts you to create the first administrator account (the default username is
admin).
You can also find the administrator account under Confluence Administration > Users, or ask the person or team who deployed Confluence.
- Confluence password / token: the administrator password is set during installation. If it is lost, reset it through the database or force a change in recovery mode.
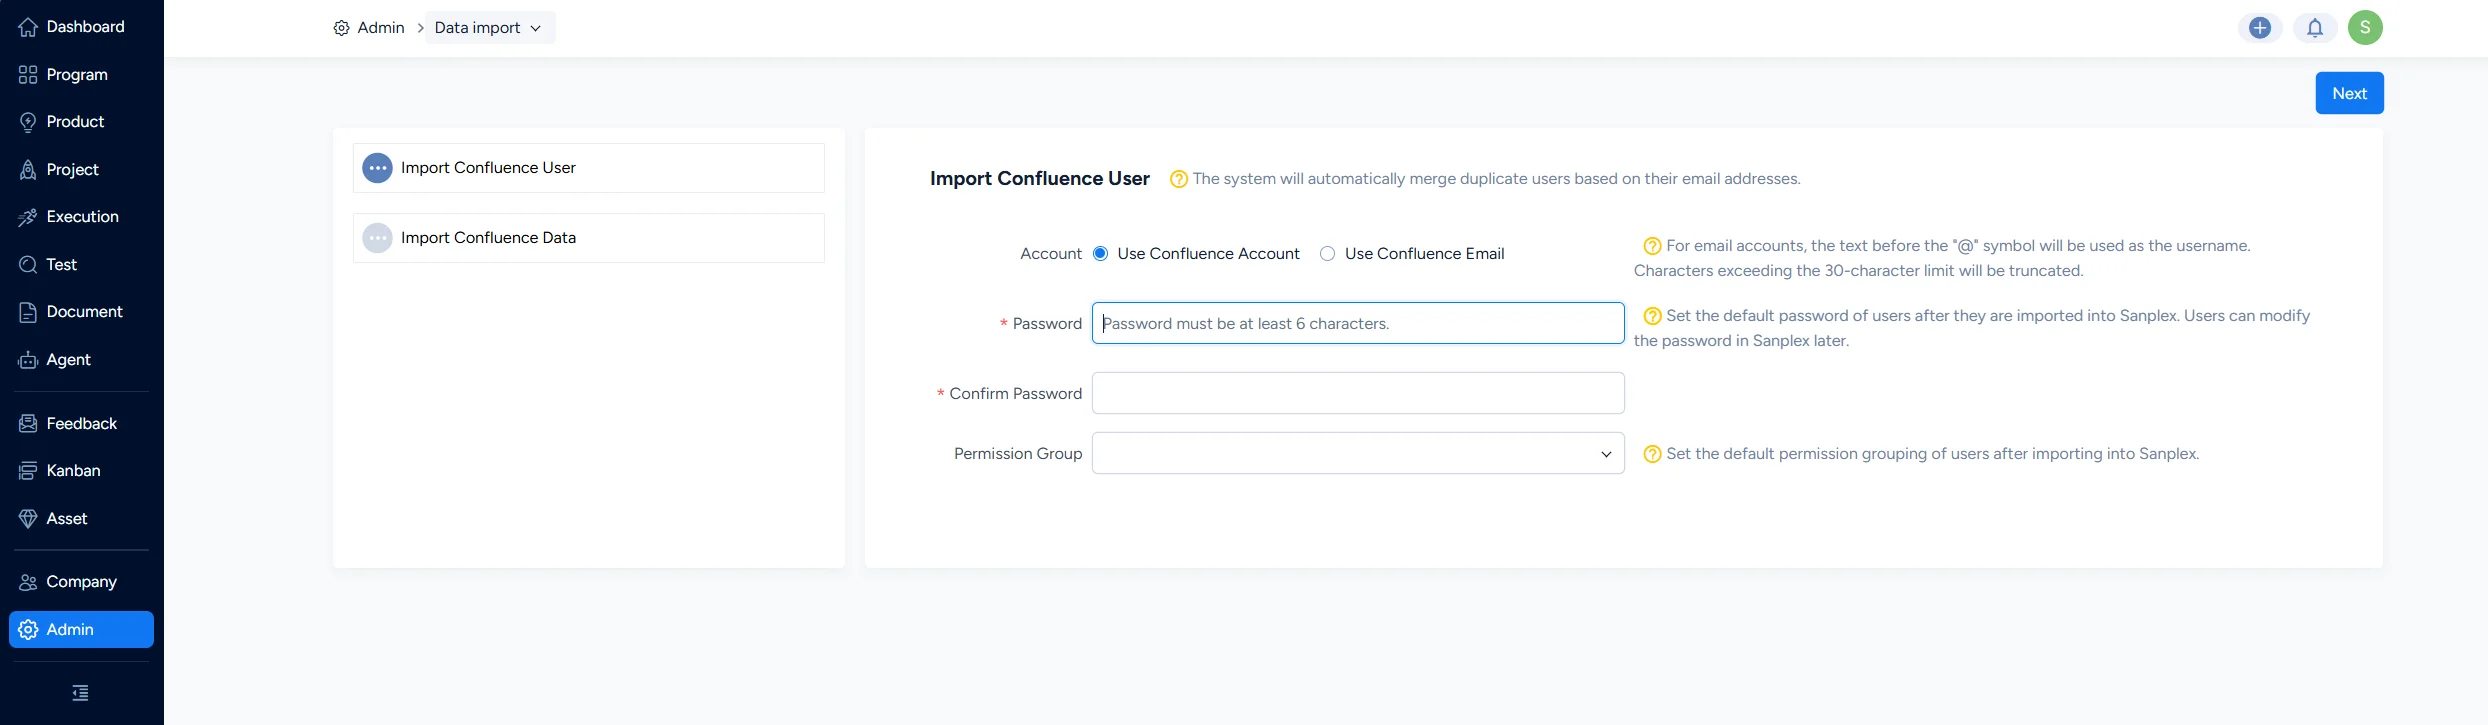
Click Next to complete the environment connection and move on to importing Confluence users.
4.2 Import Confluence Users
Import your Confluence users into Sanplex, then review and manage them under Admin > Users > User.
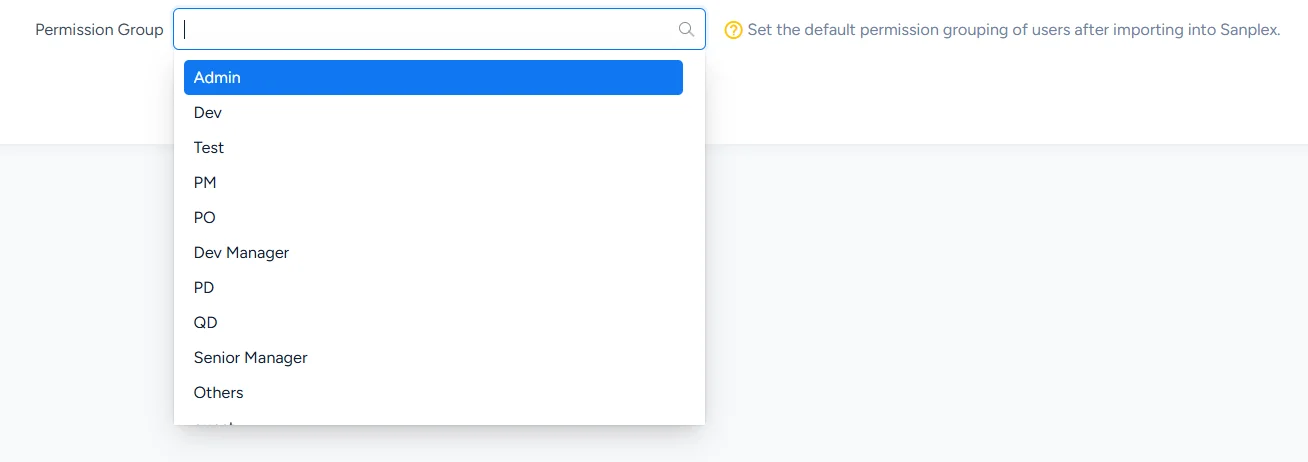
The permission group you choose when importing users becomes their default permission group in Sanplex. You can review and maintain permission groups under Admin > Users > Permission.
Click Next to continue to the data import page.
Note: if your system already has invited users, we recommend importing by Confluence email. For users whose email cannot be retrieved, Sanplex generates usernames such as Confluence1, Confluence2, and so on after import; those users can sign in with the generated usernames.
4.3 Import Confluence Data
On the data import page, click Start Migration, and the data will be imported into Sanplex automatically.
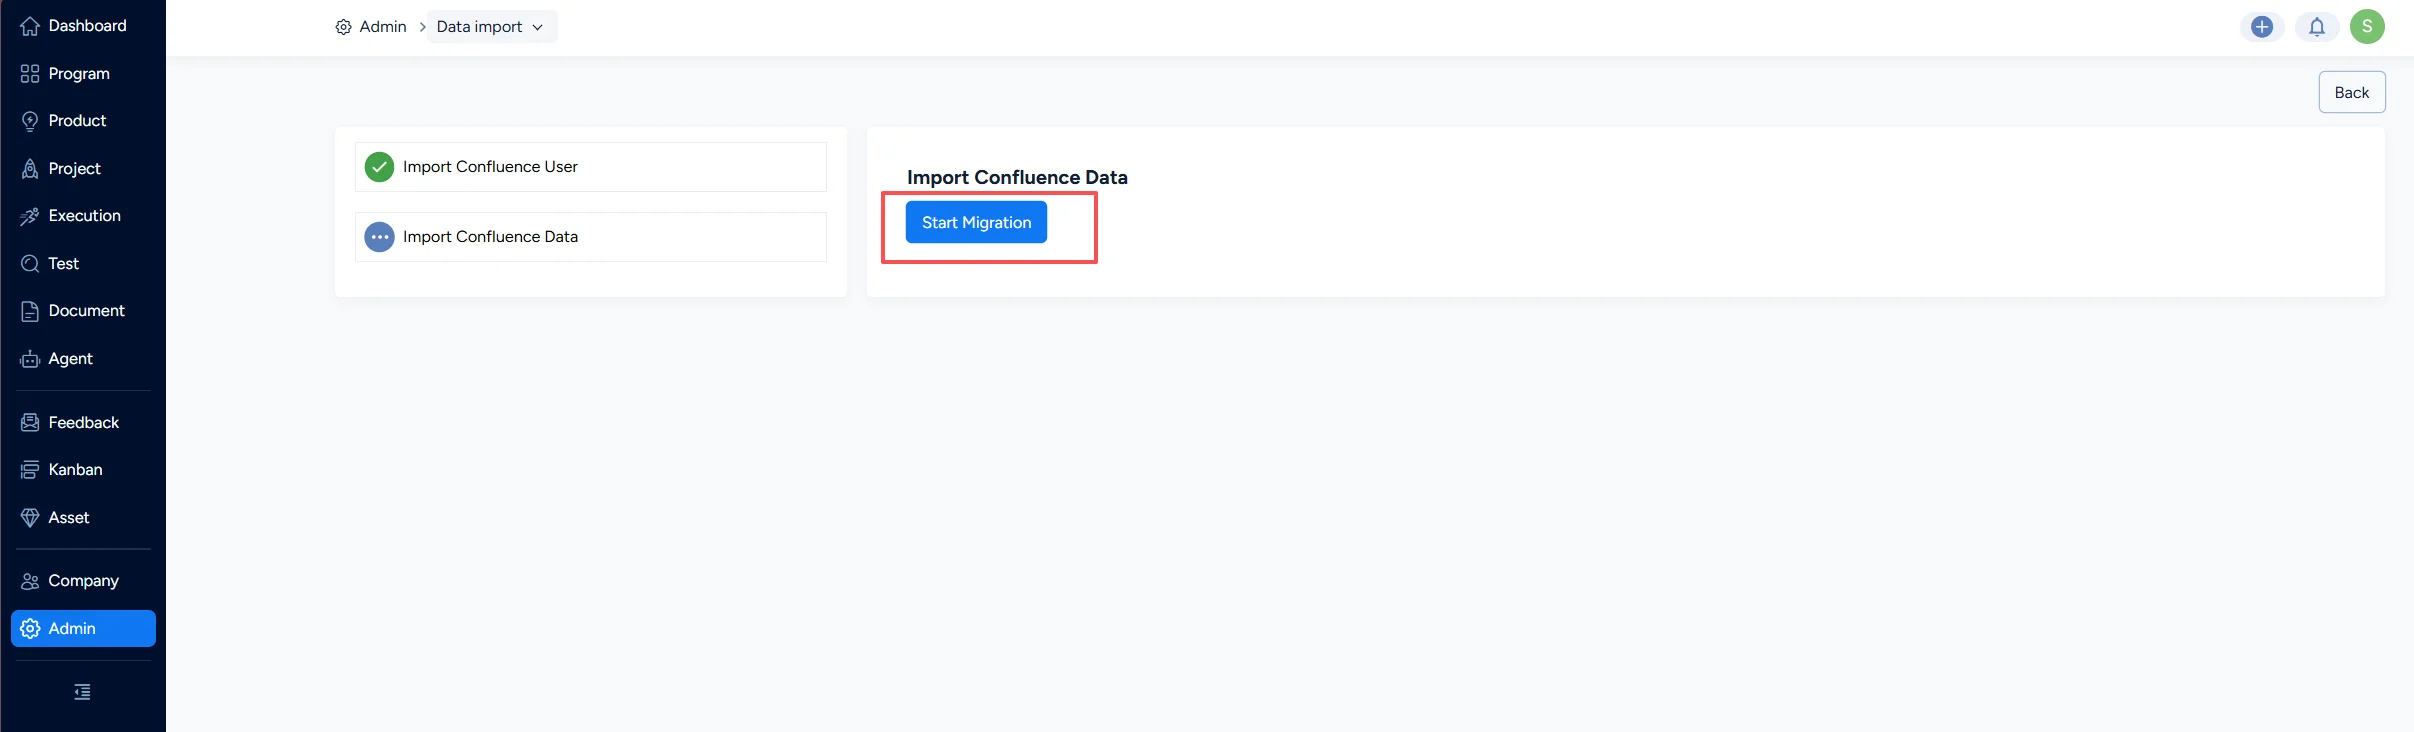
Do not leave this page while the import is running: the process can take a long time, so please be patient.
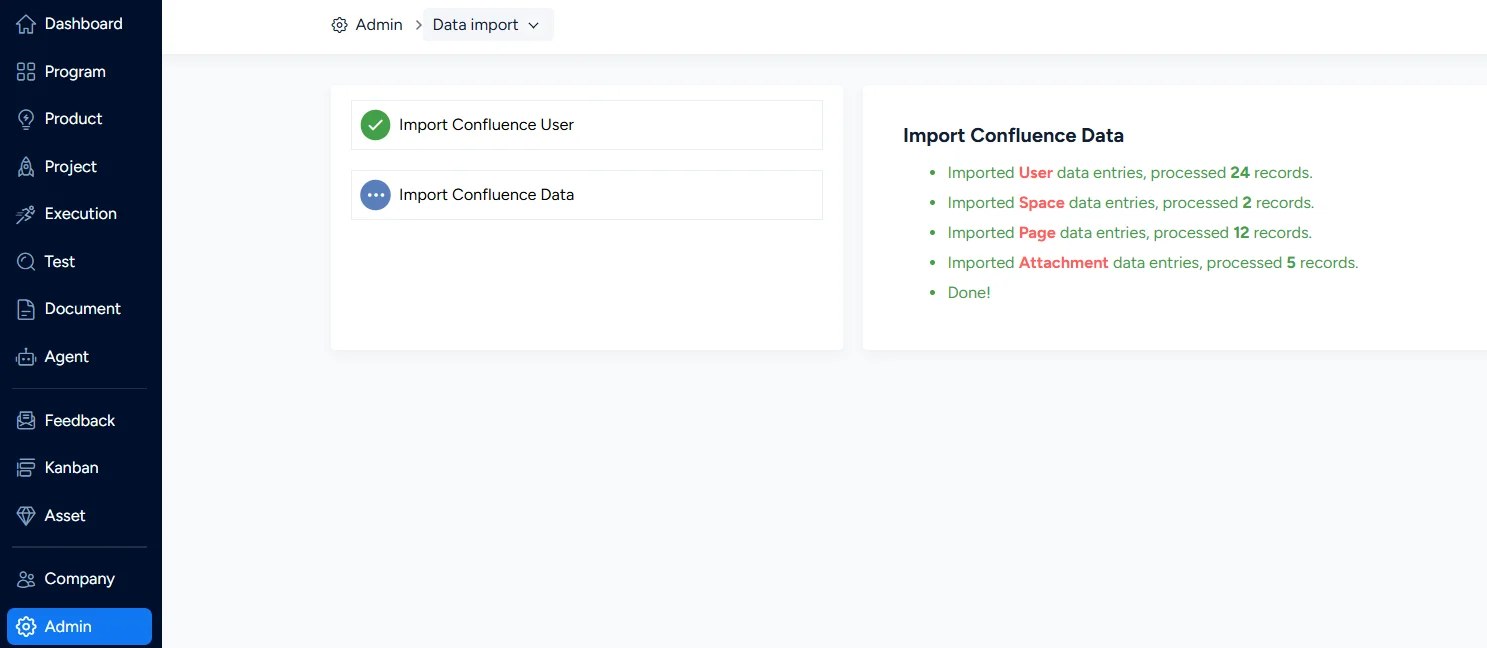
Once every data type has been imported successfully, the system shows “Done!”, and the Confluence data import is complete.
V. Import Mapping Tables
5.1 Mapping Between Confluence and Sanplex Docs
| Confluence | ———— | Sanplex Docs |
|---|---|---|
| Space | mapped to | Document library |
| Folder | mapped to | Chapter |
| Page | mapped to | Document |
| Database | mapped to | Document (the original structure and hierarchy are kept; content data cannot be imported for now) |
| Smart link | mapped to | Document (stored as a link inside the document) |
| Blog post | mapped to | Document |
Notes:
- A personal space in Confluence (permission set to visible only to me) is imported by default into My Space > Confluence Spaces > a library named after that space in Sanplex Docs.
- Any space other than a personal space is imported by default into Team Space > Confluence Spaces > a library named after that space in Sanplex Docs.
- Archived spaces and pages can be imported; archived folders cannot be imported for now.
5.2 Permission Mapping Between Confluence and Sanplex Docs
| Permission setting in Confluence | ———— | Access control in Sanplex Docs |
|---|---|---|
| Space permission | matches | Library access control |
| Folder permission | matches | Chapter access control |
| Page permission | matches | Document access control |
| Blog permission | matches | Document access control |
| Database permission | matches | Document access control |
| Smart link (no separate permission) | matches | Document access permission — public by default |
Notes:
- User and user-group permissions set on a space are imported into the library's private permission - whitelist in Sanplex Docs.
- Permissions set on a folder (visible to everyone, but editable only by certain users) are imported into the chapter's private permission - whitelist in Sanplex Docs.
- Permissions set on a page are imported into Sanplex Docs as either private permission - read-only whitelist or private permission - editable whitelist.


