Catalog
After Plans are created, product teams can create and maintain Stories in Sanplex. Sanplex organizes story-related work through Epic, Feature, and Story, which can be configured to represent different levels of product stories.
I. Create Stories
1. Create Epics, Features, and Stories
In the current Sanplex interface, story-related work is organized through Epic, Feature, and Story.
Go to the corresponding Epic, Feature, or Story page under Product, and click the Create button in the upper-right corner to create a new item.

Sanplex organizes Stories through the Epic, Feature, and Story hierarchy. Parent-child relationships and the built-in SR/sub structure support progressive decomposition, allowing teams to break down higher-level stories into more detailed work items while maintaining clear traceability between them.
2. Split Stories
Stories can be decomposed through the supported story hierarchy.
- In the Story list, use the available hierarchy or split action to decompose a Story into lower-level items.
- In the standard Epic–Feature–Story structure, Stories are decomposed level by level rather than directly skipping intermediate levels.
- Parent-child relationships created through decomposition are displayed hierarchically in the Story list.
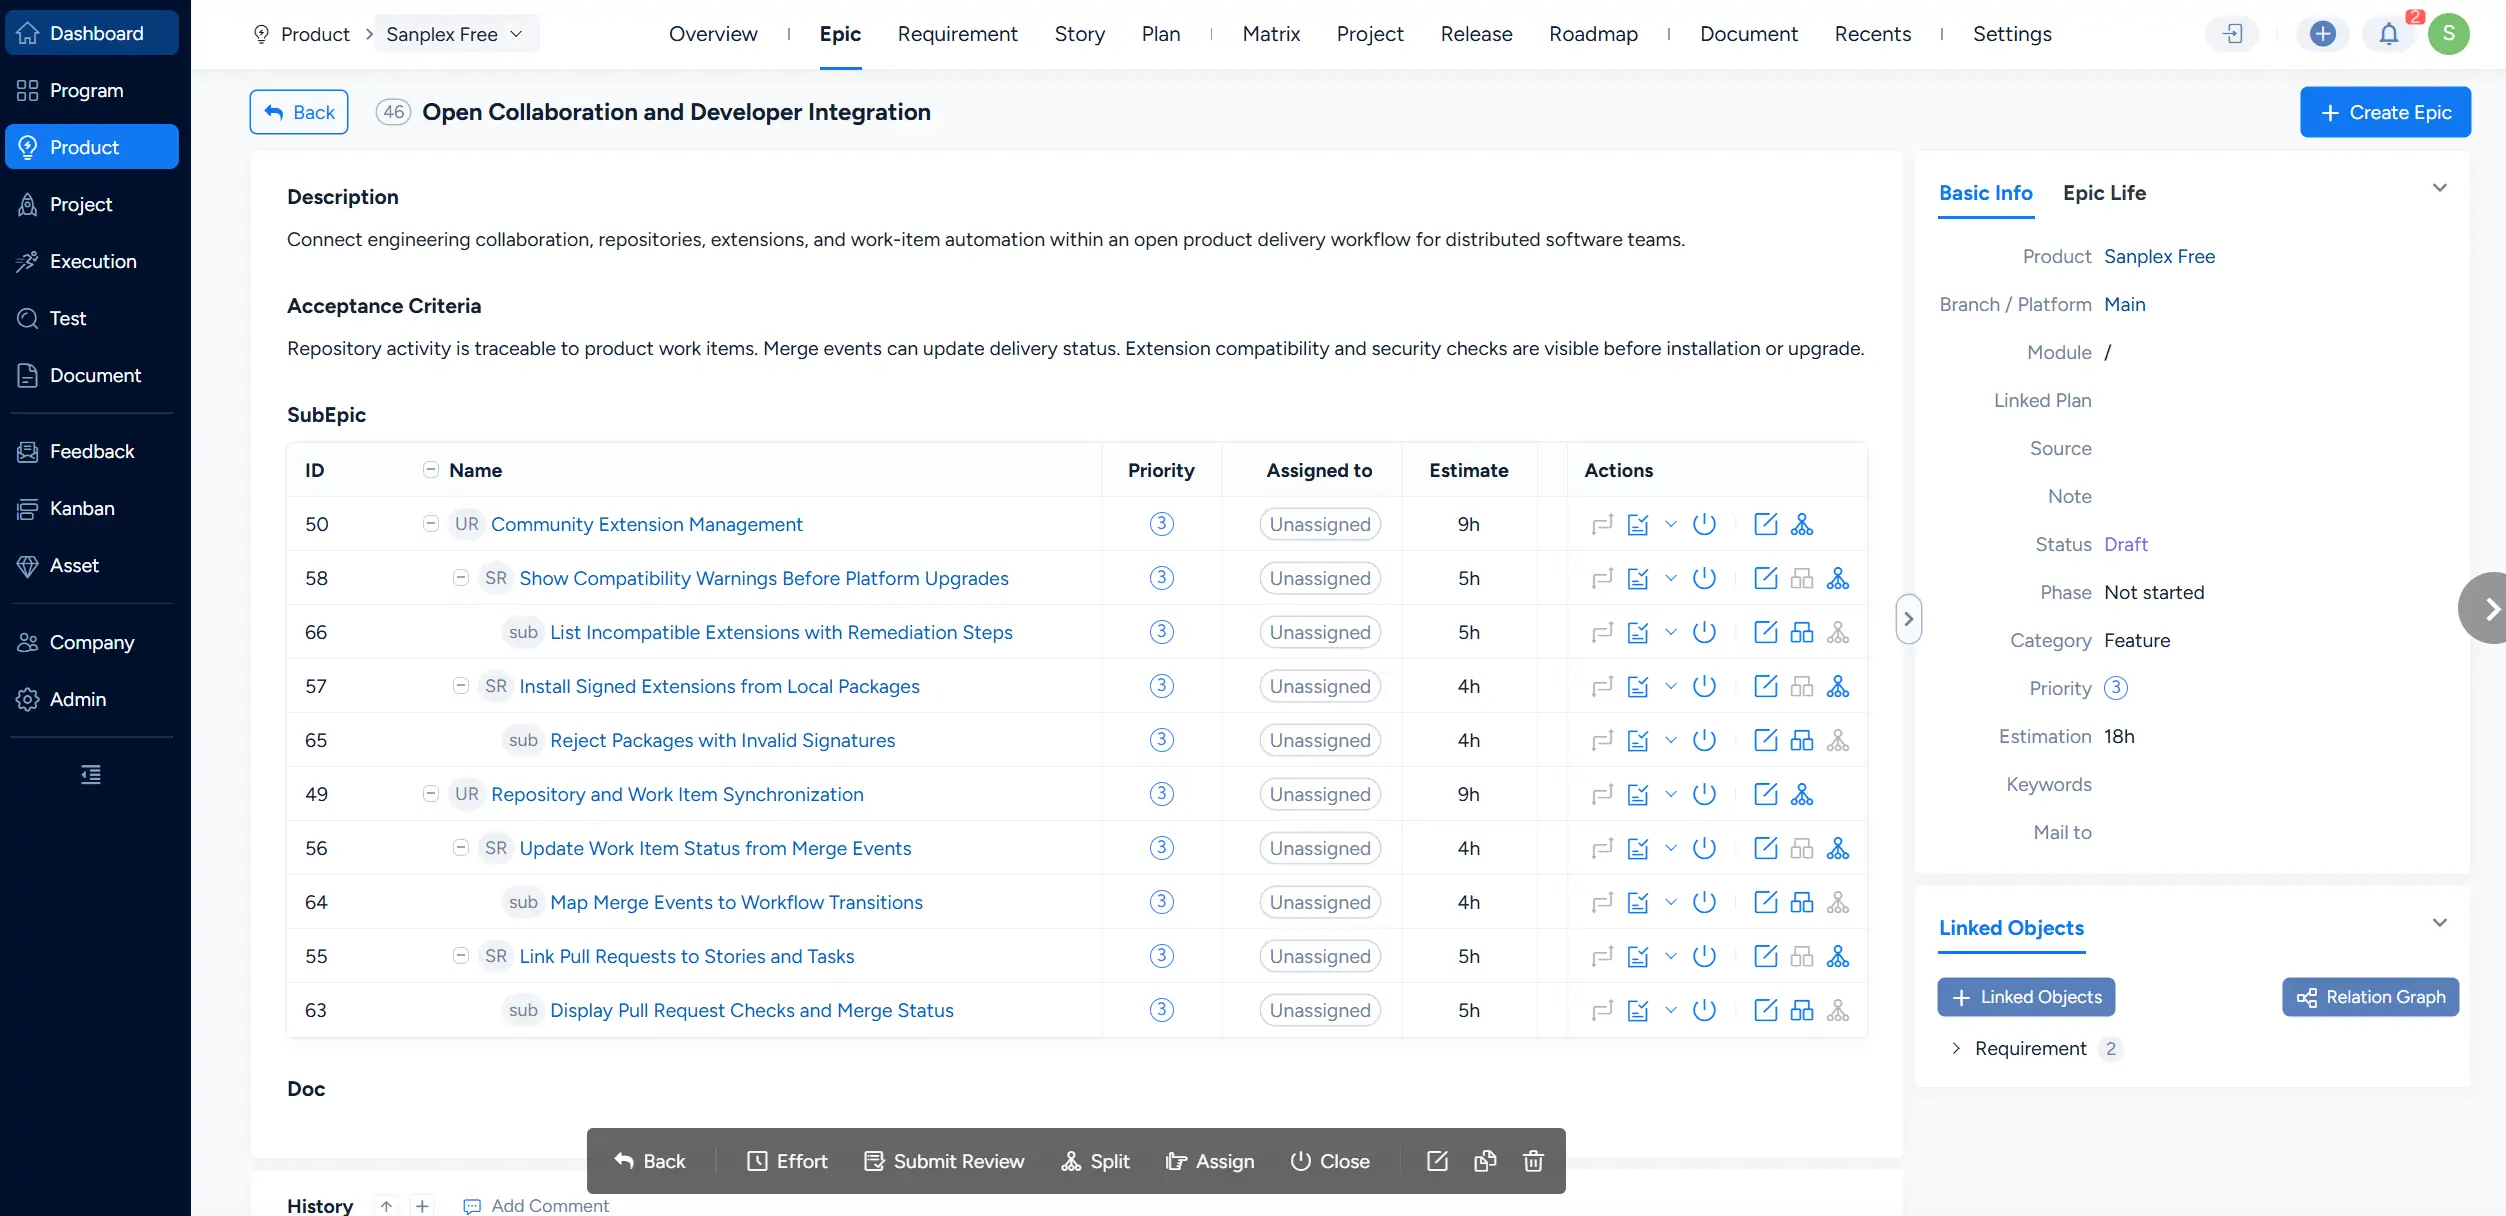
After opening a Story, its lower-level items are displayed in the corresponding child-item section, allowing you to review and maintain the story hierarchy.
3. Batch Create
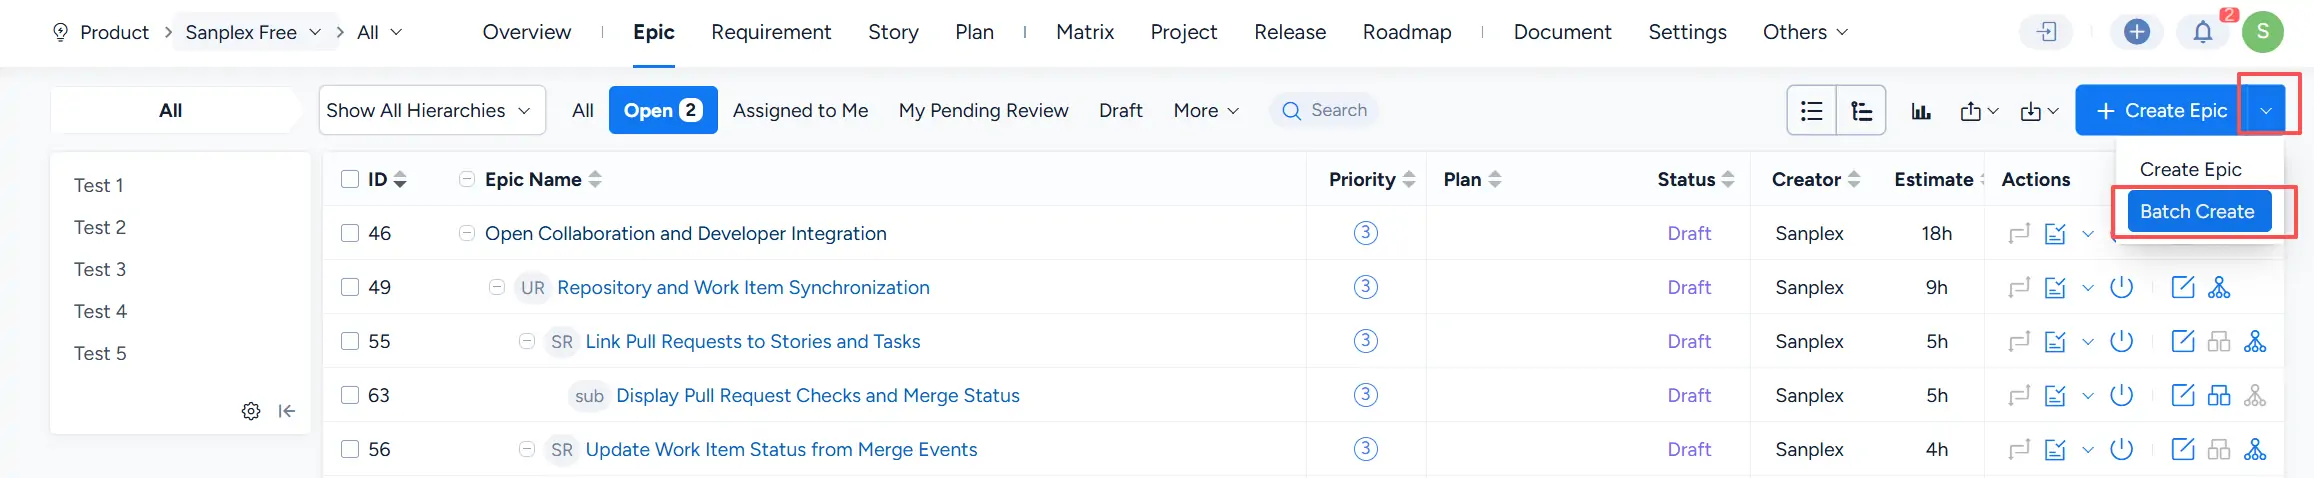
Sanplex supports batch creation for story items. Open the drop-down menu beside Create Epic, Create Feature, or Create Story, and select Batch Create where the option is available.
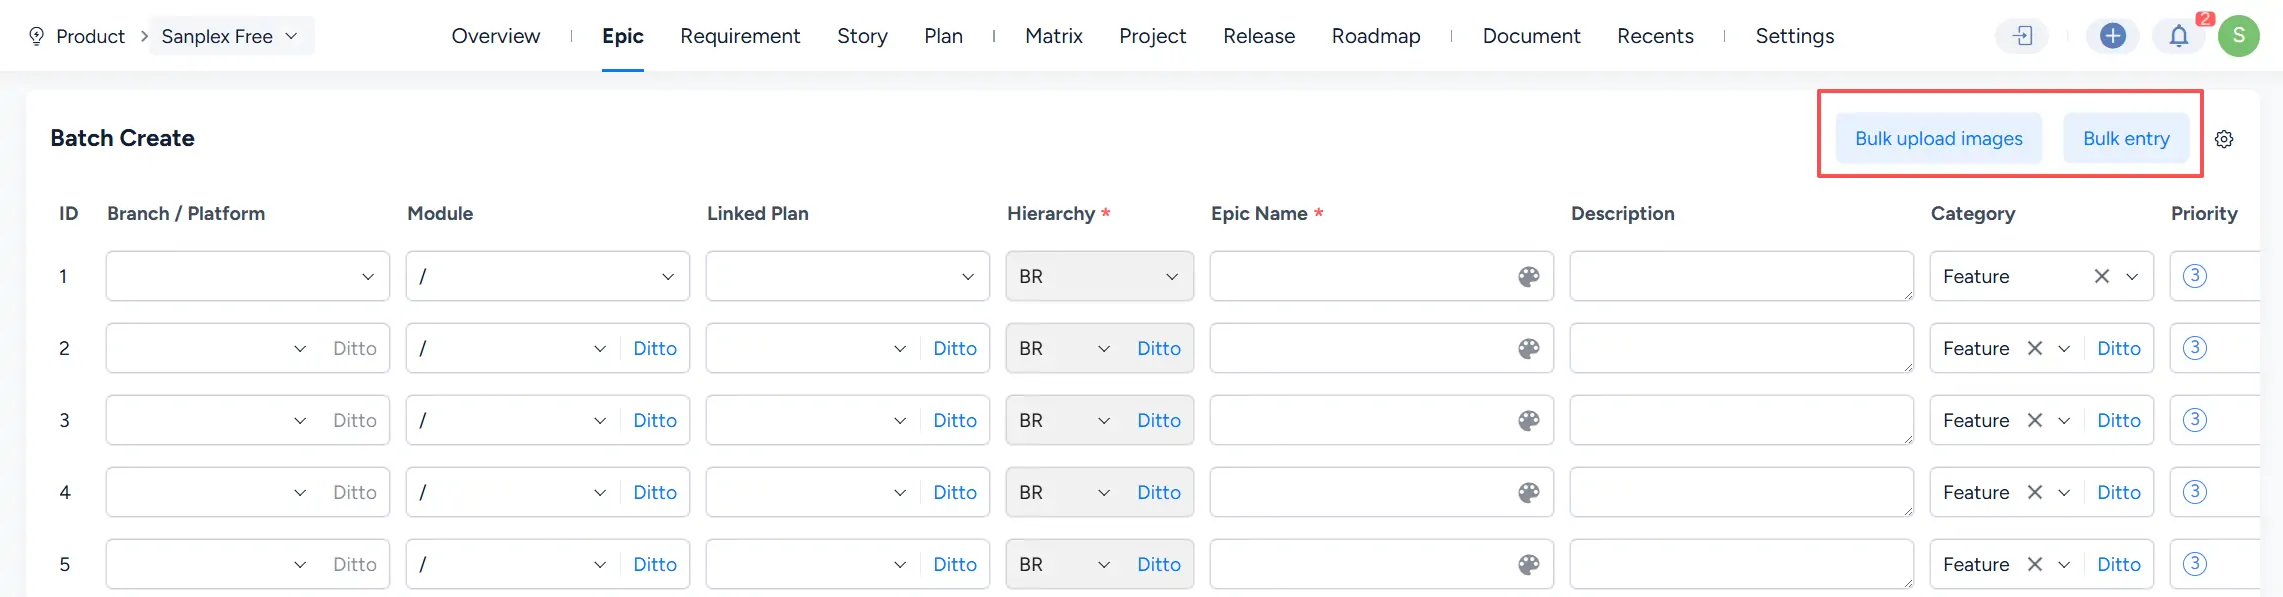
The Batch Create page provides multiple rows for creating story items together.
4. Multi-Image Upload
The Batch Create page supports Bulk upload images, allowing multiple images to be added when creating story items in bulk.
The available batch-create fields depend on the current story type and configuration.
5. Multi-Line Entry
Sanplex also supports Bulk entry. Enter one story name per line in the Bulk entry dialog, and the system places the entries into separate rows on the Batch Create page.
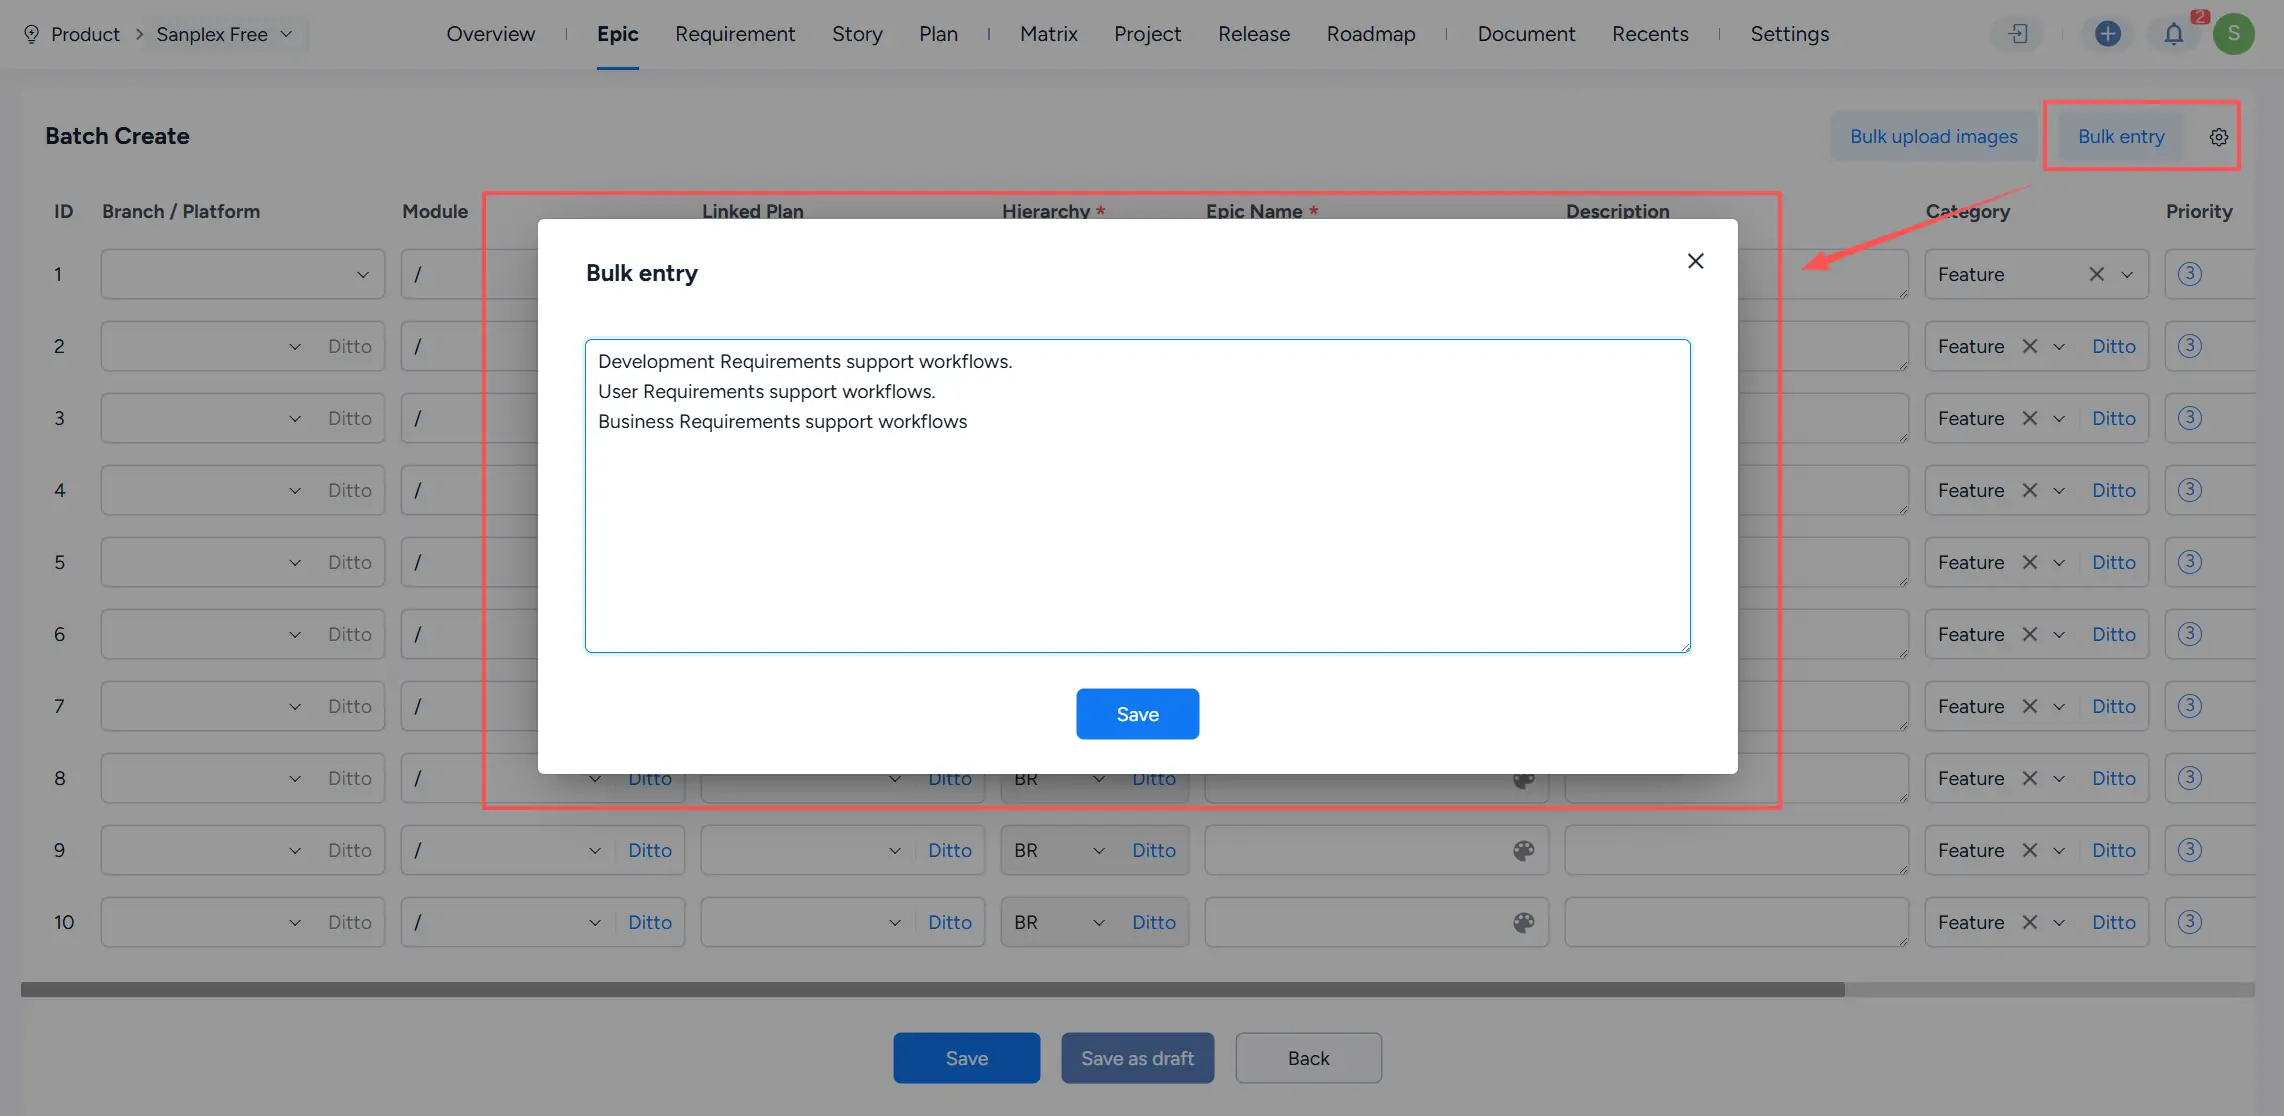
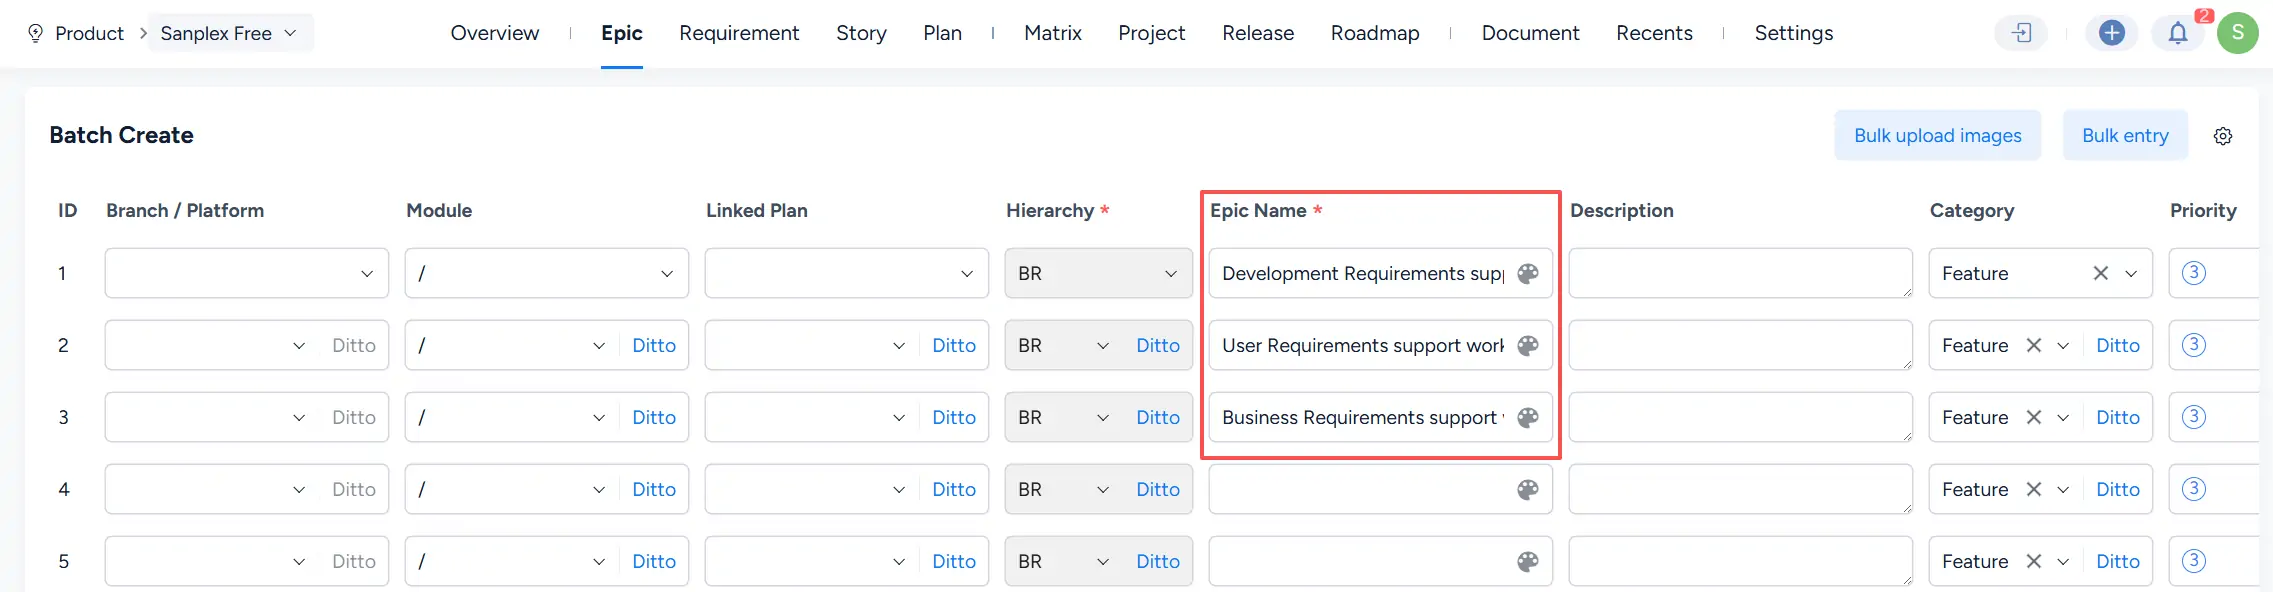
After saving the bulk text, each line is inserted into a separate row. You can then complete other fields such as Branch / Platform, Module, Linked Plan, Hierarchy, Category, and Priority as needed.
6. Edit and Maintain Stories
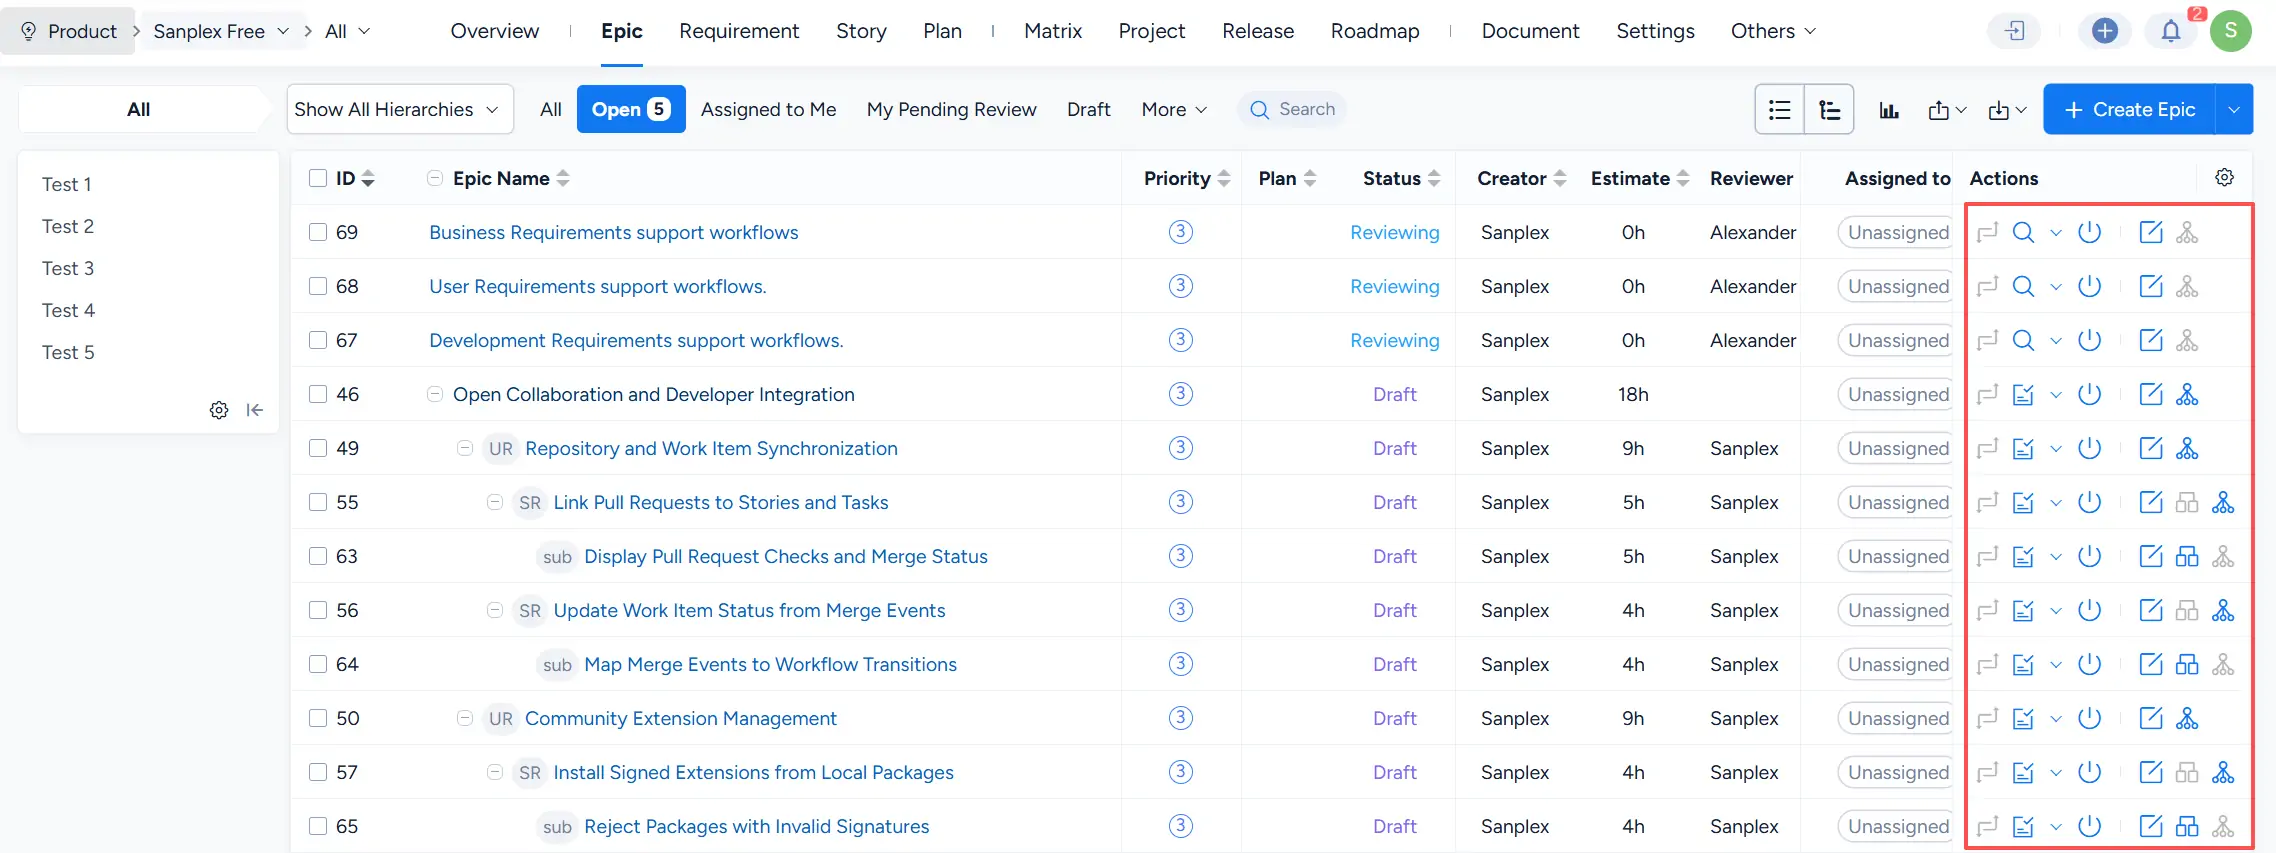
After a Story is created, you can maintain it from the corresponding list page. The Actions column provides the operations currently available for each item according to its status, hierarchy, and user permissions.
These actions may include workflow operations, review-related operations, editing, closing, hierarchy maintenance, and relationship management.
7. Child and Linked-Object Information
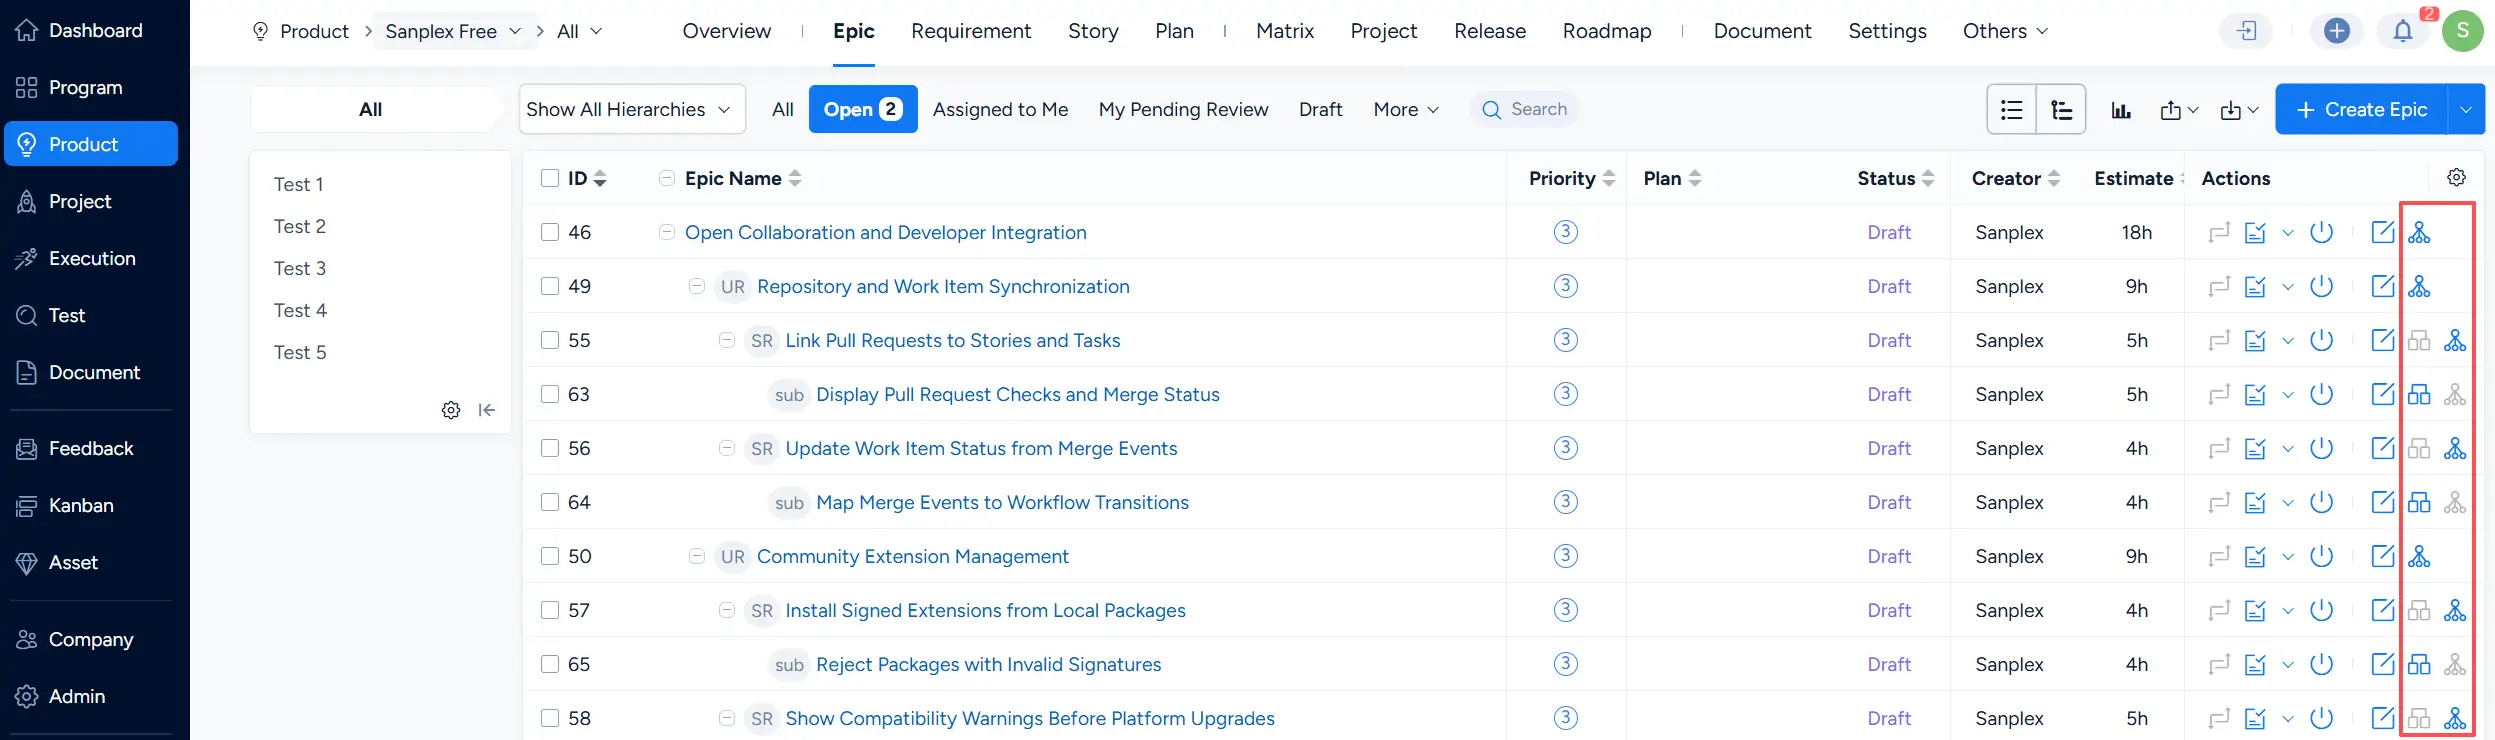
Stories can be organized into parent-child structures. The list visually distinguishes different hierarchy levels, including built-in labels such as UR, SR, and sub where applicable.
The list can also display a Linked Objects column. The value in this column indicates the number of objects associated with a Story.
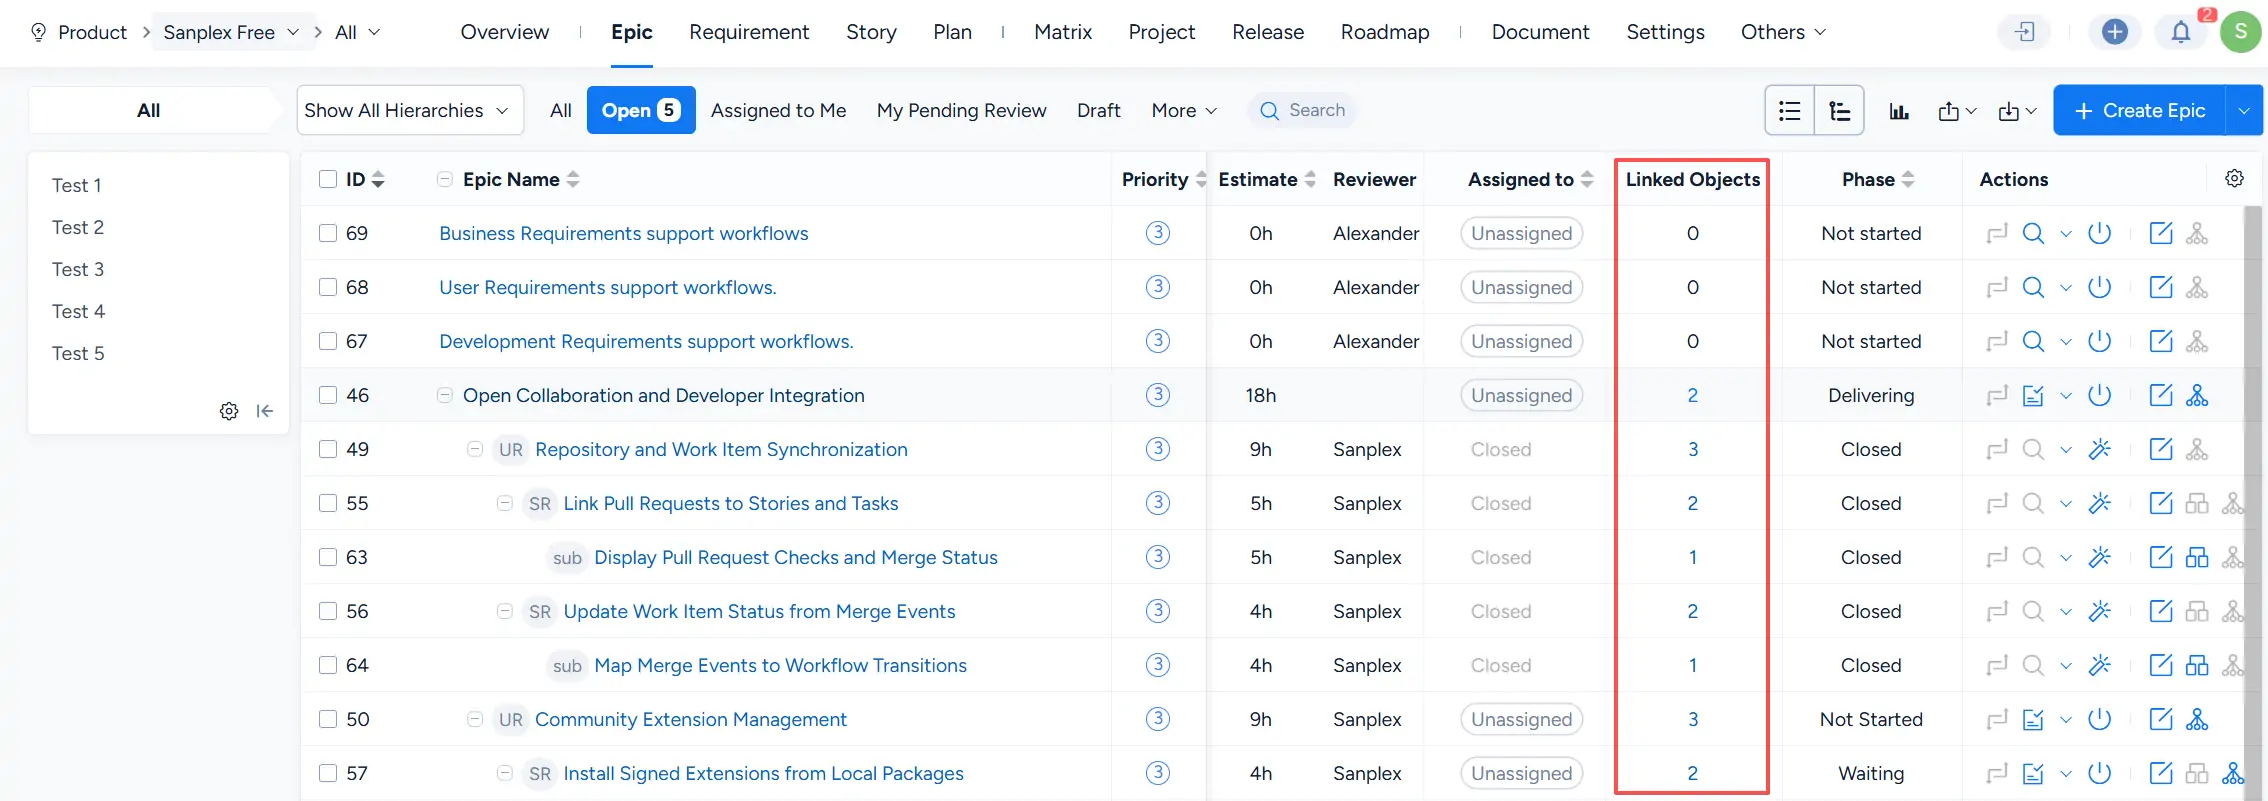
For parent-child Stories, decomposition follows the configured hierarchy.
- A parent Story can contain lower-level child Stories.
- Parent-child relationships are maintained separately from general object-linking relationships.
- Downstream operations depend on the position of the Story within the hierarchy and the functions available for that story type.
II. Feature and Permission Configuration
1. Story Concept Settings
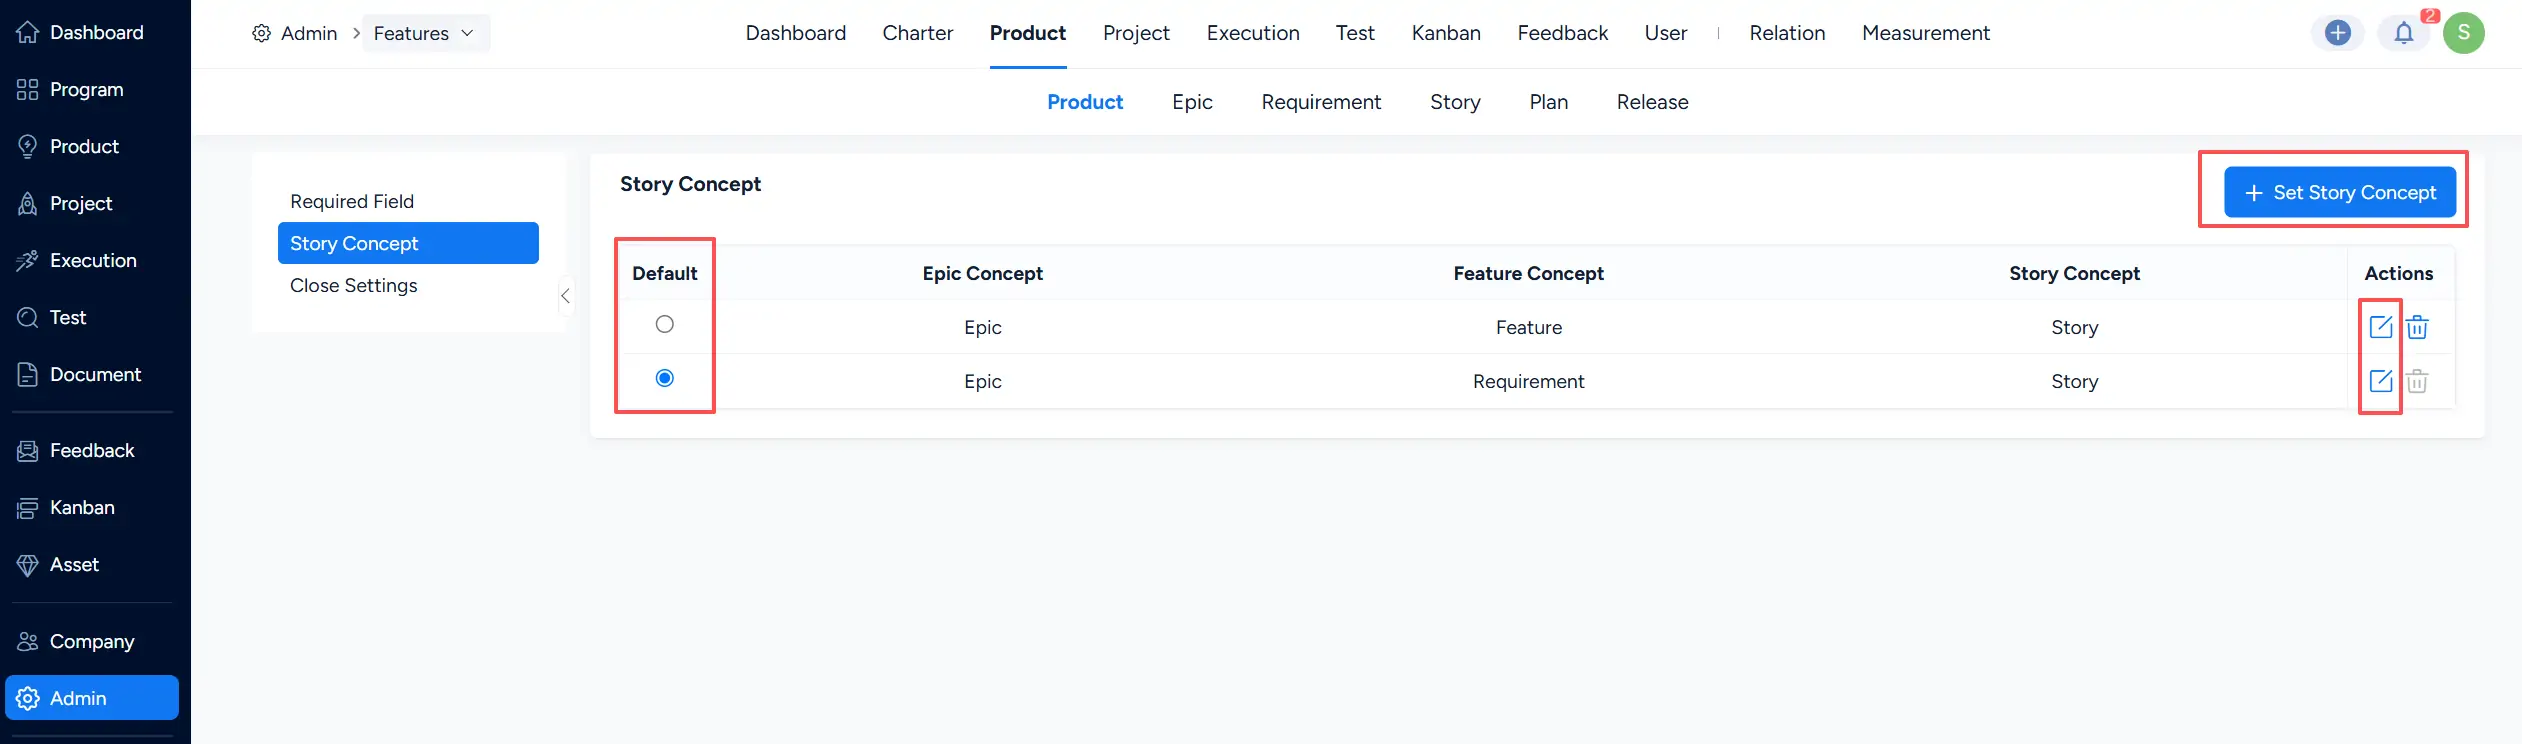
Administrators can configure the terminology used for the story hierarchy under Admin > Features > Product > Story Concept.
The Story Concept configuration defines the terms used for levels such as Epic, Feature, and Story. Administrators can select an existing concept configuration or use Set Story Concept to maintain the available concepts.
2. Enable Story-Related Product Features
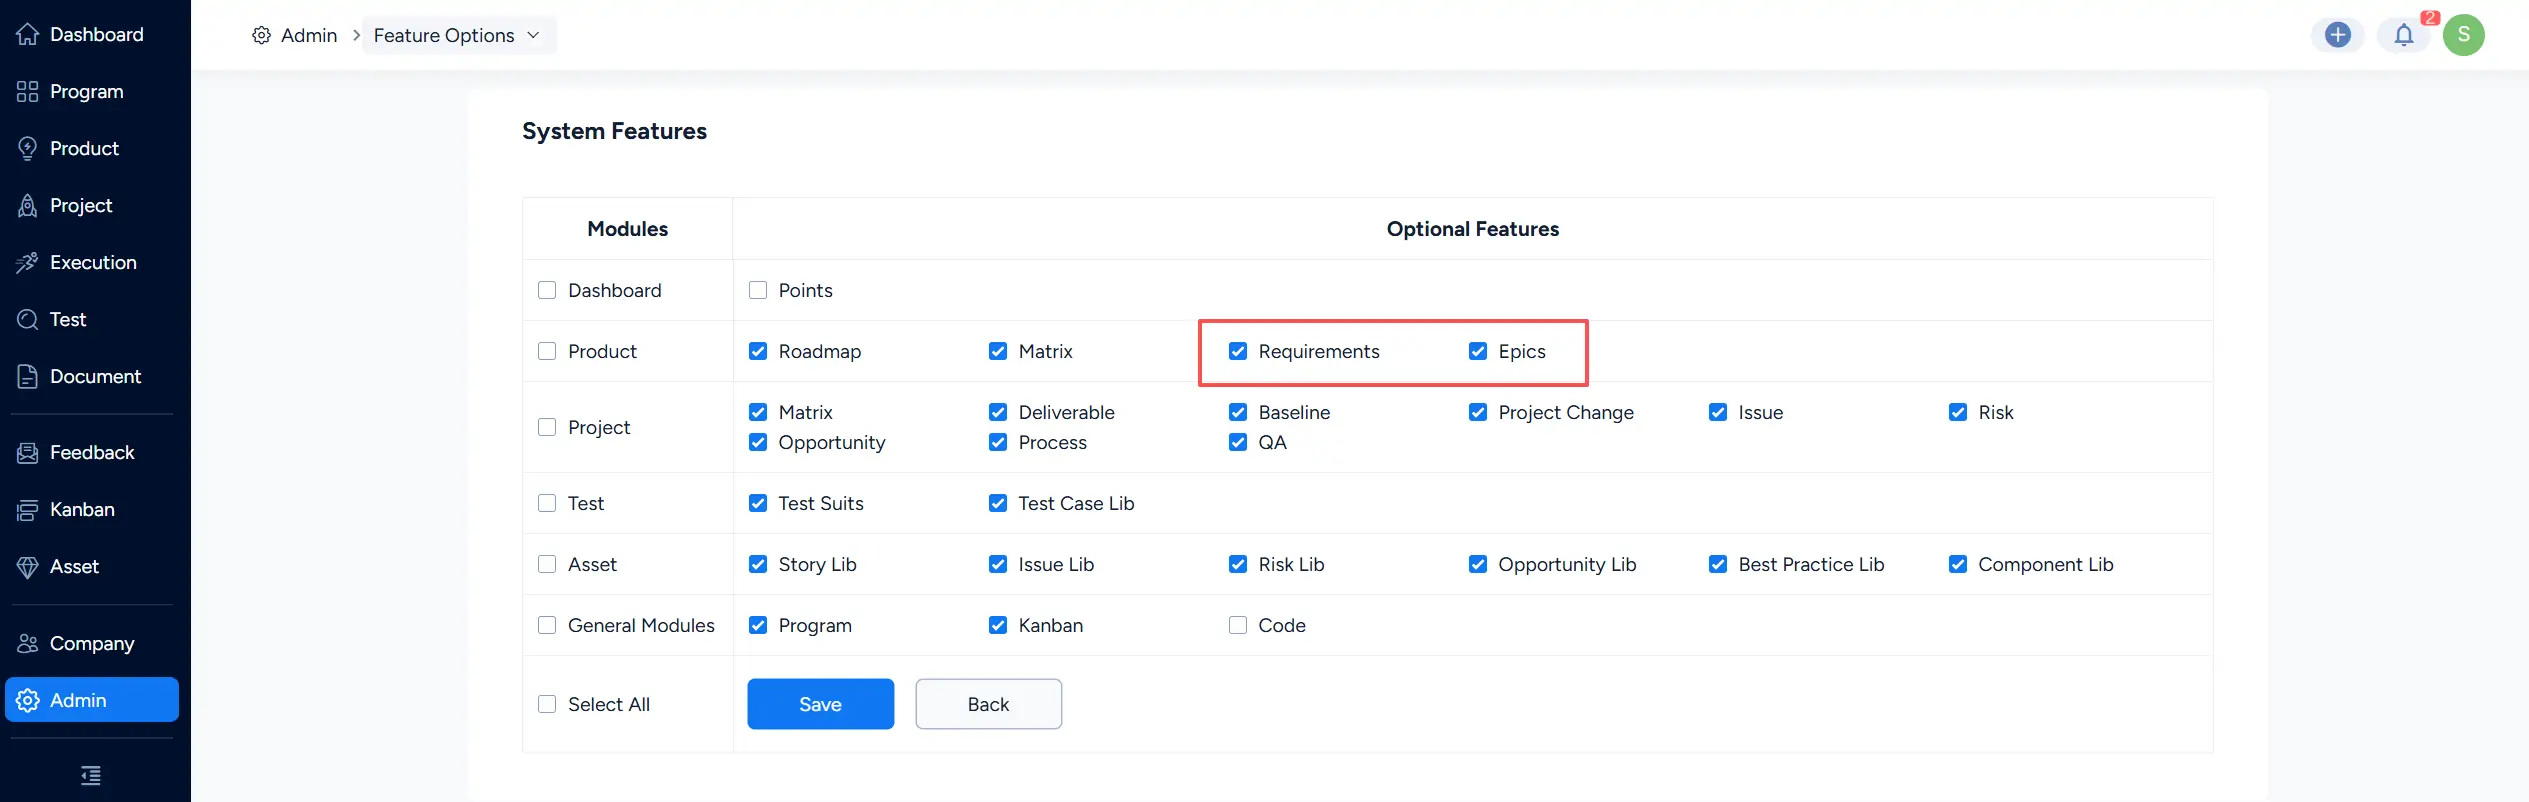
Story-related Product features can be enabled under Admin > Feature Options.
For example, the Product module provides optional features such as Stories and Epics. Select the required options and click Save to make the corresponding features available in the Product module.
3. Permission Settings
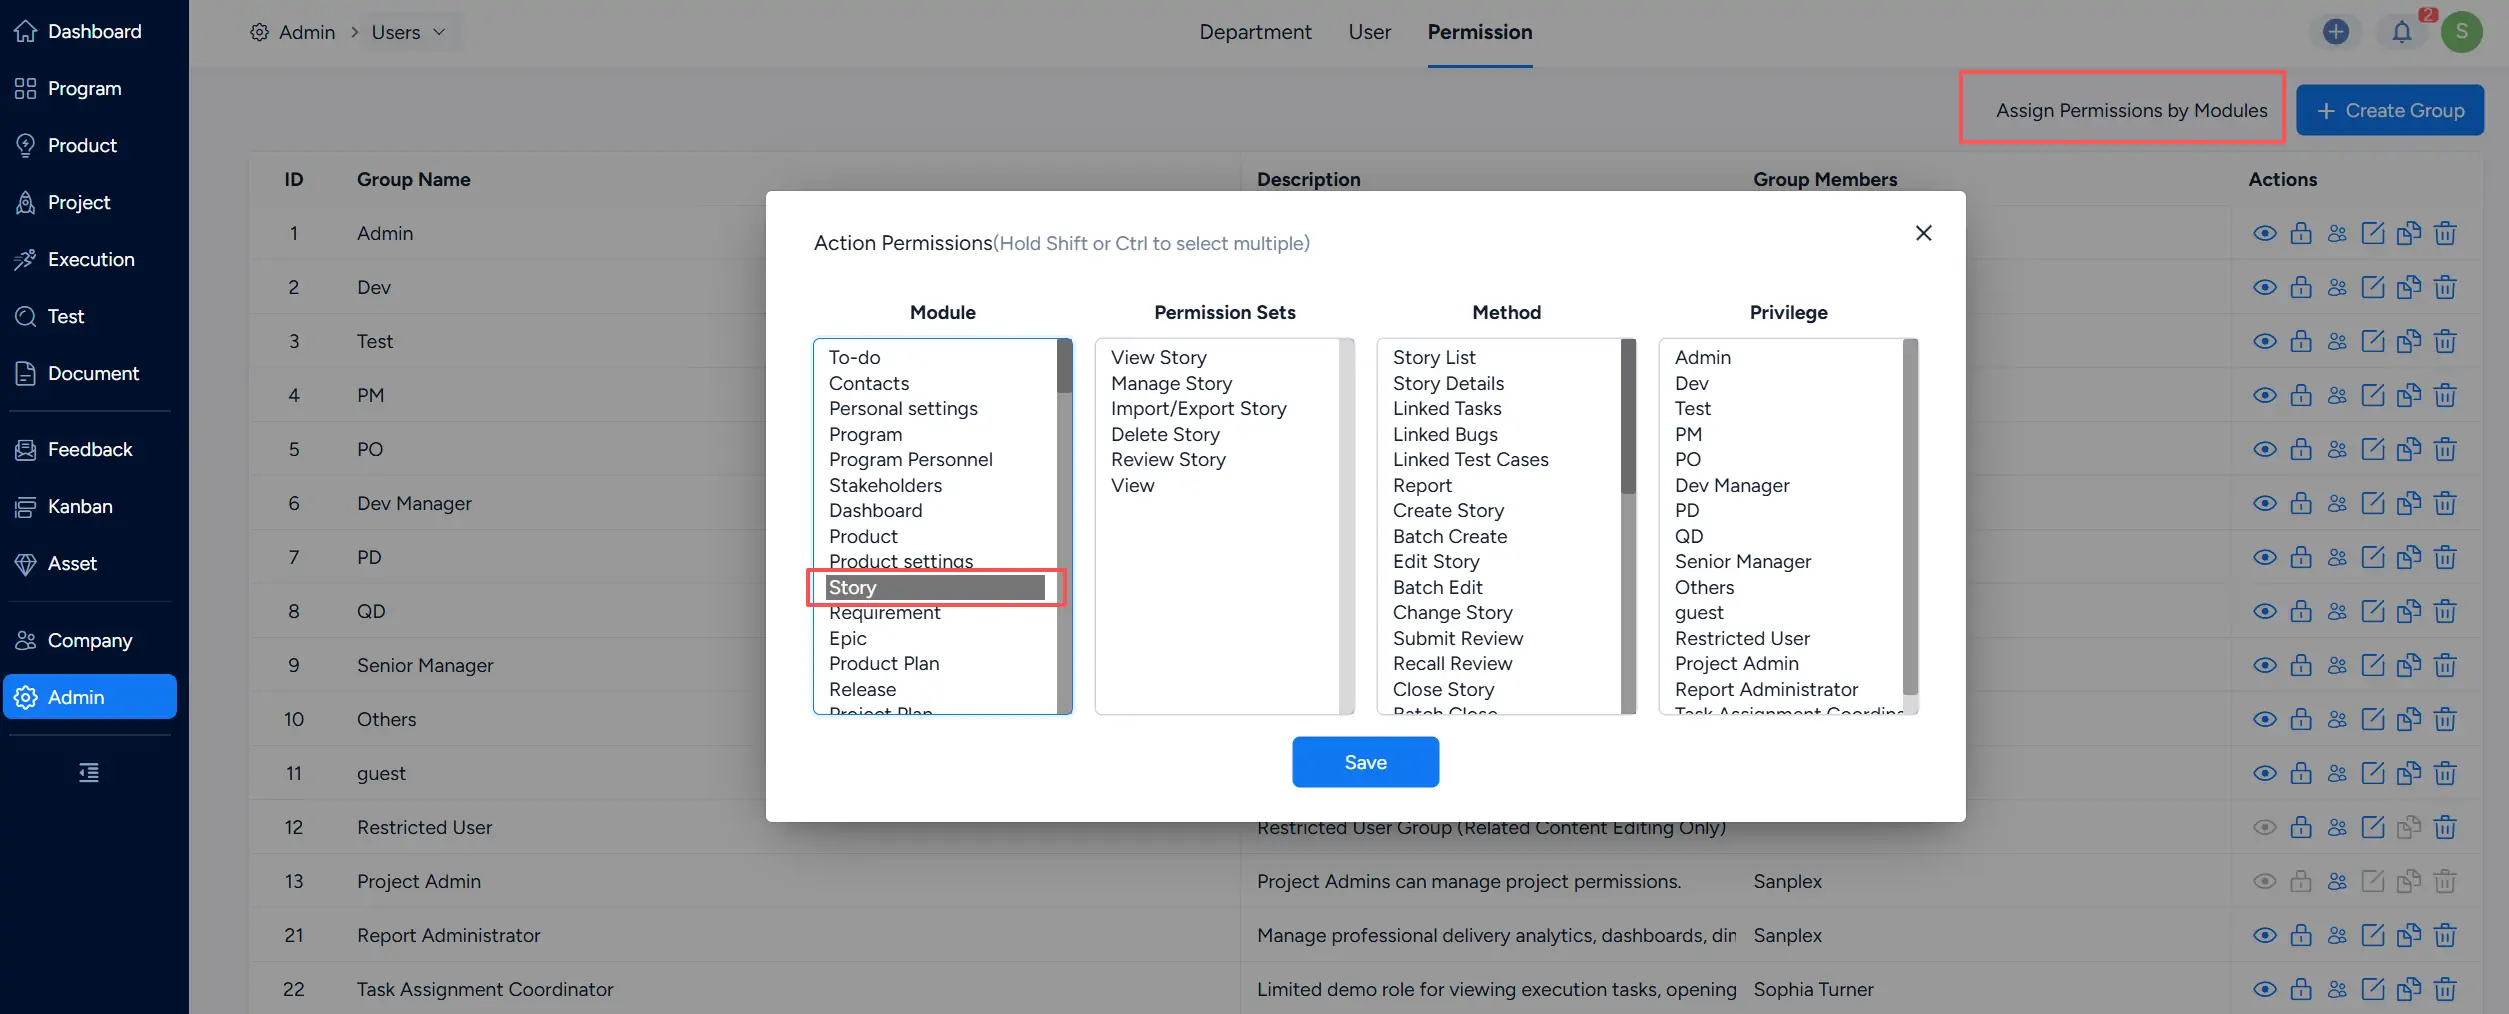
Story-related permissions are configured through the system permission groups rather than through separate Epic, Feature, and Story permission pages.
Go to Admin > Users > Permission, and use Assign Permissions by Modules to configure permissions for the relevant module. For example, selecting Story displays the available Story permission sets and methods, such as viewing, managing, importing or exporting, deleting, reviewing, creating, and editing Stories.
Different permission groups can therefore be granted different levels of access to story-related functions.
III. Switch Views
Story-related lists support different display modes for reviewing work items and their hierarchy.
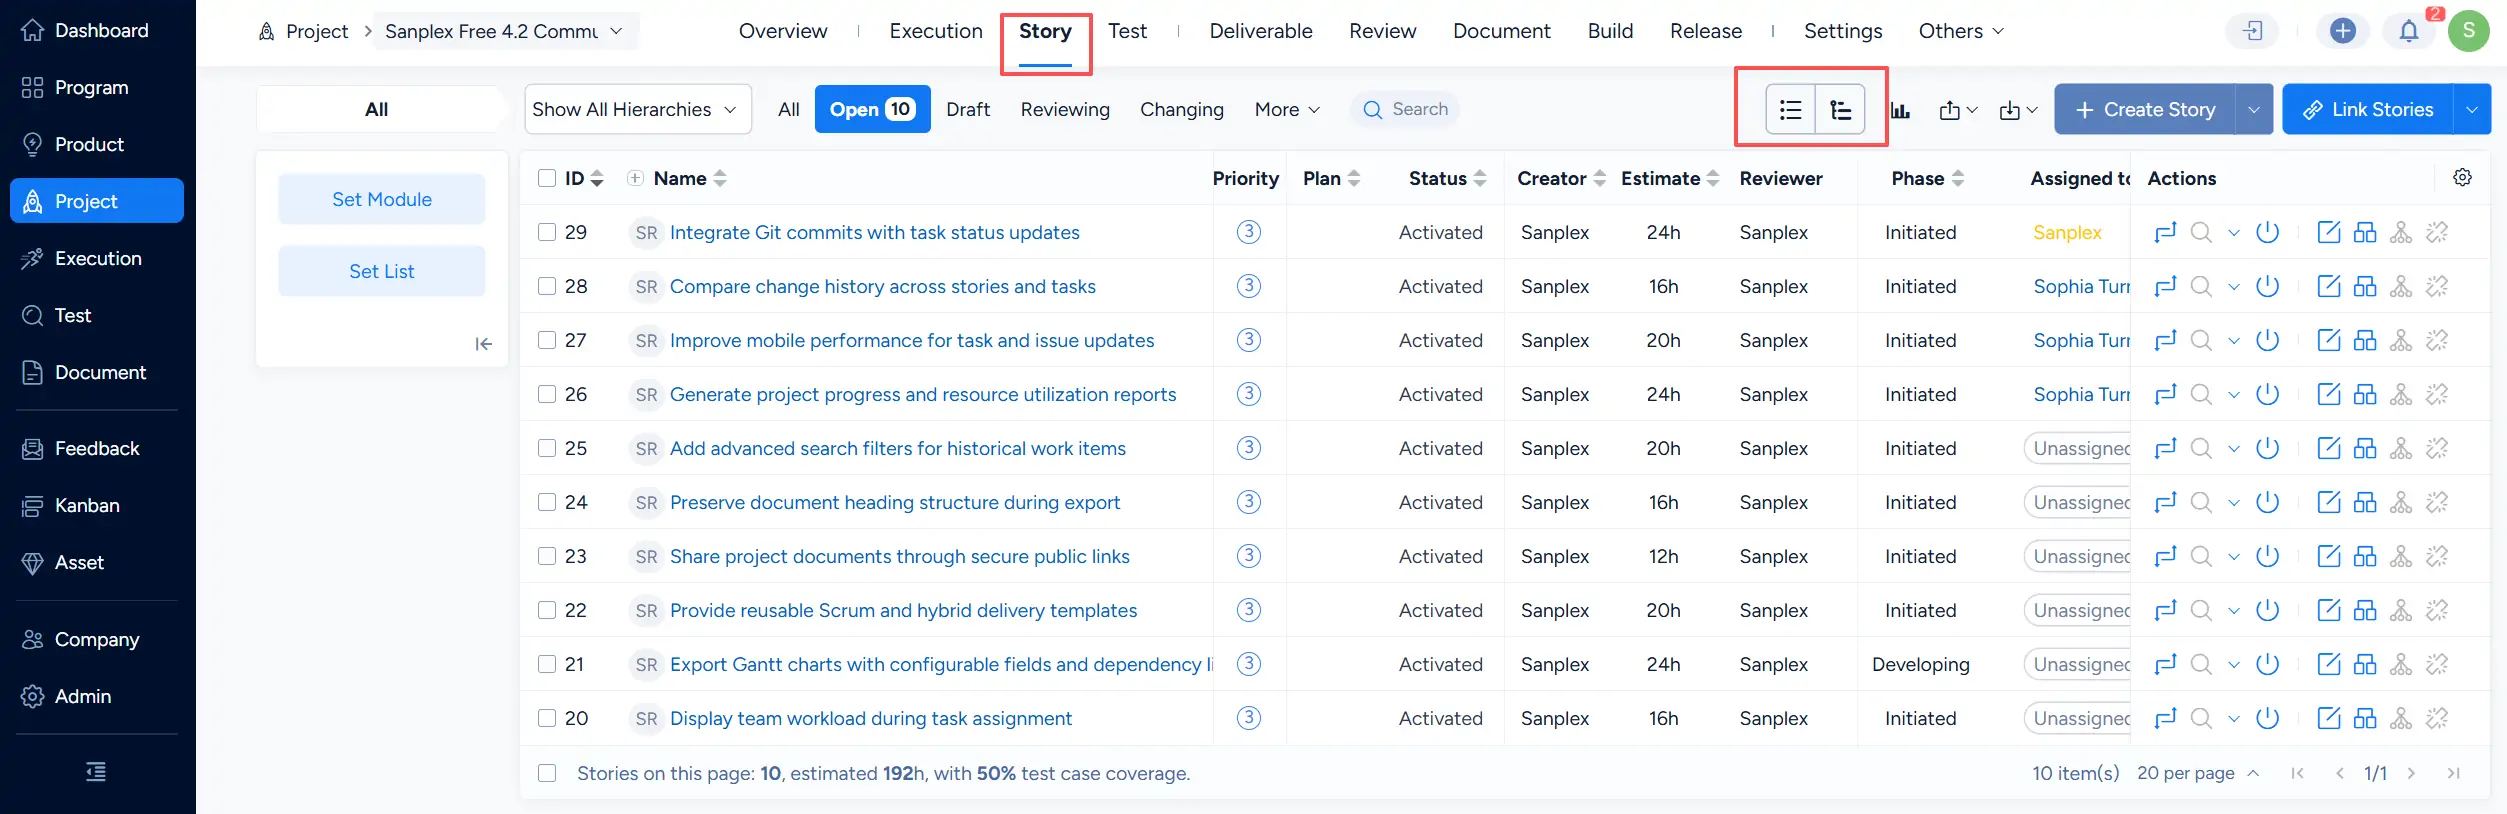
On the Story page, use the view toggle in the upper-right area of the list to switch between the available list and hierarchy-oriented views.
- A hierarchical view is useful for understanding parent-child relationships and story decomposition.
- A flat list is more convenient when searching, filtering, sorting, or reviewing item attributes independently of the hierarchy.
IV. Link Stories to Plans
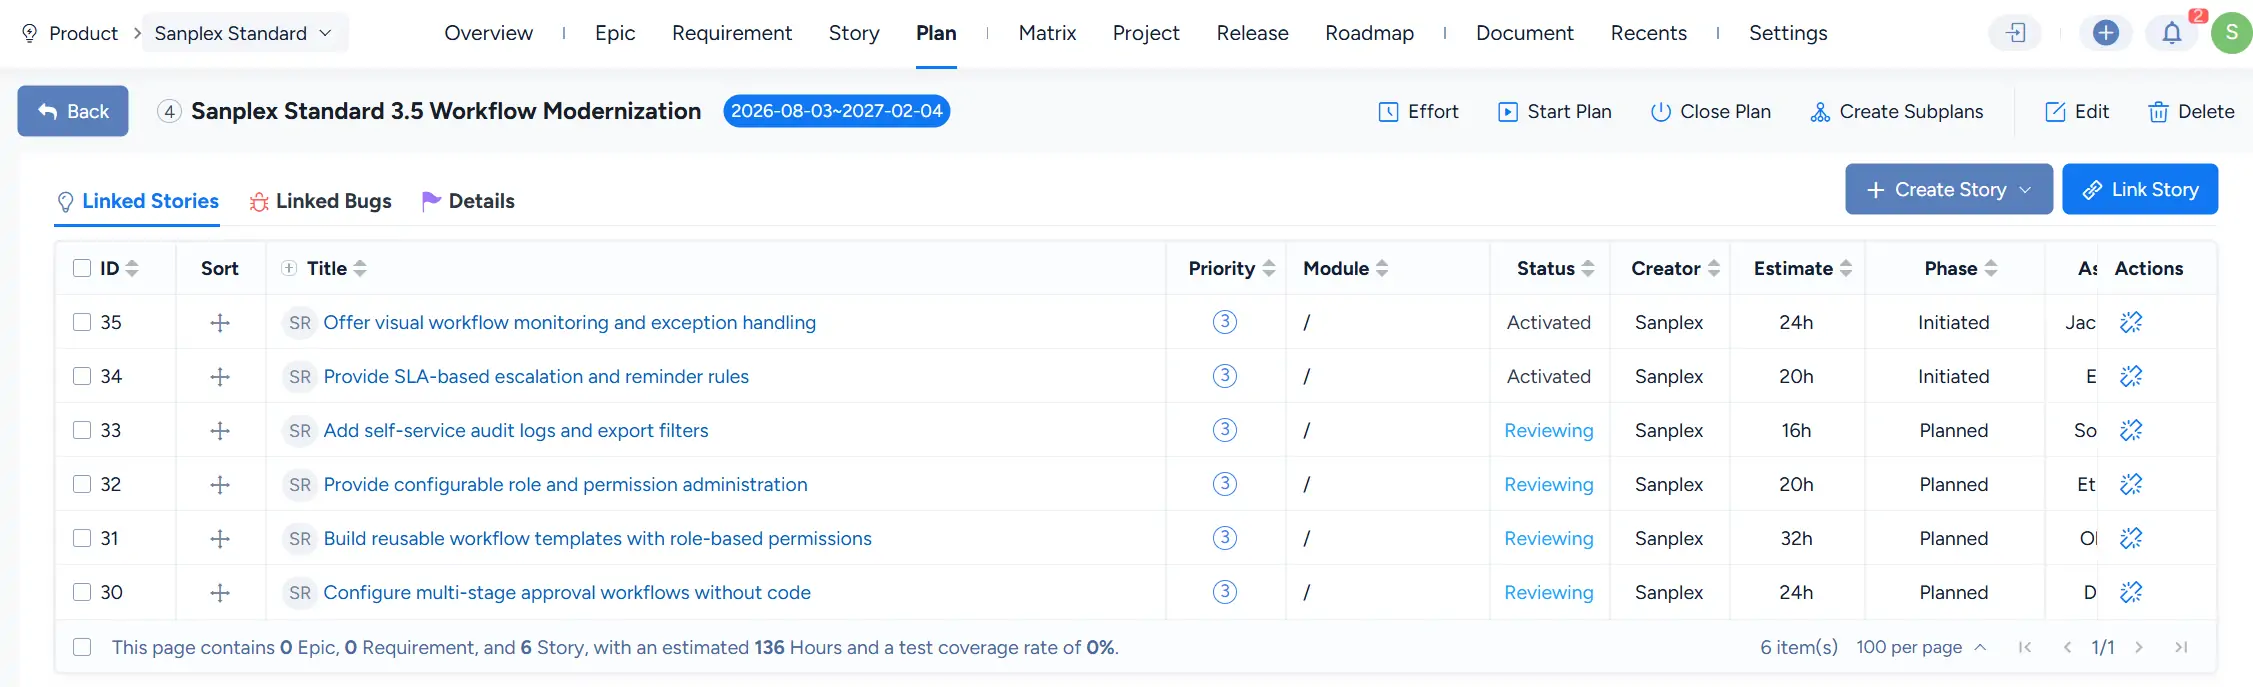
Plans can be used to organize story-related work. In the current Sanplex interface, Stories can be linked to a Plan and reviewed from the Plan details page.
Open a Plan and select Linked Stories to view Stories already associated with that Plan.
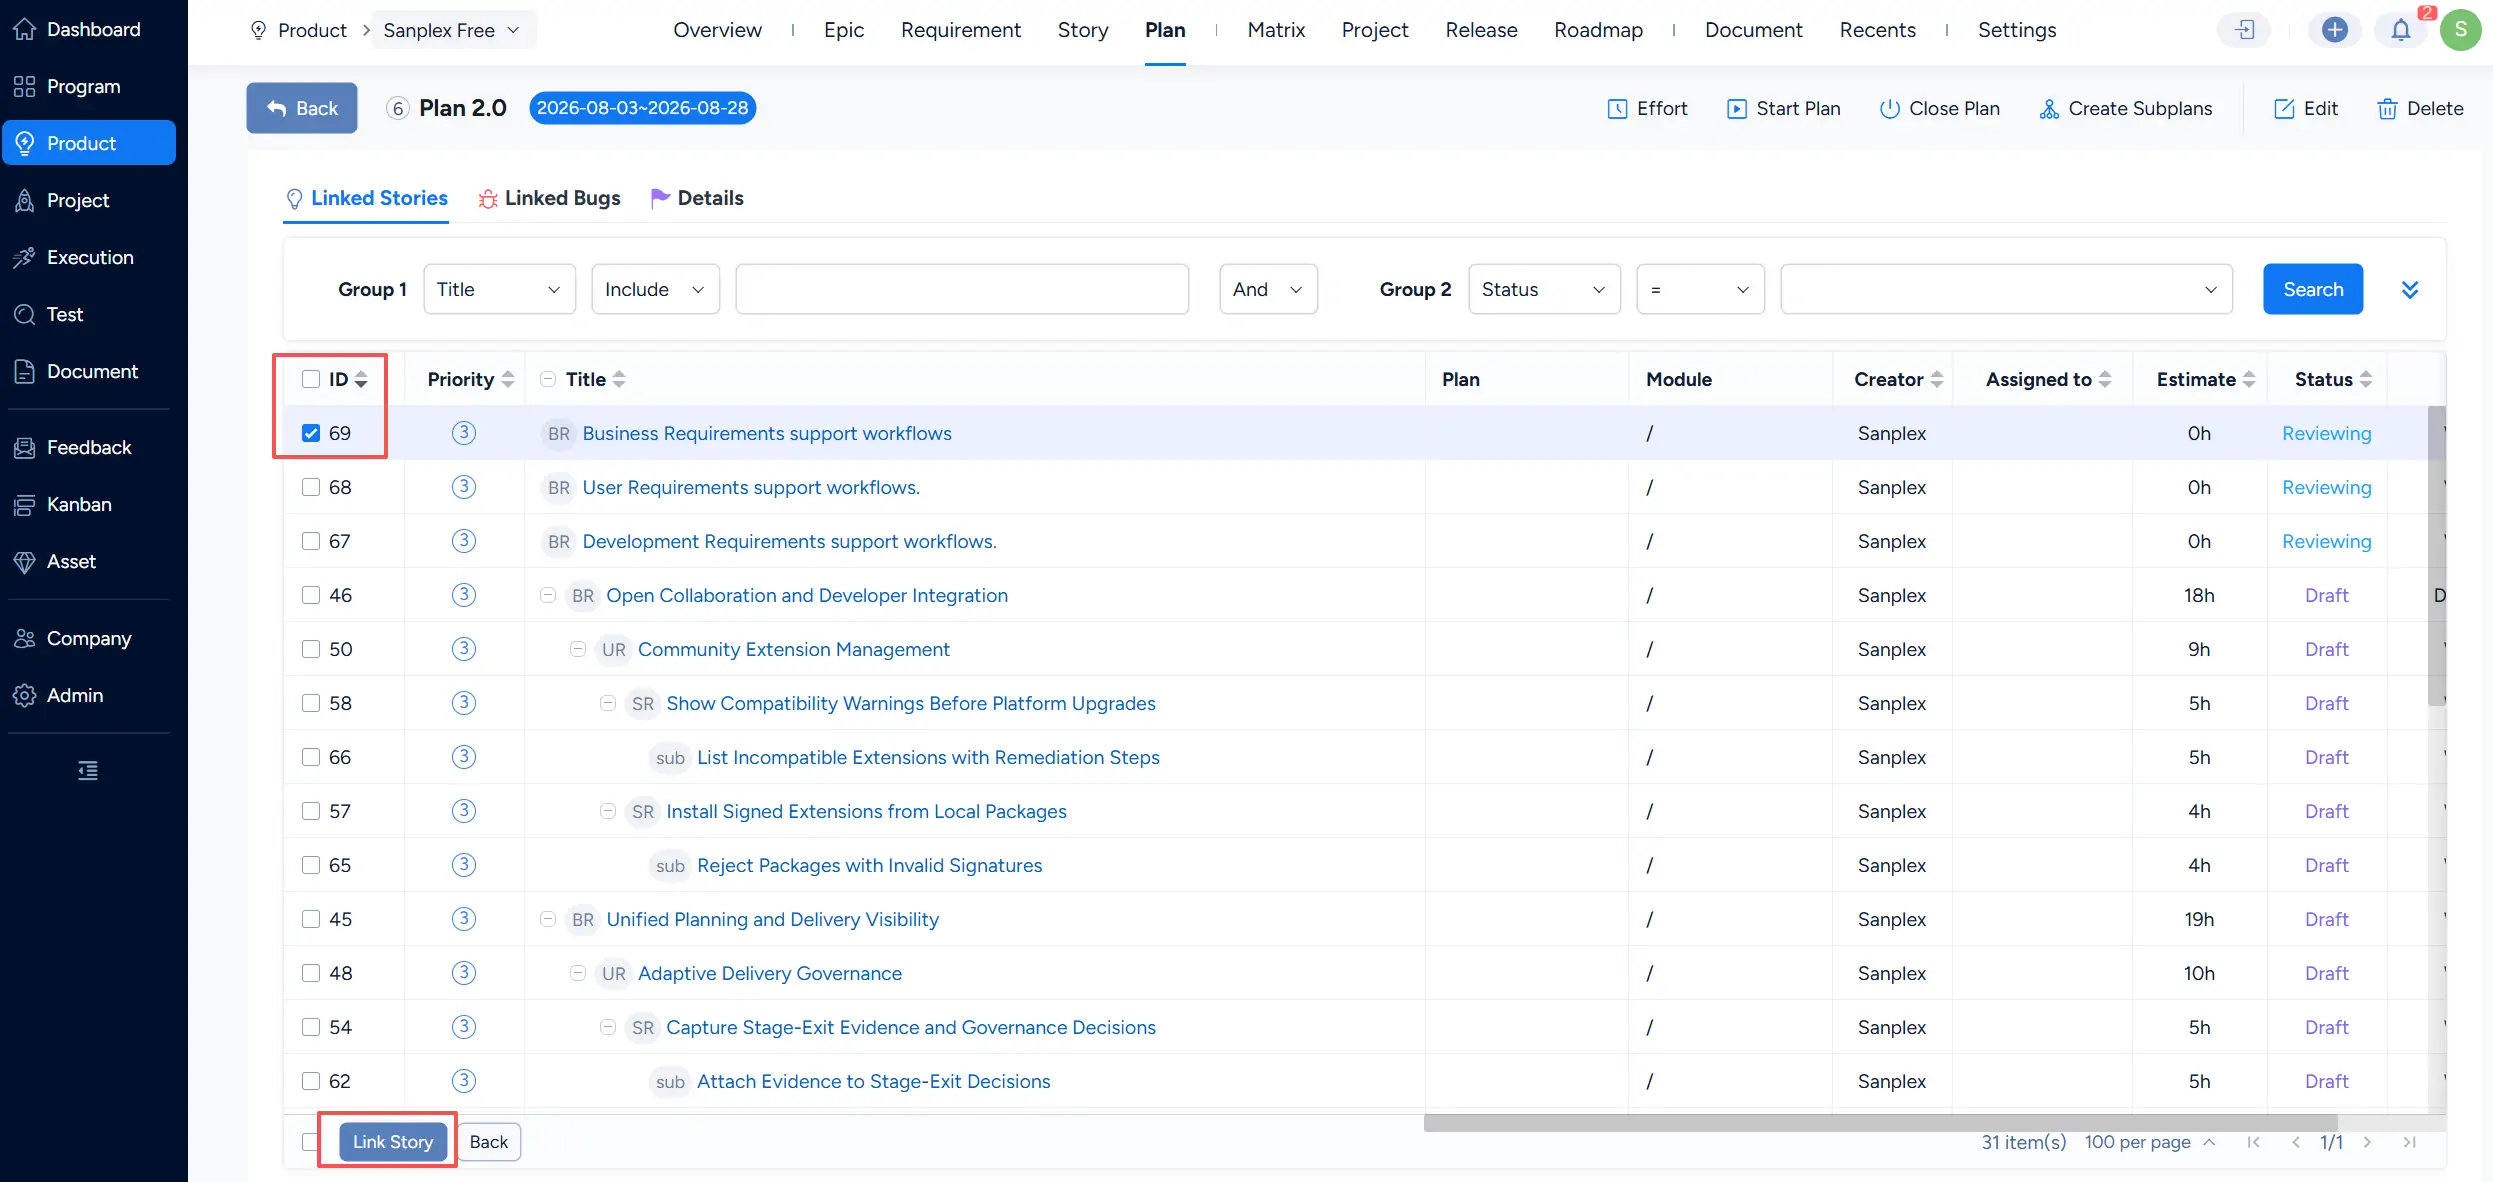
You can also link Stories directly from the Plan List. In the Actions column, click Link Story for the target Plan.

On the Link Story page, select the Stories you want to associate with the Plan, and then click Link Story.
V. Link Any Story
Parent-child decomposition and general Story relationships serve different purposes in Sanplex.
- Parent-child relationships represent hierarchical decomposition between story levels.
- Linked Objects can be used to establish additional relationships between related items without changing their parent-child hierarchy.
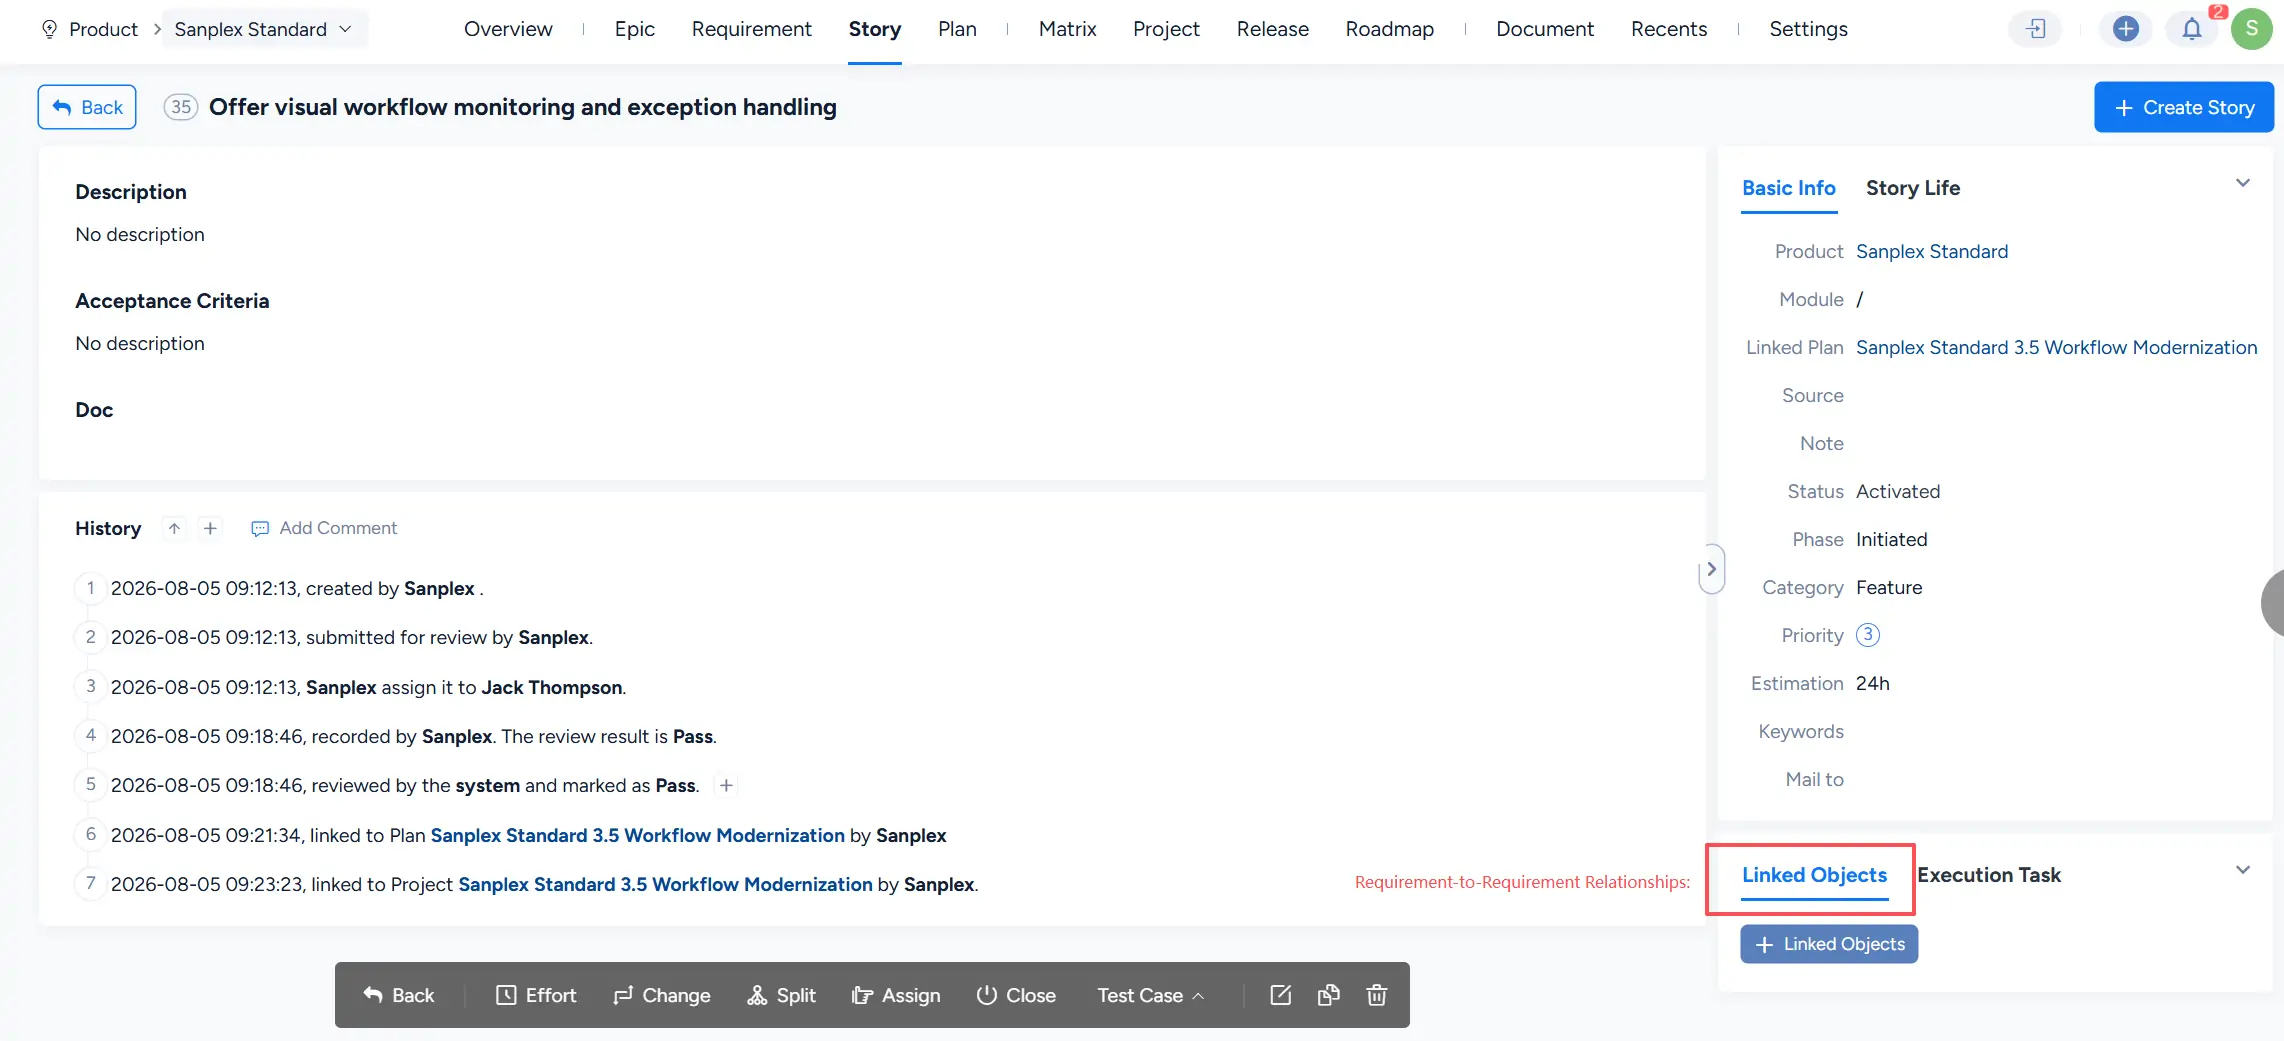
To create this type of relationship, open the Story item and use Linked Objects on the details page. Related objects can then be added and viewed from this panel.
This makes it possible to maintain relationships between related Stories or other supported objects even when they do not belong to the same parent-child structure.