Catalog
Before managing a project, it helps to understand how projects and executions are used in Sanplex. This section introduces the basic concepts, common setup options, and the five available project management models.
I. Project Concepts
1. Project and Execution
In Sanplex, a project is the top-level container for managing work, while an execution is the work unit used within a project to organize delivery activities.
Depending on the selected management model, an execution may represent a sprint, an iteration, or another delivery unit. In daily use, these work units are managed through the Execution module.
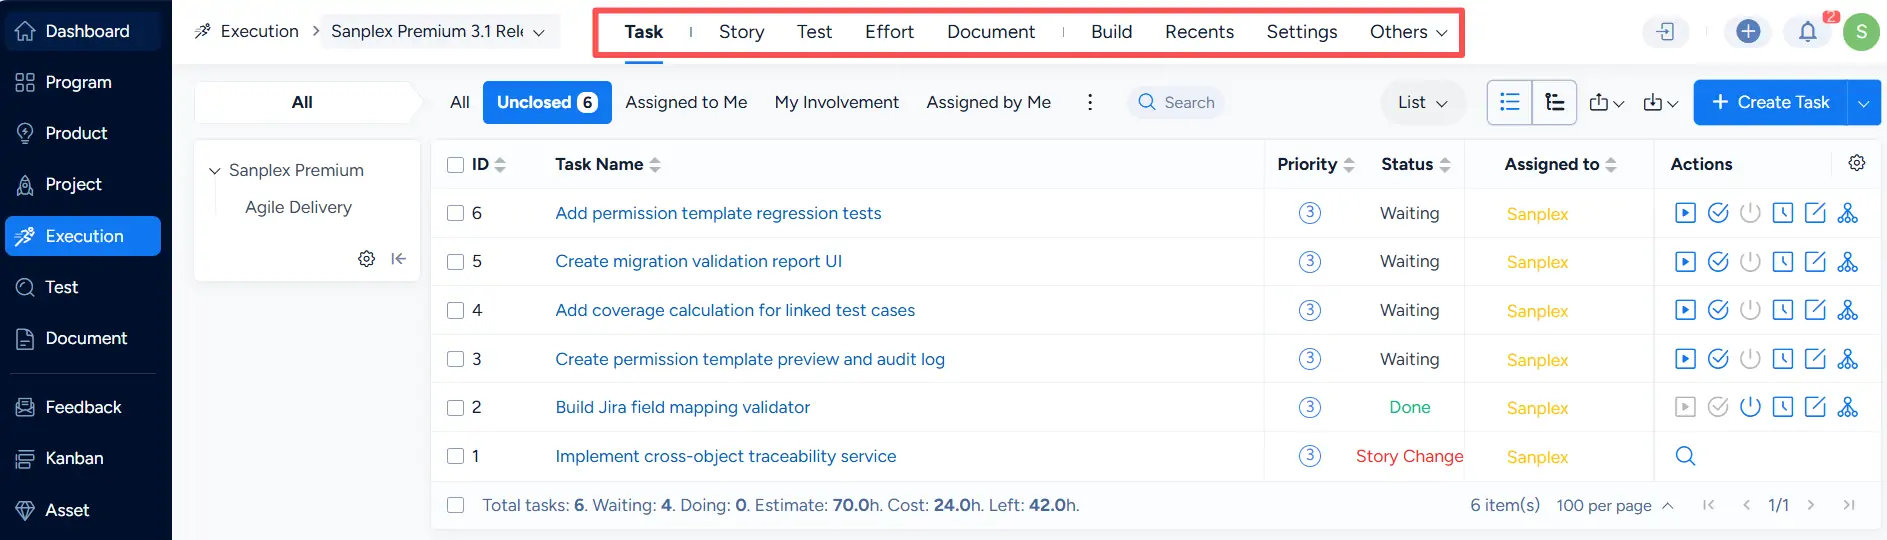
You can open the Execution tab inside a project to view and manage the executions that belong to that project.

2. Workflow Terminology Settings
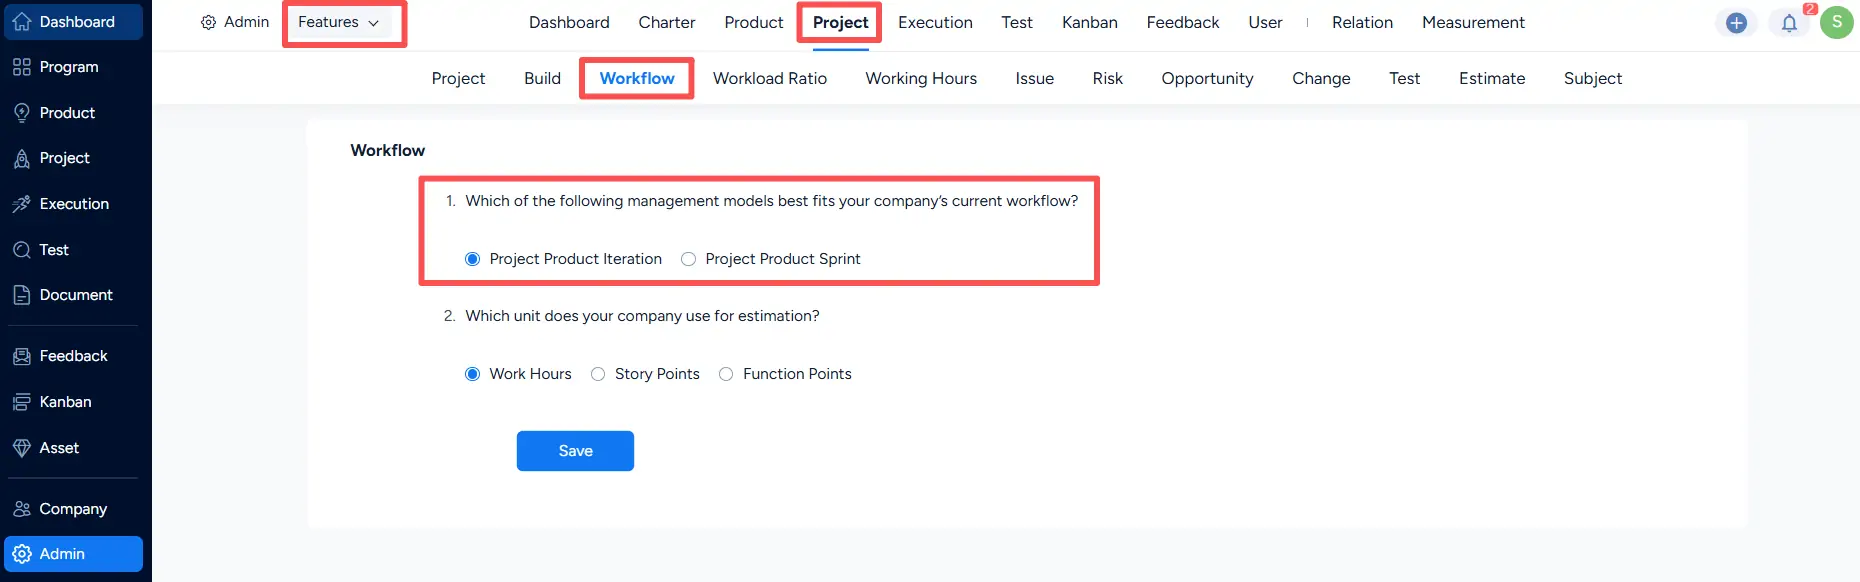
Sanplex allows organizations to configure workflow terminology in Admin > Features > Project > Workflow.
Here, you can choose the terminology model that best fits your organization’s workflow, such as:
- Project Product Iteration
- Project Product Sprint
Regardless of which terminology model is selected, execution-level work is managed in the Execution module.
II. Manage Projects and Executions
1. Create a Project
In the Project module, click Create Project.
You can create either:
- a project under a Program, or
- an independent standalone project.
When creating a project, pay attention to the following settings:
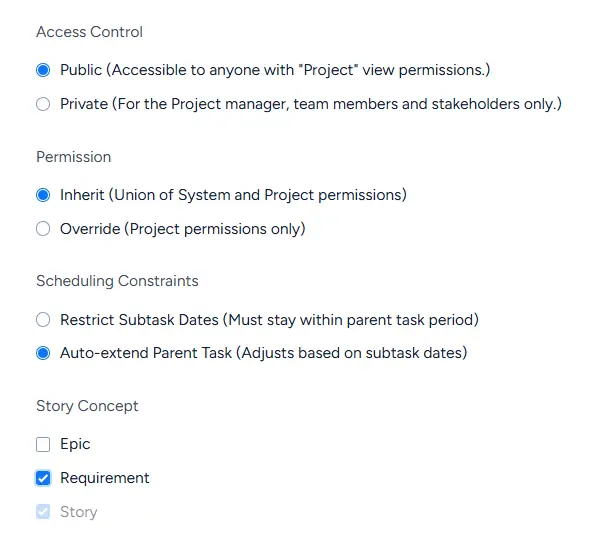
- Access Control
- Permission
- Scheduling Constraints
- Story Concept
Access Control
- Public: Accessible to anyone who has project view permissions.
- Private: Accessible only to the project manager, team members, and stakeholders.
Permission
- Inherit: Uses the combined system and project permissions.
- Override: Uses project permissions only.
Scheduling Constraints
- Restrict Subtask Dates: Subtask dates must stay within the parent task period.
- Auto-extend Parent Task: If a subtask exceeds the parent task range, the parent task dates are automatically extended.
Story Concept
Use Story Concept to define which story hierarchy concepts are available in the project. The available options are:
- Epic
- Requirement
- Story
2. Create an Execution
After a project is created, you can create executions for that project.
Open the project, go to Execution, and click Create Execution.
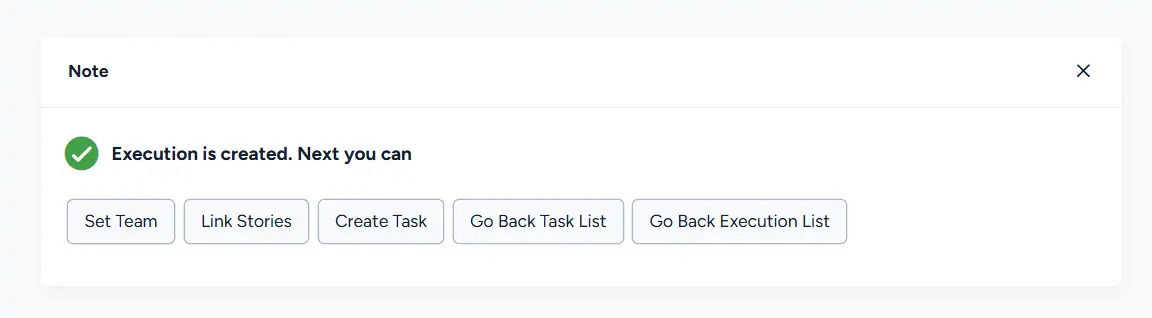
After an execution is created successfully, the system may display quick next-step actions such as:
- Set Team
- Link Stories
- Create Task
- Go Back Task List
- Go Back Execution List
A recommended sequence is:
Set Team → Link Stories → Create Task
3. Manage Executions
After an execution is created, it is automatically added to the Execution module.
In Execution, you can track and manage related work such as:
- Task
- Story
- Test
- Effort
- Document
- Build
- Recents
- other execution-related items
Detailed task breakdown steps are covered in the relevant task management section.
III. Project Management Models
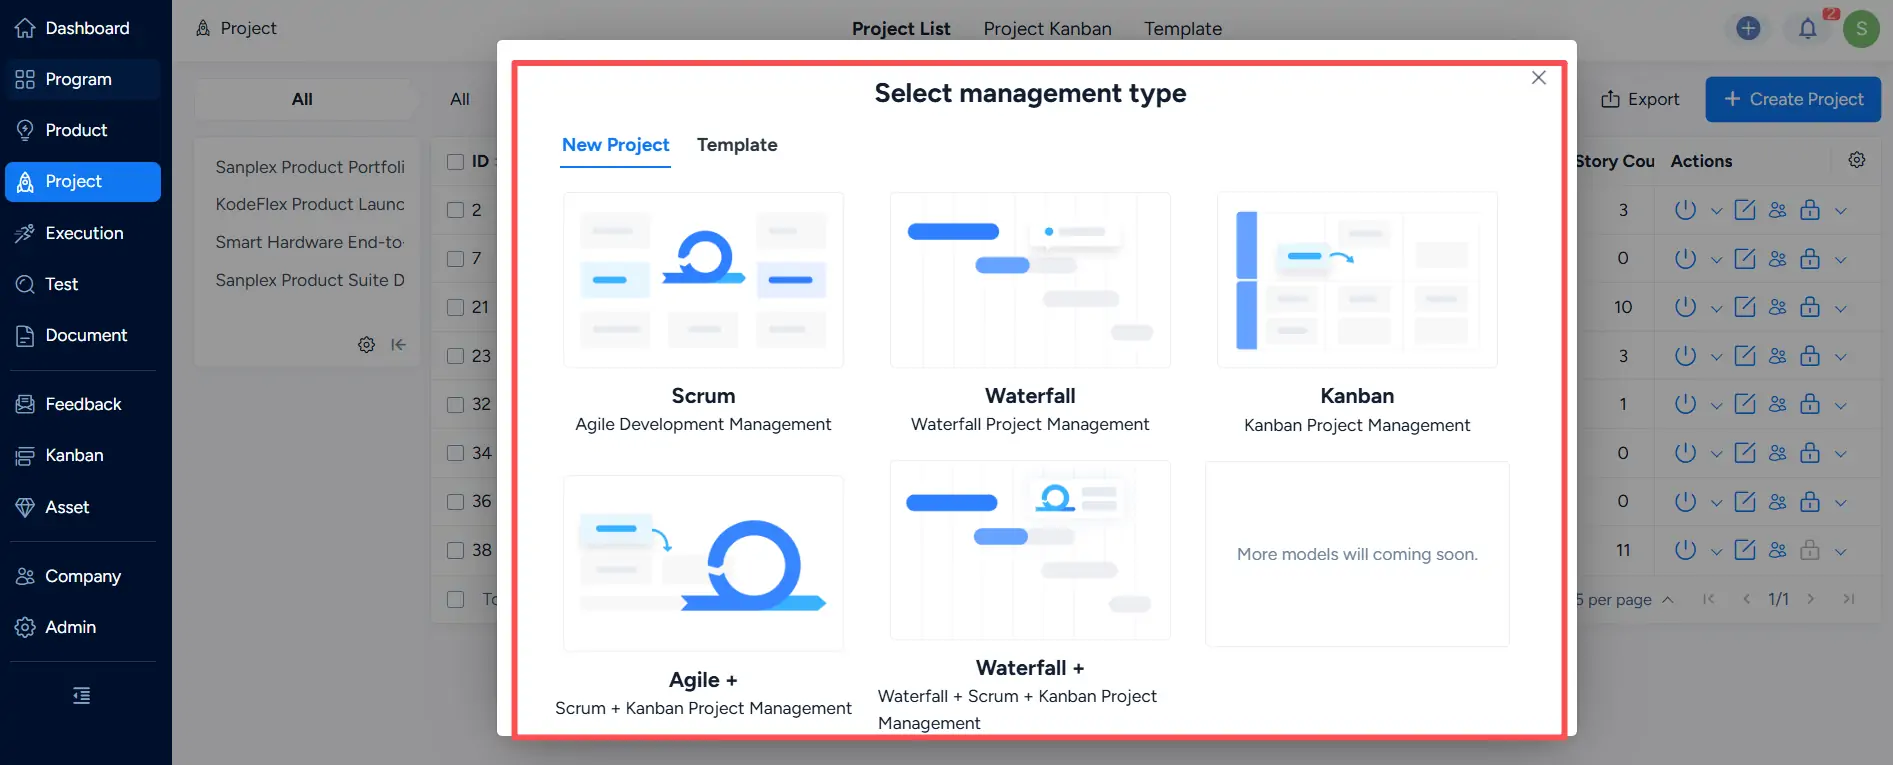
Sanplex supports five project management models:
- Scrum
- Waterfall
- Kanban
- Agile +
- Waterfall +
To create a project, click Project > Create Project, or use the global Create button to add a project. You will first select a project management type.
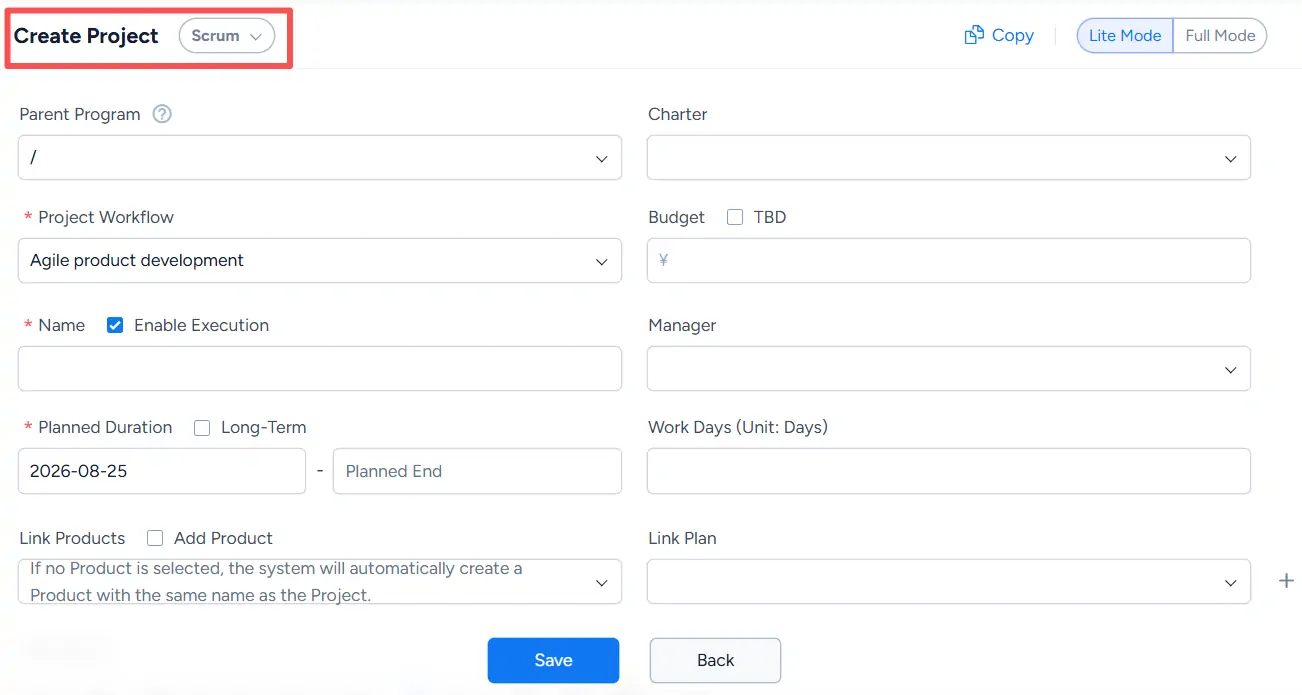
1. Create a Scrum Project
Select Scrum as the project management type, complete the required information, and click Save.
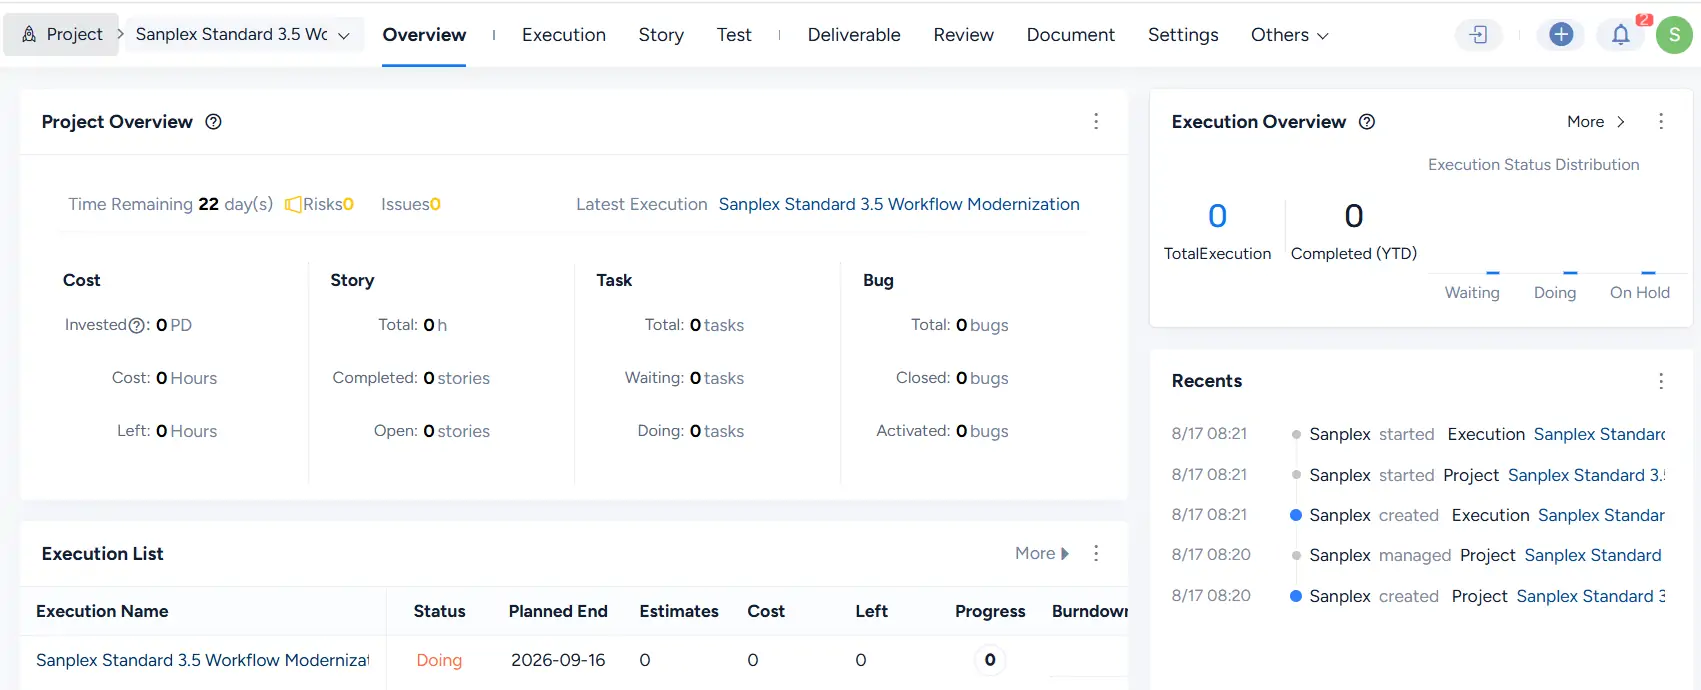
A successfully created Scrum project includes modules such as Overview, Execution, Story, Test, Deliverable, Review, Document, and Settings.
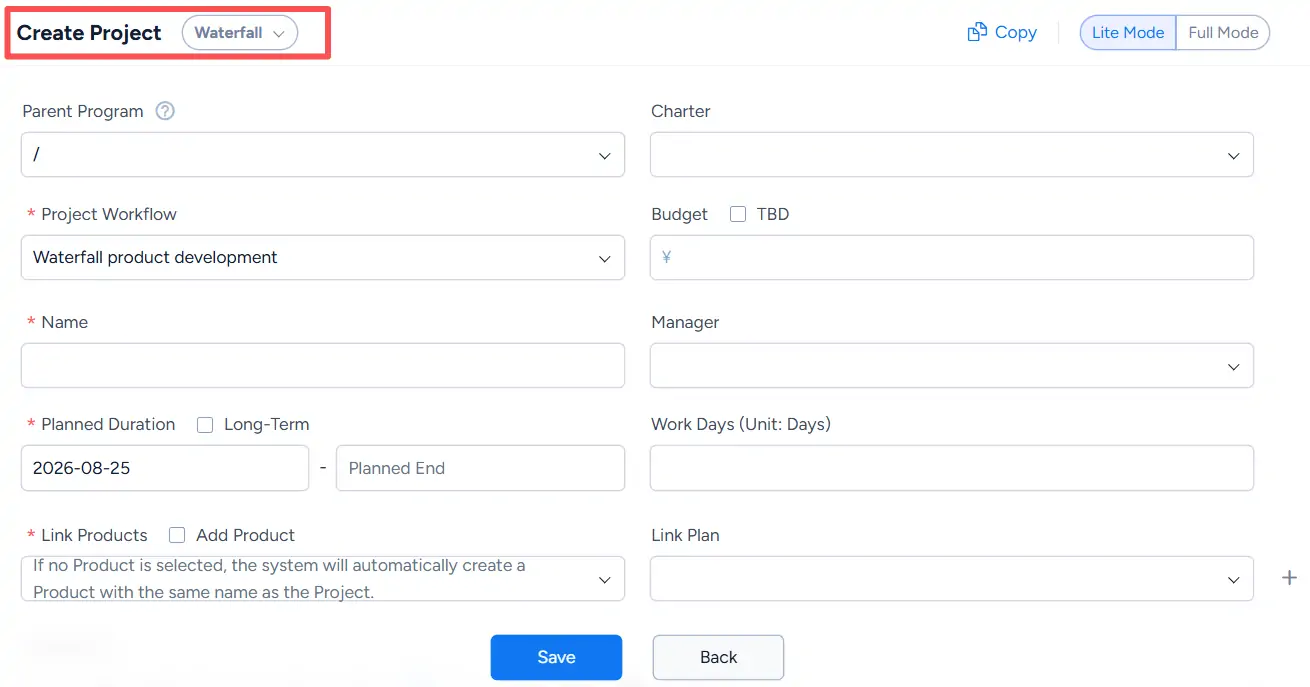
2. Create a Waterfall Project
Select Waterfall as the project management type, complete the required information, and click Save.
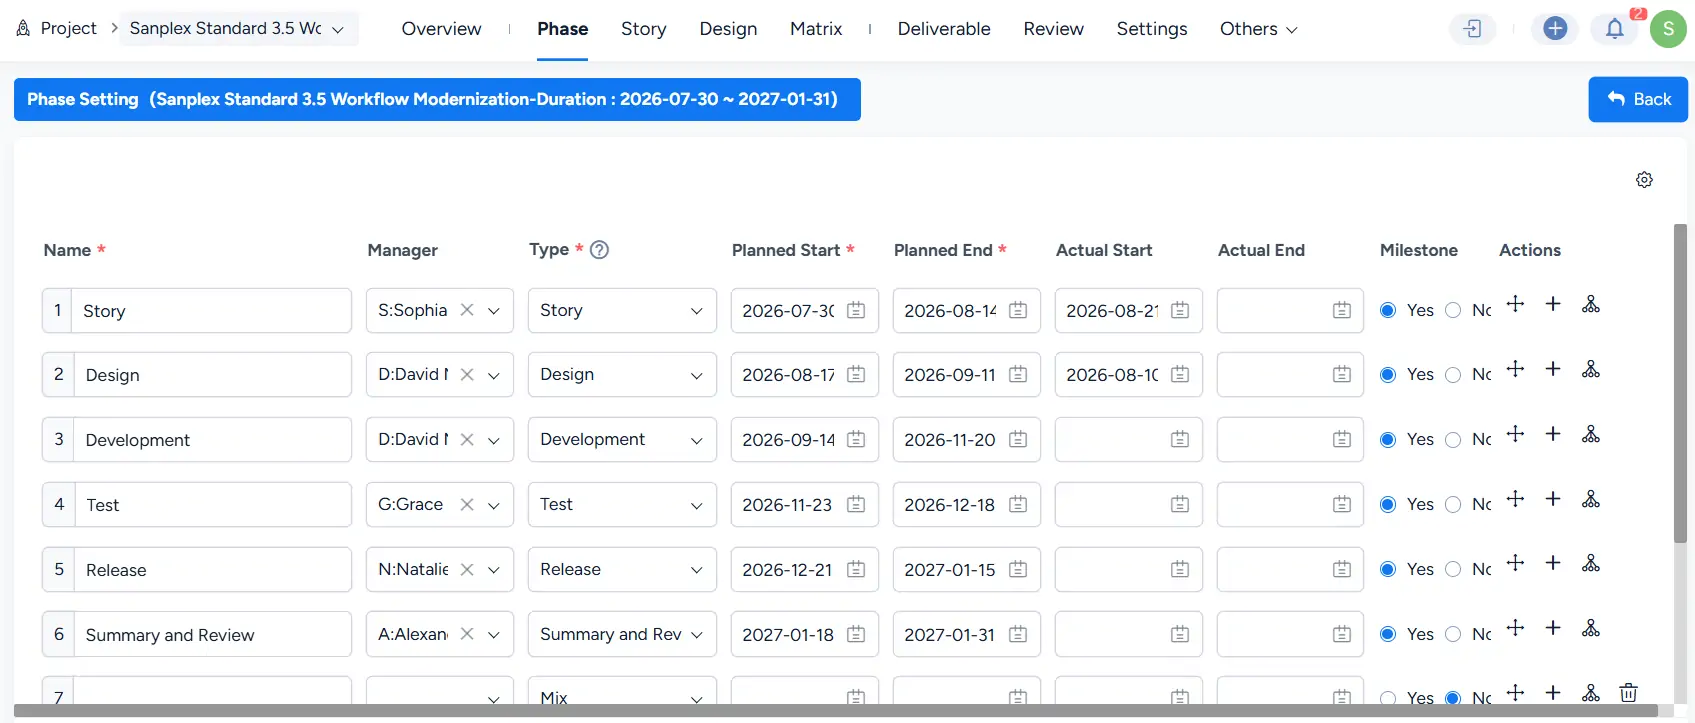
After a Waterfall project is created, you need to configure its phases on the Phase page.
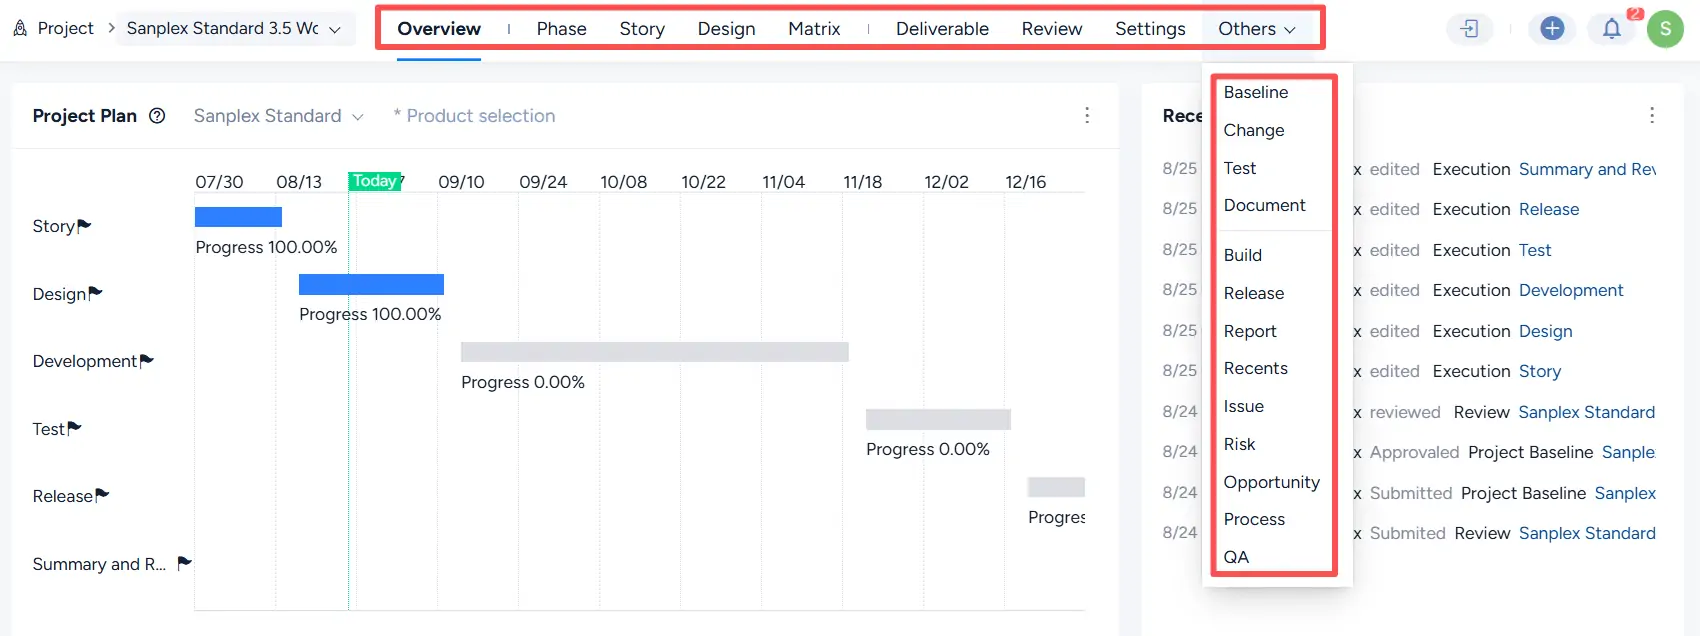
A successfully created Waterfall project includes modules such as Overview, Phase, Story, Design, Matrix, Deliverable, Review, Settings, and Others.
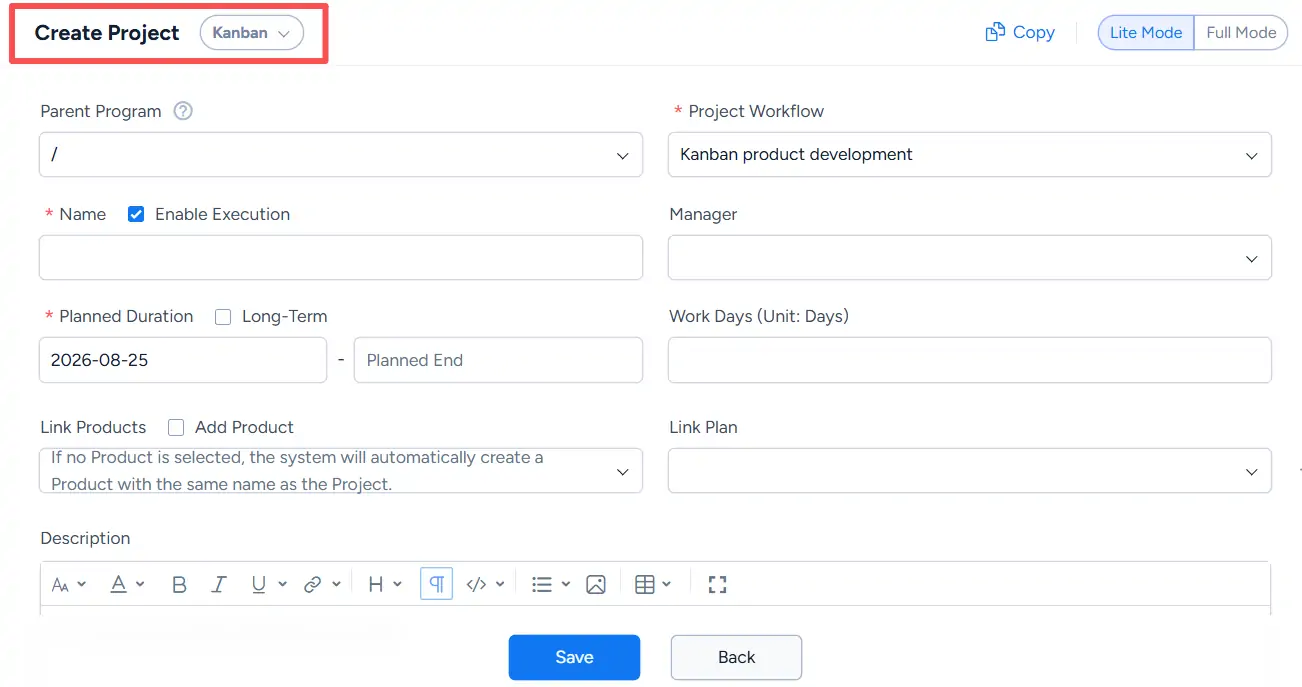
3. Create a Kanban Project
Select Kanban as the project management type, complete the required information, and click Save.
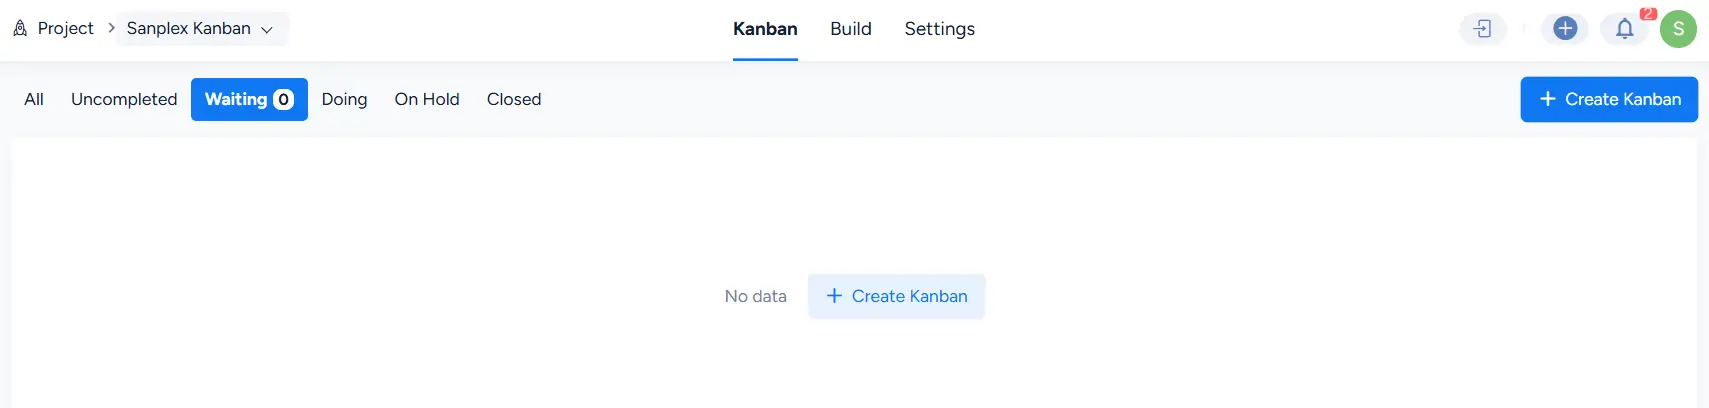
After a Kanban project is created, you can start adding boards for project management by clicking Create Kanban.
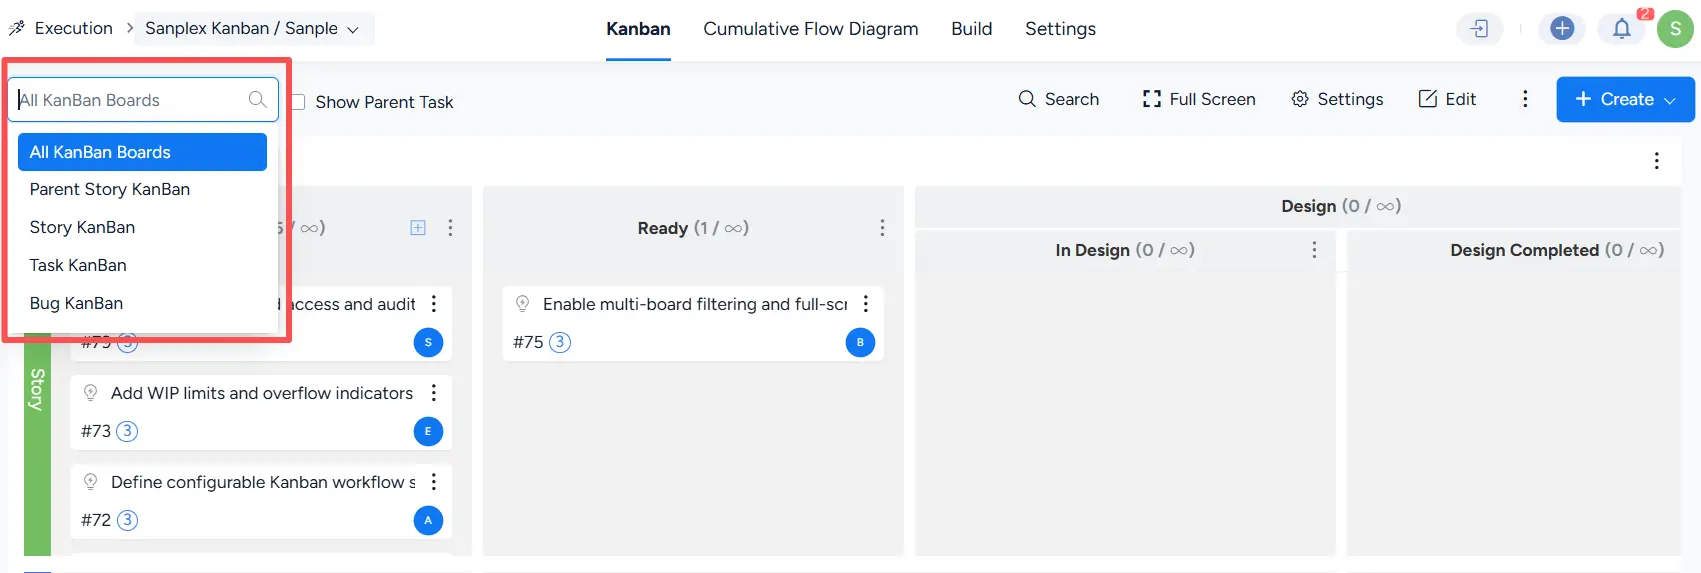
Available board views currently include:
- All KanBan Boards
- Parent Story KanBan
- Story KanBan
- Task KanBan
- Bug KanBan
4. Create an Agile + Project
Select Agile + as the project management type, complete the required information, and click Save.
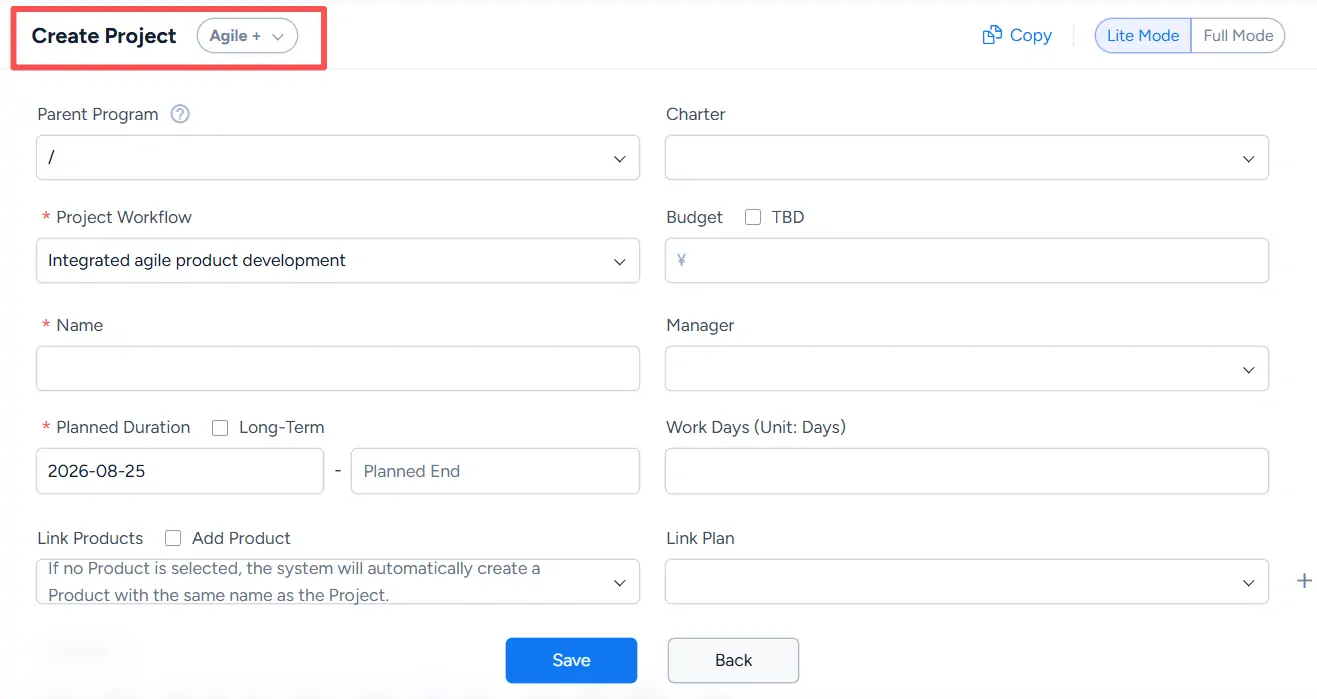
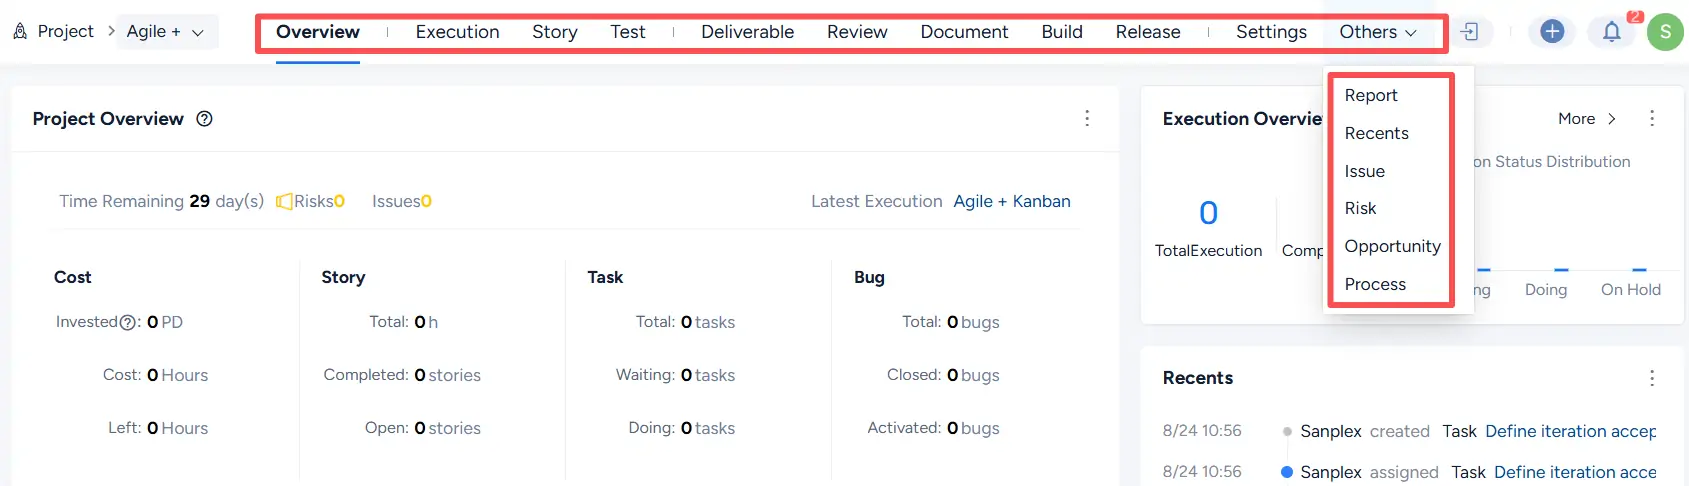
A successfully created Agile + project includes both project-level management and execution-based delivery management.
5. Create a Waterfall + Project
Select Waterfall + as the project management type, complete the required information, and click Save.
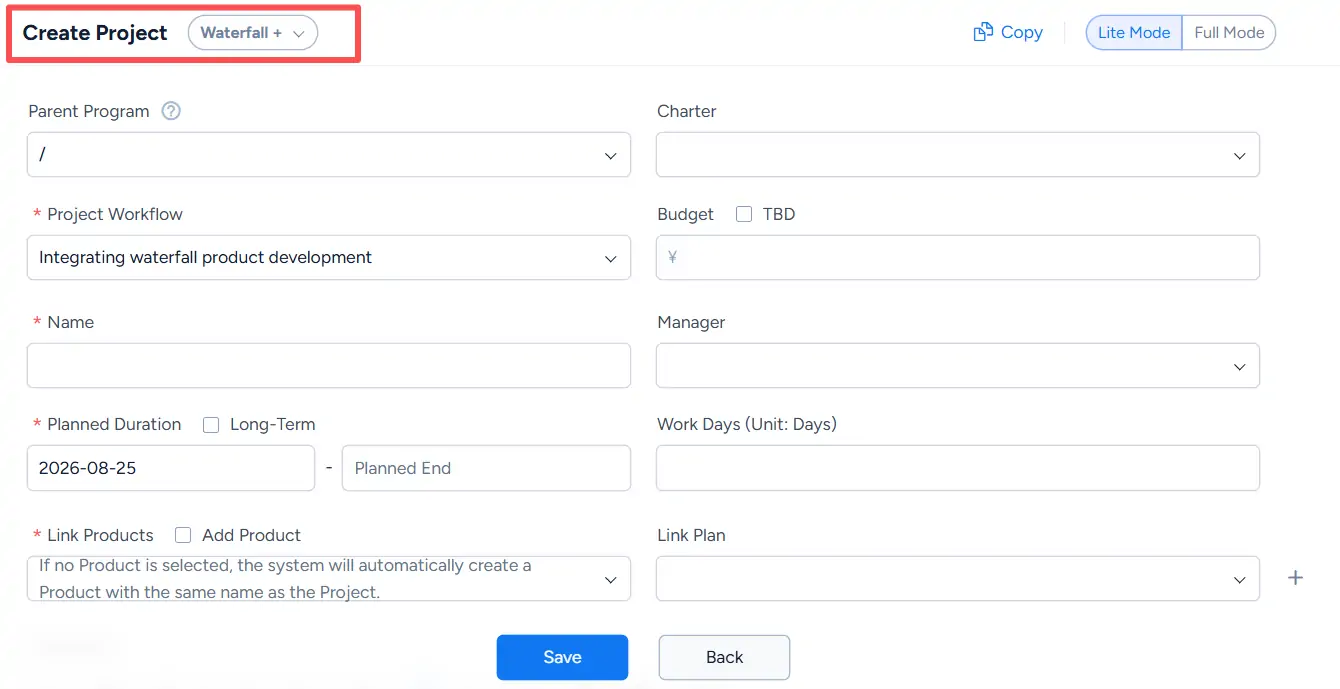
After a Waterfall + project is created, you need to configure its phase structure on the Phase page.
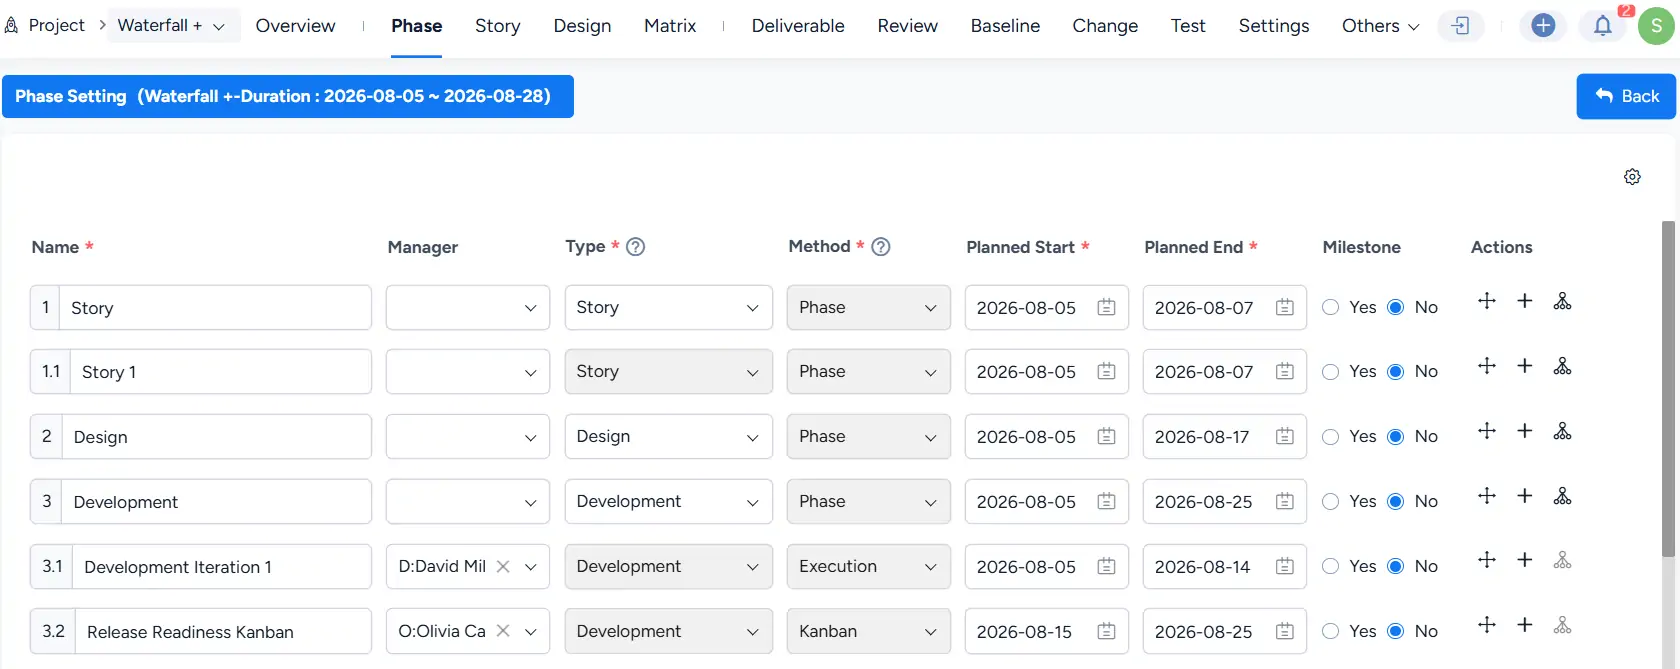
6. Browse Projects
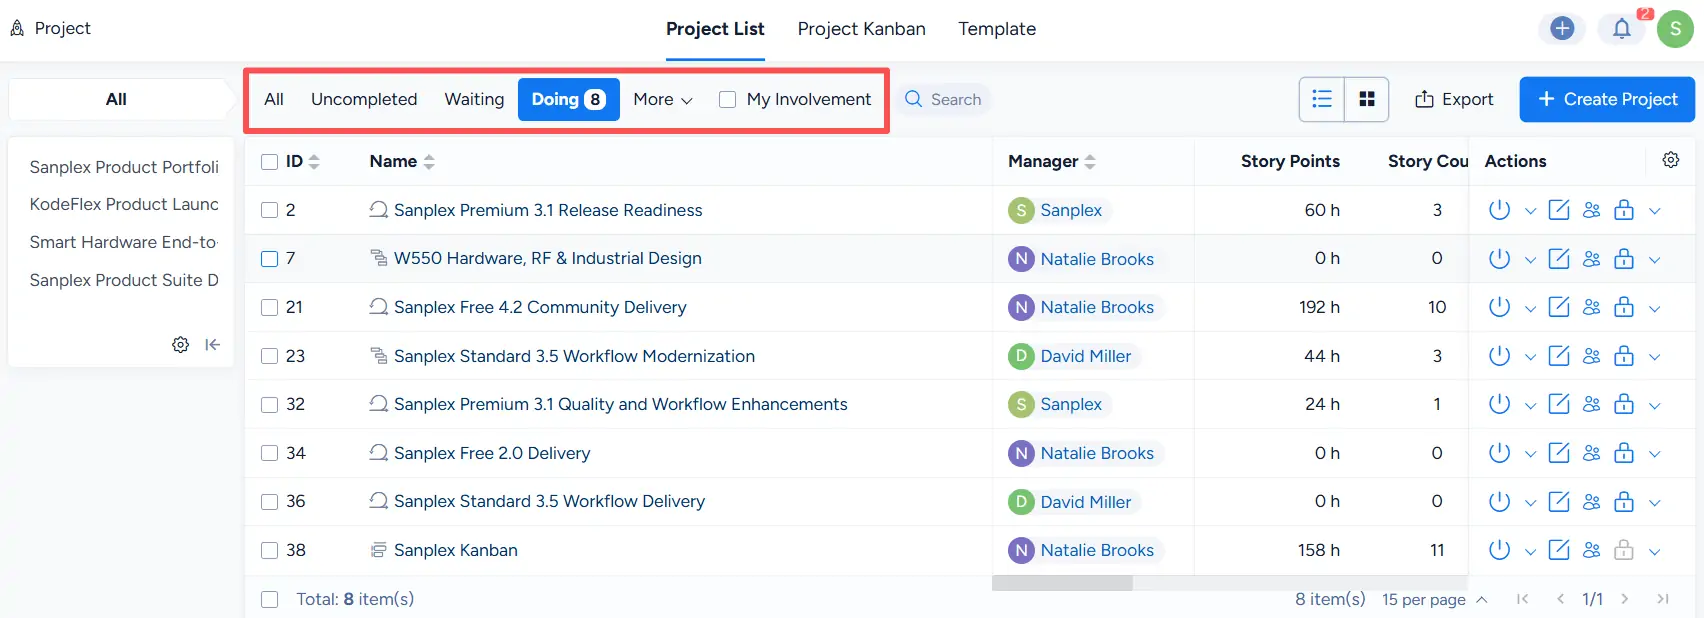
Created projects can be viewed in the Project List.
You can filter the list by project status, including:
- All
- Uncompleted
- Waiting
- Doing
- On Hold
- Delayed
- Closed
You can also select My Involvement to show only the projects you are involved in.
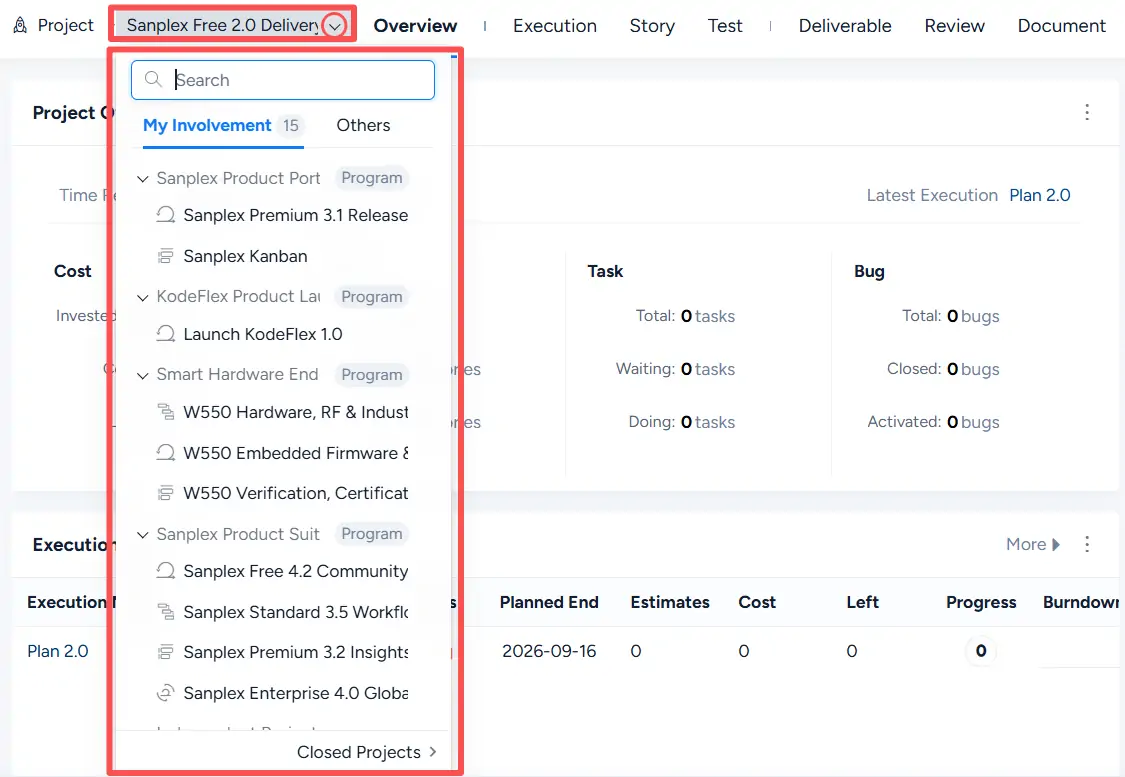
You can also browse projects by using the project selector dropdown.
The selector supports:
- search
- My Involvement
- Others
- browsing projects by program
- access to Closed Projects
7. Project Kanban
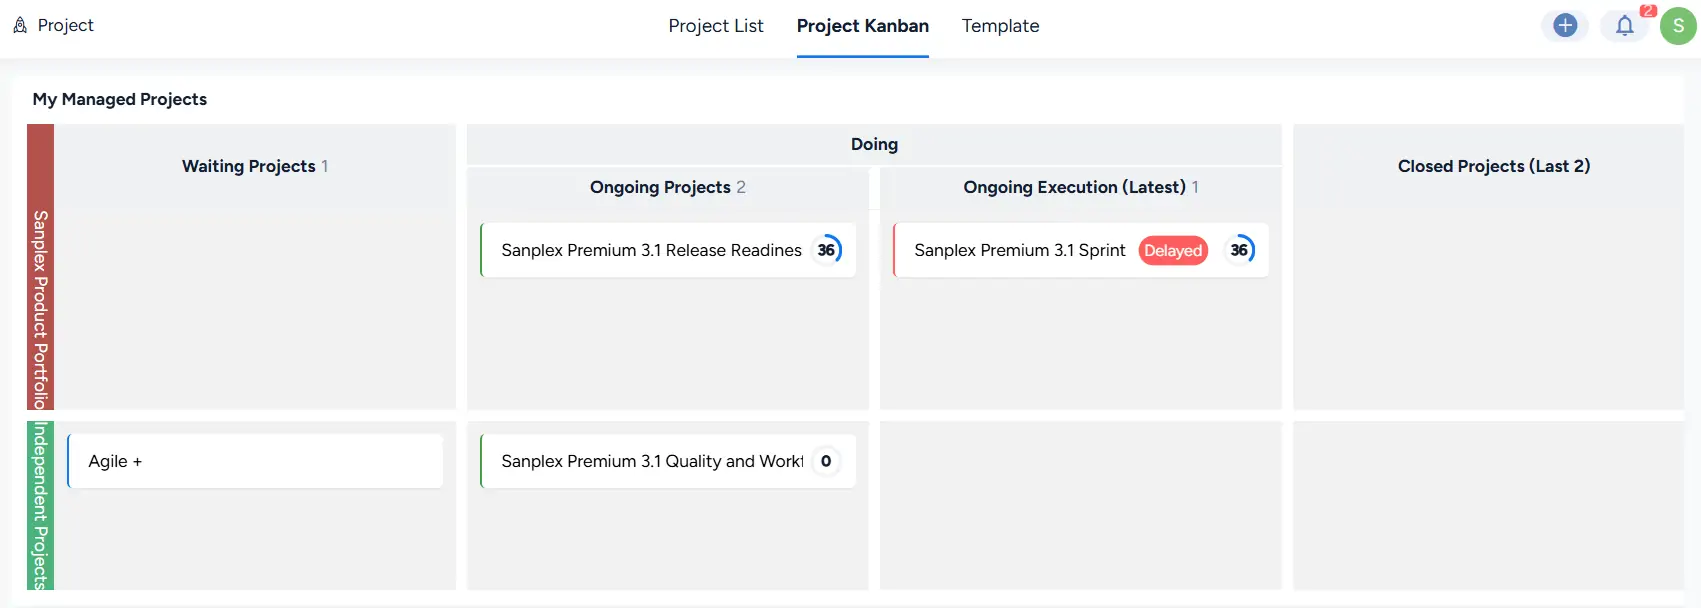
The Project Kanban page provides a more visual way to browse project information.
It groups projects by status and displays project cards in a Kanban-style layout.