Catalog
Project-level Bugs, Test Cases, Test Requests, and Test Reports can be managed under the Test tab of a project.
The project Test module provides separate pages for managing bugs, test cases, testing requests, and test reports. When multiple products are available, you can use the product selector to view the test data for a specific product.
The following example uses a Scrum project to explain how to manage these testing activities under Project > Test.
I. Manage Bugs
Go to Project > Select a Project > Test > Bug.
If multiple products are available, use the product selector in the upper-left corner to select the product whose bugs you want to view. The Test area provides the Bug, Test Case, Test Request, and Test Report tabs.

Click Report Bug to create a bug.
The Bug list displays information such as the bug name, severity, priority, status, reporter, reported date, confirmation status, assignee, and available actions.

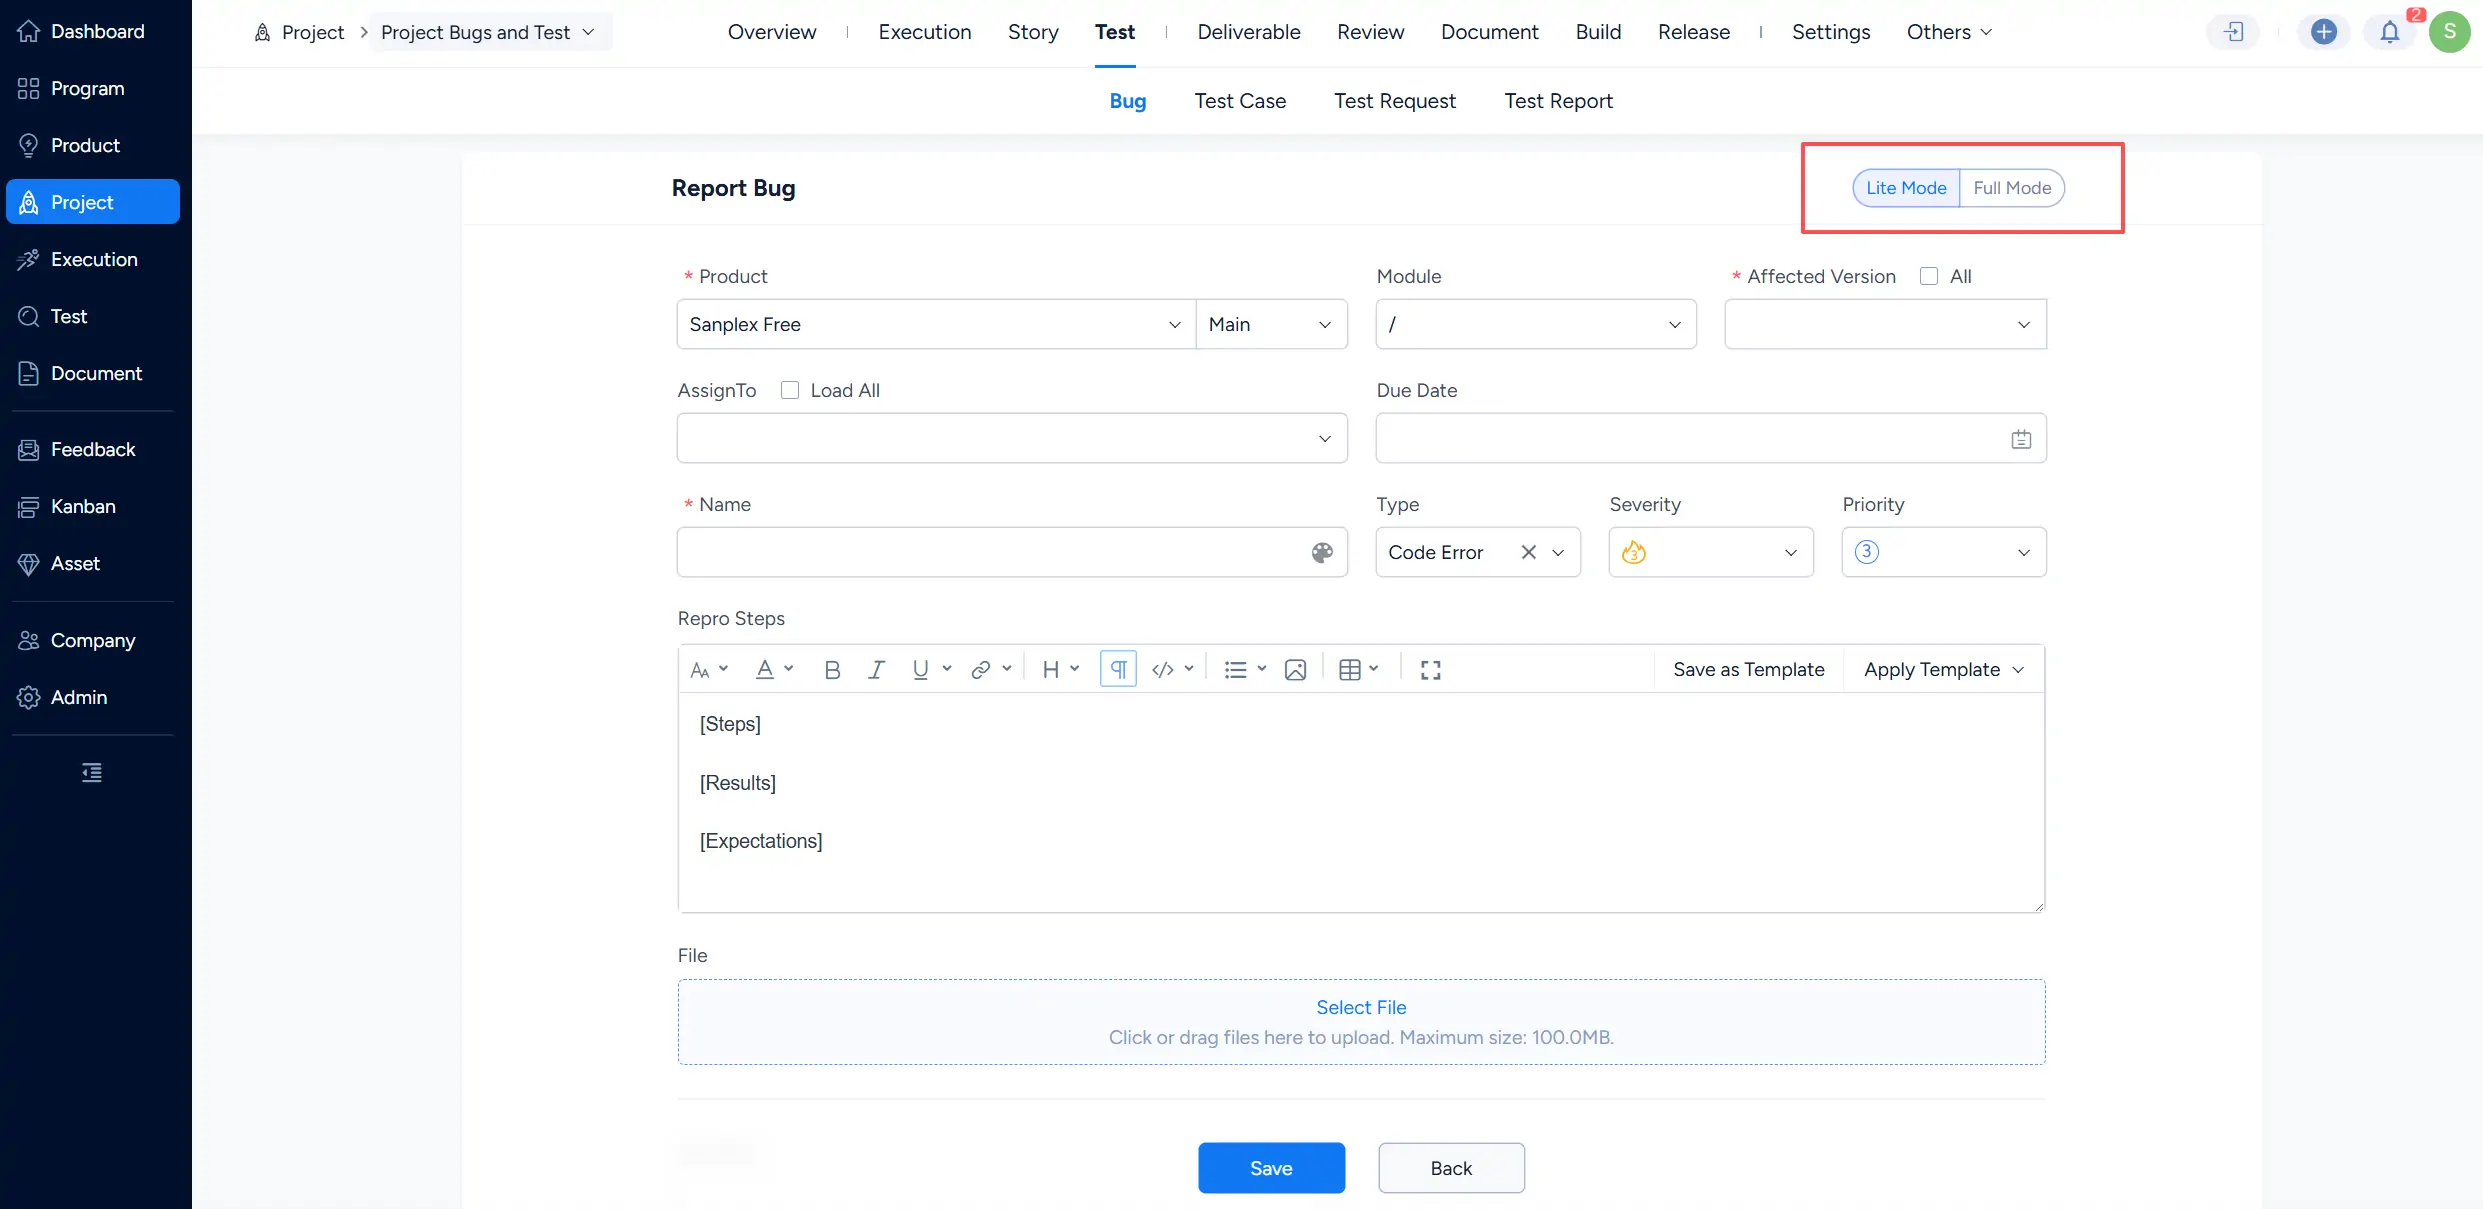
On the Report Bug page, enter the required bug information. You can switch between Lite Mode and Full Mode in the upper-right corner according to the amount of information you need to enter.
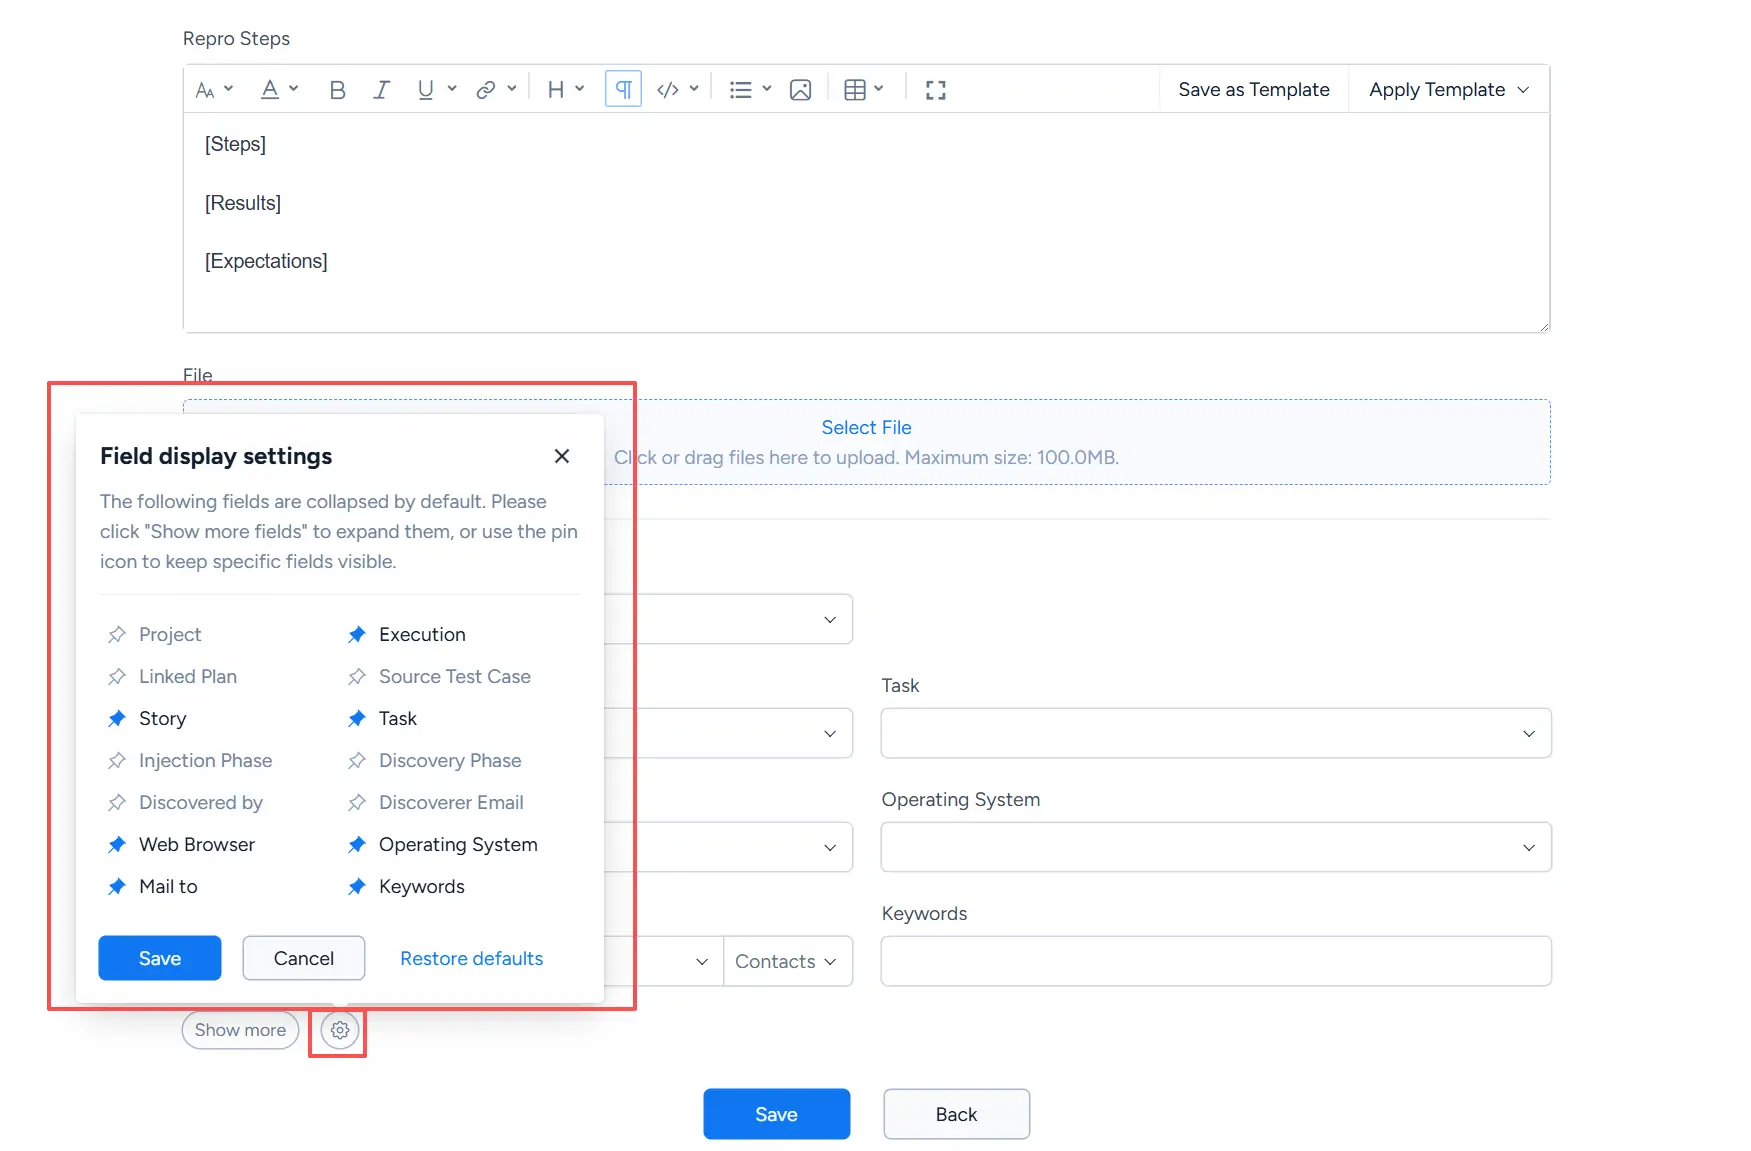
Additional bug fields can be managed through Field display settings. Click the settings icon near Show more to open the field configuration panel.
You can choose which optional fields remain visible by using the pin icons, then click Save to apply the display settings.
After the bug is saved, it appears under Project > Test > Bug.
The Actions column displays the operations currently available for each bug according to its status.

II. Manage Test Cases
Go to Project > Test > Test Case to manage project Test Cases.
The Test Case page supports different display modes. Use the view selector in the upper-right area to switch between View by List and Group View.

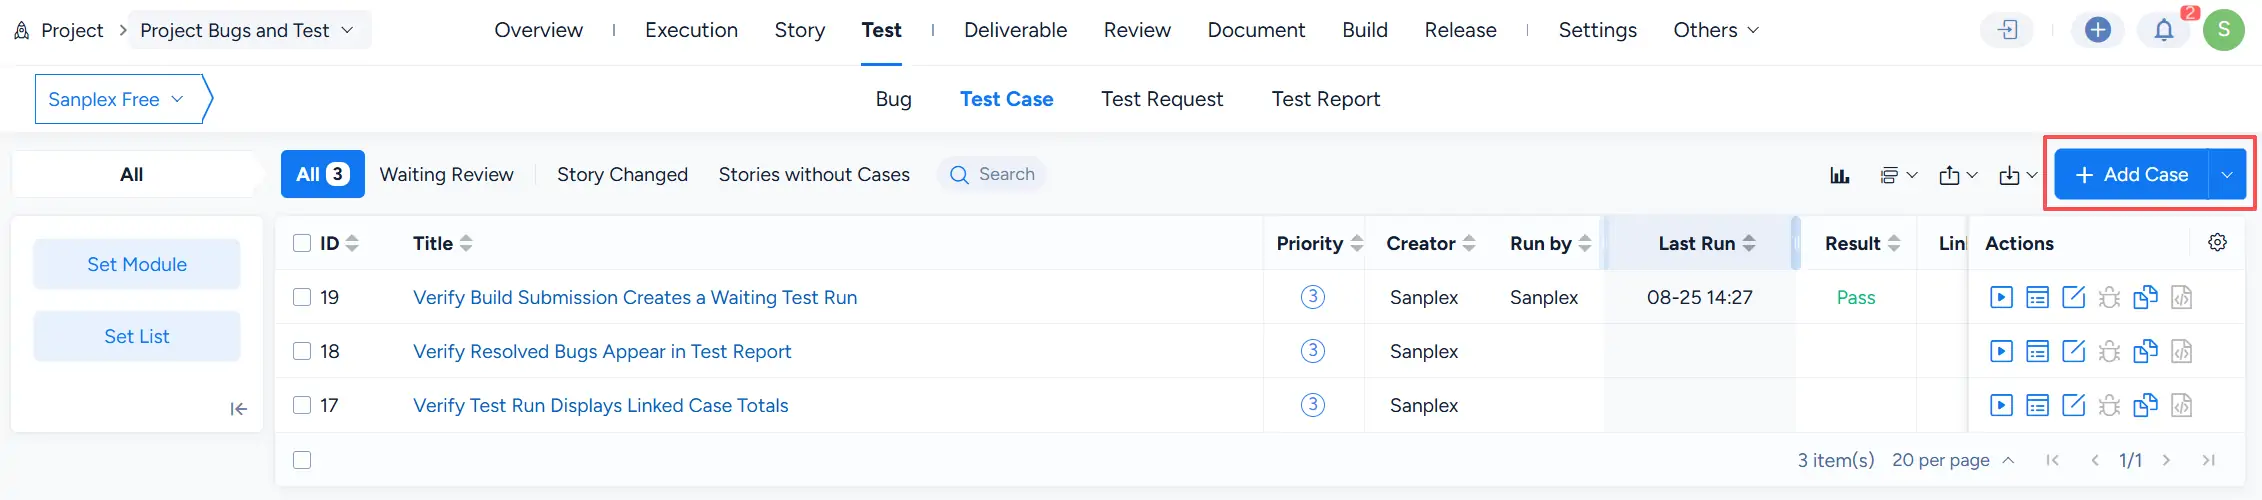
Click Add Case in the upper-right corner to create a Test Case.
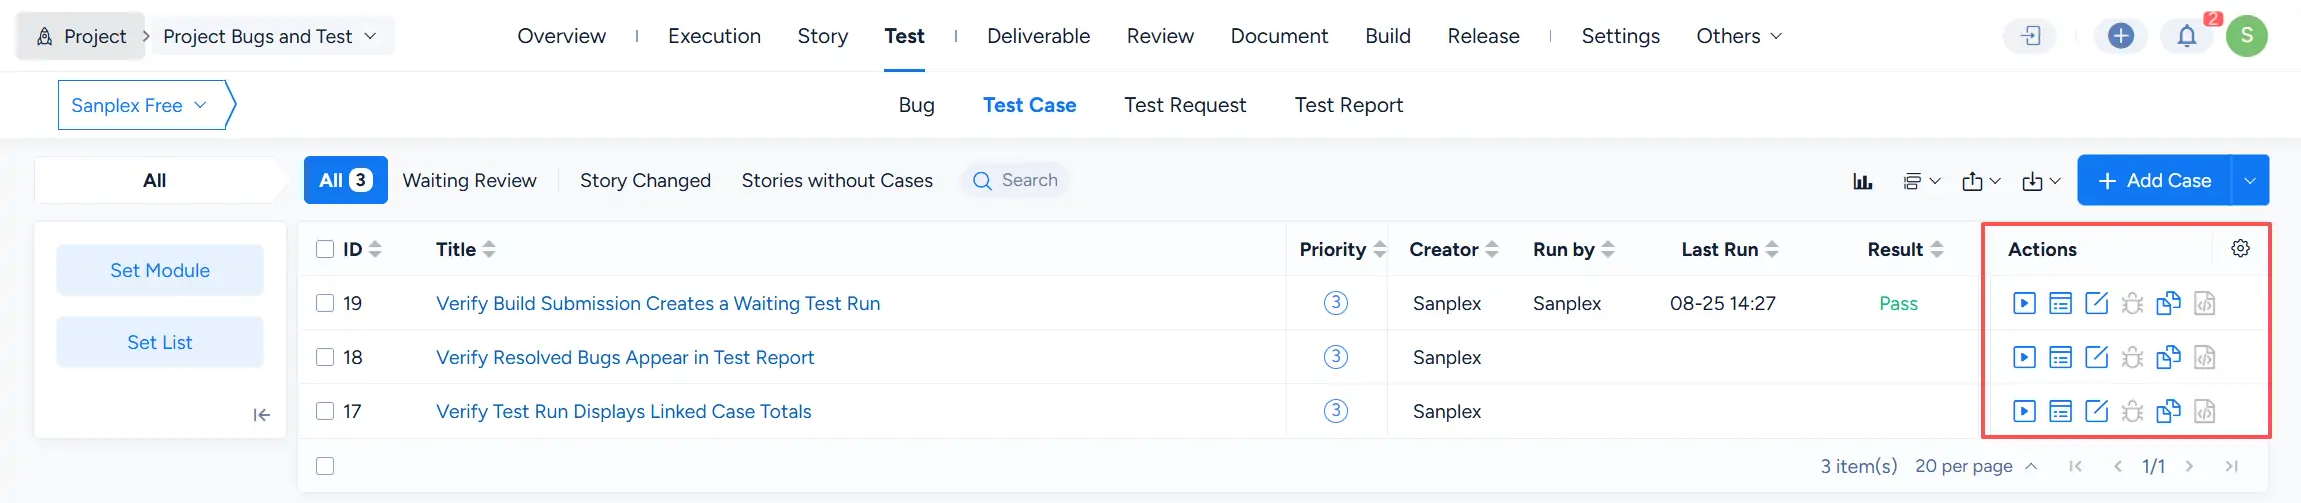
The Test Case list displays information such as title, priority, creator, run-by user, last run time, result, and available actions.
On the Add Case page, select the Product and configure the Test Case information. Available fields include Module, Linked Story, Scene, Type, Phase, Title, Priority, and Prerequisite.
Under Steps, enter the test steps and corresponding expectations.
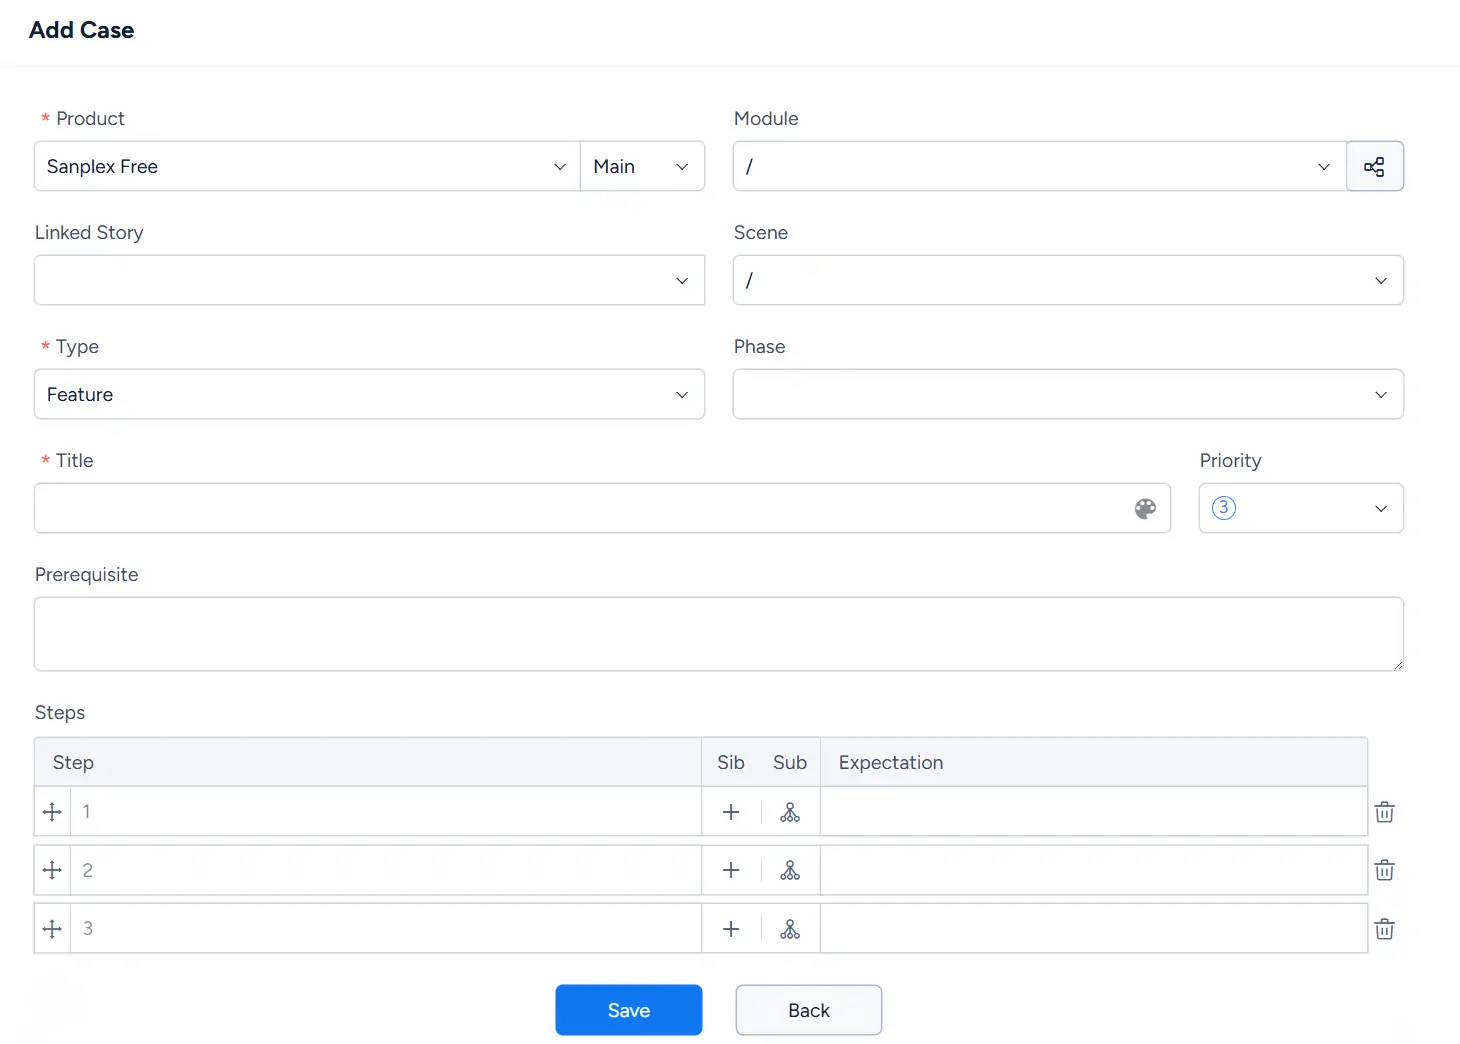
After clicking Save, the new Test Case appears in the Test Case list.
The Actions column provides the operations available for each Test Case, including actions for running, viewing related execution information, editing, bug-related processing, and copying the case where applicable.
III. Manage Test Requests
Go to Project > Test > Test Request to manage testing requests.
A Test Request can be associated with a Product, Build, and Execution, and the list displays its owner, planned start and end dates, current status, and available actions.
Click Submit Request to create a new Test Request.

The Actions column provides the operations available for each Test Request, including actions for managing related testing information, editing the request, and deleting it.

Test Requests created from Builds are also managed on this page. For details about submitting a Build for testing, see 7.5.6.4 Project Builds.
IV. Manage Test Reports
Go to Project > Test > Test Report to view Test Reports associated with project testing activities.
The Test Report list displays the Report Title, associated Project/Execution, Test Request, Creator, Created Date, and available actions.

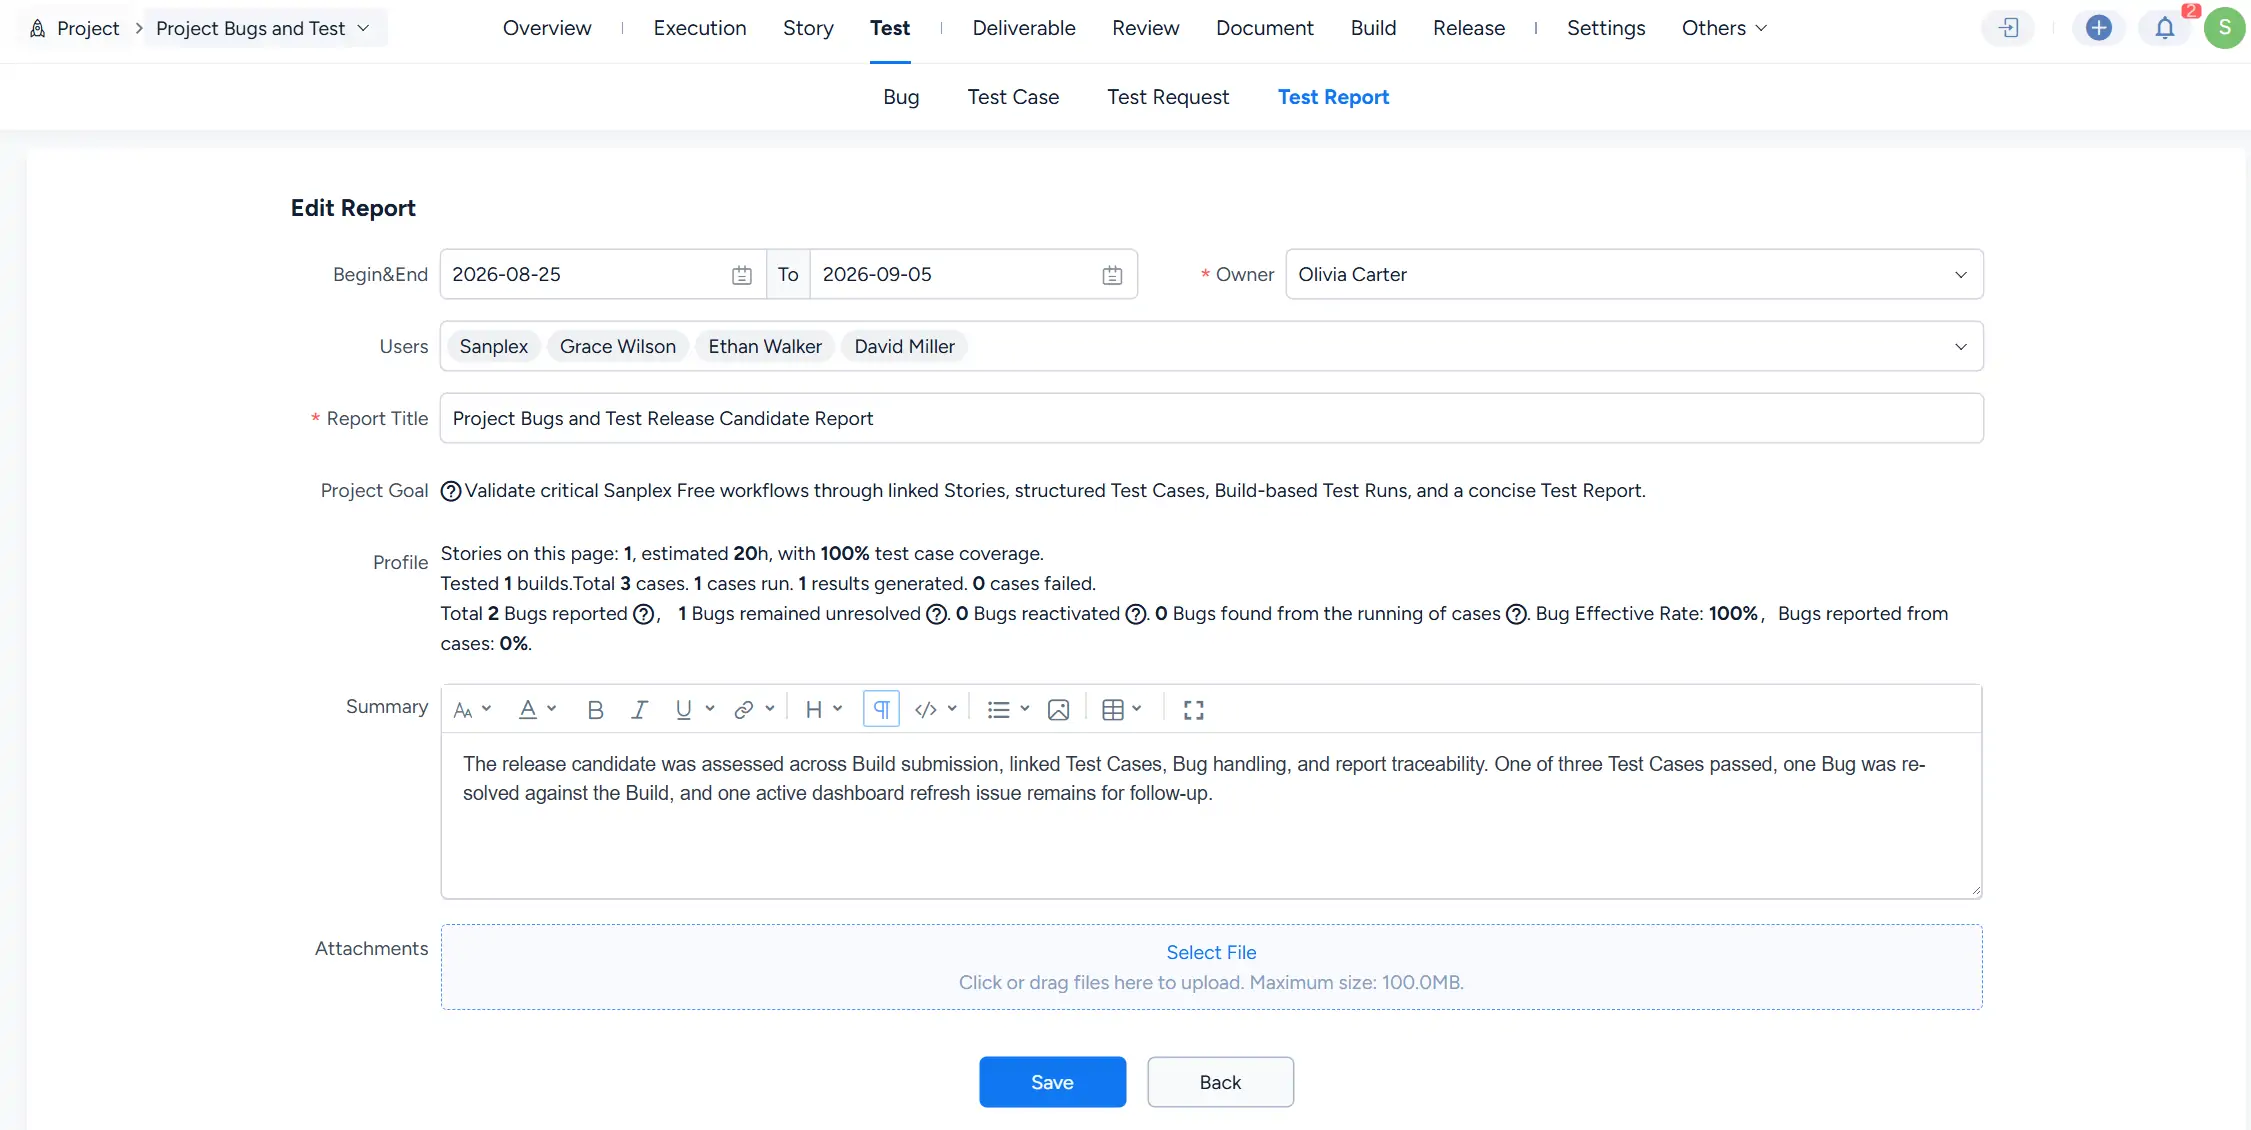
When editing a Test Report, you can configure the reporting period, owner, users, report title, and summary information. The page also displays generated project testing information such as the Project Goal and Profile.
Attachments can be added when needed.
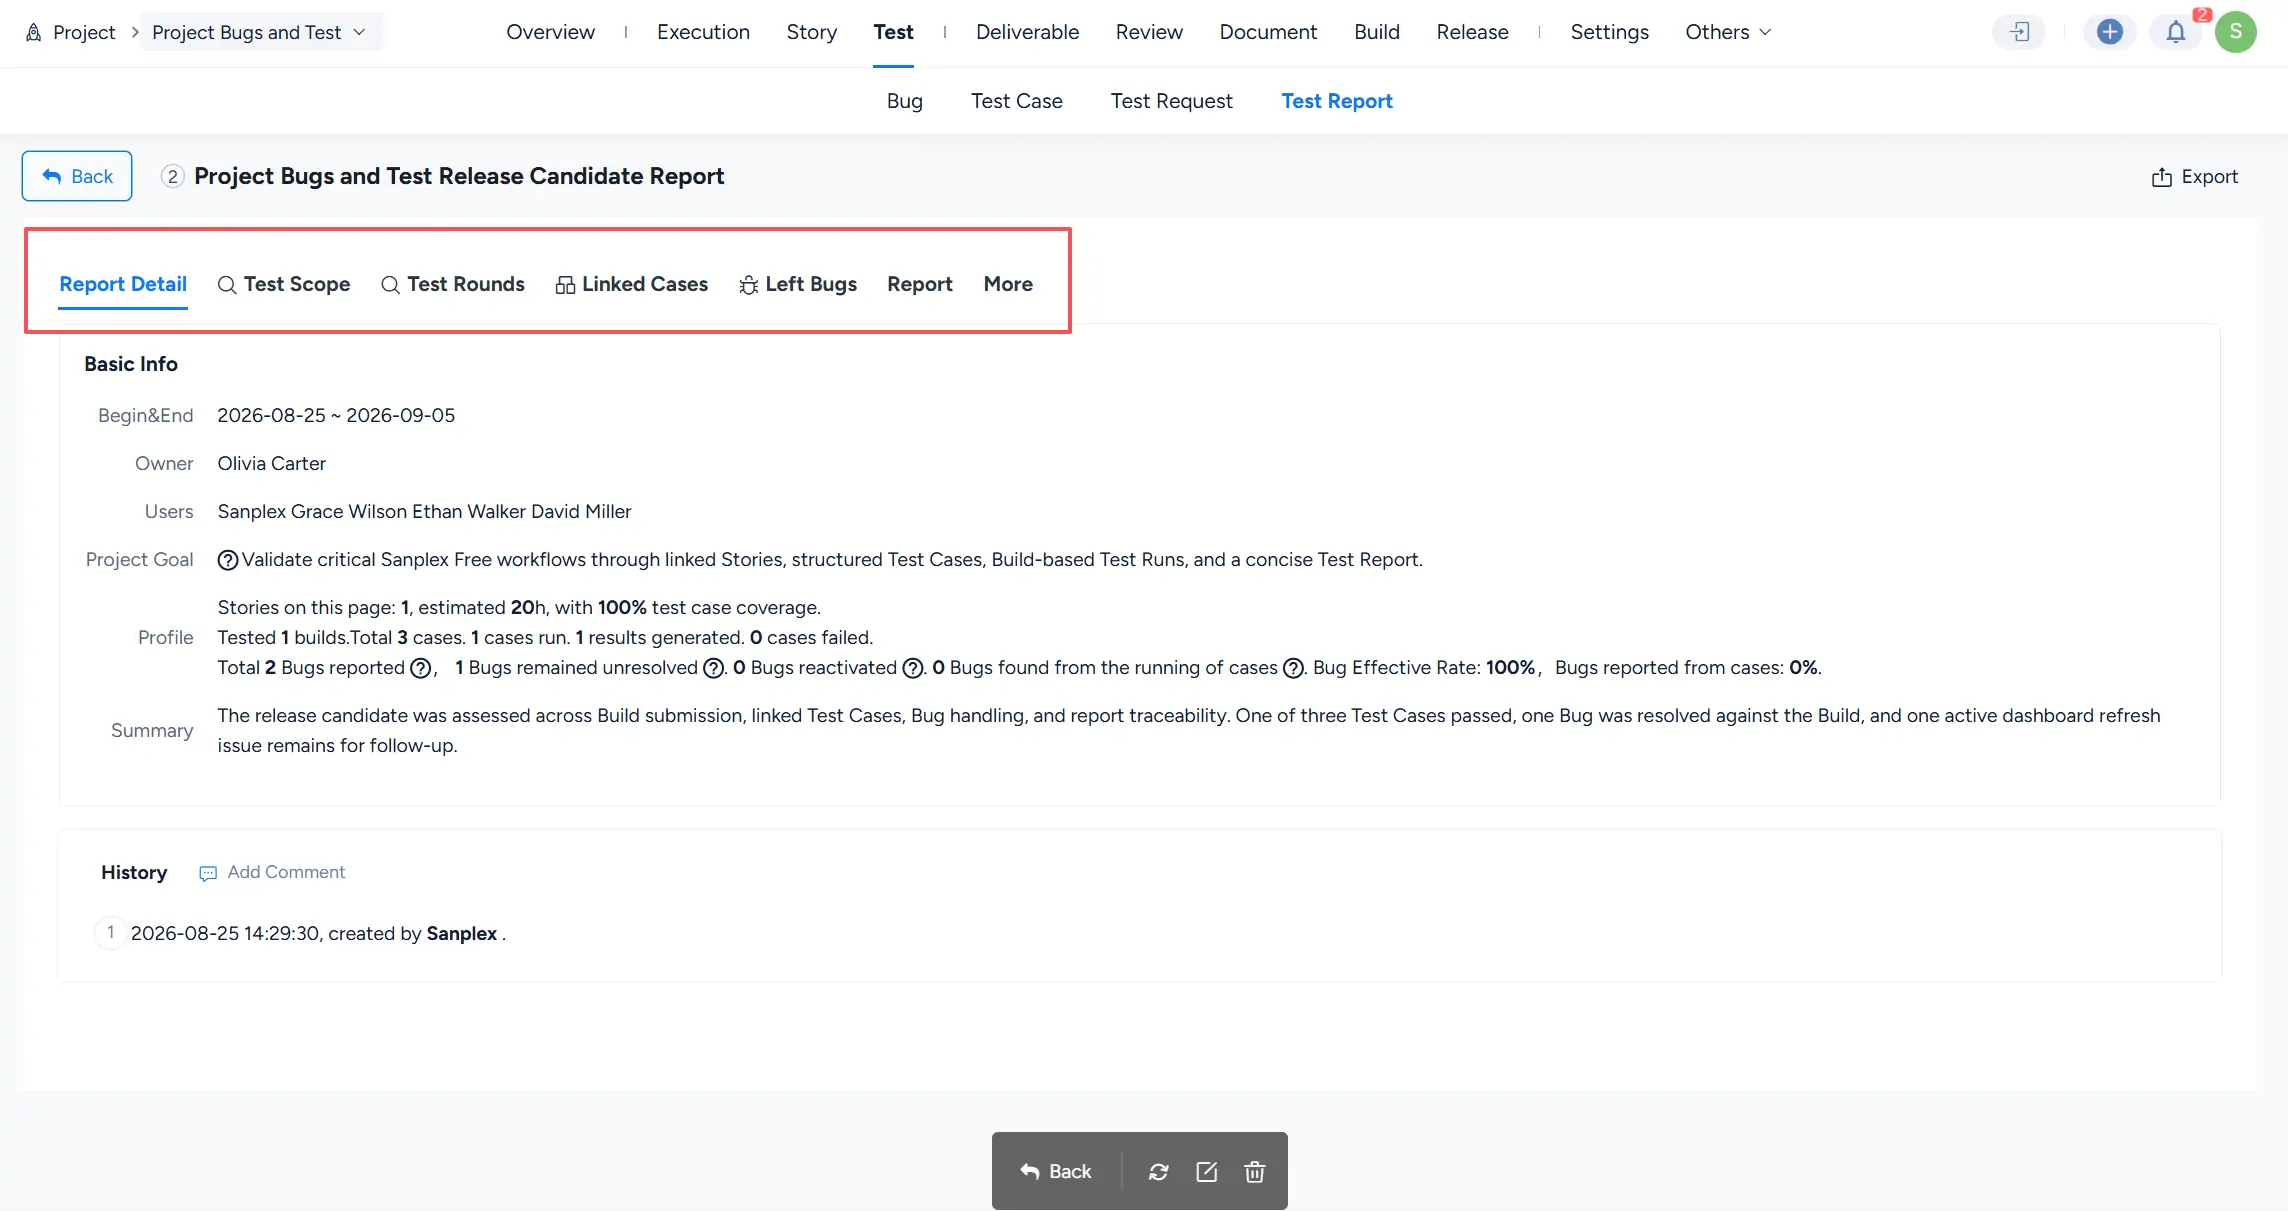
Click a report title to open the report details page.
The Test Report provides several views for reviewing testing information, including Report Detail, Test Scope, Test Rounds, Linked Cases, Left Bugs, Report, and additional options under More.
The Report Detail view summarizes basic information, project goals, testing statistics, report summary, and history.