Catalog
1. What Is Sanplex Agent
Sanplex Agent is an AI assistant in Sanplex. It can help you with a wide range of tasks, such as automatically generating story descriptions, assisting with Bug reports, and converting stories into test cases.
You do not need to write any code. Simply follow the steps in the interface to configure your own AI assistant. Once it is configured, you and your team can click it on the relevant page while using Sanplex, and the agent will process the request automatically.
For example, when creating a Bug, you only need to enter a few keywords. Sanplex Agent can use that information to complete the Bug description and reproduction steps, saving you a great deal of manual entry.
2. Who Can Design an Agent
An administrator must grant permission to design and configure Sanplex Agent. If you have been granted the required permission, you can find the Sanplex Agent feature in the Agent module and create and configure agents there. (Available in Sanplex Standard and Premium.)
3. Design an Agent
Open the Sanplex Agent list and click Create Sanplex Agent. The system will guide you through five configuration steps:
Basic Info -> Set Input Fields -> Set Input Form -> Set Prompt -> Preview Results
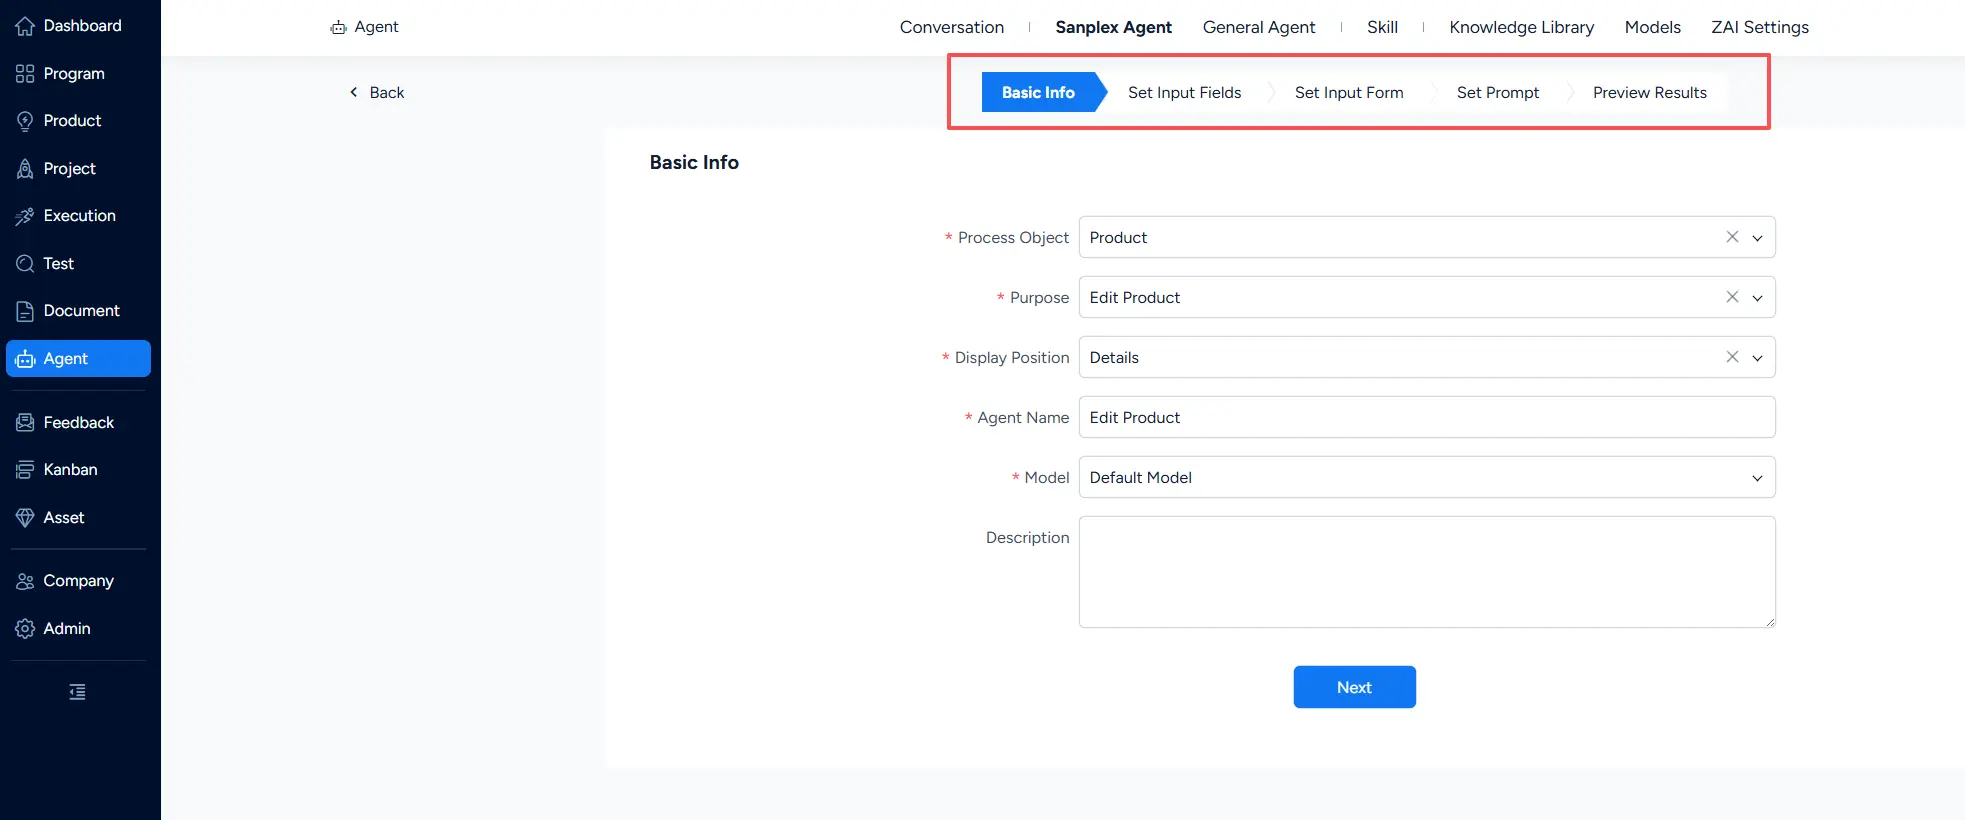
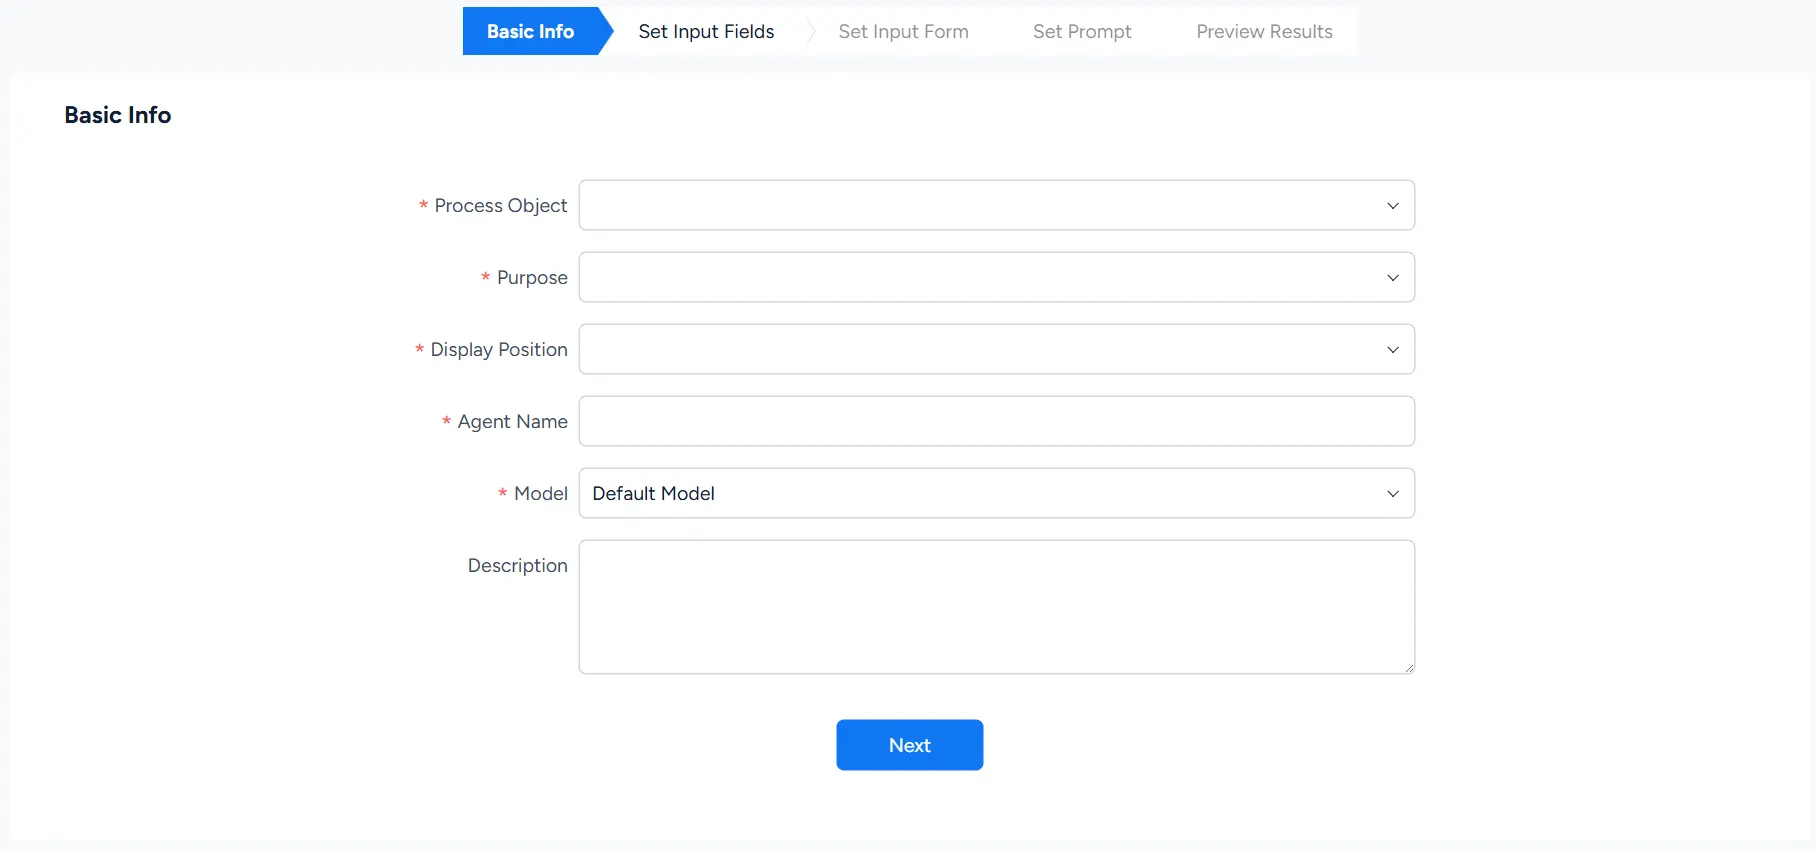
Step 1: Basic Info
This step tells the system who the agent helps, what it does, where it appears, and what it is called.
- Process Object (required): What type of Sanplex data will the agent process? For example, stories, Bugs, tasks, or test cases. Select an option from the drop-down list.
- Purpose (required): What operation should the agent perform? For example, create, edit, or convert. The available options change automatically based on the object you select.
- Display Position (required): Where should the agent appear? Details (on view pages) or Form (on entry pages).
- Agent Name (required): Give the agent a name. By default, the purpose name is displayed, but you can change it as needed.
- Model (required): Select the AI model that powers the agent. In most cases, you can keep the default model.
- Description (optional): Add supplementary information about the agent's functionality to help colleagues understand its purpose.
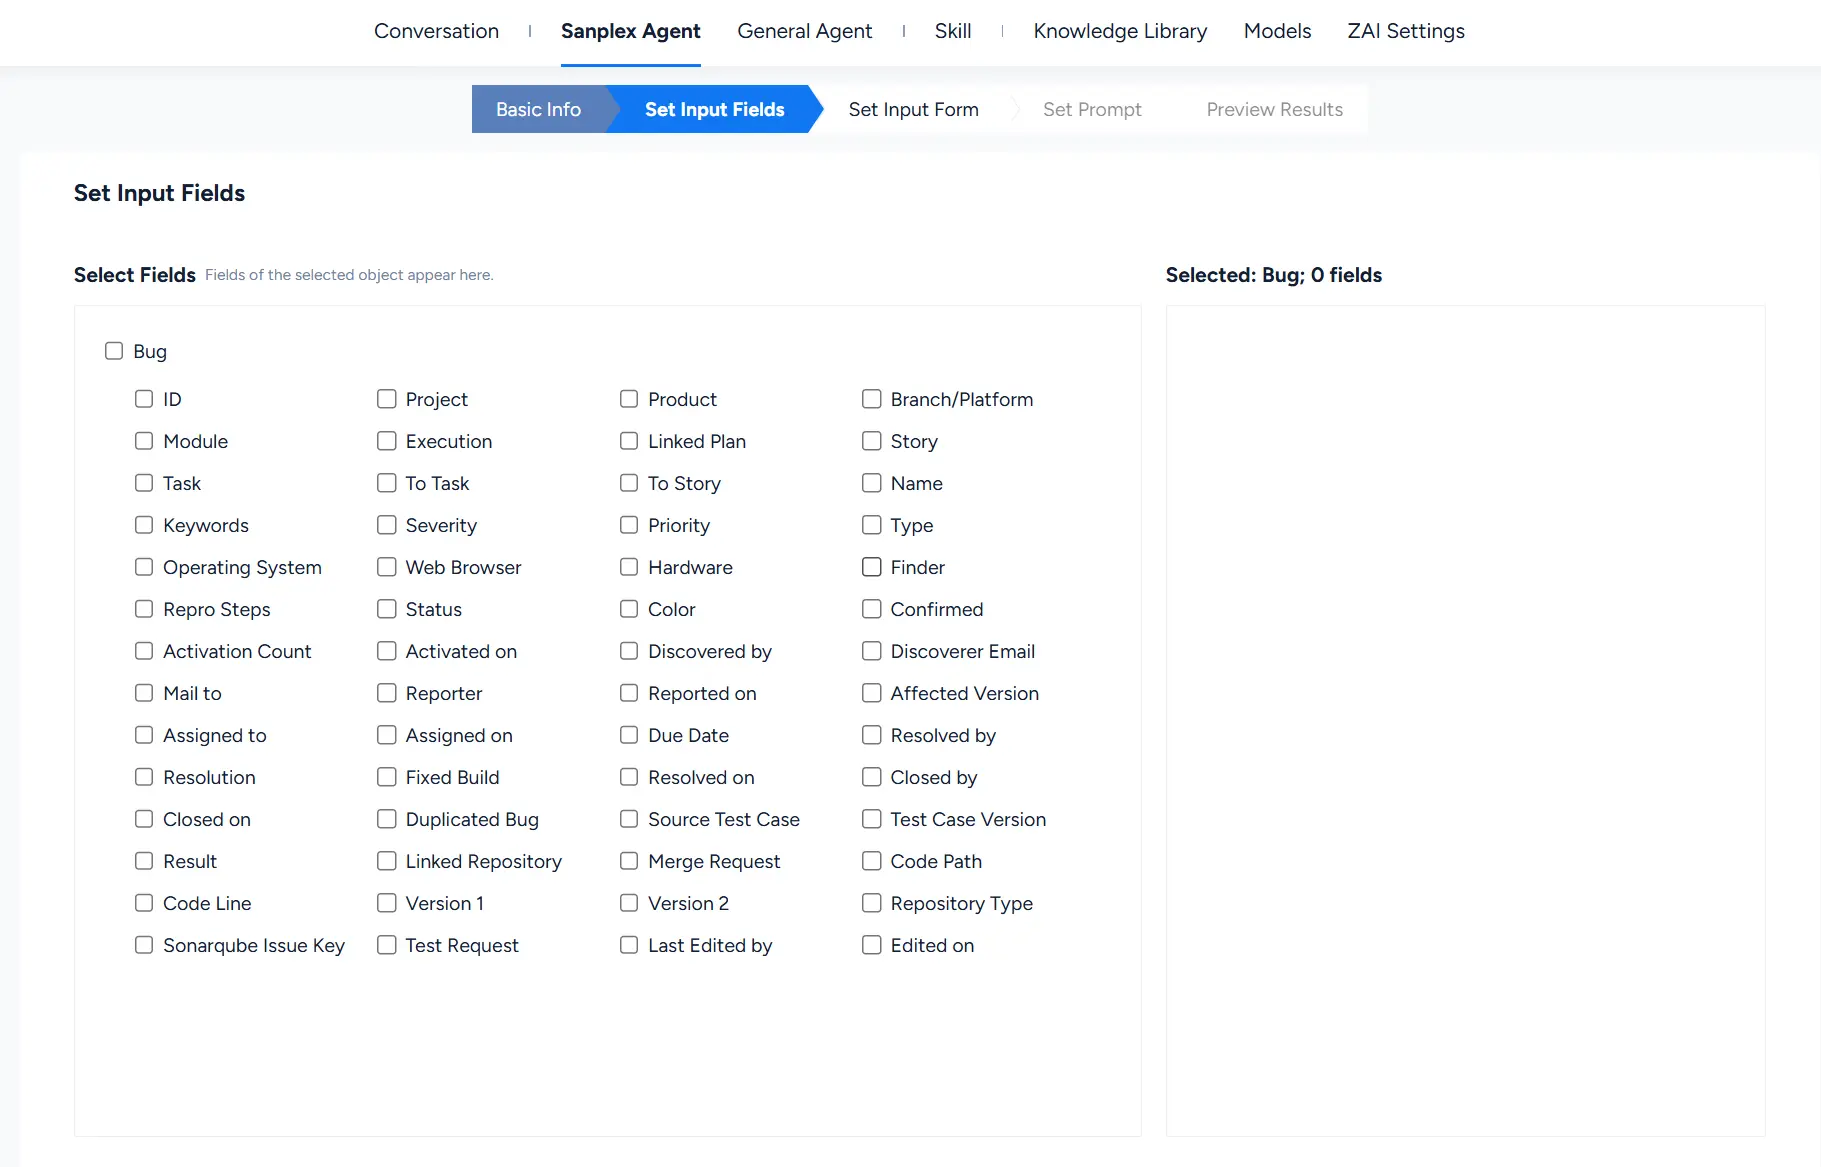
Step 2: Set Input Fields
This step determines which background information is provided to the AI. Based on the object selected in Step 1, the system lists all fields that can be referenced by the AI, and you can select the ones you need.
Note: If you select Form as the display position in Step 1, this step is skipped automatically. On a form page, the system directly reads the fields in the current form as context.
For example, suppose you create an agent that writes Bug descriptions and select Bug as the object to process. In this step, you can select fields such as the Bug title, severity, and module so that the agent can reference them when generating the description.
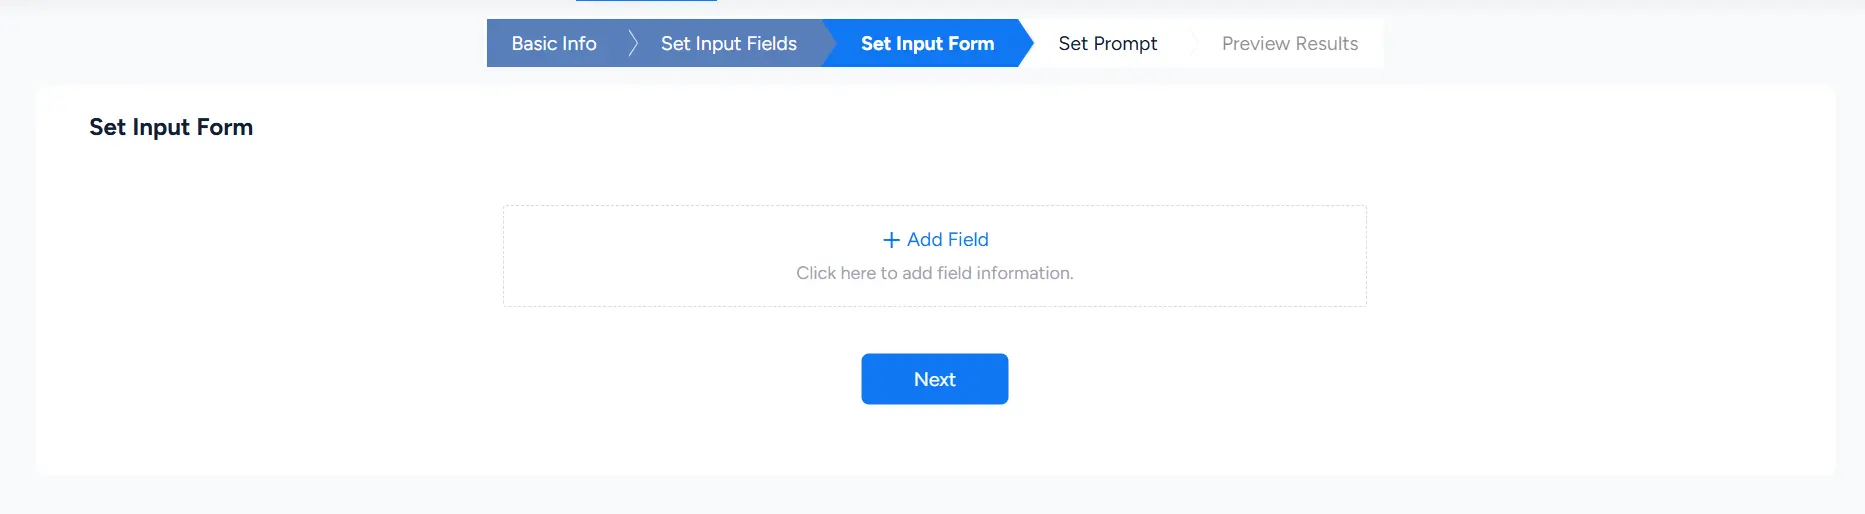
Step 3: Set Input Form
Sometimes the object's own fields are not enough, and users need to provide additional information when invoking the agent. This step lets you define those additional input fields.
For example, you may create an agent that generates test cases. In addition to the story fields, you may want users to specify a test type (functional testing, performance testing, and so on) or a priority. You can configure these additional options in this step.
You can add different types of form fields, including text boxes, drop-down lists, and date pickers. Users will see these inputs when they invoke the agent. After they complete them, the agent combines the information to generate more accurate results.
Step 4: Set Prompt
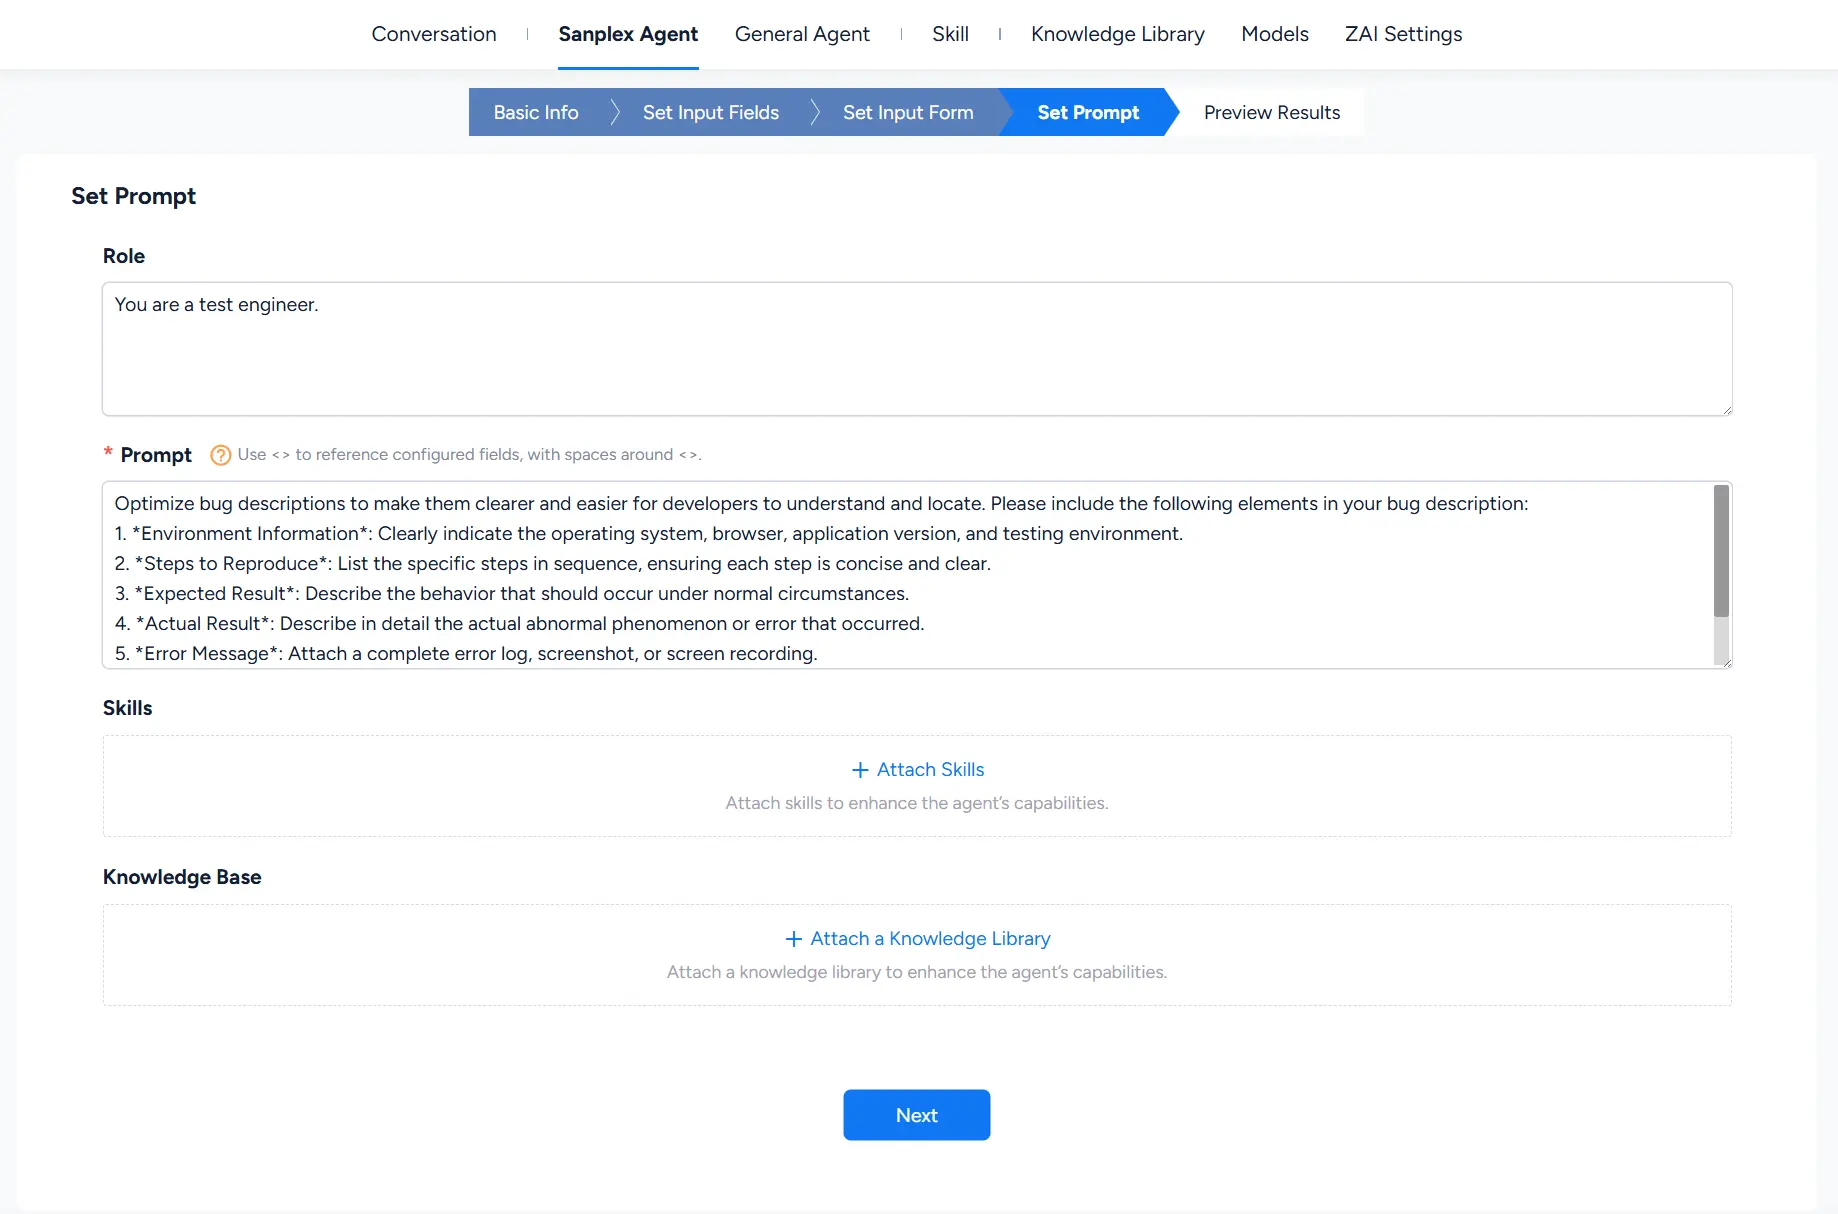
This is the agent's brain: this is where you define how the agent should think and respond.
- Role (optional): Tell the AI what role to play, such as "You are a senior test engineer." Setting a role makes the AI's responses more professional and better suited to the context.
- Prompt (required): The core instructions that tell the AI what to do and how to format its output. This is the most important part of the agent.
- Attach a knowledge base (optional): If your company maintains a knowledge base, such as product documentation or standards, you can associate it here. The AI will automatically reference the knowledge base when responding.
- Attach skills (optional): Attach published public skills to give the agent additional capabilities. See Chapter 6 for details.
Step 5: Preview Results and Publish
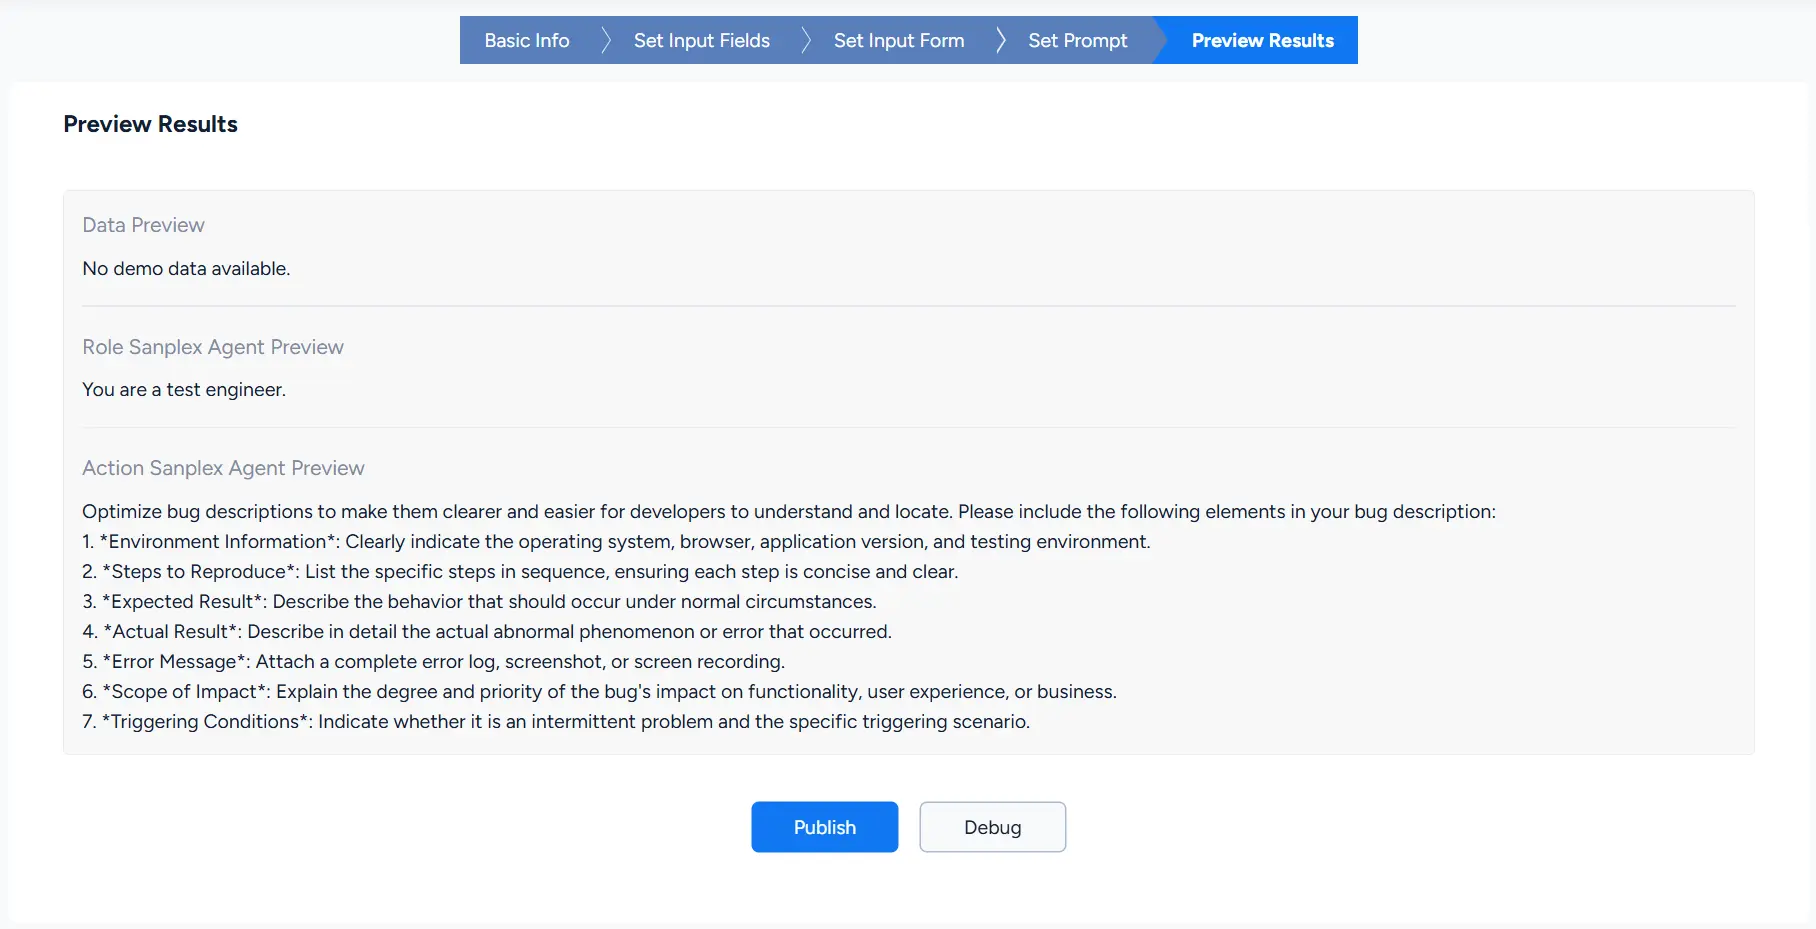
This final step summarizes the configuration from the previous four steps so you can review everything before publishing.
- Debug: Do not publish yet. Enter Debug mode to see how the agent performs in practice, then return to publish it when you are satisfied.
- Publish: Publish the agent once you have confirmed that everything is correct. After publication, team members can see and use it on the relevant pages.
We recommend running several rounds in Debug mode and publishing only after confirming that the output quality meets expectations. You can still return and modify the agent at any time after it is published.
4. Manage Agents
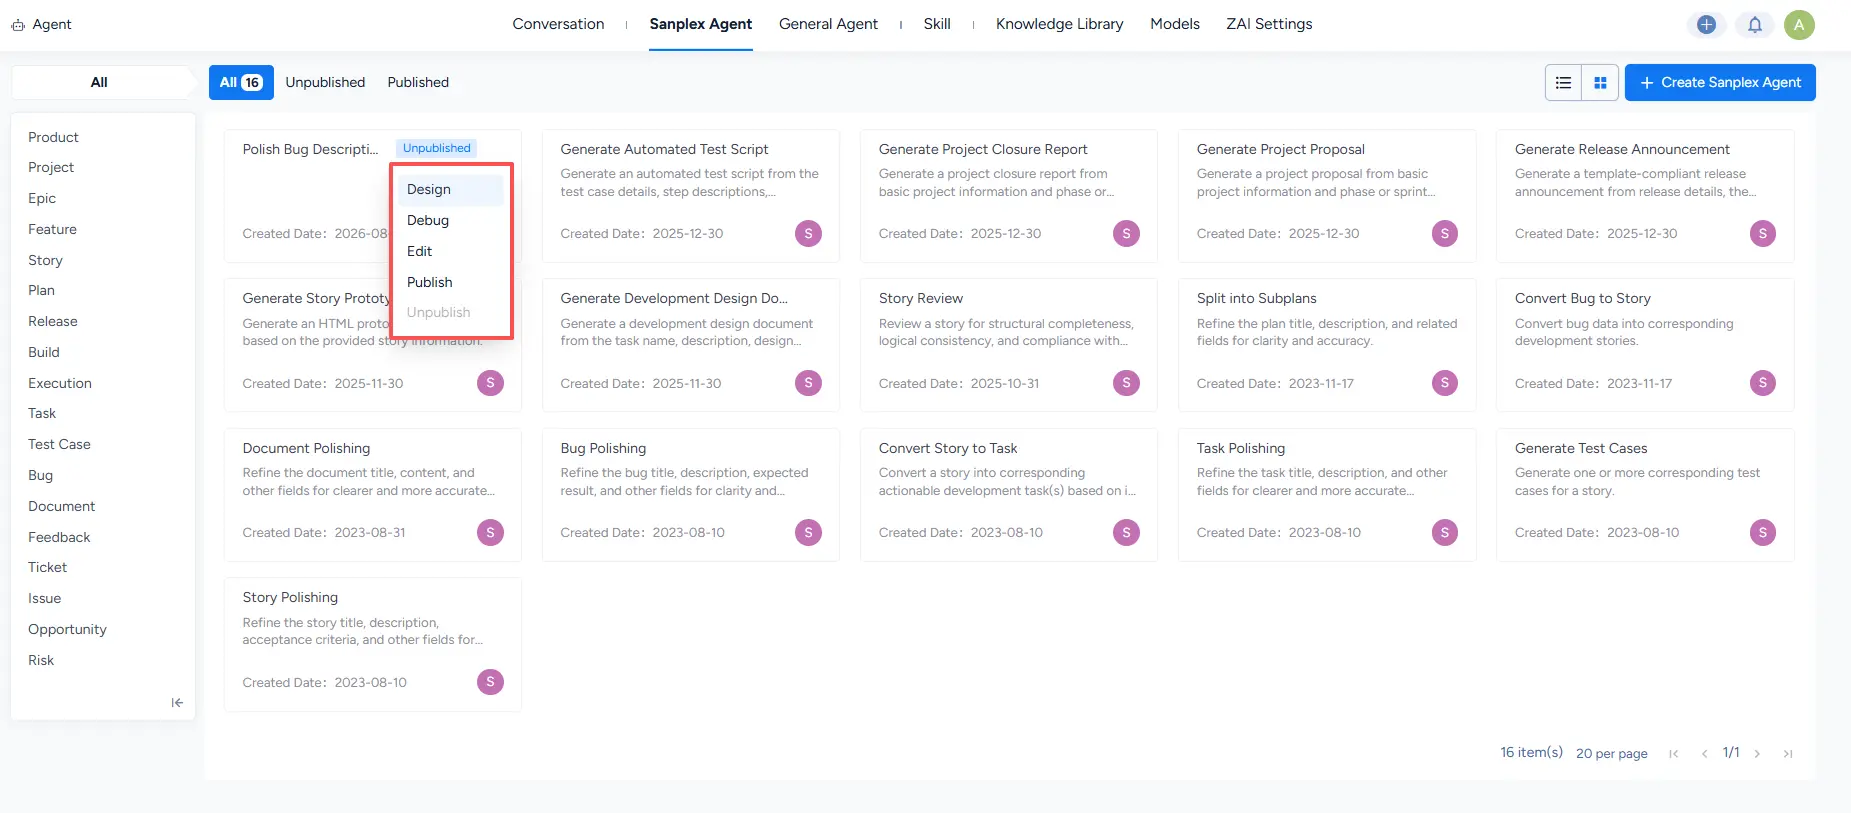
On the agent list page, you can manage all agents you have created:
| Action | Description |
|---|---|
| Publish/Unpublish | Publish or unpublish an agent |
| Edit | Edit the agent's basic information |
| Design | Open an unpublished agent to design and adjust it |
| Debug | Test the agent's performance |
| Delete | Delete an agent you no longer need. The Delete button is on the agent details page |
| Group management | Organize agents into groups for easier discovery |
5. Use Agents in Different Contexts
When configuring an agent, you can choose between two display locations: Form and Details.
Use an Agent on a Form Page
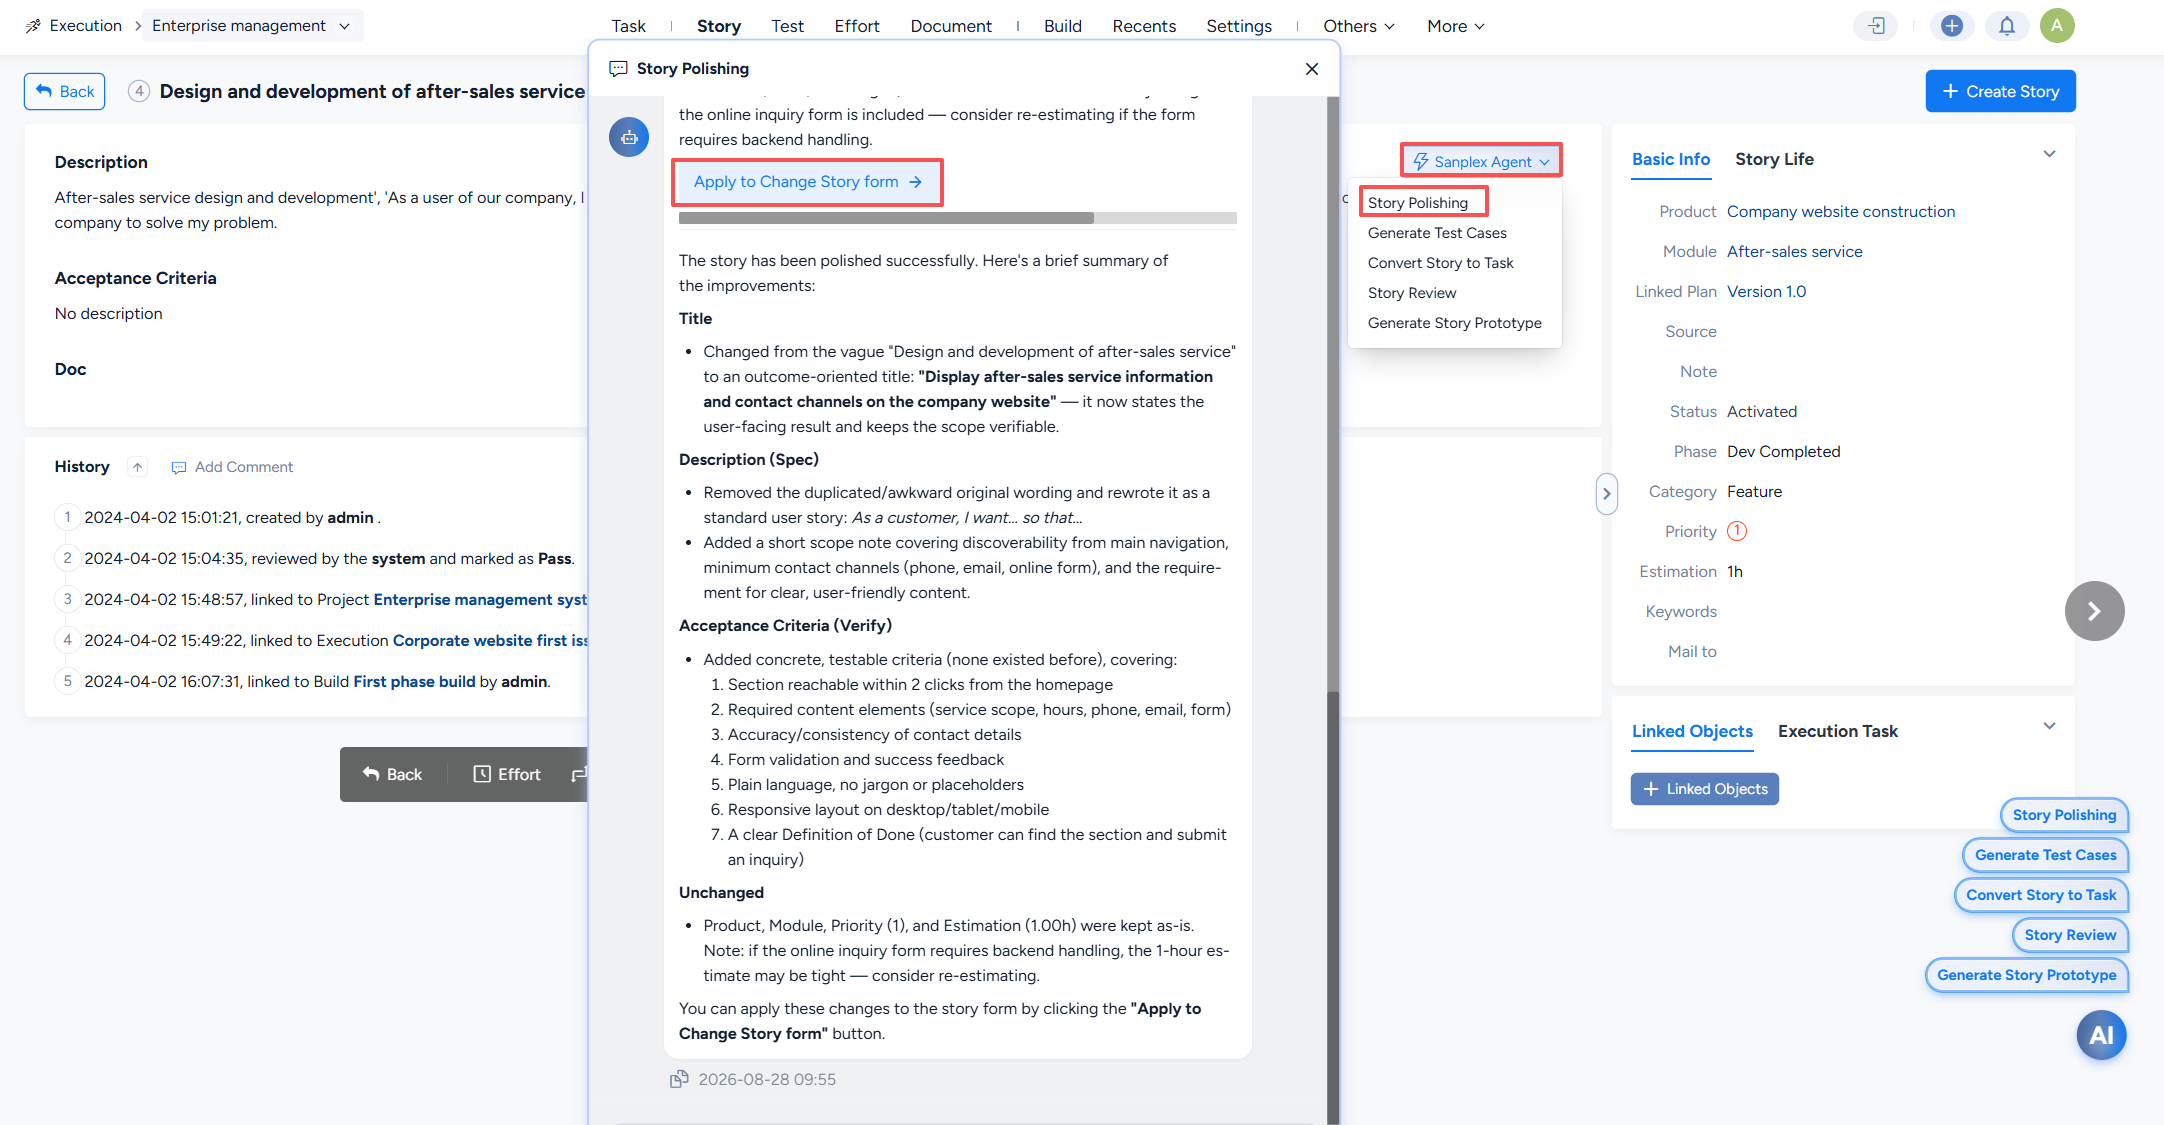
After you configure an agent, a Sanplex Agent button appears in the upper-right corner of a form when you create or edit an item, such as a new task or Bug.
How to use it:
- Trigger the agent: Click the Sanplex Agent button in the upper-right corner of the form. If multiple agents are available, select one from the list that appears. If only one agent is available, its name is shown directly.
- Run the agent: After you click it, the system automatically reads the relevant fields of the current form object, the content you have entered, the additional inputs configured for the form, and any associated knowledge bases or skills.
- Preview the result: After the AI generates a result, it is displayed in a panel for you to preview.
- Fill in the form: After confirming the result, click the Fill form button. The content is automatically inserted into the corresponding form fields.
The agent only assists with form completion and does not affect the normal form submission workflow. You can still fill out the form manually, or have the agent complete part of it and then make manual adjustments.
Use an Agent on a Details Page
When you view an object's details page, such as the details of an existing story or Bug, an entry point for the relevant agents is displayed on the page. Click it to invoke an agent.
How to use it:
- Trigger the agent: Open the details page of an object that supports agents, such as a story, Bug, or task. Find the agent entry point on the page and click the name of the relevant agent.
- Run the agent: After you click it, the system automatically reads the current object's configured fields, the additional inputs configured in the form, and any associated knowledge bases or skills.
- Preview the result: After the AI generates a result, it is displayed in a panel for you to preview.
- Fill in the form: After confirming the result, click the Fill form button. The content is automatically inserted into the corresponding form fields.