
Project Flow
1. Using Sanplex by Role
1.1. Administrator
1.1.1 Manage Departments
2. Introduction of Sanplex features
2.1. Core Management Framework
2.1.1 Program
2.1.2 Project
2.1.3 Product
2.1.4 Execution
2.1.5 Management Models
2.2. Dashboard
2.2.1 Getting Started with Tutorials
2.2.2 Quick Add
2.2.3 Notification Center
2.2.4 Effort Tracking
2.2.5 Dashboard - Project and Execution
2.2.6 Dashboard - My Work, Contribution, and Recents
2.2.7 Dashboard - Approval
2.2.8 Contacts
2.3. Program
2.3.1 Program List
2.3.2 Program Kanban
2.3.3 Create Program
2.3.4 Create Sub-Programs
2.3.5 Project Charter Management
2.4. Product
2.4.1 Create Product
2.4.2 Manage Modules
2.4.3 Multi-Branch and Multi-Platform Management
2.4.4 Manage Plans
2.4.5 Manage Stories
2.4.6 Story Reviews
2.4.7 Story Status and Phase
2.4.8 Create Releases
2.4.9 Track Progress
2.4.10 Epics and Multi-Level Stories
2.5. Project
2.5.1 Scrum Project
2.5.2. Waterfall Project
2.5.2.1 Manage Project Phases
2.5.2.2 Project Design
2.5.2.3 Project Matrix
2.5.2.4 Project Reports and Earned Value Management
2.5.2.5 Project Baselines
2.5.2.6 Project Change
2.5.3. Kanban Project
2.5.3.1 Set Up Kanban Projects
2.5.3.2 Configure Kanban Boards
2.5.3.3 Use Kanban Boards
2.5.4 Hybrid Agile Project
2.5.5 Hybrid Waterfall Project
2.5.6. Project Settings
2.5.6.1 Project Setup
2.5.6.2 Project Executions
2.5.6.3 Project Requirements
2.5.6.4 Project Builds
2.5.6.5 Project Tests
2.5.6.6 Project Docs
2.5.6.7 Project Releases
2.5.6.8 Project Reports
2.5.6.9 Project Risks
2.5.6.10 Project Issues
2.5.6.11 Project Opportunities
2.5.6.12 Project Deliverables
2.5.6.13 Project Reviews
2.5.6.14 Project Process
2.5.6.15 Deliverables
2.5.6.16 Quality Assurance
2.5.6.17 Project-specific Workflow Management
2.5.7 Project Templates
2.6. Execution
2.6.1 Product Planning and Task Breakdown
2.6.2 Task Assignment and Daily Tracking
2.6.3 Build Creation and Test Requests
2.6.4 Bug Confirmation and Resolution
2.6.5 Execution Kanban Boards
2.7. Testing
2.7.1 Write Test Cases
2.7.2 Execute Test Cases
2.7.3 Bug Submission and Reports
2.7.4 Verify and Close Bugs
2.7.5 Test Case Scenes
2.7.6 Submit a Test Request
2.7.7 Test Report
2.8. Agent
2.8.1 Conversation
2.8.2 Sanplex Agents
2.8.3 General Agents
2.8.4 Skill Management
2.8.5 AI Knowledge Library
2.8.6 Models
2.8.7 ZAI Service Installation
2.8.8 ZAI Service Control Panel
2.8.9 ZAI Configuration
2.9. Kanban
2.9.1 Kanban Spaces
2.9.2 Kanban Regions
2.9.3 Kanban Cards
2.10. Company
2.10.1 View Team Members and Work Information
2.10.2 View Recent Company Activity
2.10.3 View and Edit Company Information
2.11. Feedback
2.11.1 Configure, Create, and Review Feedback
2.11.2 Process Feedback and Send Notifications
2.11.3 Tickets
2.12. Admin Settings
2.12.1. System Settings
2.12.1.1 Mode
2.12.1.2 Backup
2.12.1.3 Trash
2.12.1.4 License
2.12.1.5 Security
2.12.1.6 Cron Job
2.12.1.7 Time Zone
2.12.1.8 Rebuild Index
2.12.1.9 LDAP
2.12.1.10 Table Engine
2.12.2 Feature Options
2.12.3. Users Management
2.12.3.1 Set Departments and Edit Company Profile
2.12.3.2 Manage Users
2.12.3.3 Set Permisions
2.12.4. Feature Configuration
2.12.4.1 Dashboard
2.12.4.2 Product
2.12.4.3 Project
2.12.4.4 Execution
2.12.4.5 Test
2.12.4.6 Kanban
2.12.4.7 Feedback
2.12.4.8 Tickets
2.12.4.9 User
2.12.4.10 Relations (Standard Version)
2.12.4.11 Meaturement
2.12.5 Migrate Jira Data to Sanplex
2.12.6 Jira to Sanplex Migration Mapping
2.12.7 Migrate Confluence Data to Sanplex
2.12.8. Agent Configuration
2.13. Asset Library (Premium)
2.13.1 Asset Library Management (Premium)

Quality Assurance

2026-09-22 11:14:48
Kelsea Zhang
3
Last edited by Kelsea Zhang on 2026-10-15 14:36:10
Share links
Summary: This guide explains QA check item configuration for project flows in Sanplex, including its use cases and how to create, edit, and delete quality assurance check items.

Overview

QA check item configuration is a key mechanism for keeping project process quality compliant and quality risks under control. It allows organizations to predefine QA check items for different process activities in the project flow in the Admin area, covering mandatory checks, compliance requirements, key review points, and quality risk identification rules, so that QA check items are consistent and complete from the source.

During project execution, QA staff can create activity check plans to check whether process activities and deliverables meet the check standards set by the organization. This safeguard keeps quality responsibilities clear and the standards executable and reusable, and gradually builds organization-level quality assurance capability.

By configuring QA check items in a unified way, organizations can standardize project processes, reduce the risk caused by inconsistent quality review criteria, and build a quality assurance system that can be replicated and reviewed. This capability is also an important foundation for process audits, maturity assessments, and CMMI compliance.

Use Cases

  • 1. Strengthen quality control for key process activities: QA check items are configured for key stages such as requirement review, design review, test review, and go-live acceptance, providing unified check standards so that QA staff can control these important milestones effectively.
  • 2. Standardize check criteria and quality standards: Different teams or members may apply inconsistent standards when performing reviews. QA check item configuration standardizes the check content, judgment criteria, and responsibilities, removing differences in how quality is evaluated.
  • 3. Support compliance and process audit requirements: In CMMI or ASPICE compliance audits and customer acceptance, QA check results serve as core evidence of quality control, making process traceability and audit verification easier and meeting compliance requirements.
  • 4. Accumulate and reuse organization-level quality experience: Experience from high-quality projects can be turned into standardized check items that later projects reuse directly, making quality capability more organizational, systematic, and continuously improved.

I. Create QA Check Items

In the QA check item list, click Create Check Item in the upper right corner to open the batch create page and add several check items for a specified activity at one time. After the check items are saved, they are applied directly to the projects that use this project flow.
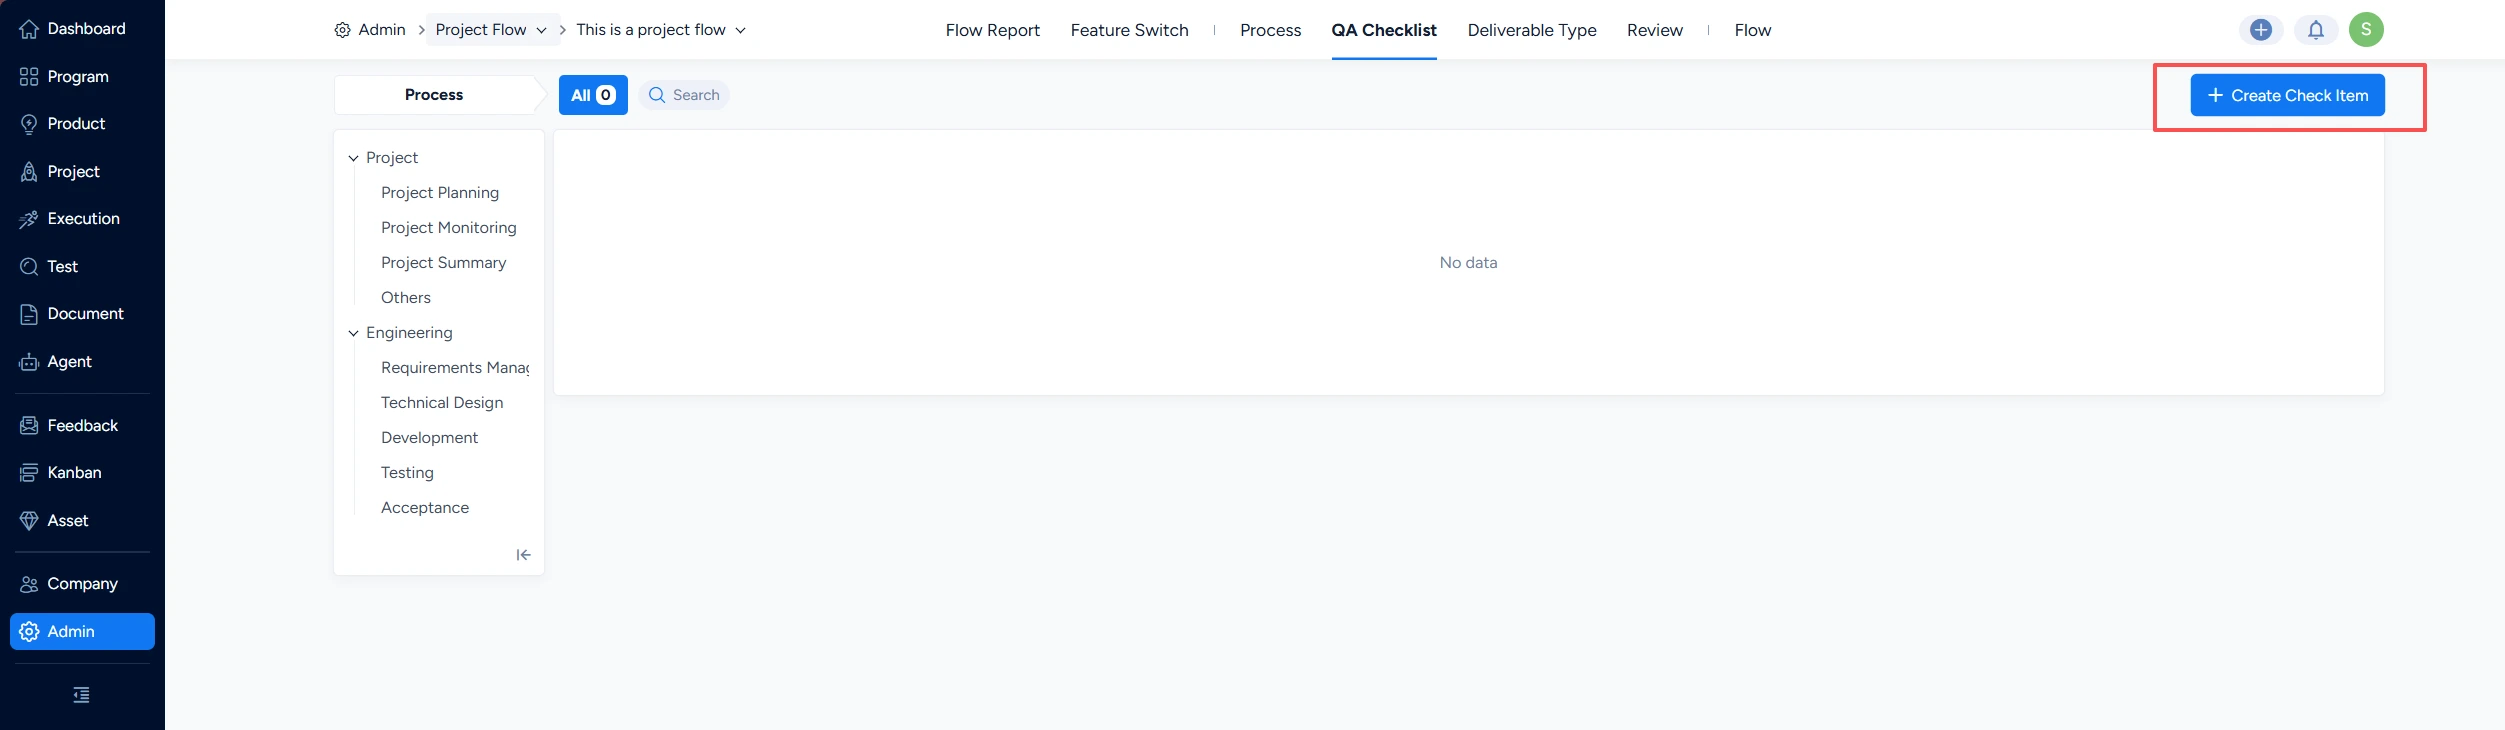
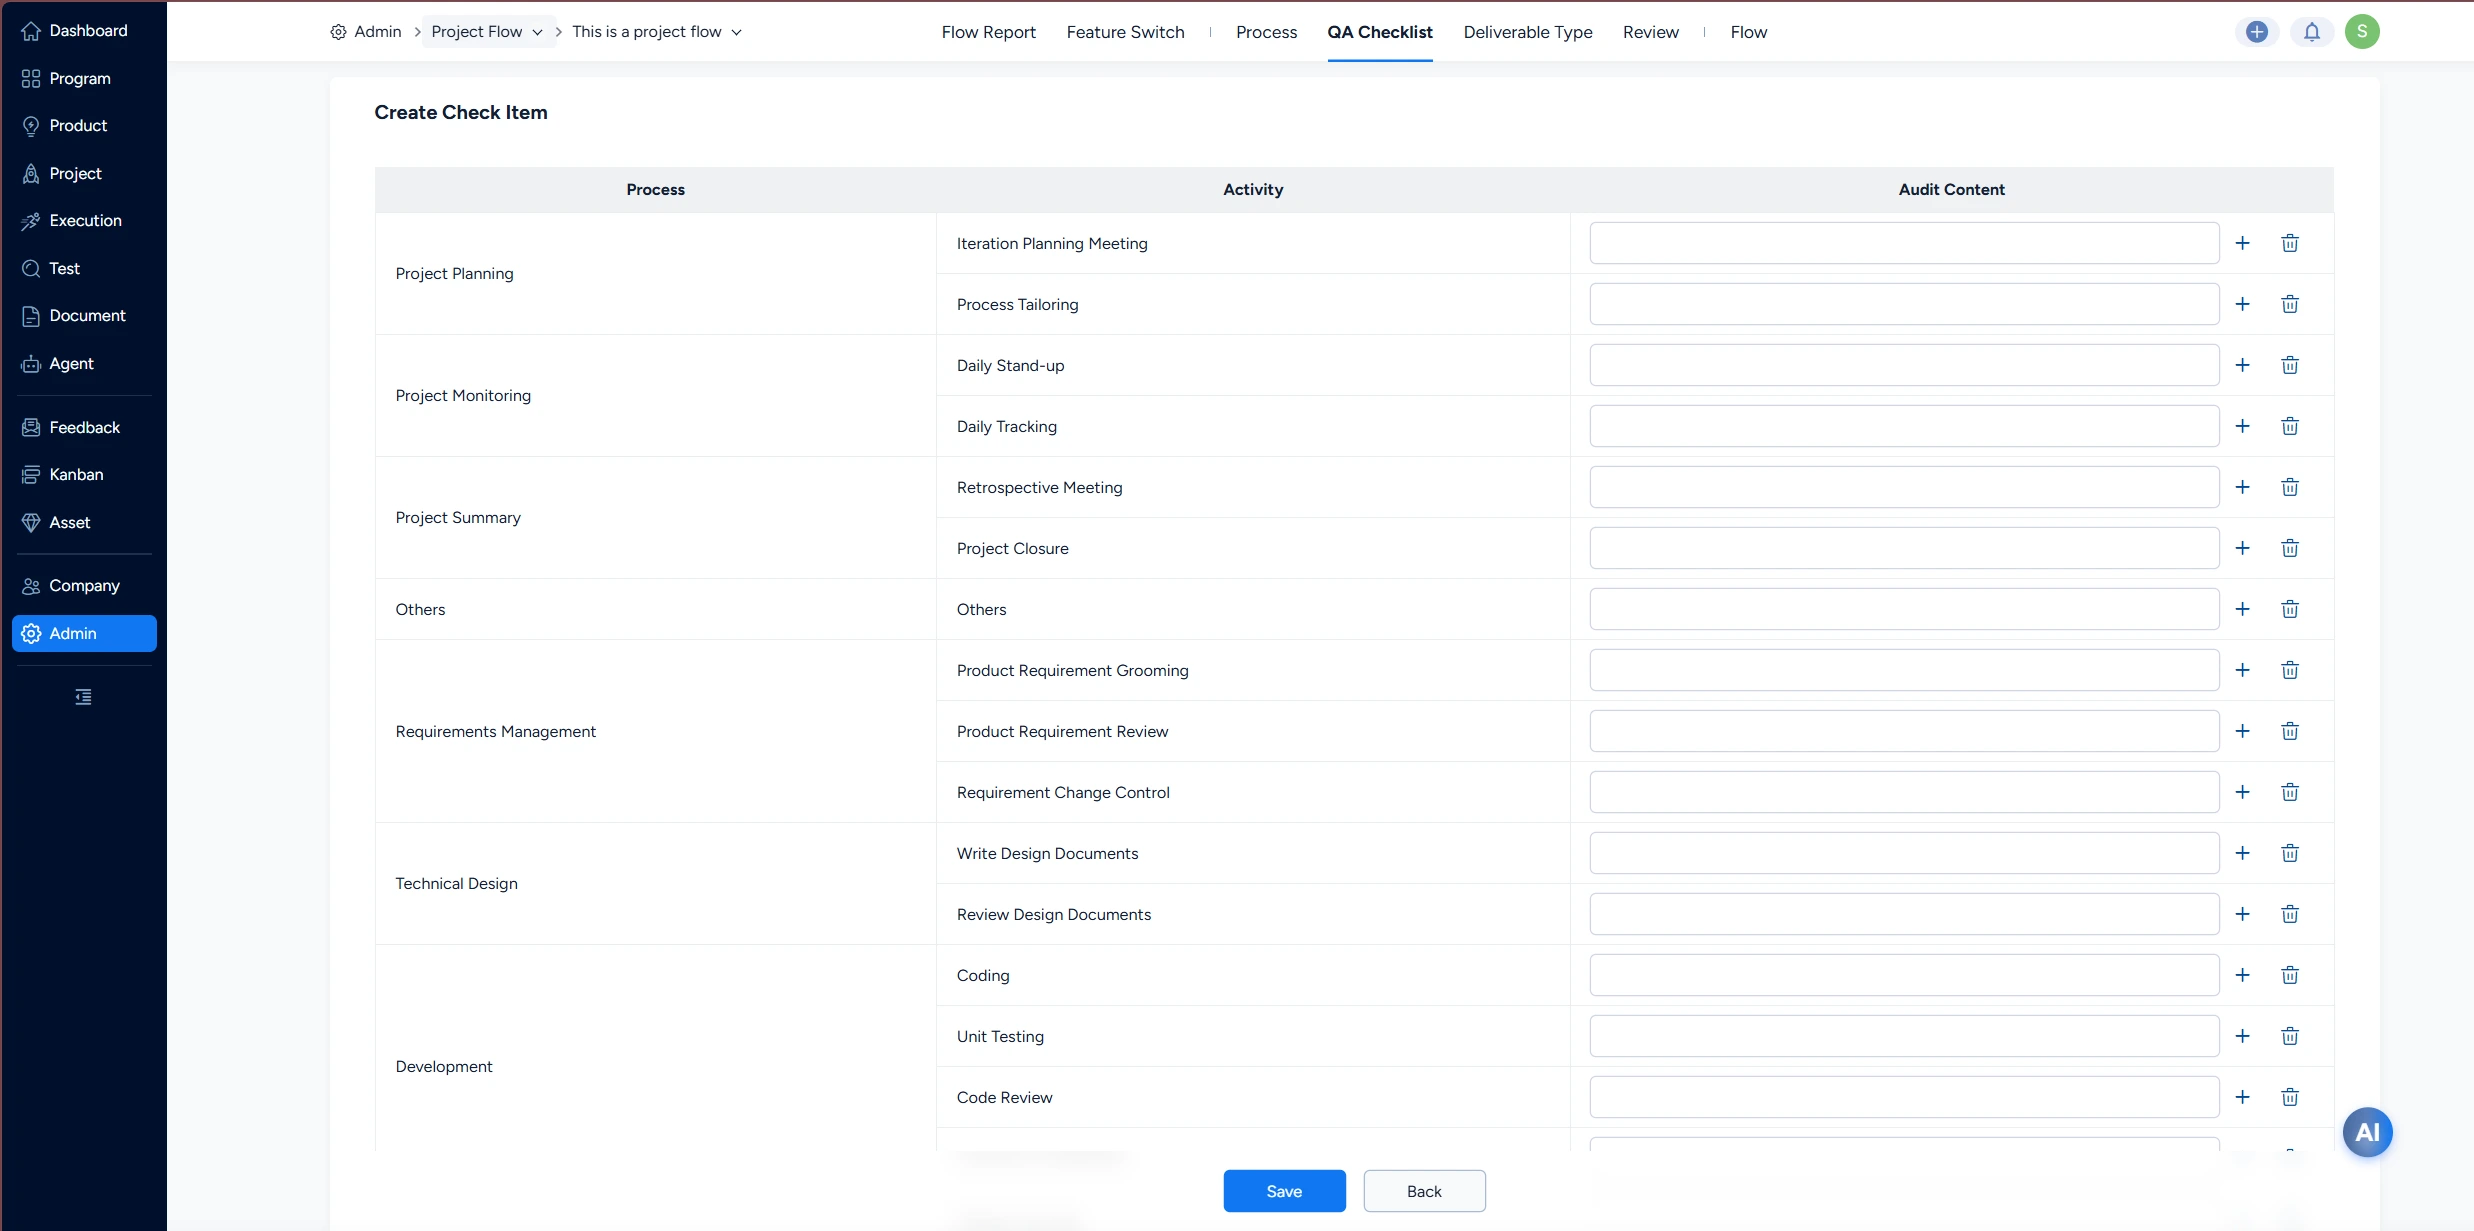
Create check item

Detail page

II. Edit QA Check Items

In the QA check item list, click Edit in the Actions column to open the edit page and modify the check item.
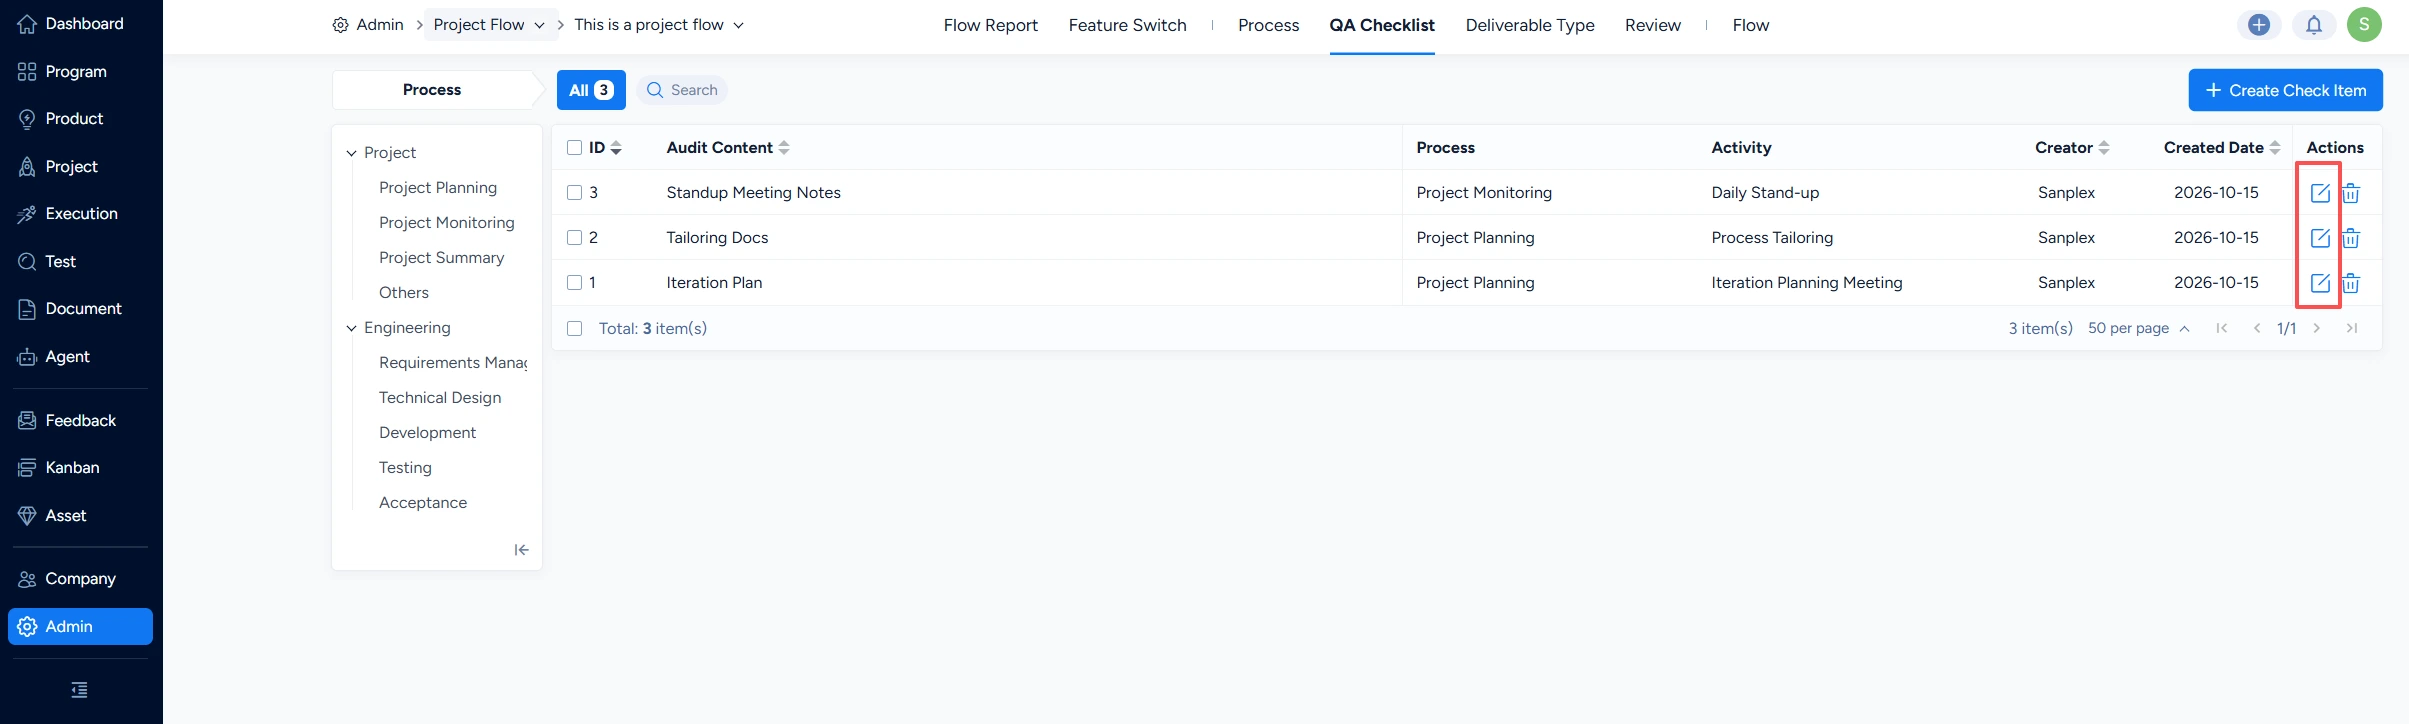
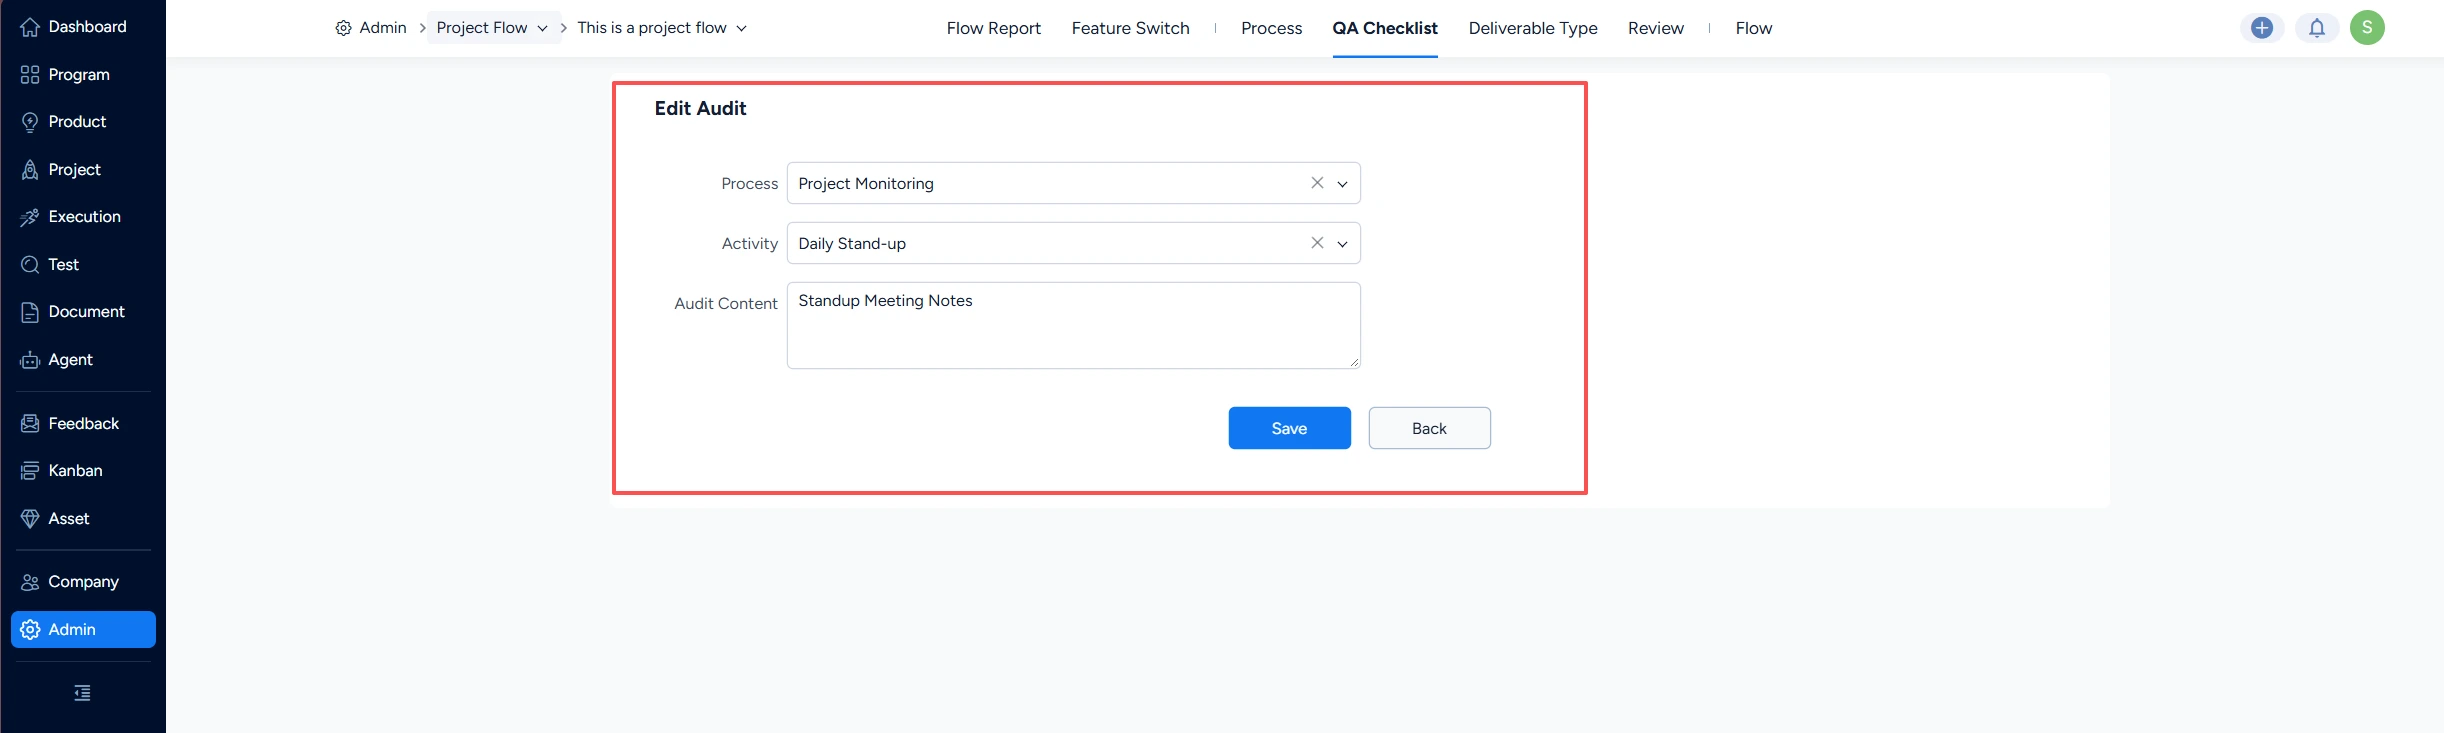
Edit the check items

Edit

III. Delete QA Check Items

In the QA check item list, click Delete in the Actions column to delete the check item. Deleted check items are moved to the Trash.
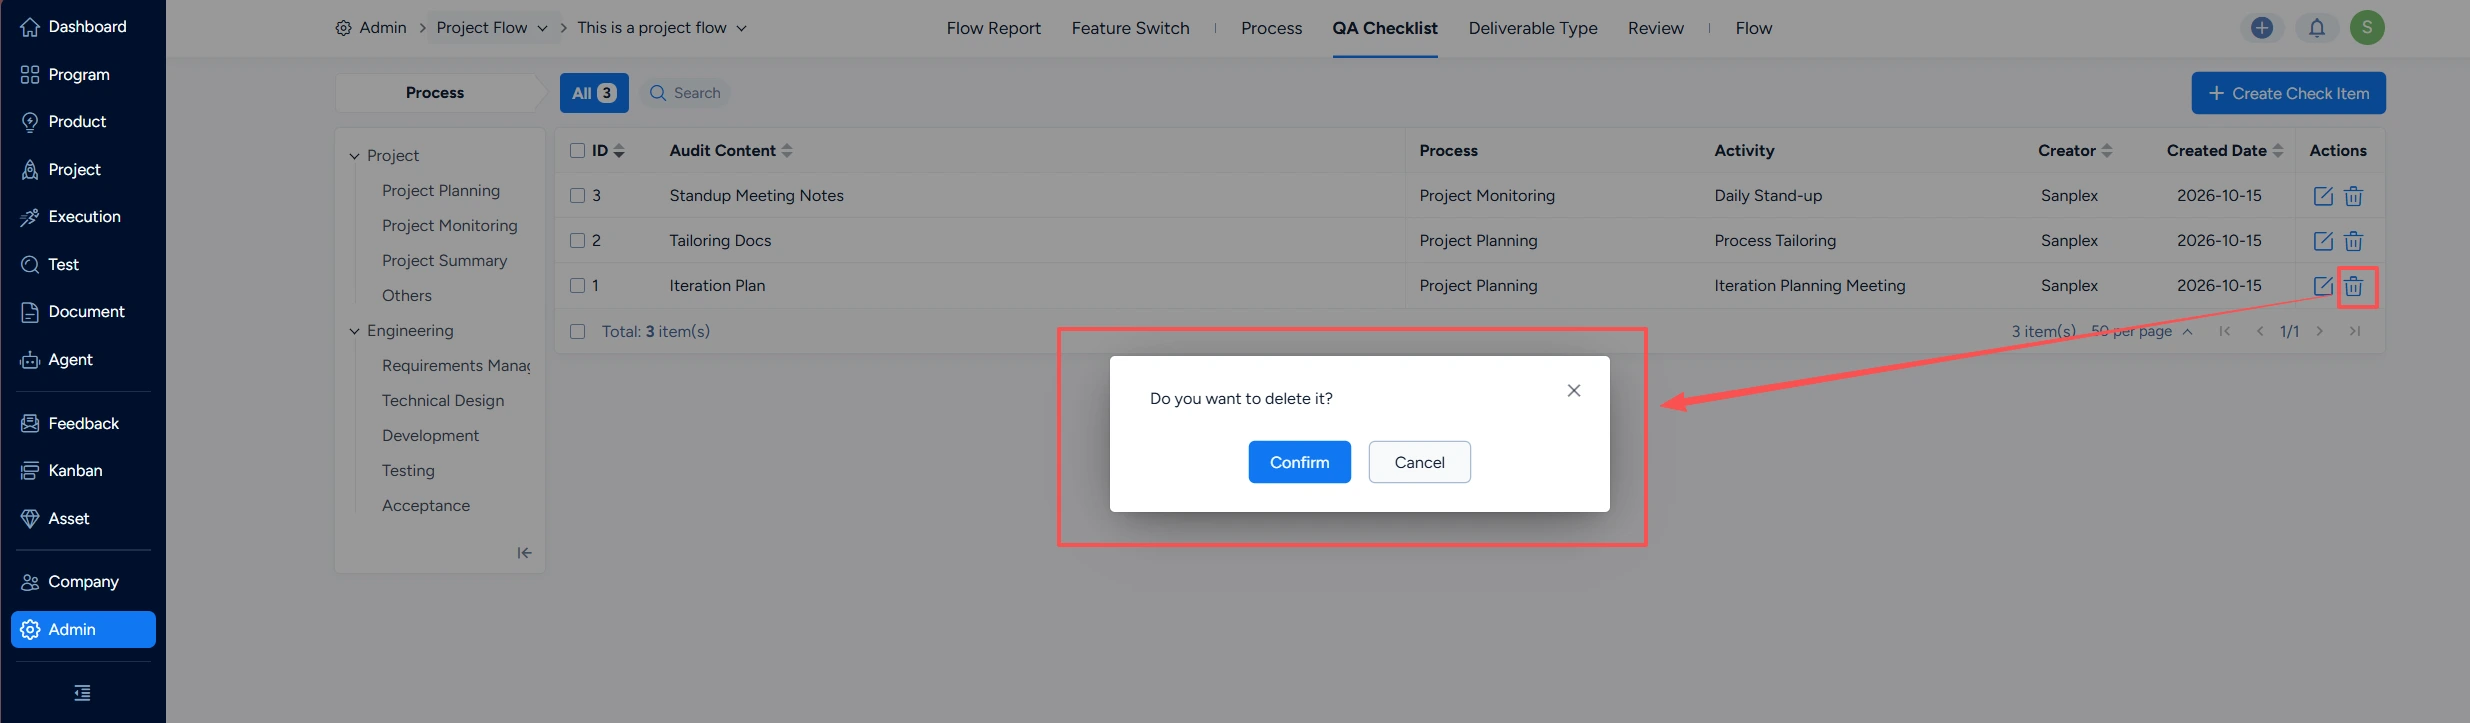
Delete a check item

Write a Comment
Comment will be posted after it is reviewed.
