Catalog
Sanplex includes built-in document management in the Project module.
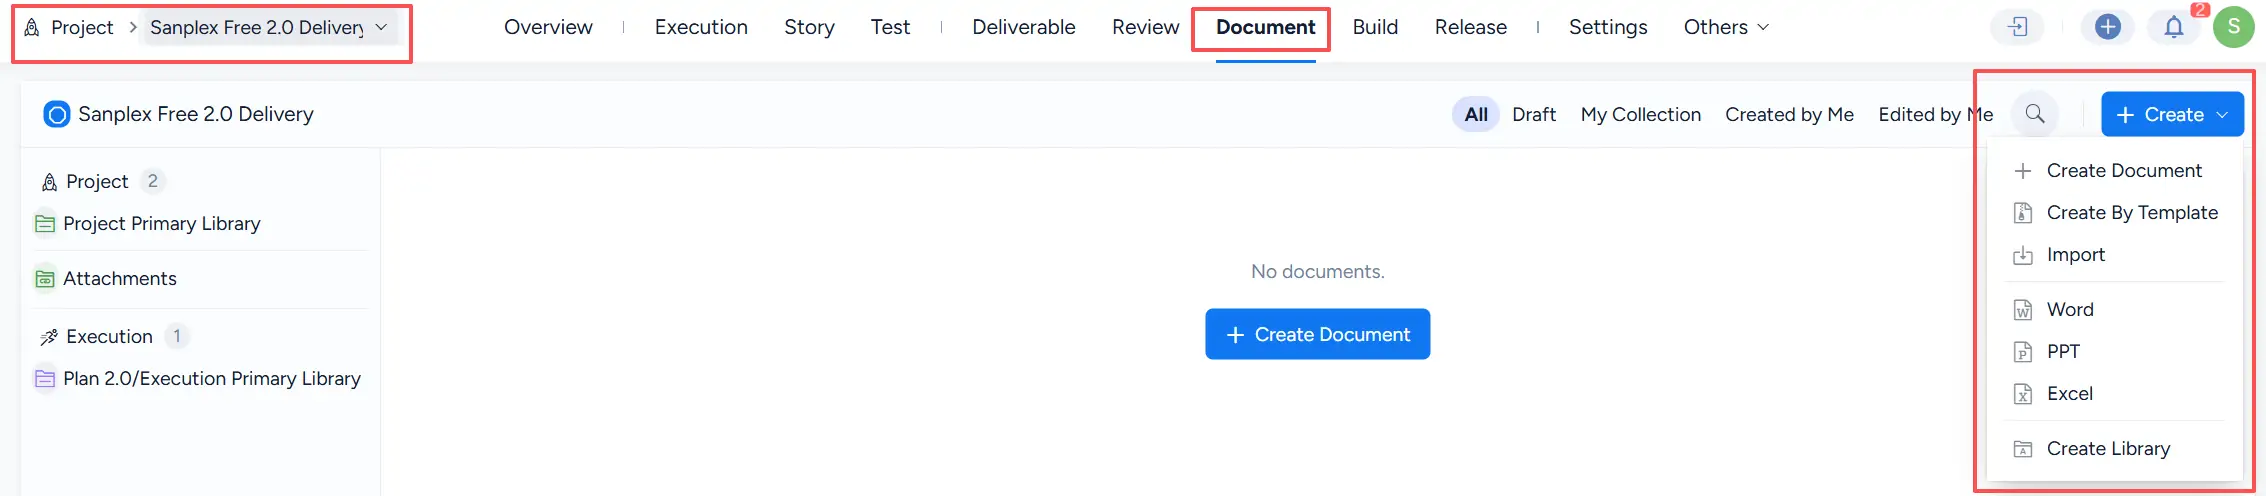
Under Document, you can create documents directly, create documents from templates, import documents, create Word, PPT, and Excel files, and create document libraries.
At the project level, documents are organized into document libraries. A Project Primary Library is available for the project, and additional libraries can be created as needed.
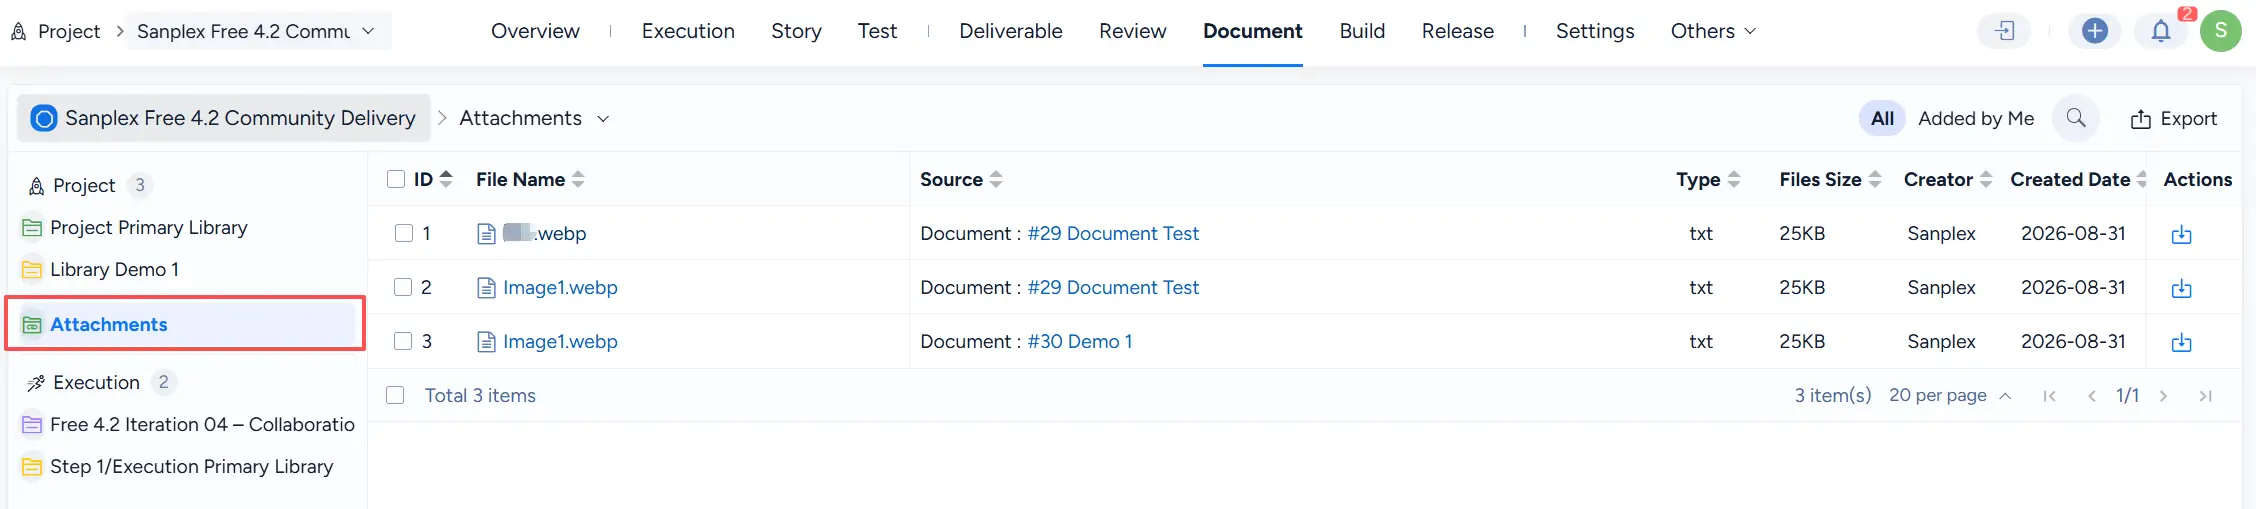
The Attachments page provides centralized access to files uploaded or attached to project-related content.
I. Create Documents
1. Create a document directly
Go to Project > Select a Project > Document.
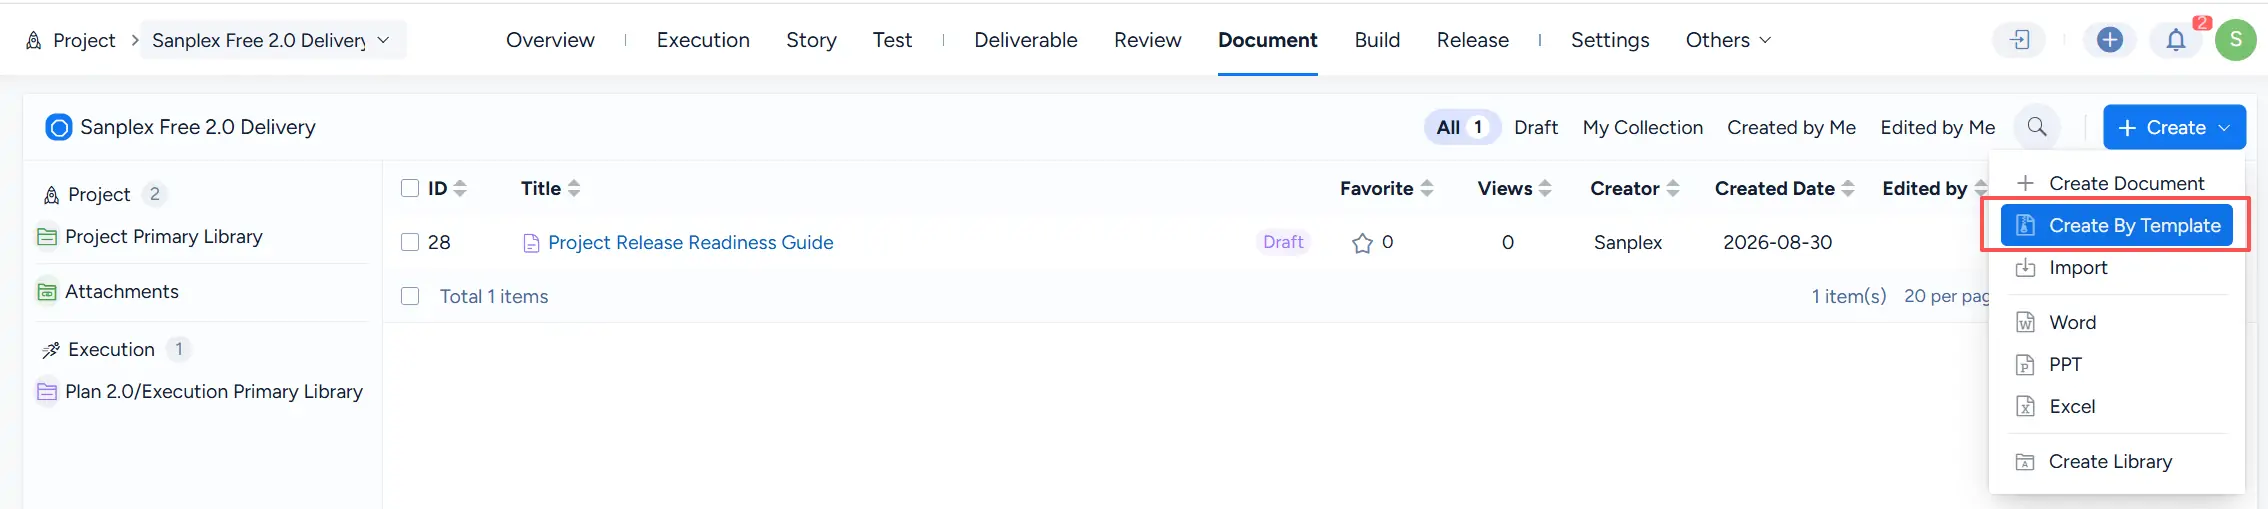
Open the Create dropdown. The available options include:
- Create Document
- Create By Template
- Import
- Word
- PPT
- Excel
- Create Library
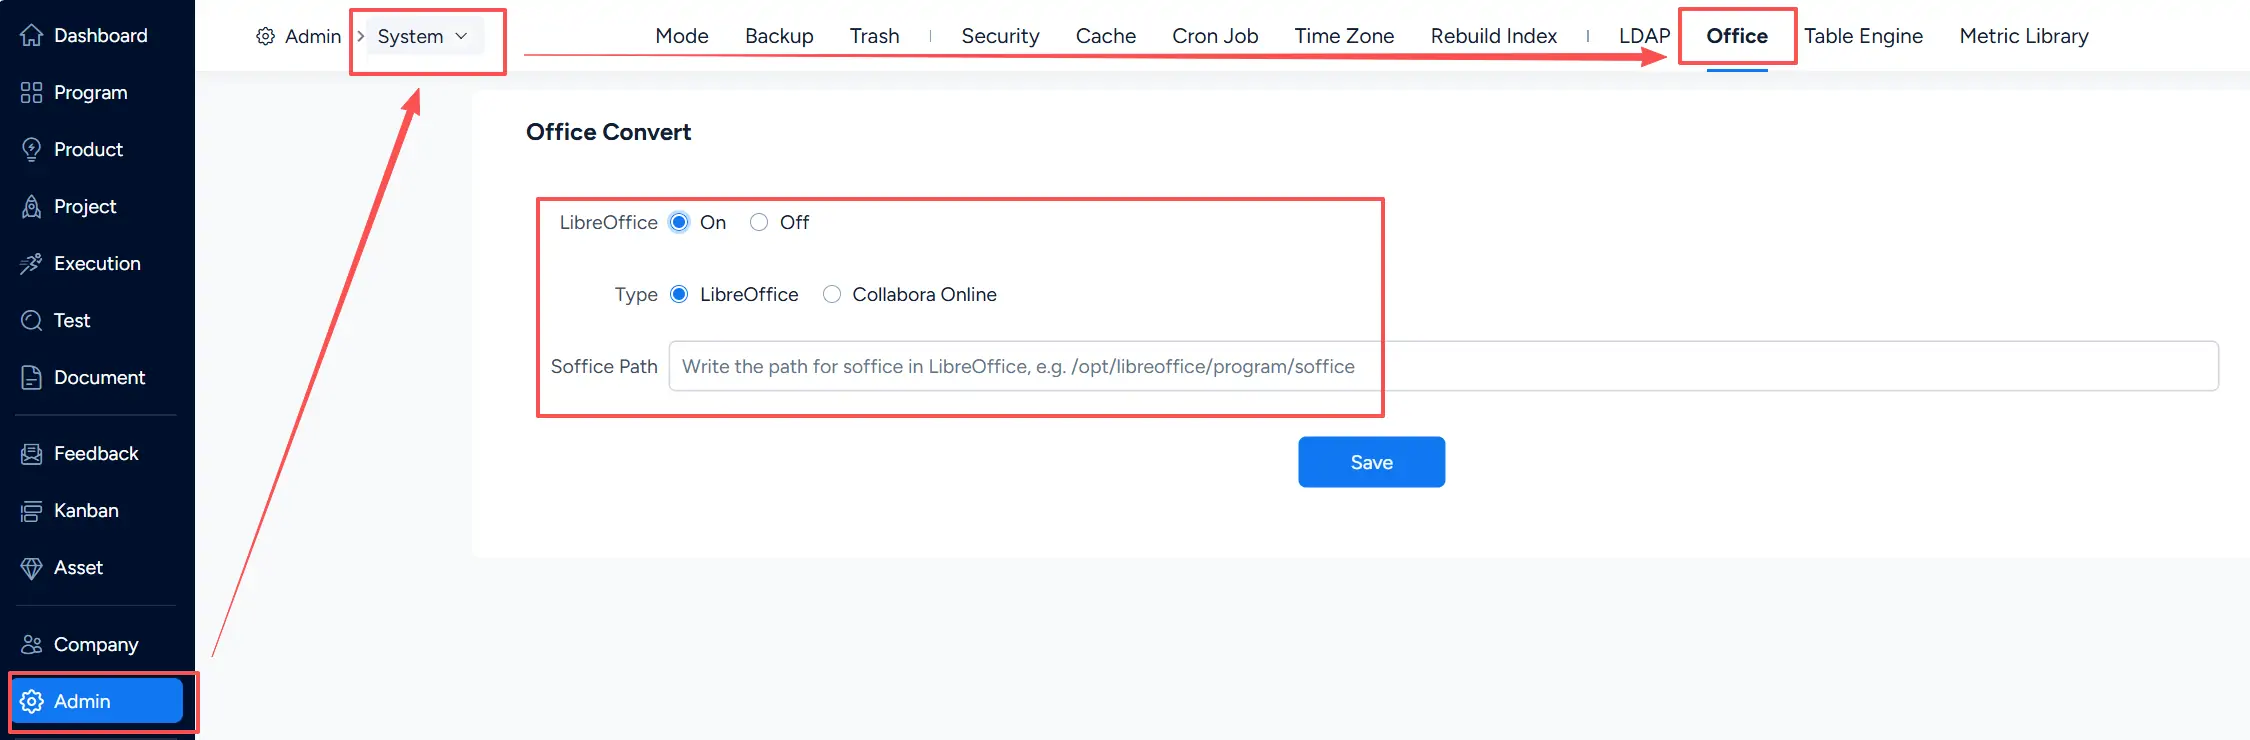
For Word, PPT, and Excel document processing, the related Office conversion settings are available under Admin > System > Office. The Office Convert settings include the conversion service status, conversion type, and service path.
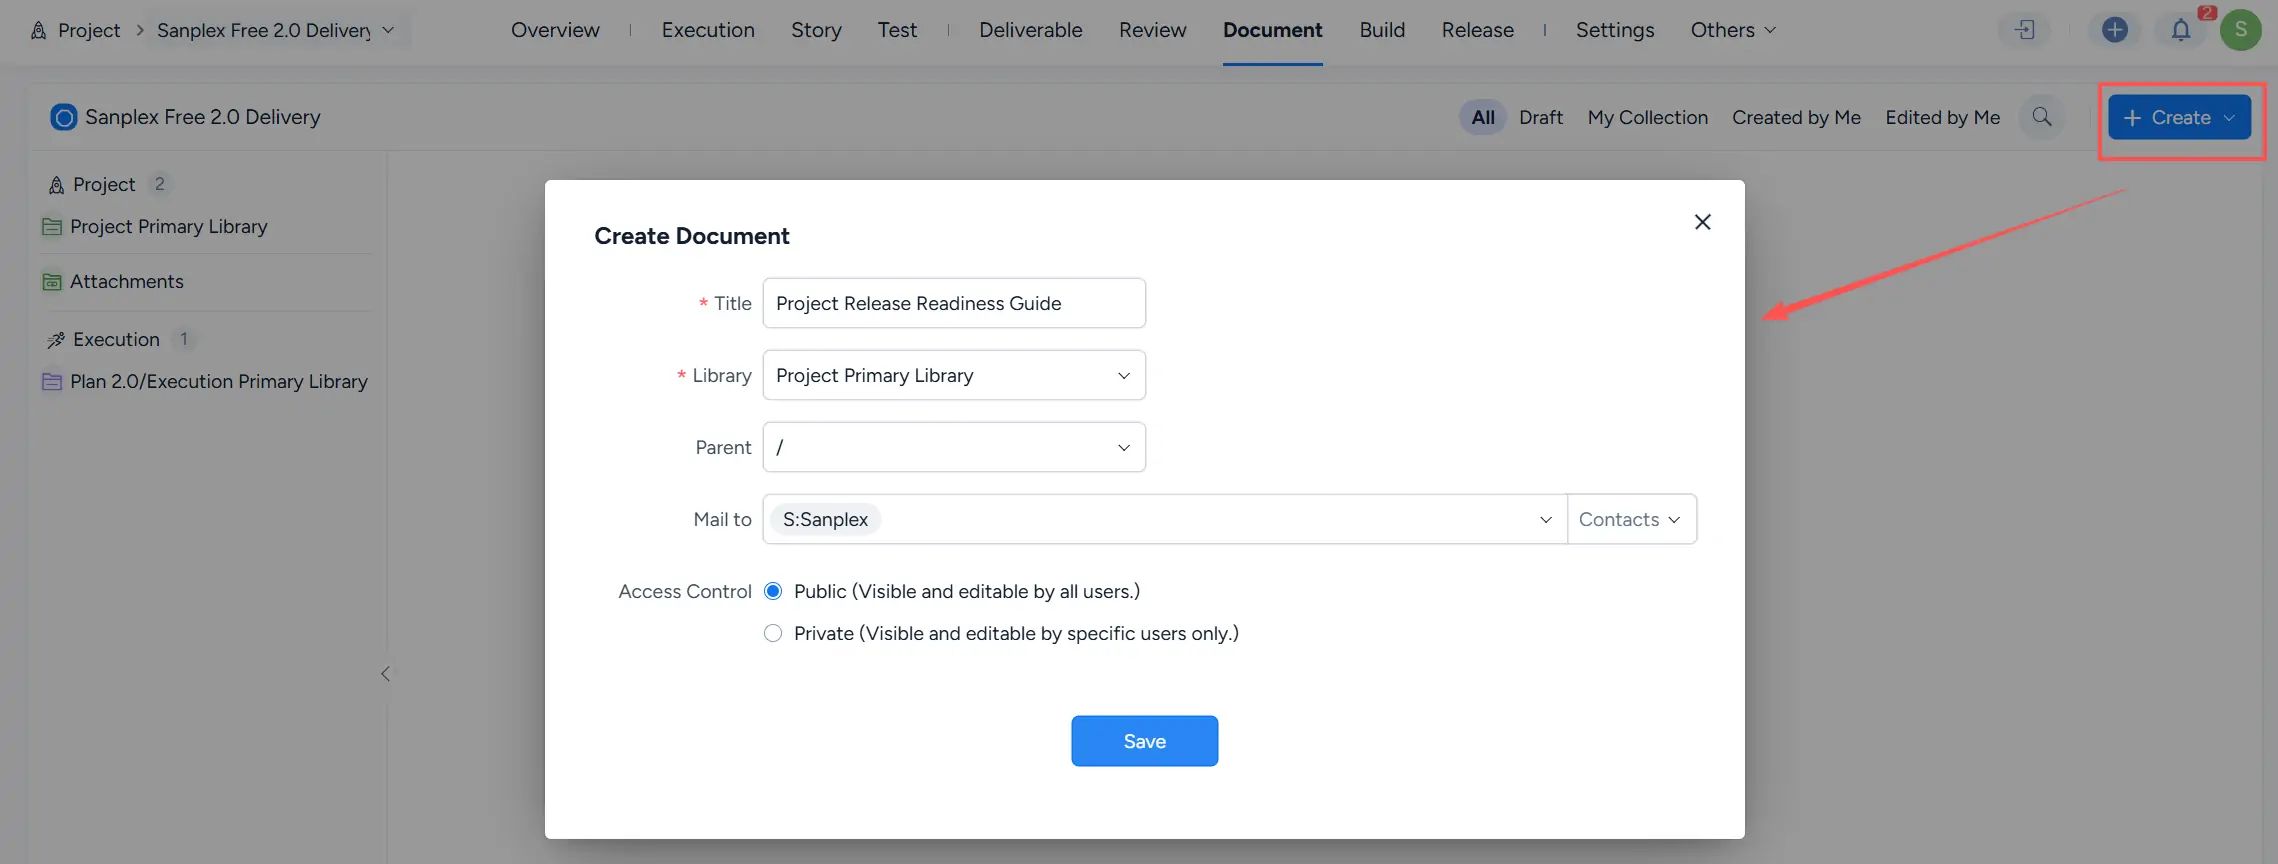
To create a document directly, select Create Document.
Enter the document Title, select the target Library and optional Parent, configure Mail to and Access Control as needed, and click Save.
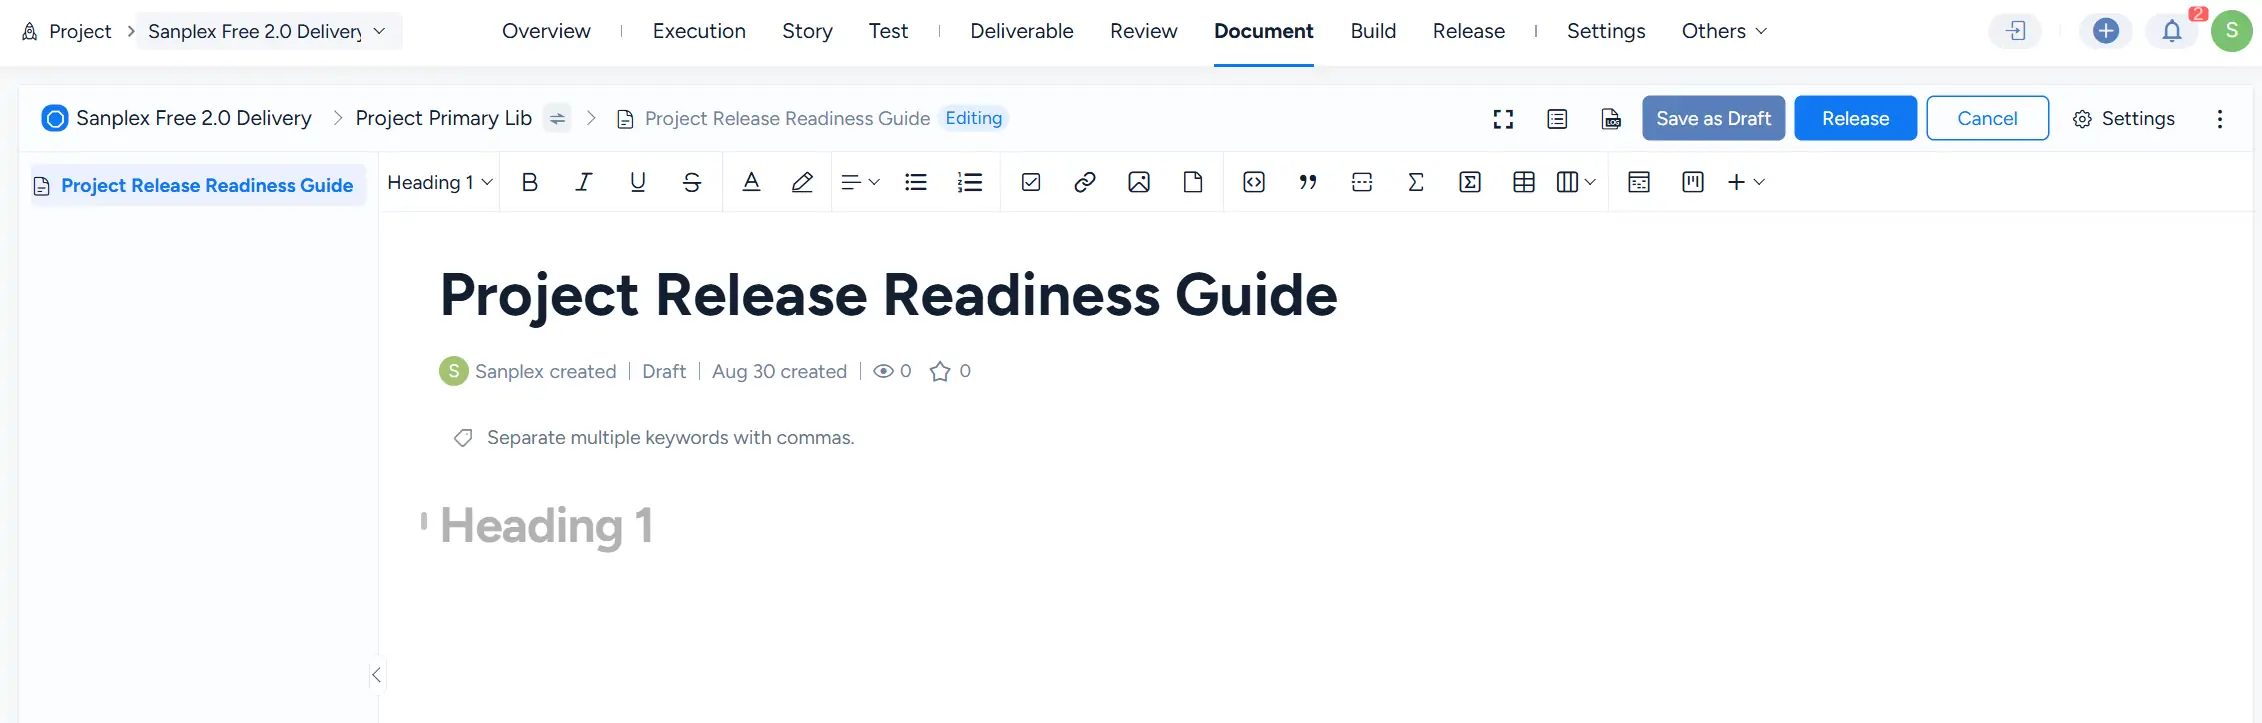
After the document is created, it opens in the document editor. You can add and format content, save the document as a draft, or release it when the content is ready.
2. Create a document from a template
You can also create a project document from an available template.
Go to Project > Document, open the Create dropdown, and select Create By Template.
II. Create a Document Library
In addition to the Project Primary Library, you can create additional document libraries to organize project documents for different purposes or work areas.
Go to the Document area, open the Create dropdown, and select Create Library.

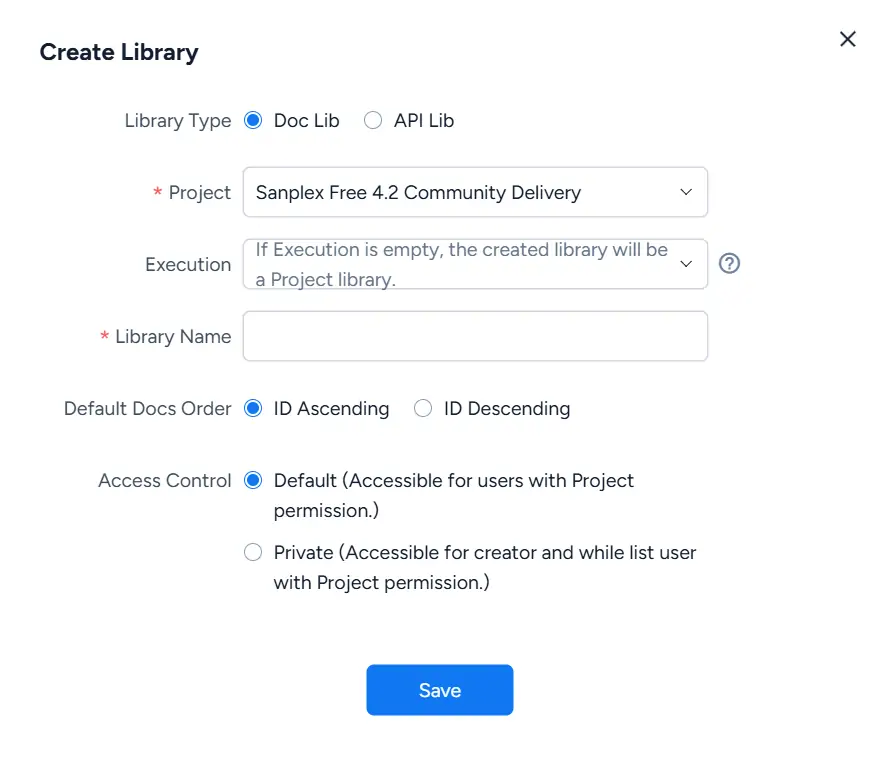
On the Create Library page, select the appropriate Library Type. For a project document library, select Doc Lib.
Select the project, enter a Library Name, and configure the Default Docs Order and Access Control. If the Execution field is left empty, the library is created as a project-level library.
Click Save to create the library.
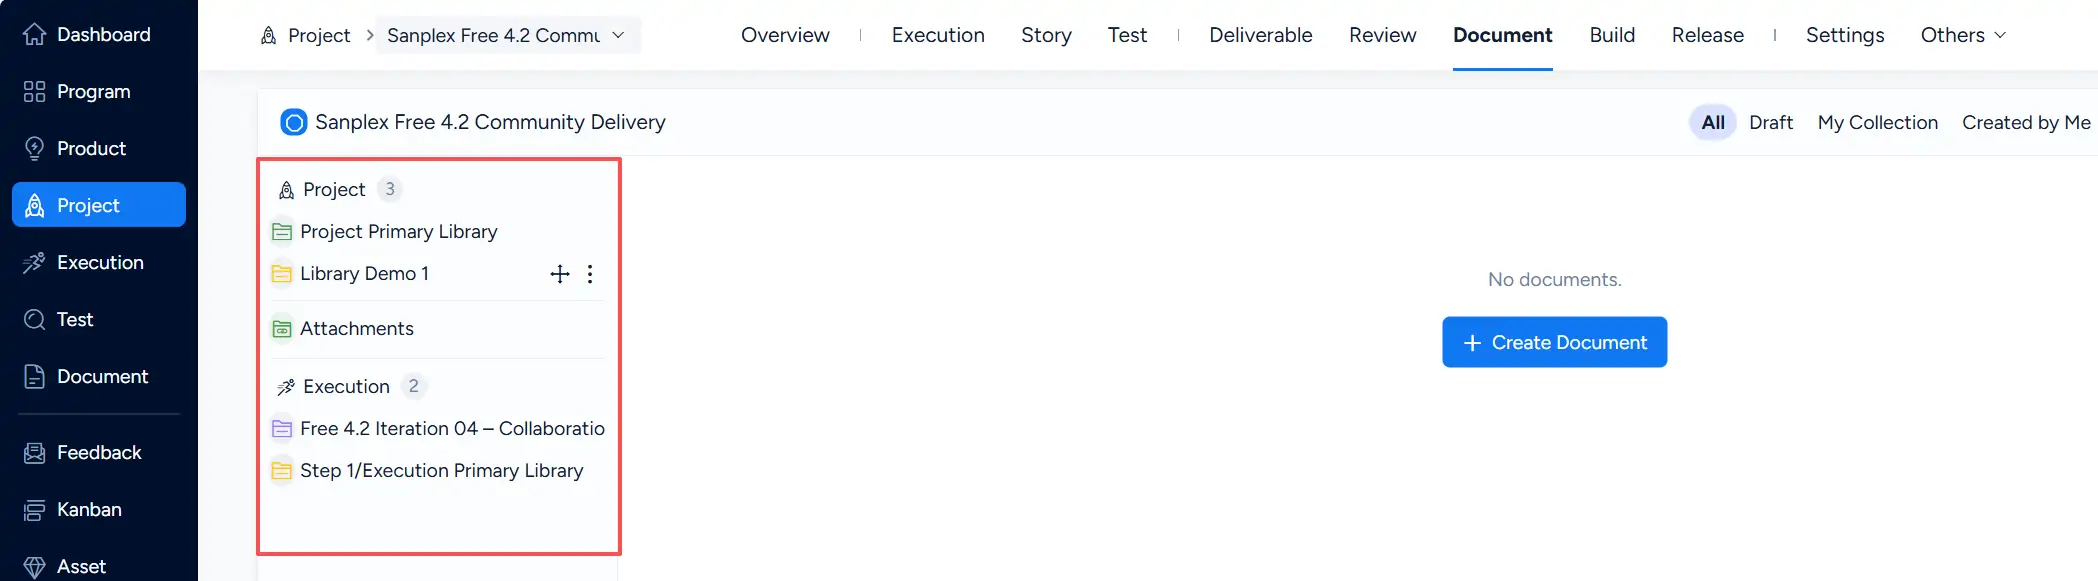
After the library is created, it appears in the library list on the left side of the Document page.
Select a project library from this list to switch between available document libraries. Execution-level libraries are also displayed separately under Execution.
III. Attachments
Files uploaded or attached to project-related content are collected under Attachments.
This can include files such as:
- images uploaded through supported document editors
- files attached to project documents
- files attached to other project-related content
Select Attachments from the library list on the left to open the attachment list.
The page displays information such as File Name, Source, Type, File Size, Creator, and Created Date. You can also filter files, search the attachment list, export information, or use the available file actions.